Loading ...
Loading ...
Loading ...
7
Step 3 – Leg to Top Assembly
a. Place the grill cart top on the work surface with the leg sockets facing up. The color
paintmarkswillbevisiblealongthesockets.Refertogure4.
b. Remove the (4) quick release pins from the hardware kit.
c. Slide each leg into the socket with the corresponding color mark, mating the lines of the
legstothelinesofthecarttopasshowningure4.Thetmaybesnug,youmay
need to wiggle the leg around to get it to seat fully.
d. Slide (1) quick release pin into each hole in the side of each leg socket. Use caution
while assembling to avoid slipping of the hand onto adjacent sheet metal edges. You
may need to move the legs a bit to align the holes of the leg to those of the leg
channel.Thepinsareinstalledfullywhentheringonthepinisushagainsttheleg
socket channel.
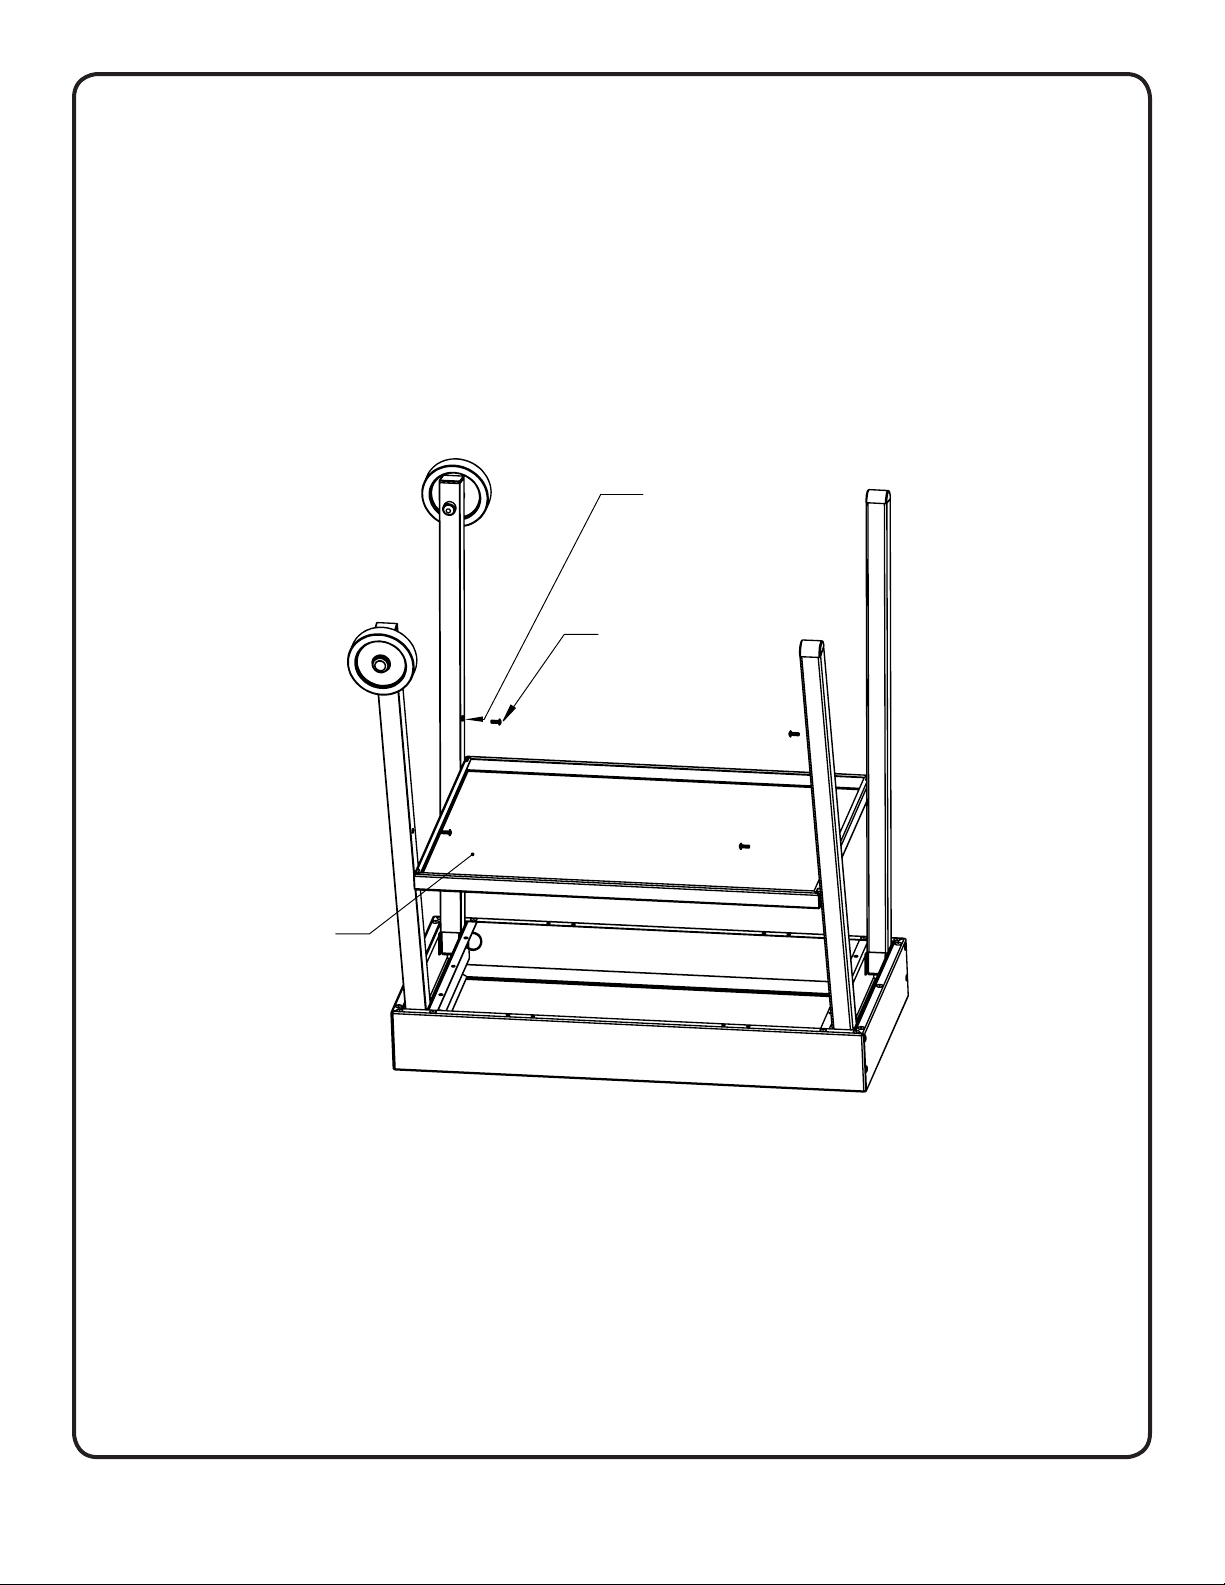
Step 4- Lower Shelf Assembly
a. Locate the Lower Shelf. Remove the (4) allen screws and allen wrench from the
hardware kit.
b. Locate the thread-lock compound from the wheel bag.
c. Apply a drop or two of thread-lock compound to the threads of each of the (4) mounting
screws, and screw them into the threaded holes located within the inner surface of
eachleg,approximatelyhalf-wayup.Refertogure5.Turnthescrewsinuntiltheyare
1/8” from the leg surface, using the allen wrench as a gage between the screw head
and the leg. Keep the (1) extra screw as a spare.
(4) ALLEN
SCREWS
BOTTOM SHELF
SHELF MOUNTING
HOLES
FIGURE 5 - LOWER SHELF ASSEMBLY
Loading ...
Loading ...
Loading ...