Loading ...
Loading ...
Loading ...
6
e. Place (1) black washer over each axle.
f. Place (1) angle end bushing onto each axle over the washer, with the angle end
surface facing up.
g. Slide (1) wheel/axle assembly onto one of the legs, aligning the axle end to the outer
hole at the bottom of the leg. Press the axle completely through the leg, moving the leg
slightly to align the axle to the inner hole as it passes through. Position the angle of the
bushingushwiththesideoftheleg.
h. While holding the wheel assembly to the leg, rotate the leg so that the wheel is facing
down. Rest the wheel on a heavy towel or other cushion surface to avoid damage to
the axle cap.
i. Slide (1) angle end bushing over the axle with the angled surface facing down, resting
ushwiththelegsurface.
j.Place(1)axlecapontotheaxleendandpressrmlydownontotheaxle,positioning
thecapattothewheel.Placeaside.
k. Repeat steps g – j for the other leg.
l.Locatetheremainingtwolegswithafxedgreendotsandremovethecardboard
packing.
m. Remove the leg glides from the hardware kit.
n. Install one leg glide to the end of each green marked leg, at the opposite end of the
greenline.Theatsoftheglideshouldbeonthesamesidesofthelegastheshelf
holes located in the center of the legs.
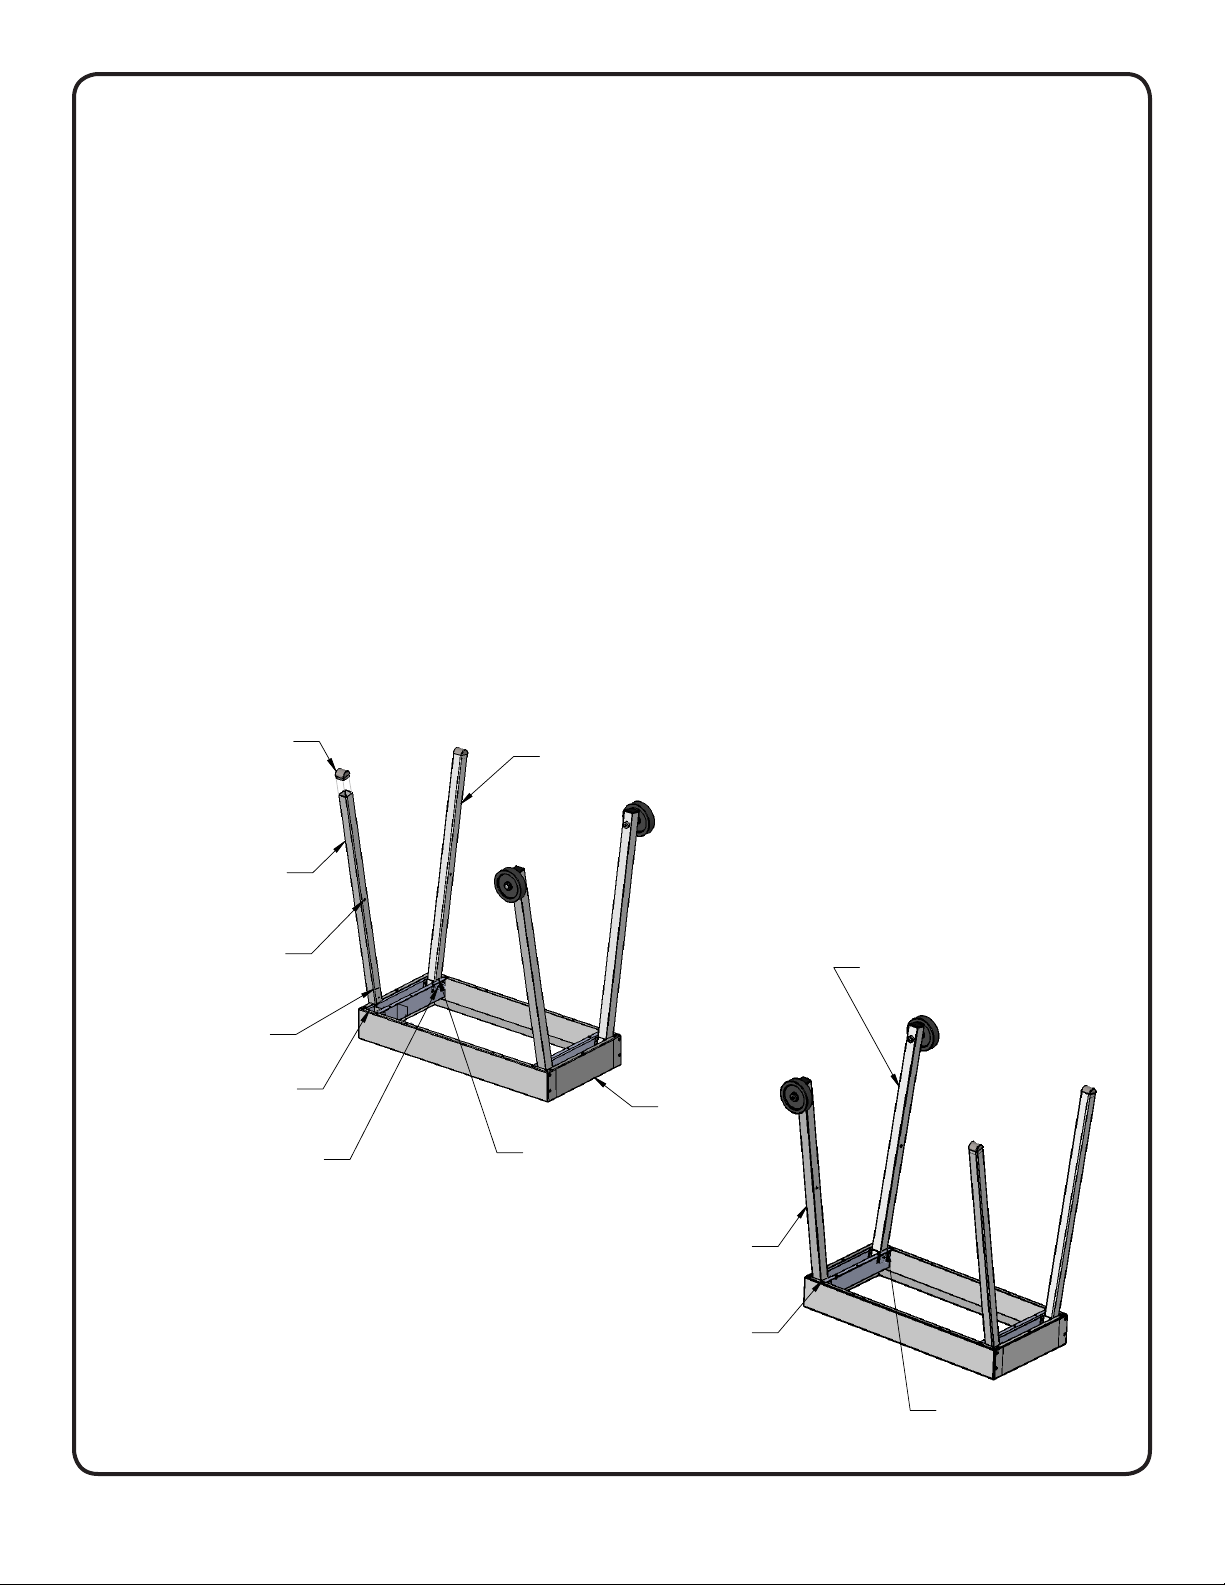
(2) BLACK PLASTIC
LEG GLIDE-
PRESS TO LEG ENDS
(4) LEG SHELF
MOUNTING HOLES-
ALL FACING INWARD
CART TOP
(4) LEG SOCKET
(4) QUICK-RELEASE PINS
LEG (GREEN DOT)
LEG (GREEN DOT)
LEG/TOP GREEN
COLOR LINE
LEG GREEN
COLOR LINE
FIGURE 3 - LEG / TOP ASSEMBLY
REAR LEG / WHEEL
ASSEMBLY (BLUE DOT)
FRONT LEG / WHEEL
ASSEMBLY (WHITE DOT)
LEG / TOP
WHITE COLOR LINE
LEG / TOP
BLUE COLOR LINE
FIGURE 4 - LEG/TOP ASSEMBLY
Loading ...
Loading ...
Loading ...