Loading ...
Loading ...
Loading ...
Instructions
Step 1 - Unpack and Inspect Grill Cart Components
a. Unpack cart components carefully, laying the parts out on a clean work surface. Check
for damage or missing items. Refer to the package content list.
b. Strip all of the protective vinyl from the sheet metal components. Leave any visible
paint marks intact.
c. Use a towel or other soft fabric to place components onto during unpacking and
assembly to prevent scratching.
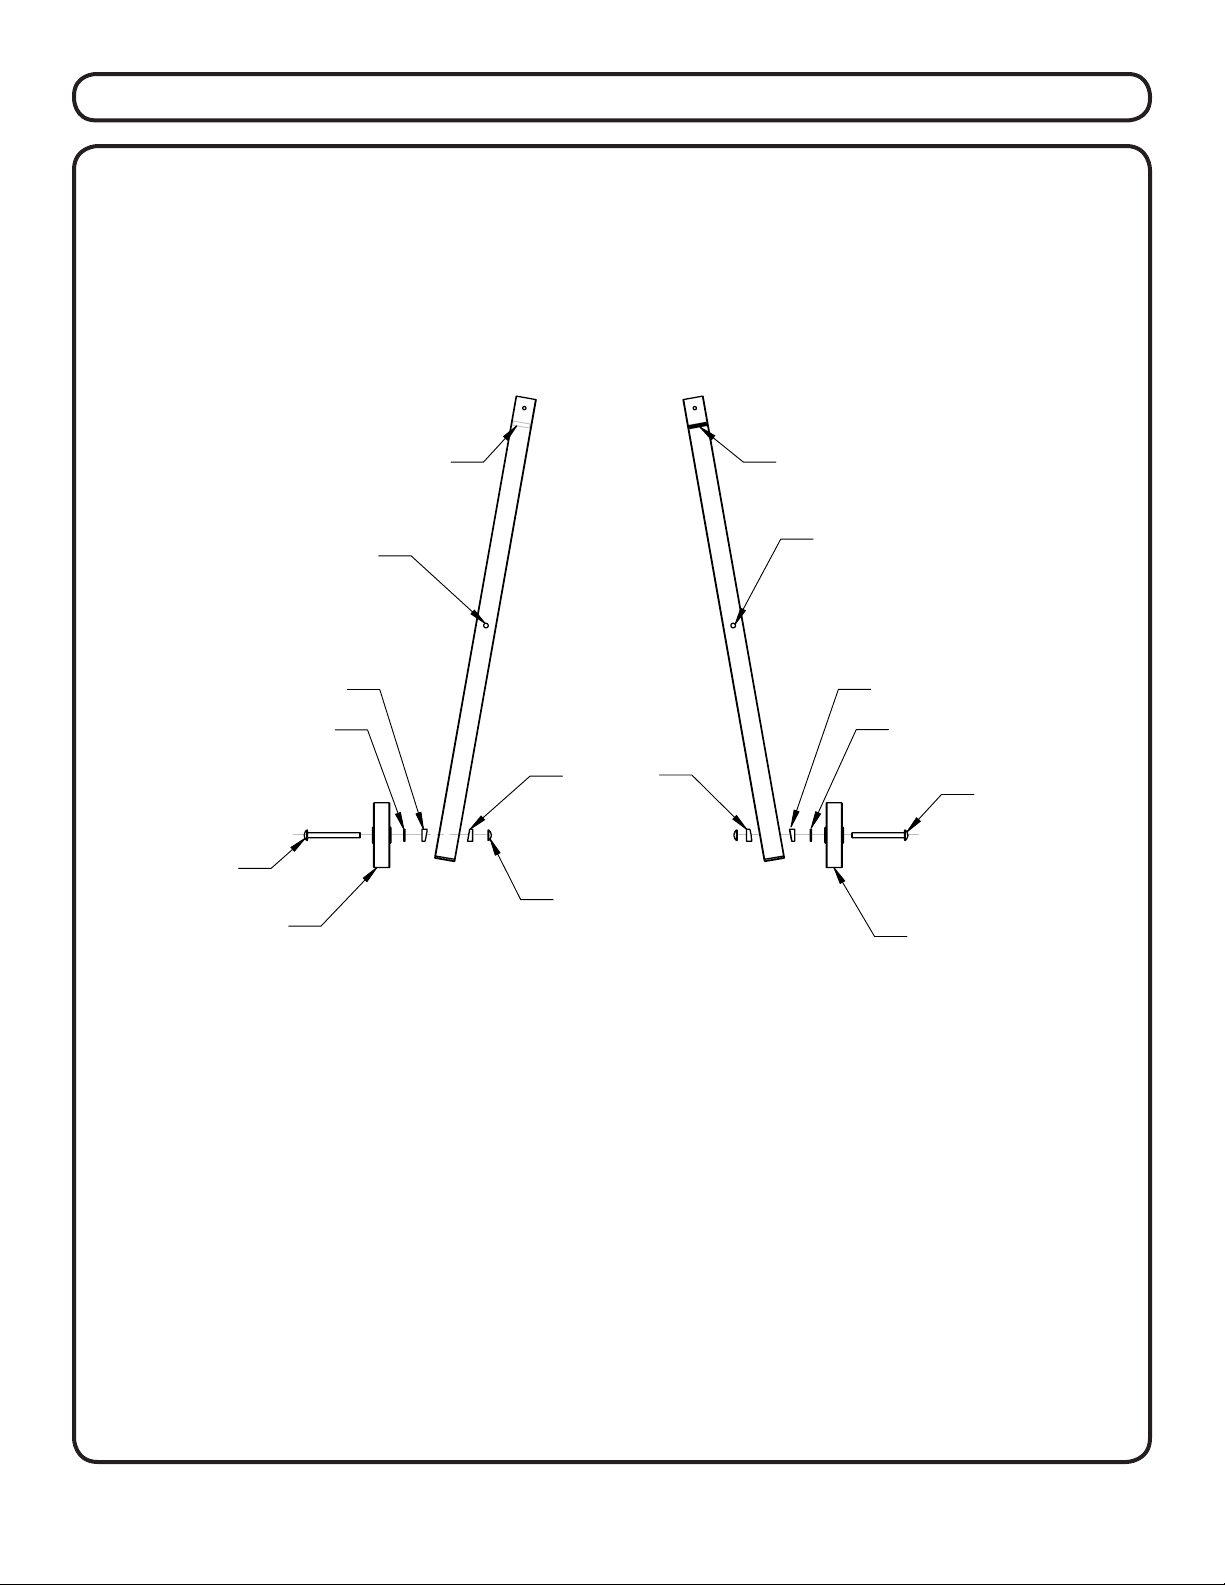
Step 2 – Leg / Wheel Assembly
a.Locatethefrontlegwiththeafxedwhitedot,andtherearlegwiththebluedot,and
remove the cardboard packing. Both legs should have a black plastic cap
installed on one end, and blue or white paint lines on the opposite ends.
b. Locate the hardware kit and remove the axle components. The axles will have a cap
pre-installed to one end.
c.Positionfrontandrearlegsonaatsurfaceasshowningure3,withthewhitepaint
line facing up and to the left, and the blue paint line facing up and to the right. The legs
will be angled so that the ends with the large drilled axle holes on the side are angled
outwards, forming a pyramid shape.
d. Remove the wheels from the bag. Slide (1) axle through the hole in each wheel, and
place both on the work surface with axle ends facing up.
5
FRONT LEG
(WHITE LINE)
REAR LEG
(BLUE LINE)
AXLE
W/ CAP NUT
WHEEL
BLACK WASHER
WHEEL BUSHING
WHEEL
BUSHING
AXLE CAP NUT
SHELF
MOUNTING HOLE
SHELF
MOUNTING HOLE
BLACK WASHER
AXLE
W/ CAP NUT
WHEEL
WHEEL BUSHING
WHITE LINE
MARKING
BLUE
LINE MARKING
FIGURE 2 - WHEEL ASSEMBLY
FIGURE 3 - WHEEL ASSEMBLY
Loading ...
Loading ...
Loading ...