Loading ...
Loading ...
Loading ...
6 7
Anti-skating Force Adjustment
The anti-skating force must be adjusted corresponding to the tracking force as follows:
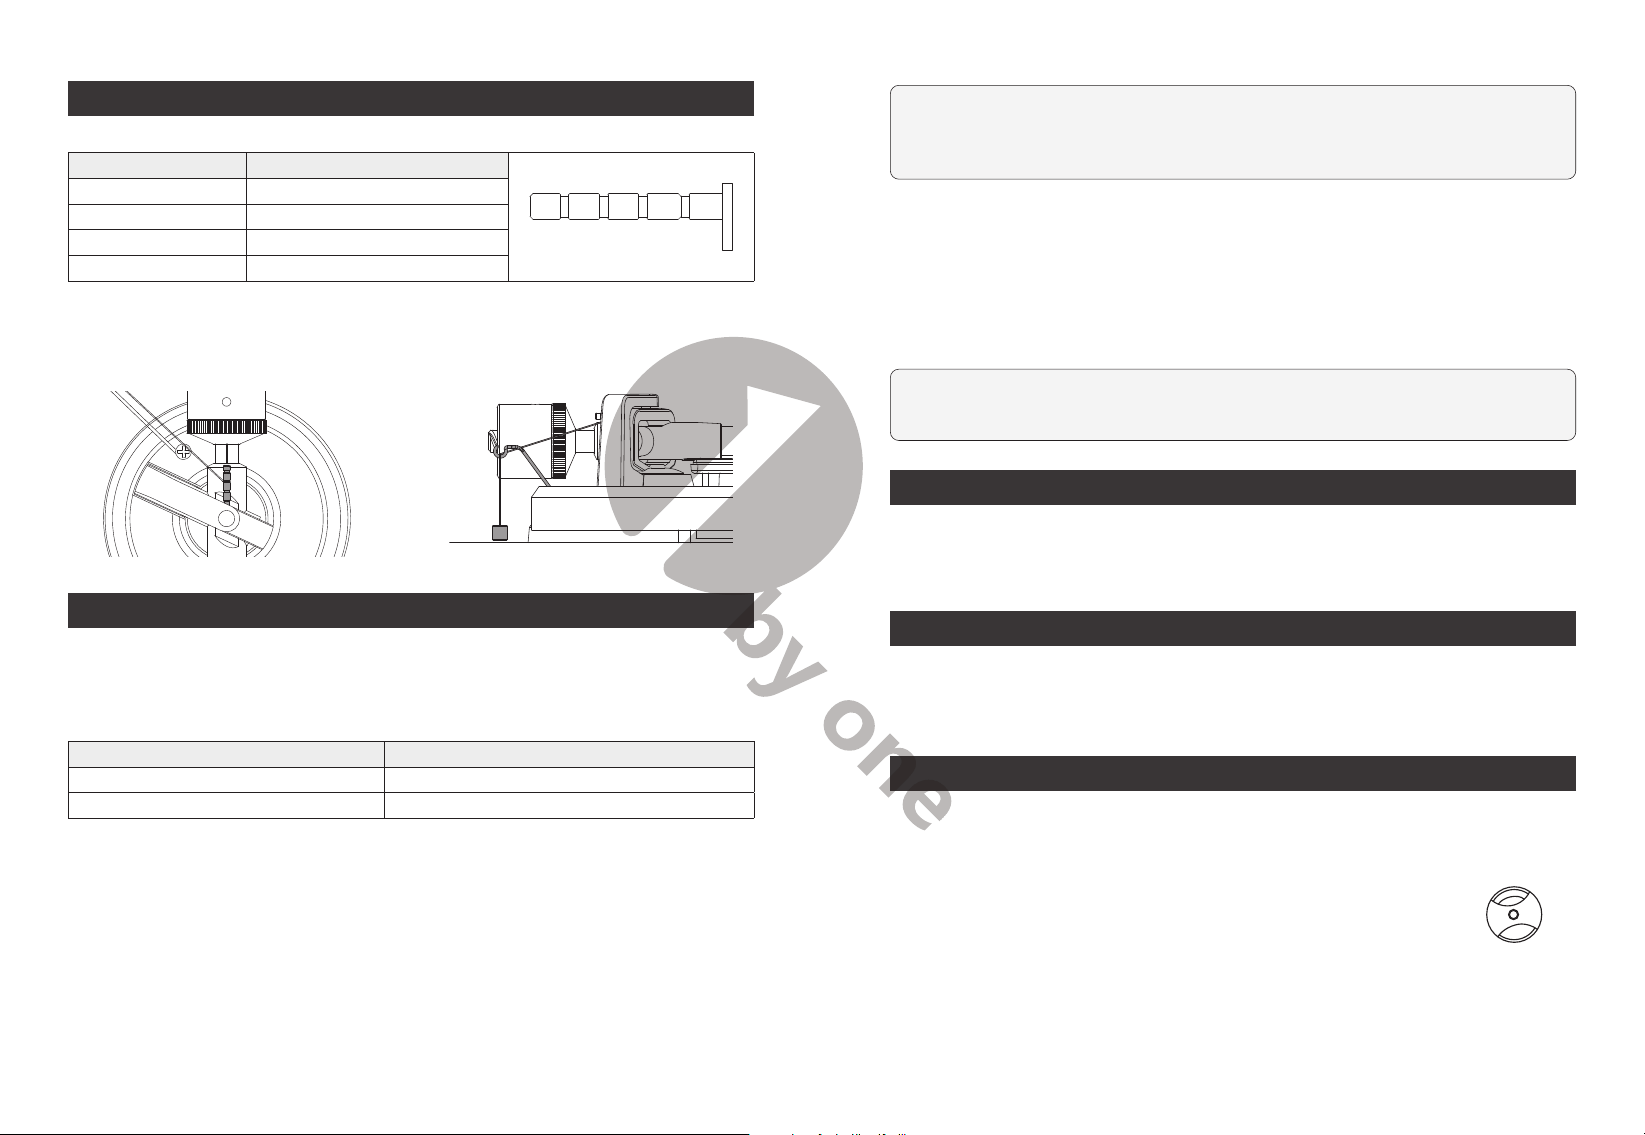
Tracking Force Groove in the stub
④ ③ ② ①
5-10 mN 1st from bearing ring
10-15 mN 2nd from the bearing ring
15-20mN 3rd from the bearing ring
20mN and larger 4th from the bearing ring
1. Slip the loop of the anti-skating weight's
thread over the
3rd
groove of the stick
to set the correct anti-skating force for
the factory-fitted cartridge.
2. Feed the thread through the hook of
the wire support.
Setting Phono-Line Out Switch
This product has a built-in phono equalizer function. You can use the turntable, even
if you do not have a phono amplifier or connectable equipment with a built-in phono
amplifier.
Use the
Phono-Line Out Switch
to set the output, as shown below.
Connectable device being used Position of Phono-Line Out Switch
Device with phono input Phono
Device without phono input Line
Connection to an Amplifier (Device with Phono input, PHONO mode)
This turntable uses a moving magnetic cartridge. Set the
PHONO & Line Out Switch
on PHONO mode. Connect the phono out cables to the phono input on your amplifier
of pre-amplifier (phono stage).
Line inputs such as CD, Tuner, Tape, or Video are
not suitable for phono inputs.
Make sure the amplification of the selected input
matches the type of cartridge being used. The factory installed cartridge is 47k ohms /
MM-input.
NOTE:
If your amplifier does not have an input suitable for phono cartridges, you
will need to purchase a separate phono amplifier for moving magnetic cartridges.
This separate phono amplifier will then connect between your turntable and your
amplifier.
Stereo System Connection (Device without phono input, LINE mode)
Set the
PHONO & Line Out Switch
to LINE mode. The RCA
PHONO & Line Out
Jacks
output analog line-level signals and can be connected directly with a par of
active/powered speakers of the appropriate input of your stereo system.
The Red plug connects with the Right channel and the White plug connects with the
Left channel.
NOTE:
The RCA Jacks are not designed to be connected directly to passive/
unpowered speakers in LINE mode. If connected to the passive speakers, no sound
will come out.
Main Power Connection
Unpack the power adapter from the foam packing material and plug the small end
into the
DC power jack
located on the back of the turntable. Plug the power adapter
plug into an electrical outlet.
Power Management Function
The turntable will automatically go into standby mode after 20 minutes of inactivity.
To resume operation, simply press the power switch off, then press it to the "ON"
position after 1 second.
Operation
Turntable Operation
1. After connecting to power, press the power switch to the “ON” position.
2. Remove the stylus protector from the stylus.
3. Place the slip mat on the platter and place a record on the slip
mat. If using 45 RPM records, put the 45 RPM adapter on the center
spindle before placing the record on the platter.
4. Set the 33/45 RPM Selector according to the type of record.
45RPM Adapter
5. Turn the Start/Stop dial to the Start position. The platter will start spinning.
6. Unlock the tonearm clip and set the Lift Lever to the up position.
Loading ...
Loading ...
Loading ...