Loading ...
Loading ...
Loading ...
26 49-3000217 Rev 5
Installation Instructions
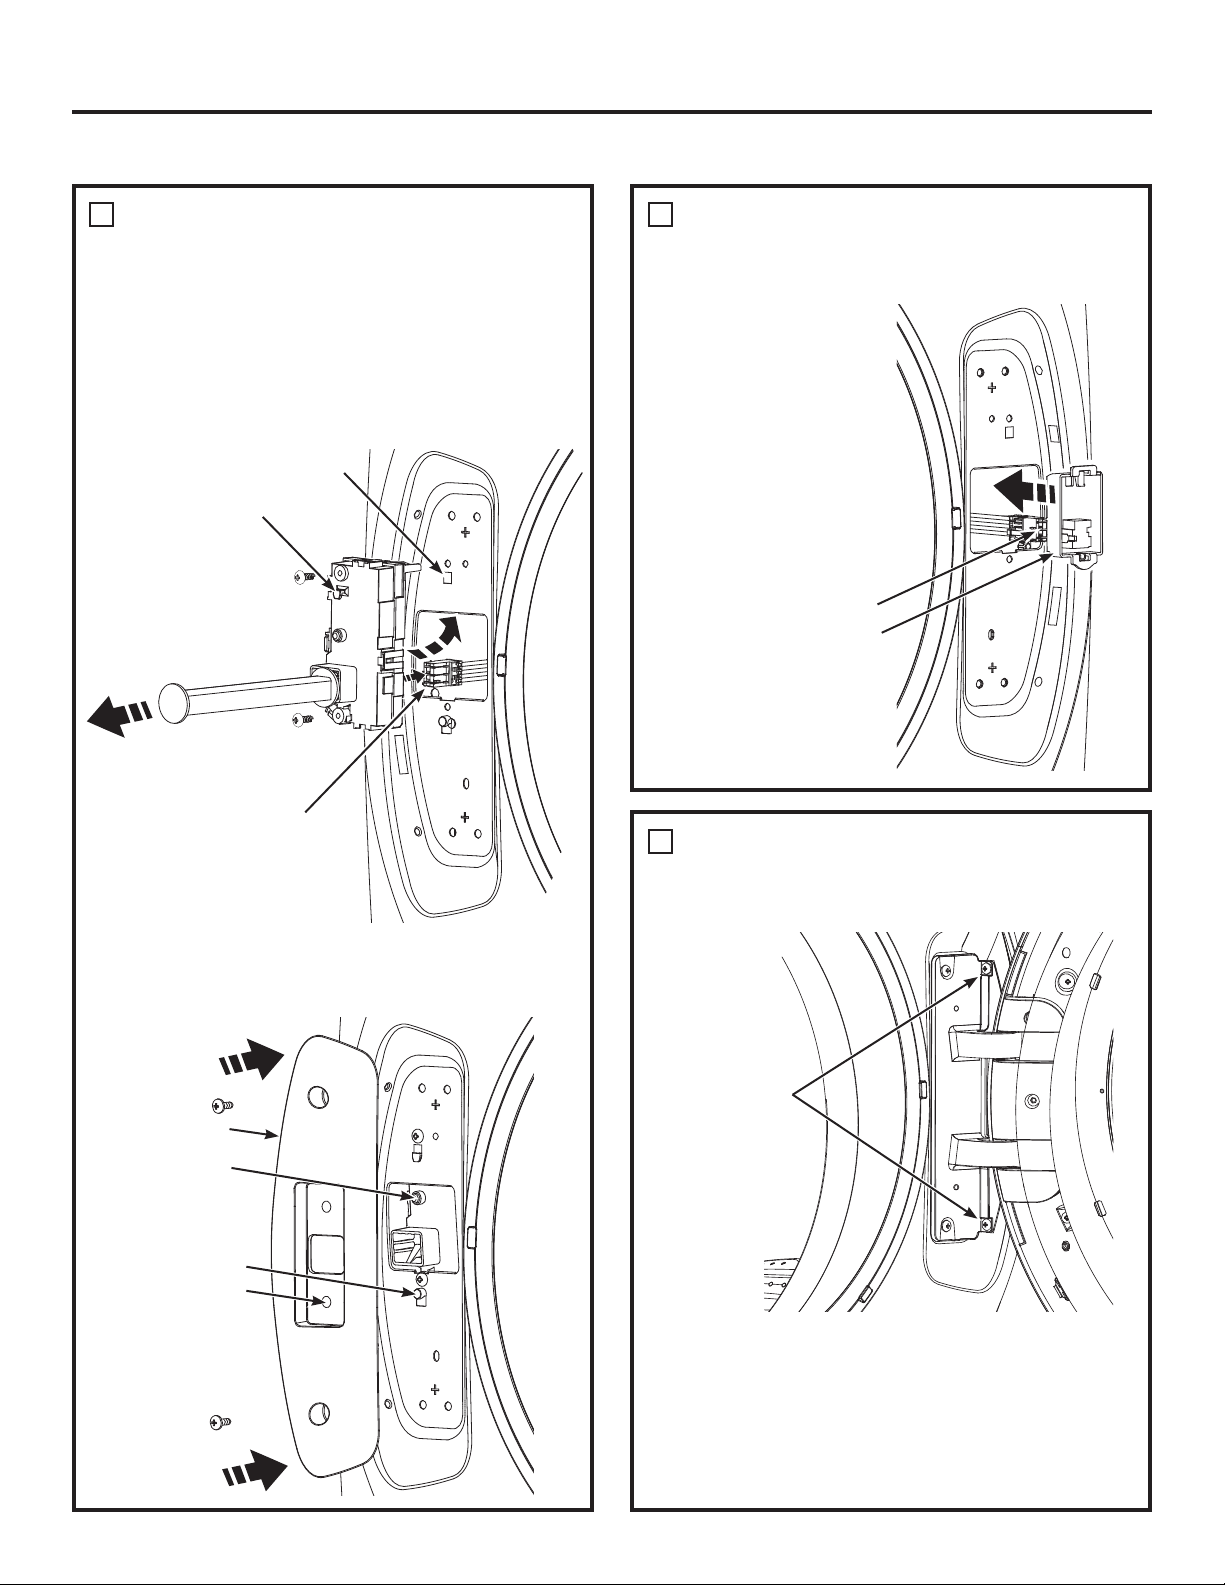
REVERSING THE DOOR SWING (Optional)
REMOVE LOCK ASSEMBLY AND
INSTALL ON OPPOSITE SIDE OF
WASHER (CONTINUED)
• Do NOT rotate lock assembly. Move it to the opposite
side of the washer and connect the pin connector making
sure it is fully snap locked together. Tilt and insert
the lock assembly into the washer face, lift it up and
latch its hook into its window. Replace its screws.
Remove the lock bar from the assembly and retain
for future use.
7
RECONNECT
PIN CONNECTOR
FROM THE WASHER AND REPLACE
THE TERMINAL HOLDER
8
• Reconnect the
pin connector and
press the terminal
holder back into
the washer face on
the opposite side.
Remove lock bar
Replace
Assembly
Pin Connector
• Install the lock cover over the lock assembly, making
sure the locating post fits into the locating hole and
that the lock switch operates freely. Replace its screws.
Pin Connector
Terminal Holder
REPLACE THE DOOR ASSEMBLY
9
• Lift the door assembly into place and secure it onto
the washer face with its 4 screws.
Replace 4 screws
into the hinge and
secure into the
washer face
• Close the washer door.
NOTE: Make sure the door opens and closes
correctly. If not, repeat all steps making sure all
parts and screws are securely seated.
• Connect power cord and turn on the breaker.
• Run the washer through a complete cycle to verify
proper operation.
Hook Window
Hook
Locating Post
Lock Cover
Locating Hole
Lock Switch
Loading ...
Loading ...
Loading ...