Loading ...
Loading ...
Loading ...
49-3000217 Rev 5 23
Installation Instructions
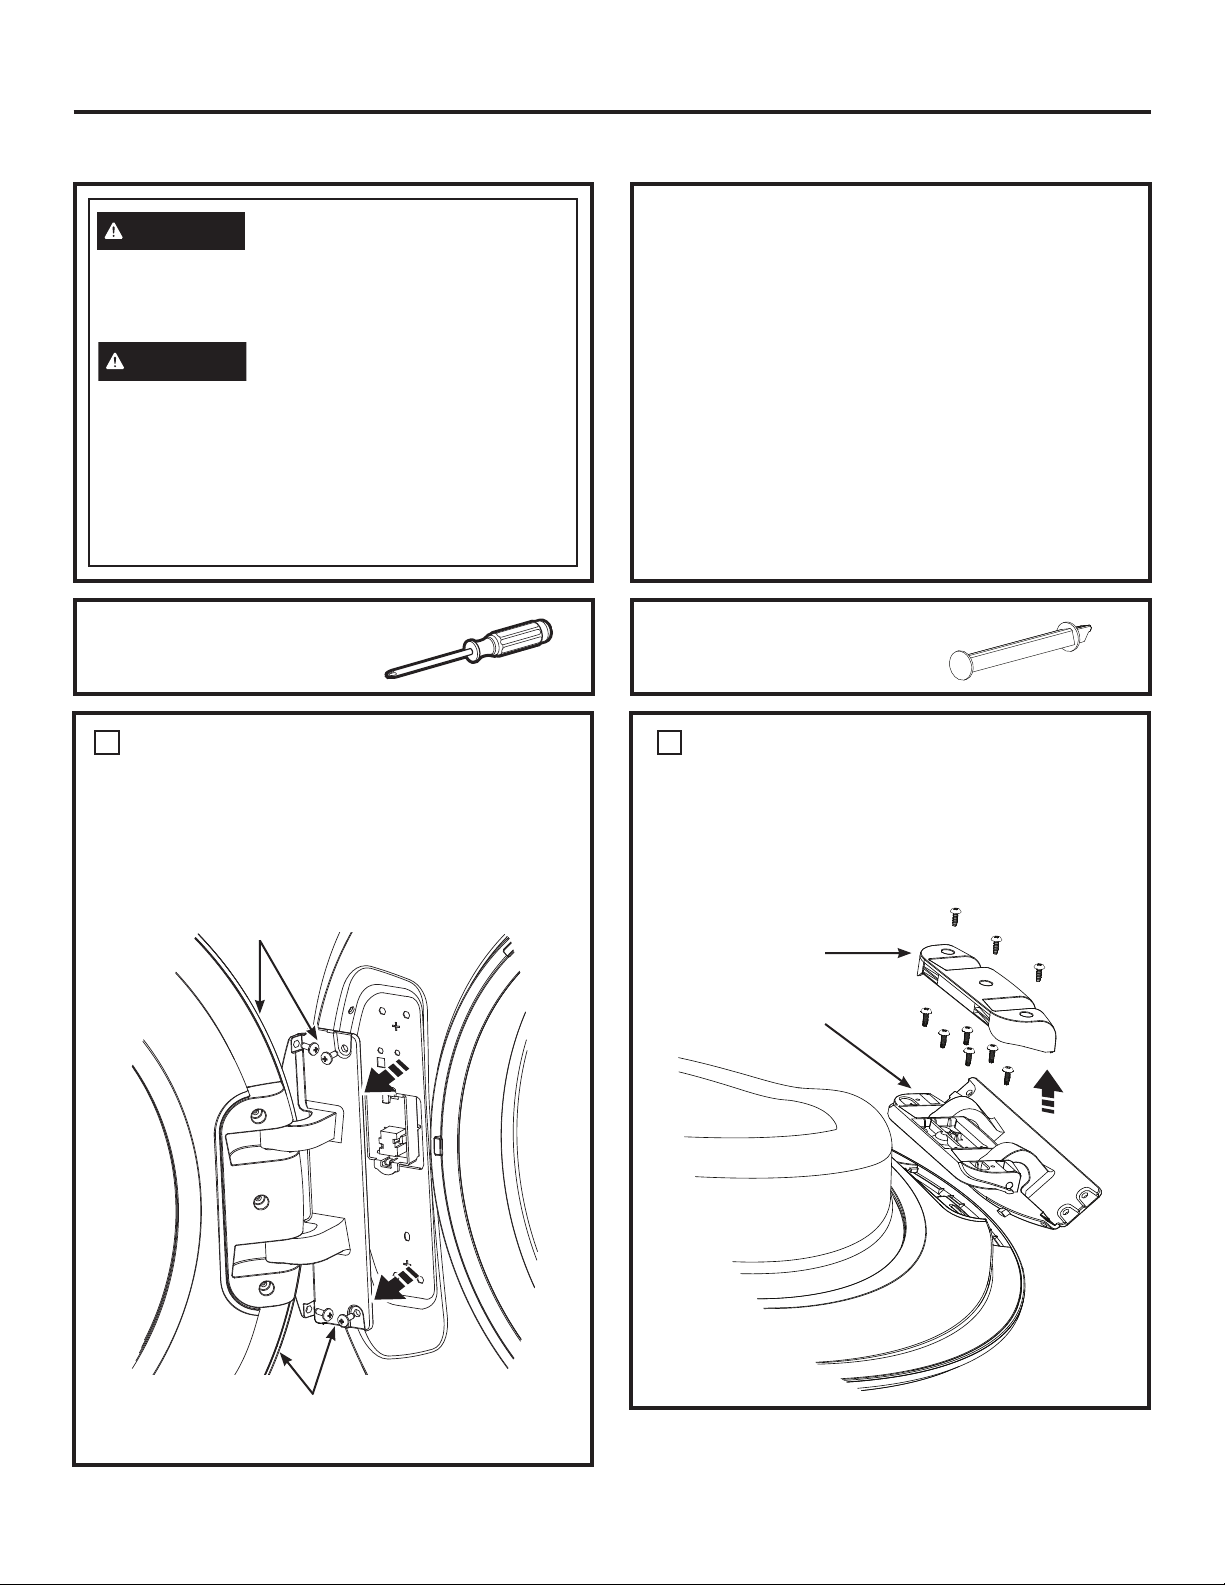
REVERSING THE DOOR SWING (Optional)
REMOVE THE DOOR HINGE
COVER AND THE DOOR HINGE
• Remove the 3 screws from the hinge cover and
remove the cover.
• Remove the 6 screws from the hinge and remove
the hinge from the door.
2
Hinge Cover
Hinge
Unplug the appliance or turn off the circuit breaker
before servicing. Pressing the Power pad DOES
NOT disconnect power.
WARNING
- Shock Hazard
Certain internal parts are intentionally not grounded
and may present a risk of electric shock only during
servicing.
Service personnel – DO NOT contact the following
parts while the appliance is energized: water valve,
drain pump, NTC, heater, door lock, inverter board,
motor and MC board.
WARNING
REMOVE THE DOOR ASSEMBLY
• Open the washer door.
• While supporting the door, remove the 4 screws
from the hinge in the washer face.
• Lift the door assembly to remove it from the washer
face and set it on a protective surface.
1
Phillips-head screwdriver
TOOL YOU WILL NEED
PART SUPPLIED
Lock Bar
IMPORTANT NOTES
• Handle parts carefully to avoid scratching paint.
• Provide a non-scratching work surface for the
door.
• Set screws down by their related parts to avoid
using them in the wrong places.
• Once you begin, do not move the cabinet until
door-swing reversal is completed.
• These instructions are for changing the hinges
from the left side to the right side—if you ever
want to switch them back to the right side, follow
these same instructions and reverse all references
to the left and right.
Hold the Door and
Remove Hinge Screws
from the Washer
Door and Hinge
Assembly
Loading ...
Loading ...
Loading ...