Loading ...
21/8"
54 mm
11/2"
38 mm
What is the thickness of your door?
Use the shorter
gold screws.
Use the medium
silver screws.
1-3/8" (35 mm) 1-3/4" (44 mm) 2" (51 mm)
Use the longer
black screws.
or or
1-3/8"
35 mm
1-3/4"
44 mm
2"
51 mm
QR S
actual
size
Q (1-3/8" / 35 mm)R (1-3/4" / 44 mm)
S (2" / 51 mm)
2 / 4
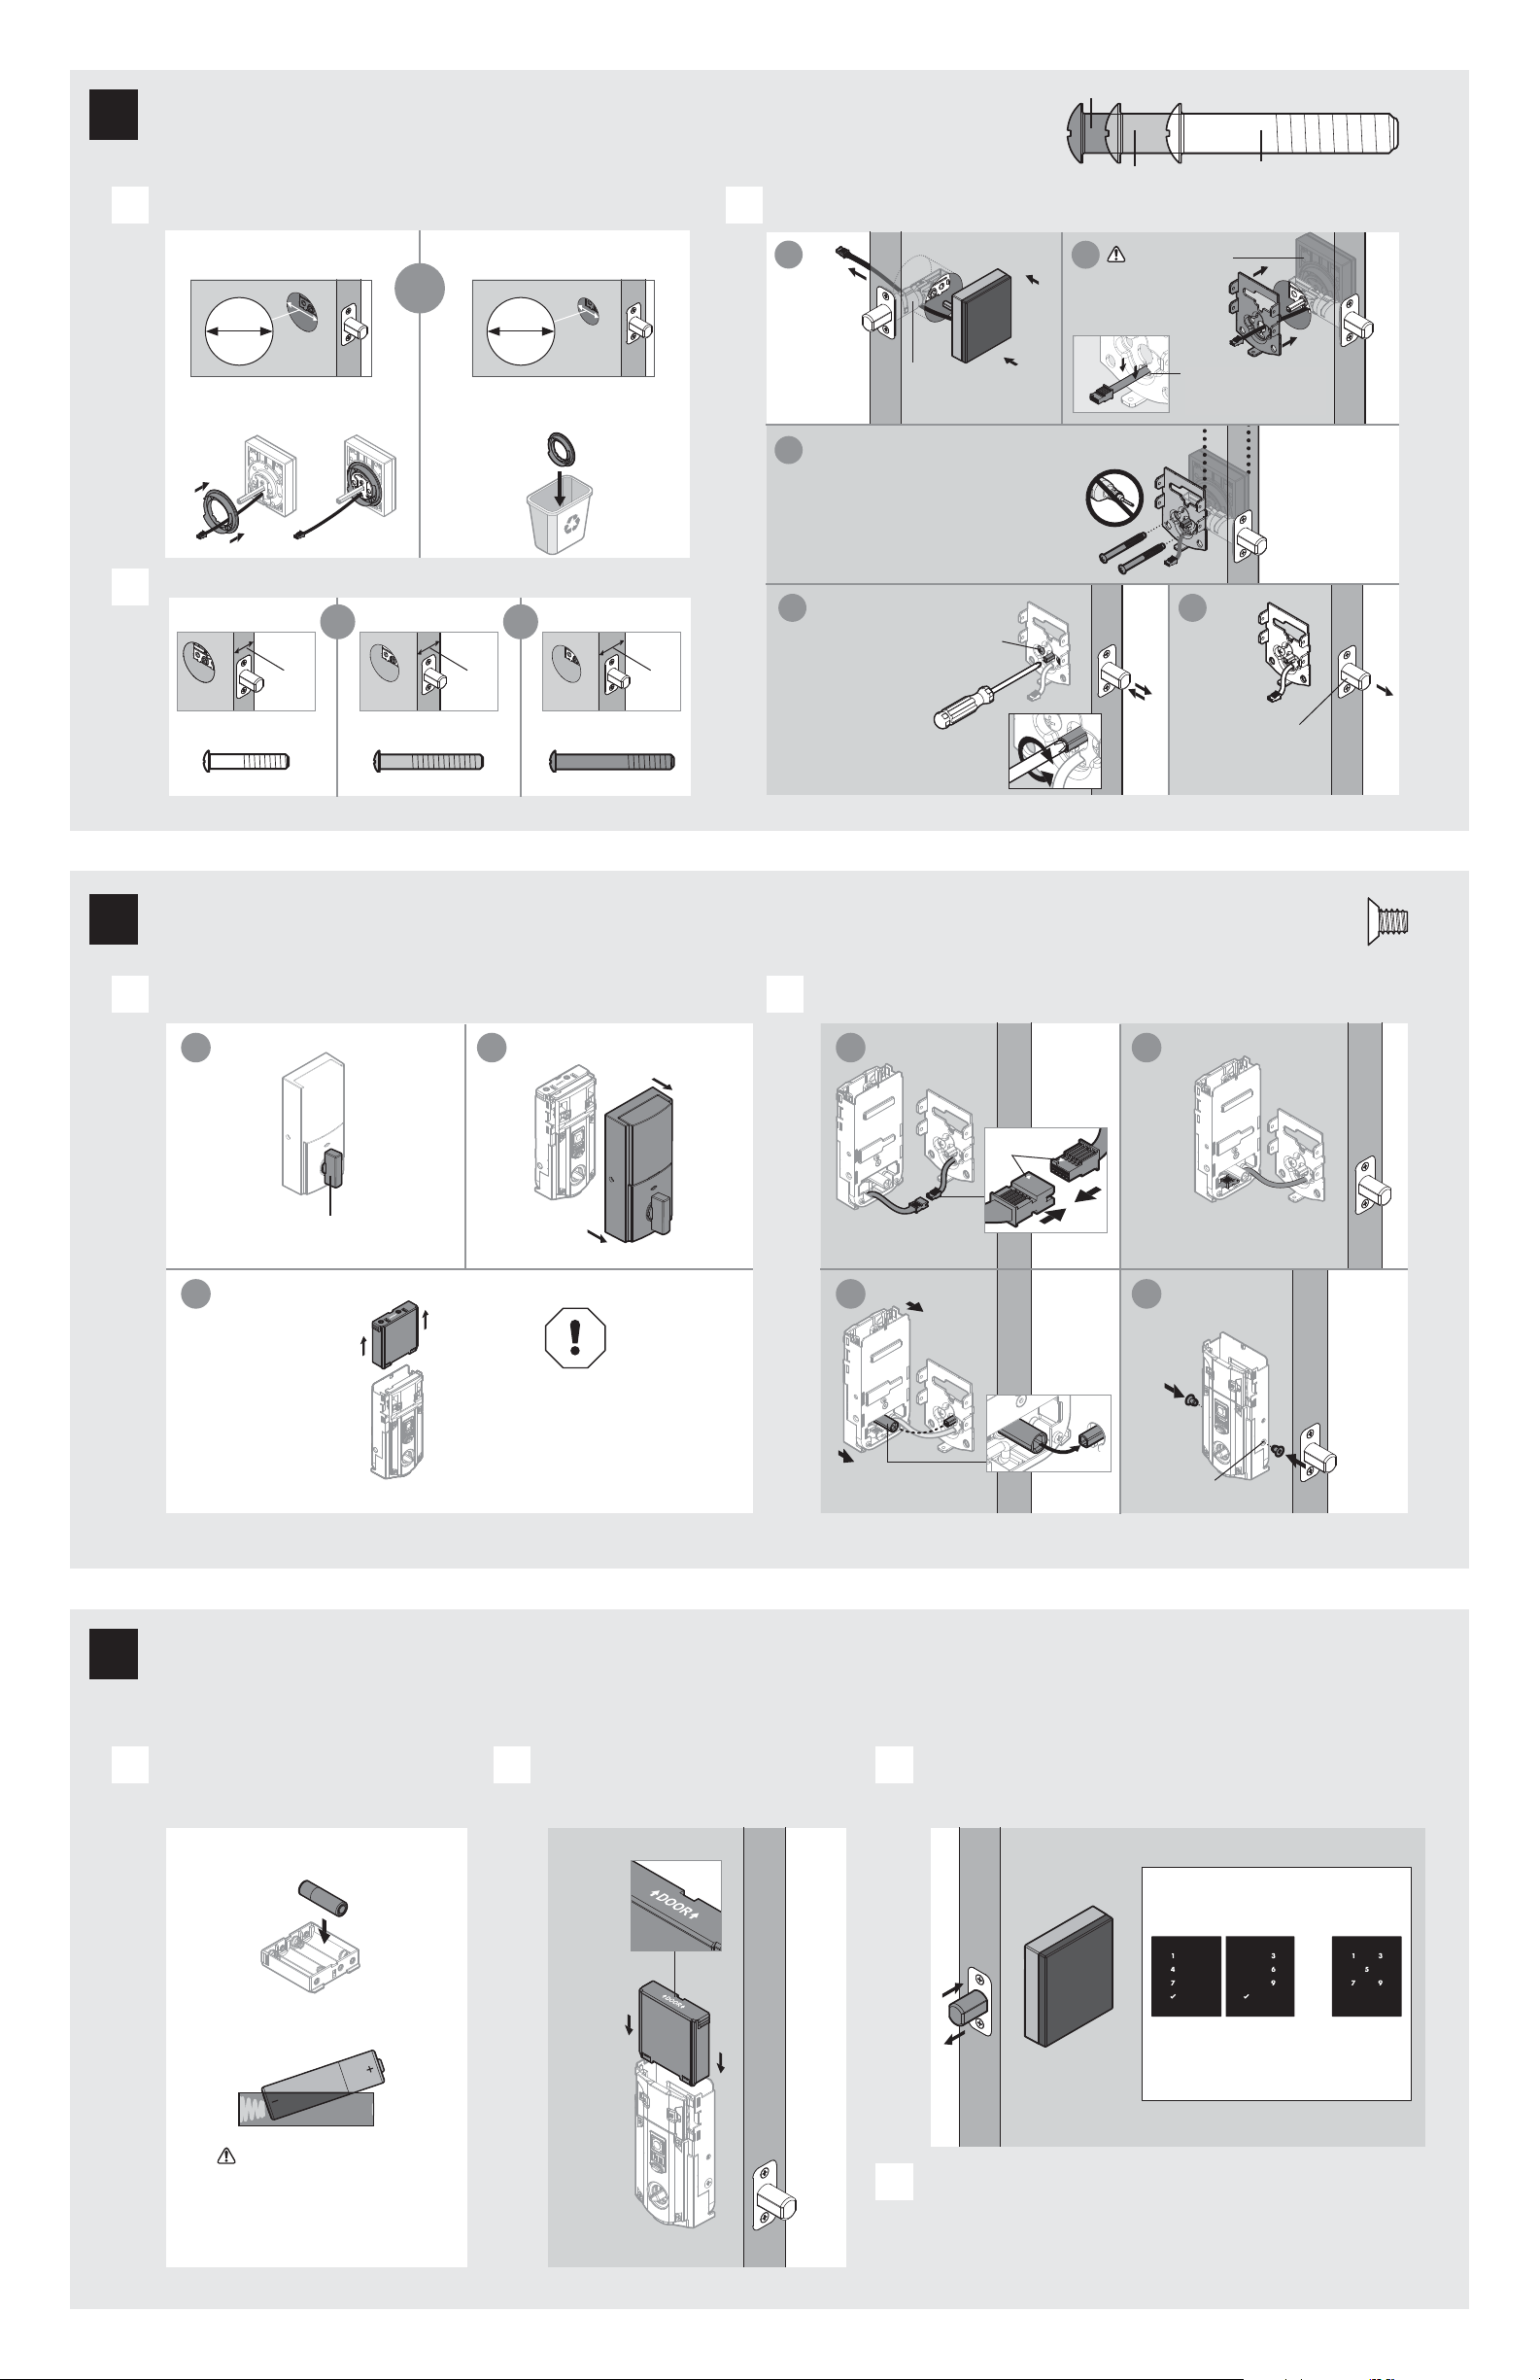
What is the diameter of the hole in the door? Install exterior touchscreen and mounting plate.
A
B
C
Diameter is 2-1/8"
(54 mm)
Diameter is 1-1/2"
(38 mm)
or
“D” is required for installation.
Install “D” on “F”.
“D” is not needed for
installation. Discard “D”.
Cable goes
underneath latch.
Support exterior
assembly during
mounting plate
installation.
Insert the tip of a Phillips
screwdriver into the
torque blade.
screws
Keep parallel to
edge of door.
Tighten screws evenly.
a
c
b
d
Remove battery cover and battery pack from interior assembly. Install interior assembly onto mounting plate.
A B
a
c
b
Make sure turnpiece is in
the vertical position.
H
H
This step will teach your lock the orientation of your door and is crucial to lock operation.
Install 4 AA batteries in battery pack. Make sure the door is open, and
insert the battery pack.
After a few seconds, the latch bolt will retract and extend on
its own to learn the orientation of the door. This is called the
door handing process, and it is crucial to lock operation.
If the touchscreen indicates a failure make sure that
the cables are connected, the batteries are installed
correctly, and attempt this procedure again.
If the door handing process is still unsuccessful after a second
attempt, perform the “Manual Door Handing” procedure on page 4.
A B C
D
Ensure correct polarity.
For best results, use
new, non-rechargeable
Alkaline batteries only.
Ensure tight cable
connection.
Lay excess cable lat inside the
bottom of the interior housing.
align
J
a
c
b
d
T
(2x)
T
actual
size
bottom
hole
J
G
J
H
4
Install the interior assembly
5
Install the batteries and perform the door handing process
Do not install
batteries until step 5.
Once the door handing process
is complete, the touchscreen
will indicate success or failure:
Success:
lashing checkmark
symbol and single
column of digits
Failure:
lashing
“X” pattern
extended
Make sure
the latch
bolt is fully
extended.
Apply slight pressure
while rotating the torque
blade to test for smooth
latch operation.
Route cable through
center hole, then push
cable into bottom hole.
If the latch does not retract
and extend smoothly, adjust
the mounting screws.
D
D
F
F
Q, R, or S (2x)
E
e
3
Install the exterior touchscreen
Loading ...
Loading ...