
Loading ...
Loading ...
Loading ...
8
We value your experience using Sunny Health and Fitness products. For assistance with parts or
8669).
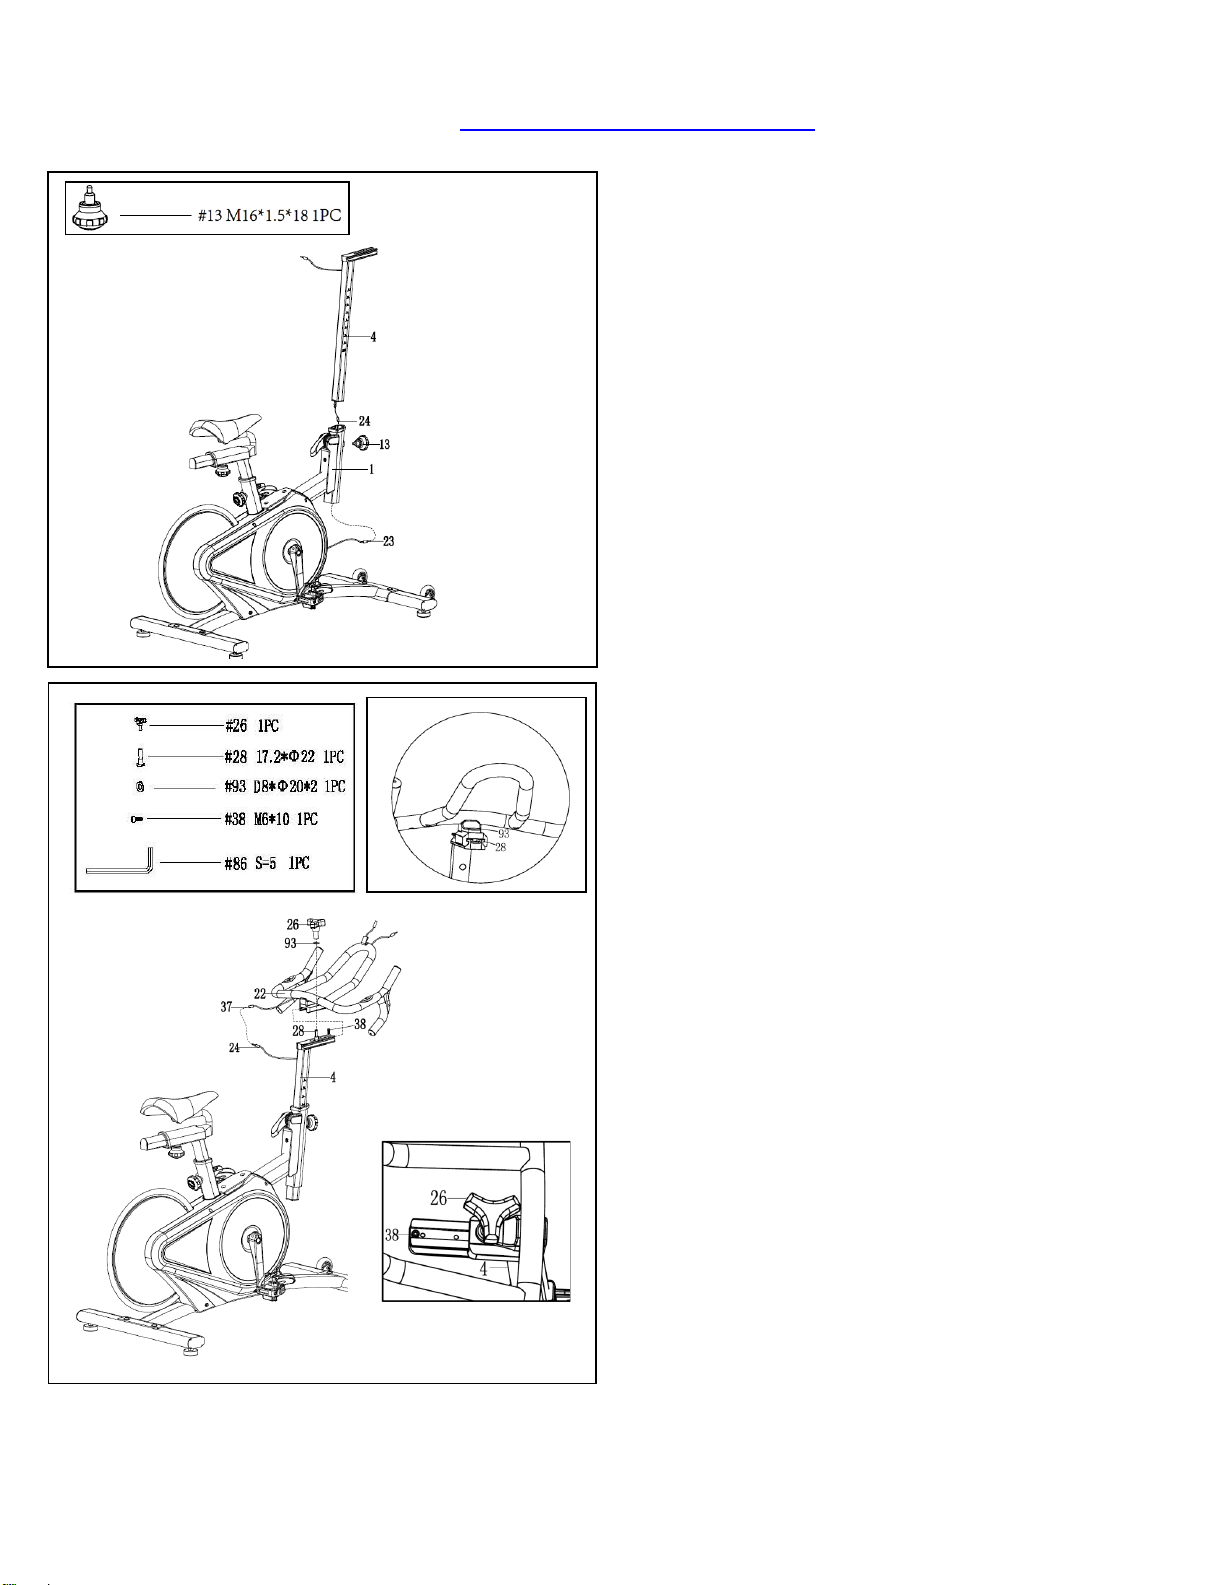
Fig A
Fig B
STEP 4:
Thread Extension Wire 1 (No. 24) into Main
Frame (No. 1). Insert Handlebar Post (No. 4)
into Main Frame (No. 1) and set at suitable
height. Then insert Spring Knob (No. 13) and
tighten to secure. Finally connect Extension
Wire 1 (No. 24) to Sensor Wire (No. 23).
STEP 5:
Remove Hexagon Socket Cap Screw (No. 38)
from Handlebar Post (No. 4) using Allen
Wrench (No. 86). Unscrew preassembled Bolt
(No. 28) and Washer (No. 93) from Triangle
Knob (No. 26). Place Handlebar (No. 22) on
Handlebar Post (No. 4). Do not slide all the
way on yet.
Insert Bolt (No. 28) into the hole in the
Handlebar (No. 22) from the bottom. Hold Bolt
(No. 28) on the threaded end to keep it in place
while you slide the Handlebar (No. 22) onto the
Handlebar Post (No. 4). Make sure the head of
Bolt (No. 28) fits into the groove in the
Handlebar Post (No. 4) (See Fig A). Now slide
the Handlebar (No. 22) all the way in.
Put Washer (No. 93) and Triangle Knob (No.
26) on Bolt (No. 28). Then turn the Triangle
Knob (No. 26) to tighten. Put Hexagon Socket
Cap Screw (No. 38) into the hole in the
Handlebar Post (No. 4) (See Fig B), and
tighten using Allen Wrench (No. 86).
Finally connect the Extension Wire 1 (No. 24)
and Extension Wire 2 (No. 37).
Loading ...
Loading ...
Loading ...