
Loading ...
Loading ...
Loading ...
7
We value your experience using Sunny Health and Fitness products. For assistance with parts or
8669).
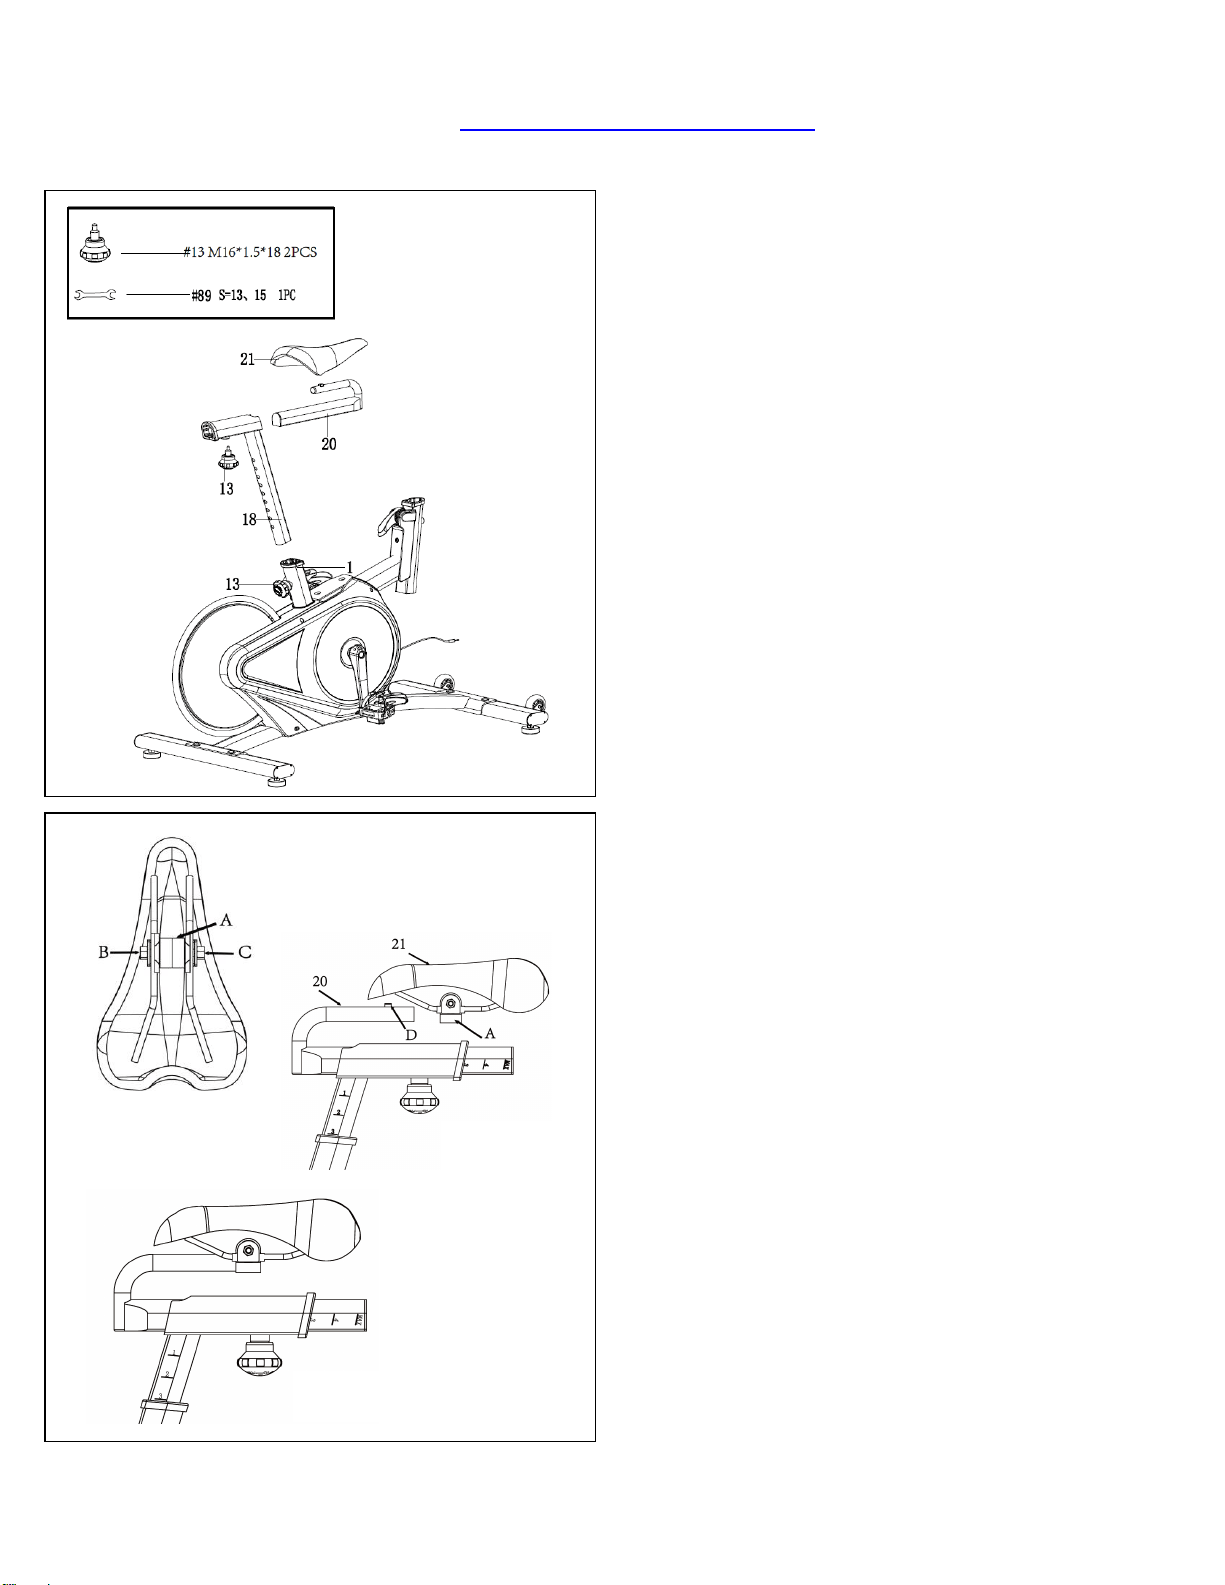
STEP 3:
Insert the Seat Post (No. 18) into the Main
Frame (No. 1). Set Seat Post (No. 18) at
desired height. Insert Spring Knob (No. 13)
and tighten to secure.
Insert the Seat Horizontal Tube (No. 20) into
the Seat Post (No. 18). Set Seat Horizontal
Tube (No. 20) at desired position. Insert Spring
Knob (No. 13) and tighten to secure.
ASSEMBLING THE SEAT
1. Use Wrench (No. 89) to loosen the 2 nuts (B
& C) on the Seat (No. 21). The round side of
the seat clamp (A) should be horizontal and on
the bottom. If it is not on the bottom, turn the
seat clamp (A), so the round side is on the
bottom. If the seat clamp (A) does not fit on the
Seat Horizontal Tube (No. 20), loosen the 2
nuts (B & C) some more. (Figure 1)
2. Slide the Seat (No. 21) onto the Seat
Horizontal Tube (No. 20). The points on the
front edge of the seat clamp (A) will go into the
indentations (D) on the Seat Horizontal Tube
(No. 20), and the V-shaped stopper at the end
of the seat clamp (A) will be in contact with the
back edge of the Seat Horizontal Tube (No.
20). (Figure 2)
3. Use Wrench (No. 89) to tighten the 2 nuts (B
& C) on the Seat (No. 21). Adjust the Seat (No.
21) so that it is leveled and not tilted forward or
backward. Continue tightening the 2 nuts (B &
C).
4. Use your hand to try to move the Seat (No.
21) forward, backward, and side to side to test if
it is secured. If the Seat (No. 21) moves, tighten
the nuts (B & C) until the Seat (No. 21) does not
move. (Figure 3)
Figure 1
Figure 2
Figure 3
Loading ...
Loading ...
Loading ...