Loading ...
Loading ...
Loading ...
32 49-1000361 Rev. 7
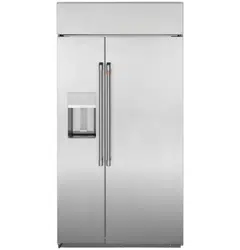
STEP 12 START ICEMAKER
CAUTION
To minimize the risk of personal
injury, avoid contact with the moving parts of the
ejector mechanism, or with the heating element that
releases the cubes. Do not place fingers or hands
on the automatic ice making mechanism while the
appliance is plugged in.
ATTENTION
Pour minimiser les risques de
blessures, évitez le contact avec les pièces mobiles du
mécanisme éjecteur, ou avec l’élément chauffant qui libère
les glaçons. Ne posez pas les doigts ou les mains sur le
mécanisme de la machine à glaçons automatique pendant
que le réfrigérateur est branché.
PRECAUCIÓN
Para minimizar el riesgo de
lesiones personales, evite el contacto con las partes
móviles del mecanismo eyector o con el elemento de
calefacción que libera los cubos. No coloque los dedos
ni las manos en el mecanismo de la máquina de hielo
automática mientras el refrigerador esté enchufado.
• Set the ice maker to ON with the control panel.
• The icemaker will begin operation automatically.
• Be sure nothing interferes with the sweep of the
feeler arm.
• Discard the first full bucket of ice cubes.
• Use the control panel to set the ice maker to OFF.
Installation Instructions
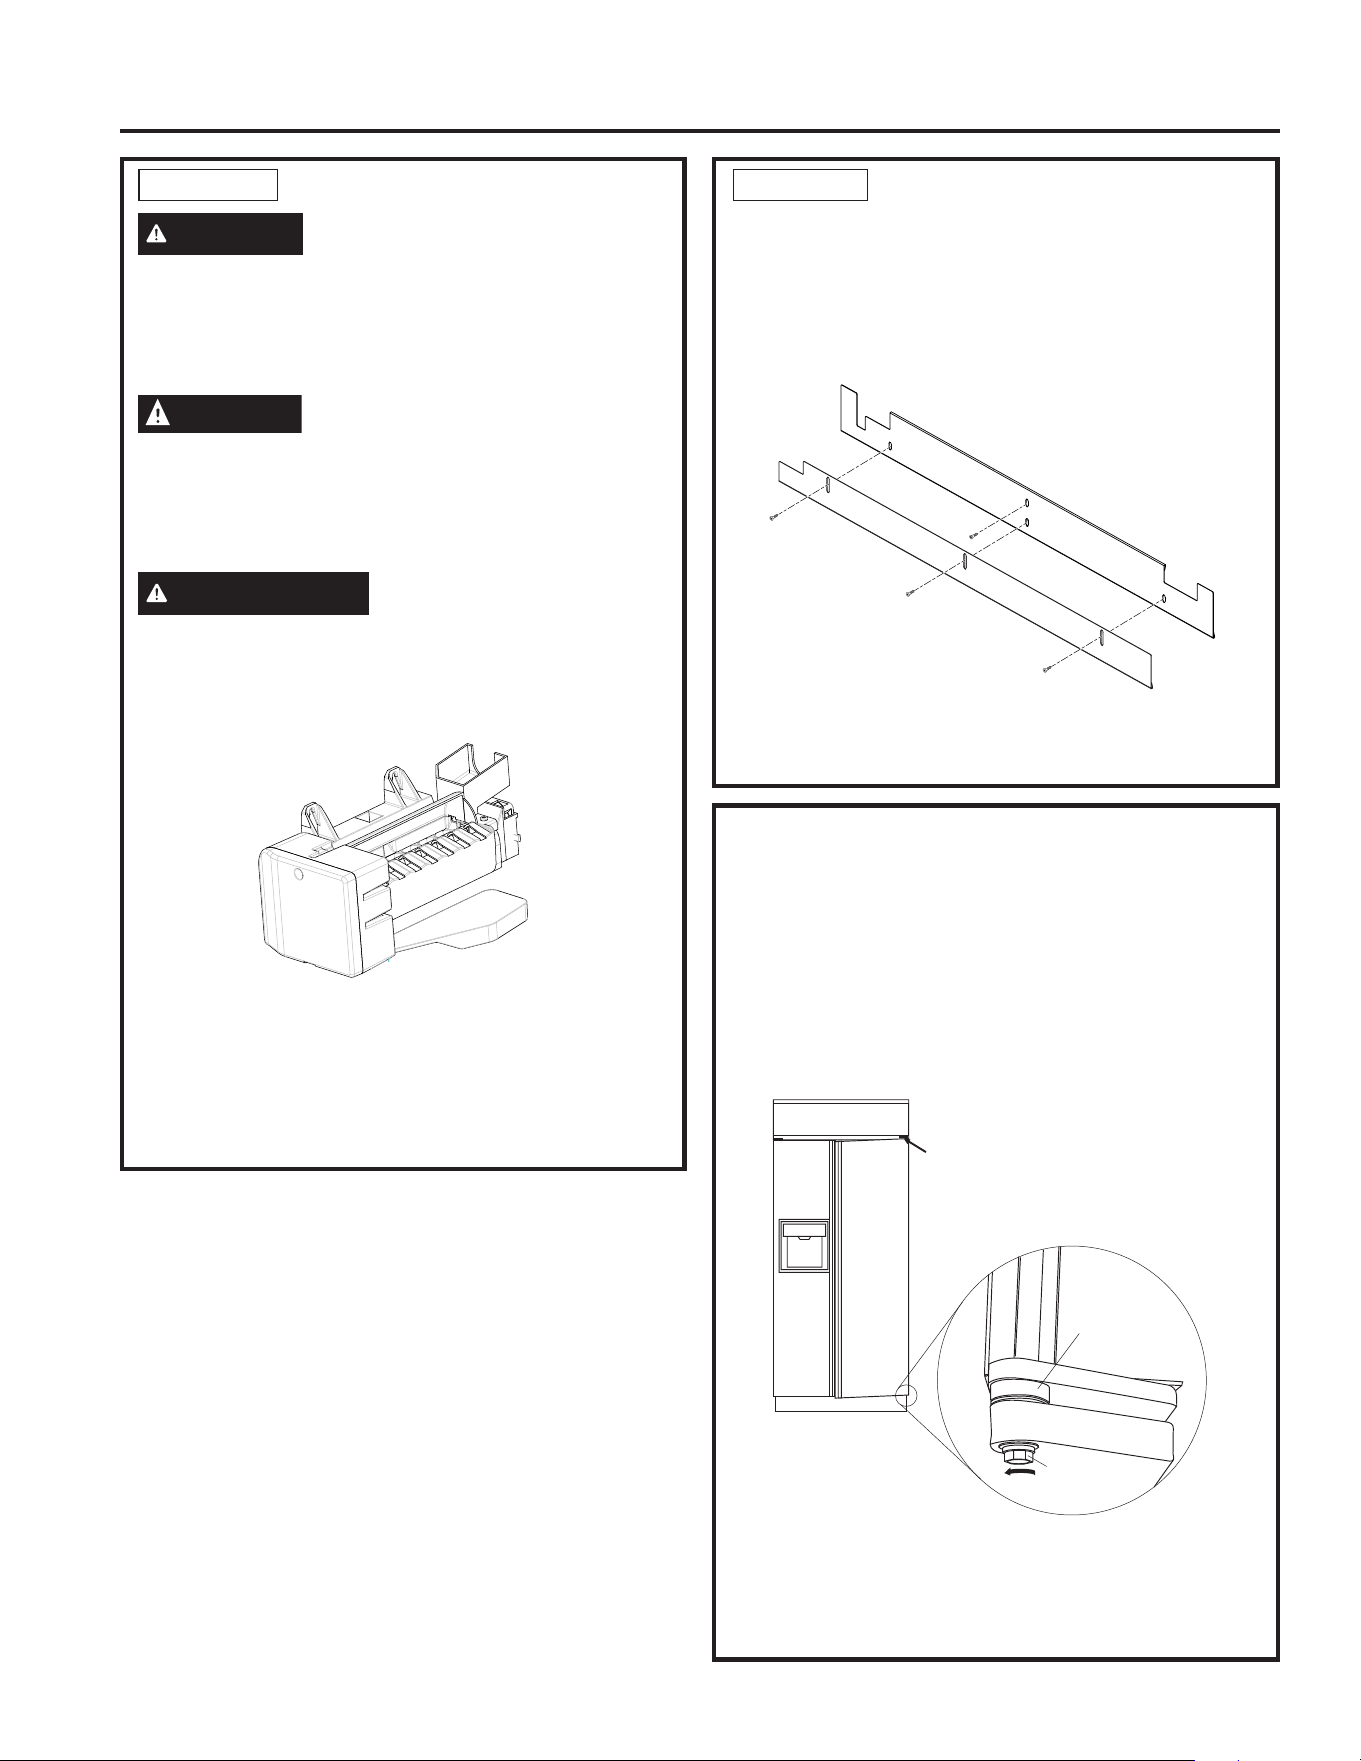
INSPECT FINAL INSTALLATION
Check door alignment. Stand back away from the
refrigerator to inspect the final installation.
• Check to be sure the handles are evenly aligned
with each other at the top. To adjust, loosen the
handle screws and slide up or down. Tighten the
screws.
• Shipping or the addition of heavy door panels may
have caused the doors to move slightly out of
alignment.
• If necessary, the refrigerator door may be adjusted
up or down to align with the freezer door.
8VHD´ZUHQFKWRDGMXVWWKHKLQJHSLQDV
shown.
Bushing
Door Hinge
Case Hinge
5/16" Wrench
Raise
Door Out of
Alignment
STEP 13 INSTALL TOEKICKS
• Locate the supplied toekicks (shipped taped to the
side of the refrigerator.
• Attach the LARGER toekick to the refrigerator using
ONLY the top center hole (1).
• Attach the toekick skirt to the refrigerator using the
three lower slots (2).
• A custom toekick can be installed to match or
complement the surrounding cabinetry. Use the
supplied toekick as a template to cut the shape.
1
2
INSTALLATION INSTRUCTIONS
Loading ...
Loading ...
Loading ...