Loading ...
Loading ...
Loading ...
49-1000361 Rev. 7 29
INSTALLATION INSTRUCTIONS
Installation Instructions
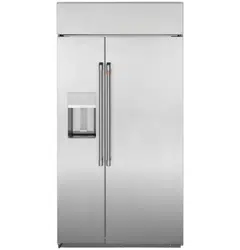
IMPORTANT: When the refrigerator is installed
under a soffit or if there is not enough height for
this method of security, brackets cannot be used.
Proceed to step 7 to level the refrigerator and then
to step 8 to secure refrigerator to cabinets. The
refrigerator must be secured to prevent tipping.
Connect power cord:
• Before pushing the refrigerator into the opening,
plug the power cord into the receptacle. The water
filter guard will need to be removed for access
(some models). Remove the 3 screws holding it
in place. If access is still too tight, remove the 2
screws holding the water filter bracket and move
aside. Open the grille panel and reach into the
opening at the back to grasp the power cord. Pull
the power cord into the opening as you push the
refrigerator back. Secure the bracket and guard
with the original screws.
• Gently push refrigerator into the opening with hands
against front corners.
STEP 6
ANTI-TIP PROCEDURE
(Cont.)
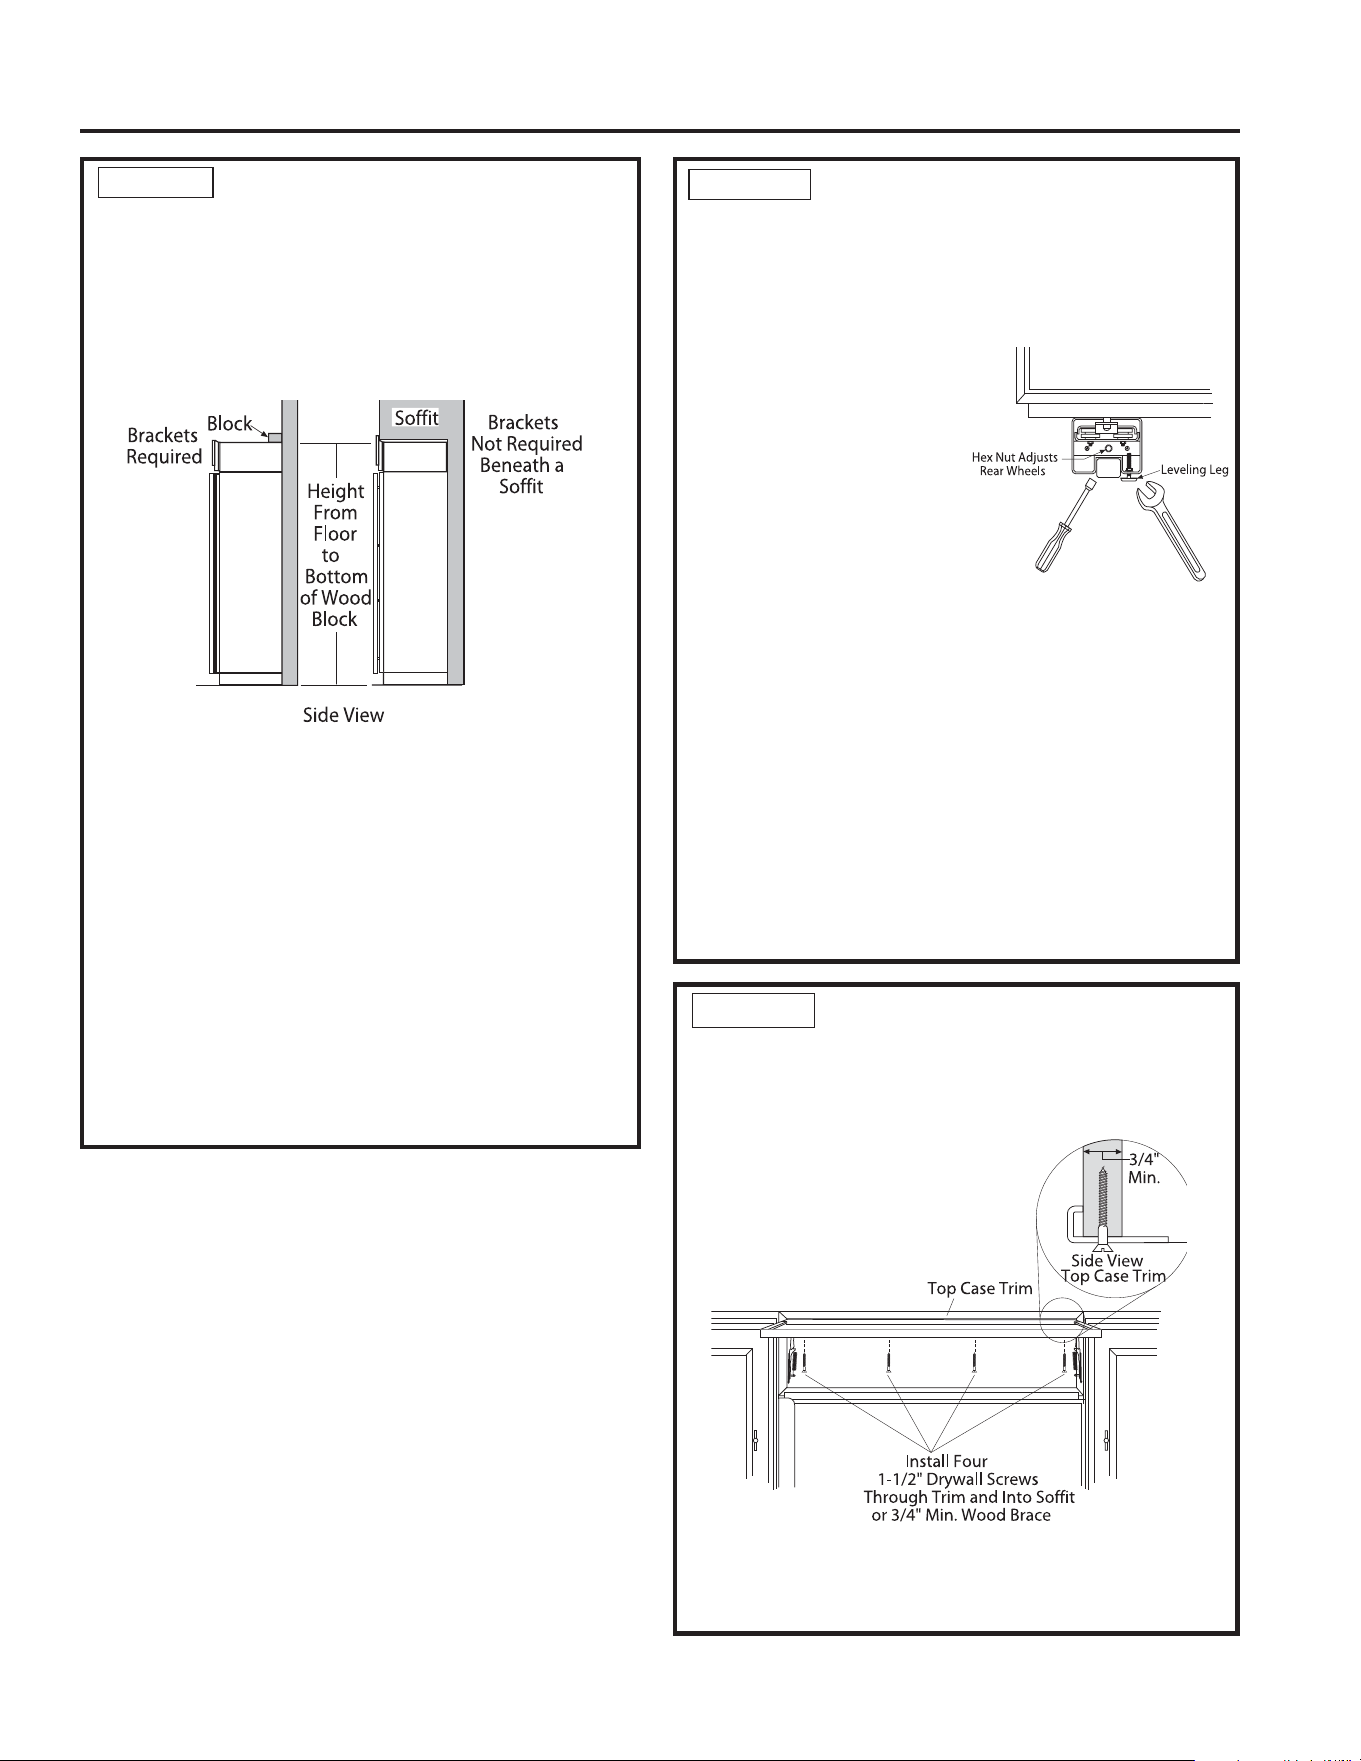
STEP 7 LEVEL REFRIGERATOR
All models have 4-point leveling. The front is
supported by leveling legs, the rear is supported by
adjustable wheels. Both are accessible from the front
of the refrigerator.
7ROHYHOWKHEDFNRIWKHUHIULJHUDWRUWXUQWKH´
hex nut located above
the front wheels. Turn
clockwise to raise or
counterclockwise to lower
the refrigerator.
• For front leveling, use a
´RSHQHQGZUHQFK
• Adjust height of refrigerator
to match installation cutout
RSHQLQJ´
cm). The refrigerator should be level and plumb with
cabinetry.
NOTICE: The rear leveling wheels and front leveling
OHJVDUHOLPLWHGWRDPD[LPXPKHLJKWDGMXVWPHQWRI´
(2.54 cm). If the installation requires more than
´FPKHLJKWWKHLQVWDOOHUVKRXOG
elevate the refrigerator on a sheet of plywood or
runners. Cabinetry trim could also be added across
the top of the opening to shorten the opening. If you
attempt to raise the refrigerator more than 1” (2.54
cm), you will damage the front leveling legs and
the rear leveling wheels. Make adjustments in
small increments.
STEP 8 ALTERNATE ANTI-TIP
PROCEDURE
The refrigerator must be secured to prevent
tipping.
• Raise the grille panel to access case trim.
8VHD´ELWWRGULOOIRXUHYHQO\VSDFHGFOHDUDQFH
holes through the metal top case trim.
Loading ...
Loading ...
Loading ...