Loading ...
Loading ...
Loading ...
28 49-1000361 Rev. 7
STEP 3 INSTALL WATER LINE
(Cont.)
Shut off the main water supply.
Turn on the nearest faucet long enough to clear the
line of water.
• Install a shut-off valve between the icemaker water
valve and cold water pipe in a basement or cabinet.
The shut-off valve should be located where it will be
easily accessible.
• Turn on the main water supply and flush debris.
Run about a quart of water through the tubing into a
bucket. Shut off the water supply at the shut-off valve.
NOTE: Saddle type shut-off valves are included in
many water supply kits. Before purchasing, make
sure a saddle type valve complies with your local
plumbing codes.
NOTE: Commonwealth of Massachusetts Plumbing
Codes 248CMR shall be adhered to. Saddle valves
are illegal and use is not permitted in Massachusetts.
Consult with your licensed plumber.
Installation Instructions
STEP 5 INSTALL SIDE PANELS
Skip this step when not using side panels.
,I\RXDUHXVLQJ´FPVLGHSDQHOVWKH\
should be inserted into the case trim. Fasten the
panels to the refrigerator with stick-on hook and loop
fastener strips before setting the refrigerator in place.
STEP 4 WATER LINE
INSTALLATION WITH A REVERSE
OSMOSIS SYSTEM OR OTHER
HOUSEHOLD FILTRATION SYSTEM
Skip this step when not using an RO System or
other household filtration system.
If the water supply to the refrigerator is from a
household filtration system, use the refrigerator’s filter
bypass plug. Using the refrigerator’s water filtration
cartridge with the RO filter can result in hollow ice
cubes.
Filter Bypass
Plug
Rotate Counterclockwise to Remove
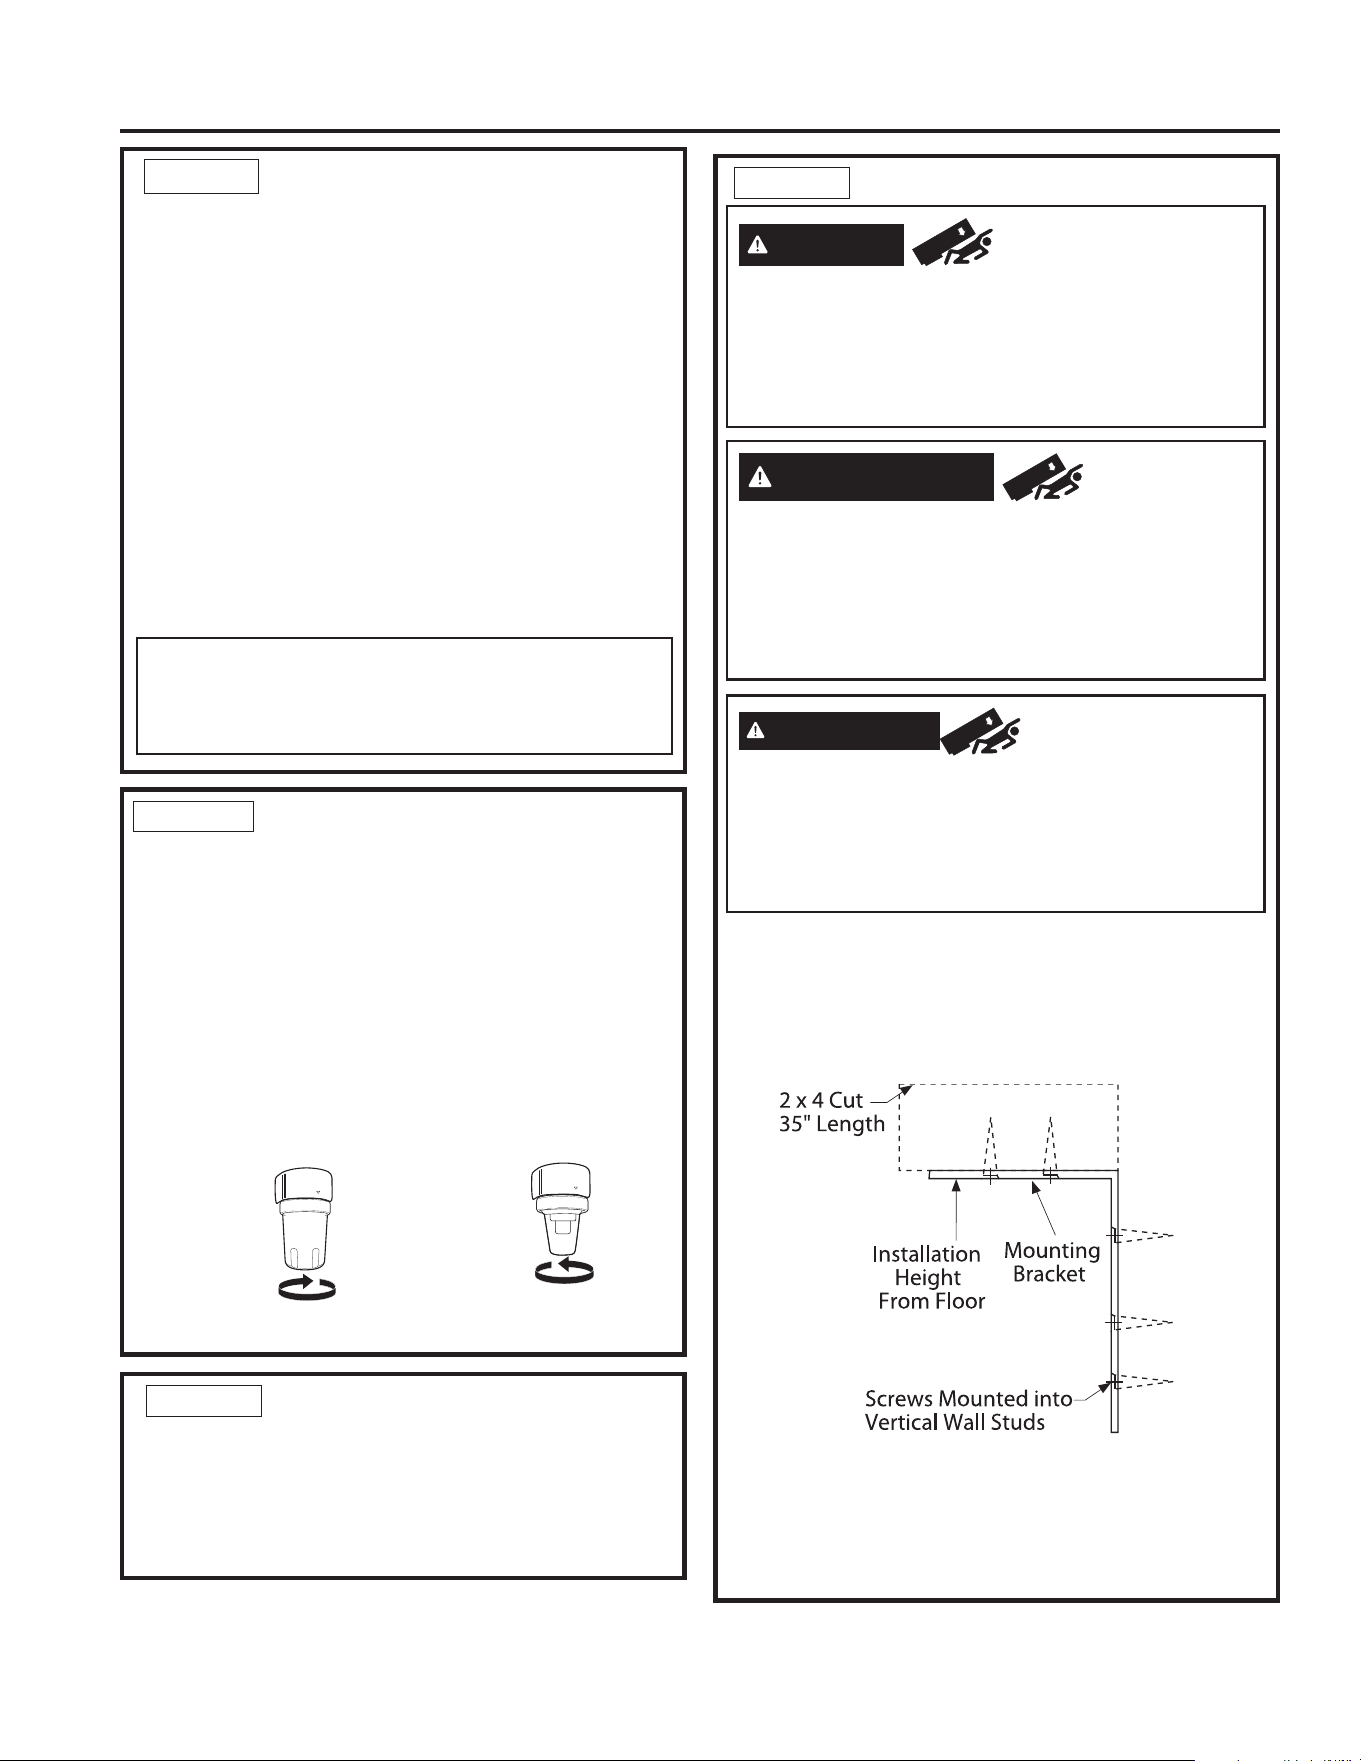
STEP 6
ANTI-TIP PROCEDURE
&XWD´[´EORFN´FPORQJDQGVHFXUH
the block to the mounting brackets provided using
#12 or #14 wood screws.
• Secure the bracket with wood block to the back wall
VRWKDWLWLV´FPIURPWKHILQLVKHGIORRU
Use #12 or #14 wood screws. See the illustration.
• The screws must penetrate at least one inch into the
vertical wall studs.
• If metal wall studs, use self-tapping sheet metal
screws in place of wood screws.
WARNING
Tip Over Hazard.
These refrigerators are top heavy, especially
with any doors open, and must be secured to
prevent tipping forward which could result in
death or serious injury. Read and follow the entire
installation instructions for securing the refrigerator
with the anti-tip system.
AVERTISSEMENT
Risque de
basculement
Ces réfrigérateurs sont trop lourds, en particulier avec
l’une des portes ouvertes, de sorte qu’ils doivent être
fixés pour prévenir le basculement susceptible de causer
des blessures graves voire fatales. Lisez et observez
la totalité des instructions d’installation pour fixer le
réfrigérateur à un dispositif antibasculement.
ADVERTENCIA
Riesgo de Caídas
Estos refrigeradores son inestables, especialmente
con puertas abiertas, y deben ser asegurados para
evitar inclinaciones hacia delante que pueden provocar
la muerte o lesiones graves. Lea y siga todas las
instrucciones de instalación para asegurar el refrigerador
con el sistema antivolcaduras.
INSTALLATION INSTRUCTIONS
Loading ...
Loading ...
Loading ...