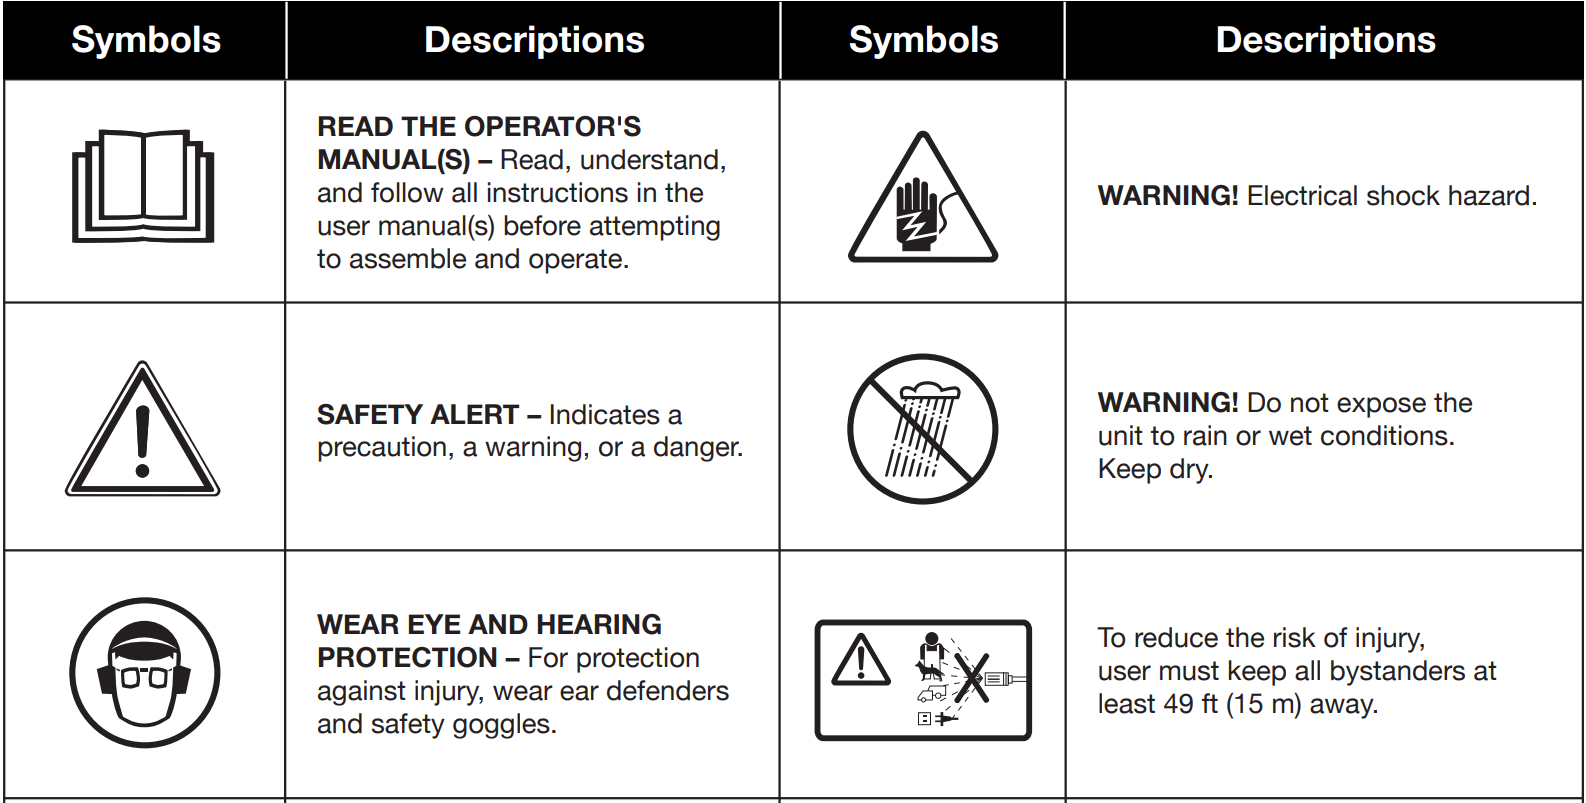
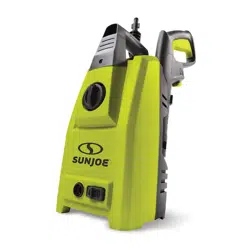
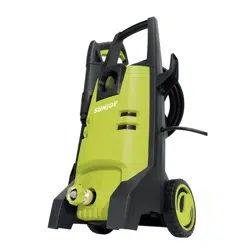
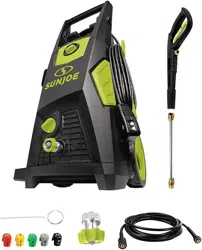
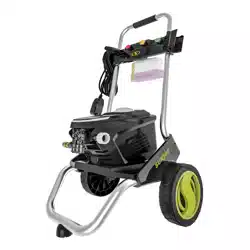
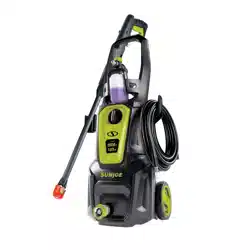
This electric high pressure washer is intended for residential use only. It is designed for medium-to-heavy duty cleaning jobs on boats, motorcycles, RV’s, ATV’s, trailers, decks, barbecues, siding, patio furniture, and more.
Areas of application
Never use the machine in potentially explosive areas under any circumstances!
The operating temperature must be between 32ºF (0ºC) and 104ºF (40ºC).
The machine consists of an assembly with a pump, which is encased in a shock-absorbing housing. To provide the operator with an optimal working position, the machine is equipped with a spray wand and a non-slip handle grip, whose shape and configuration comply with applicable regulations.
Do not cover or modify the spray wand or the spray nozzle in any way.
The high-pressure electric power washer is designed to be used with cold or lukewarm water; higher temperatures can damage the pump.
Do not use water that is dirty, gritty, or contains any chemical products, as such impurities could impair operation and shorten the life of the machine.
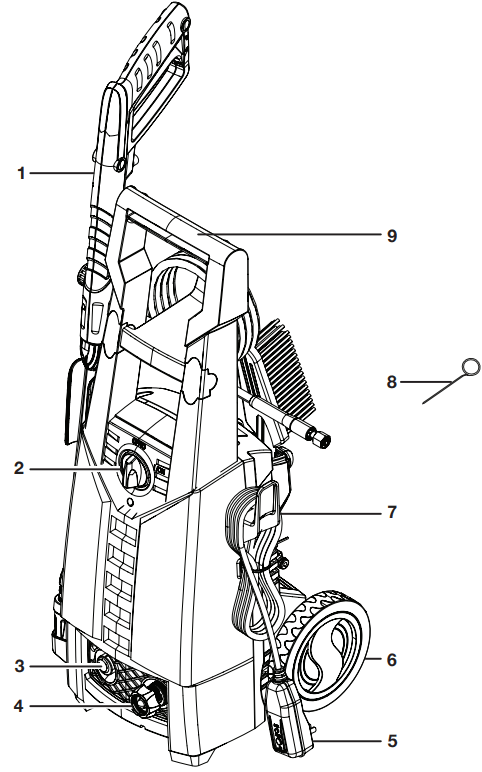
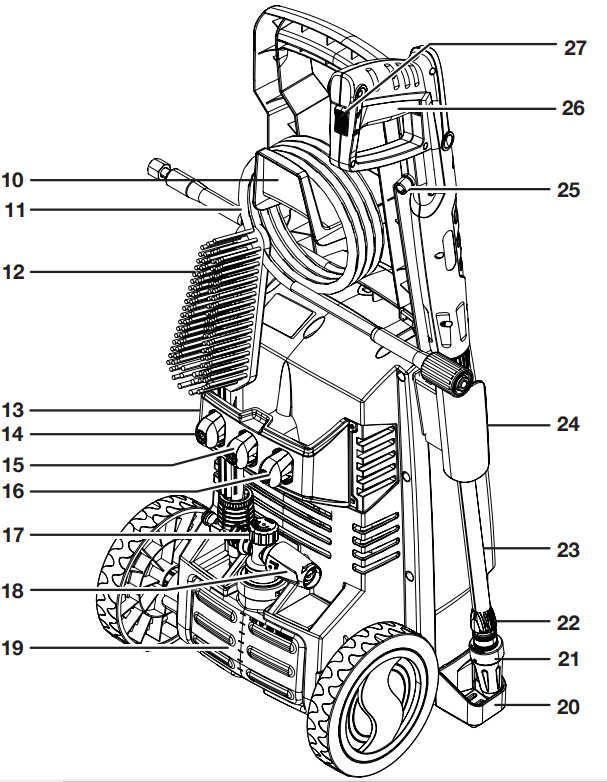
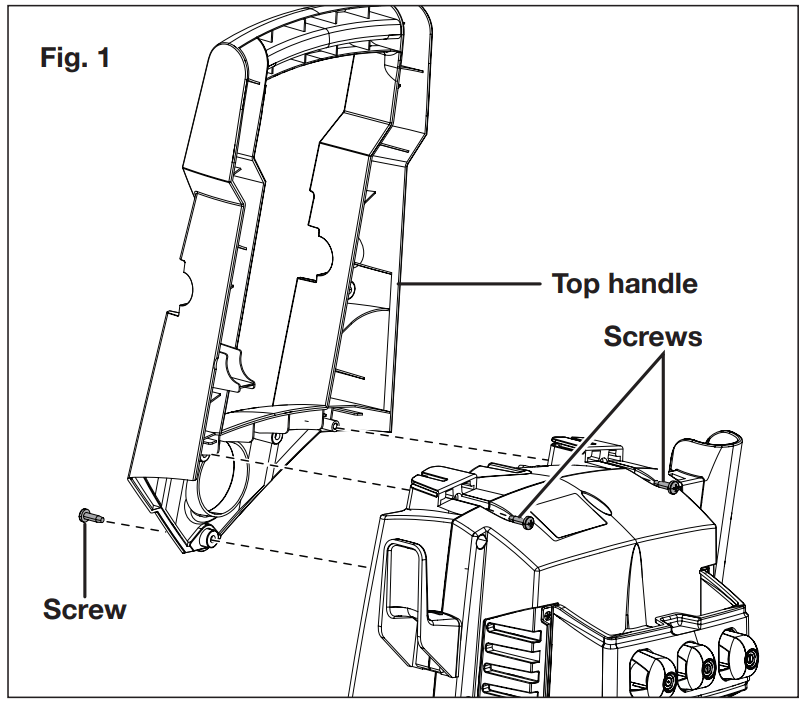
1. Slide the top handle in position on the top of the pressure washer, and attach using the three screws as shown (Fig. 1).
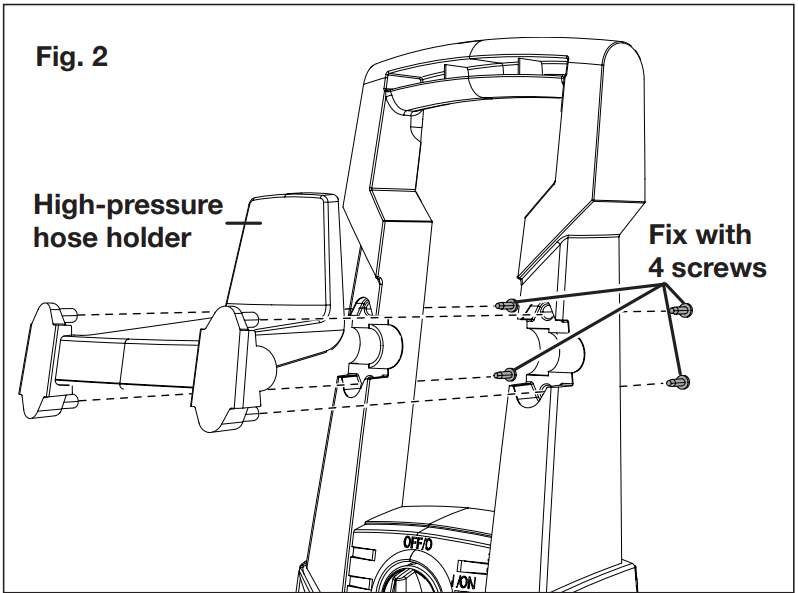
2. Attach the high-pressure hose holder and secure using the four additional screws provided, as shown (Fig. 2).
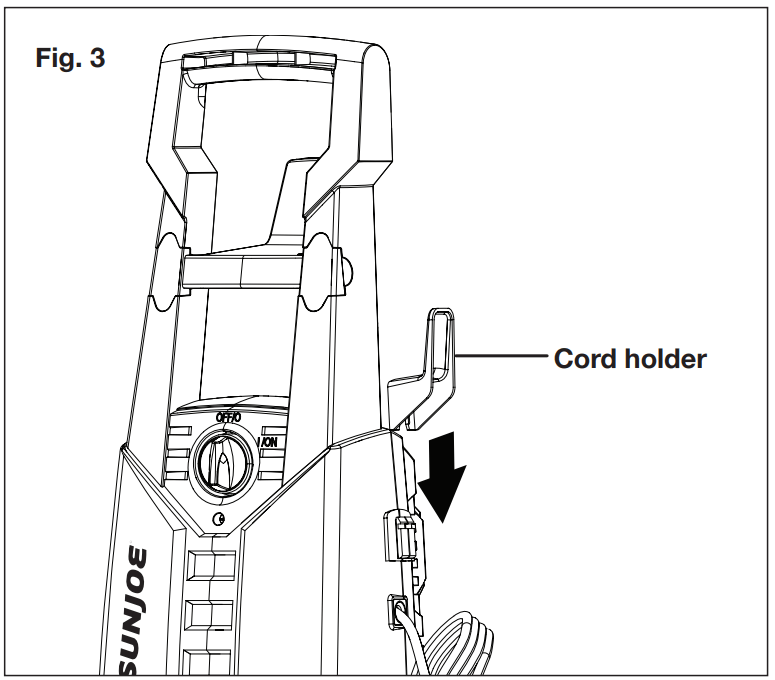
3. Slide the cord holder into position (Fig. 3).
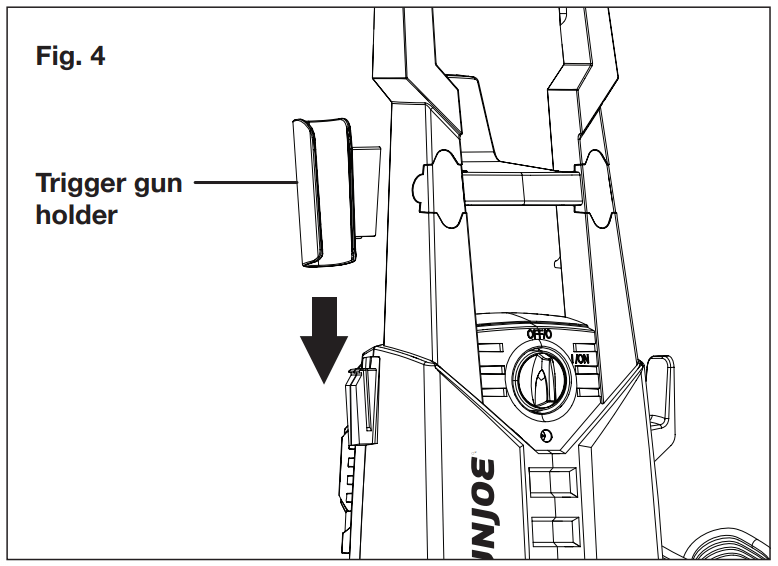
4. Slide the trigger gun holder into position (Fig. 4).
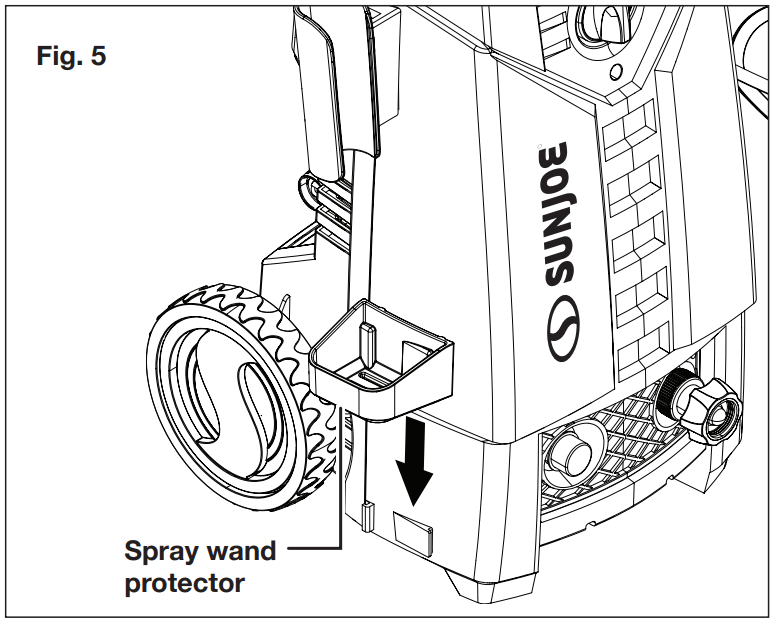
5. Slide the spray wand protector into position (Fig. 5).
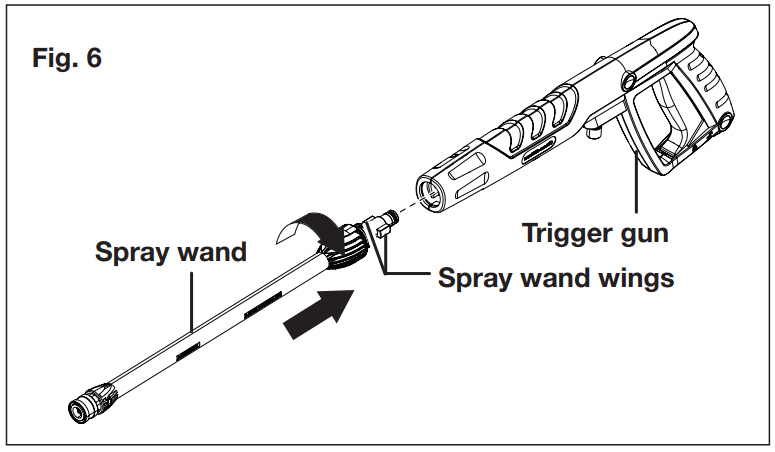
6. To connect the spray wand with the trigger gun, press the wings of the spray wand into the slot of the trigger gun, then twist counterclockwise until the 2 parts are completely locked together (Fig. 6).
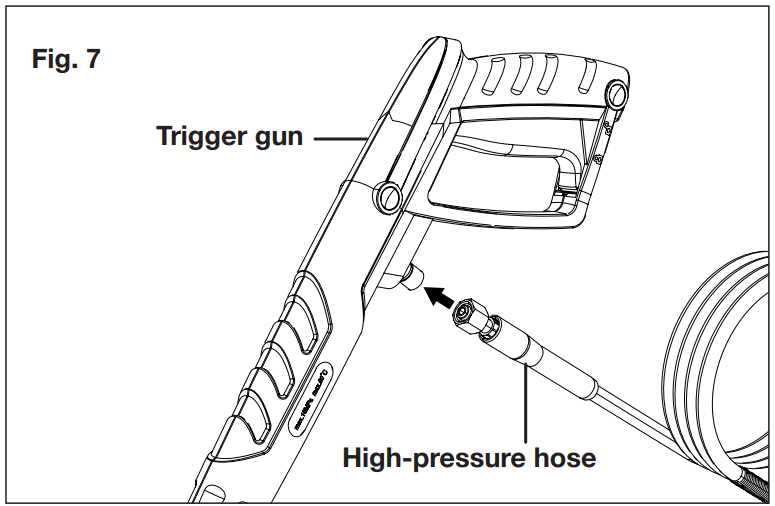
7. Connect the high-pressure hose to the trigger gun. Twist to secure the connection (Fig. 7).
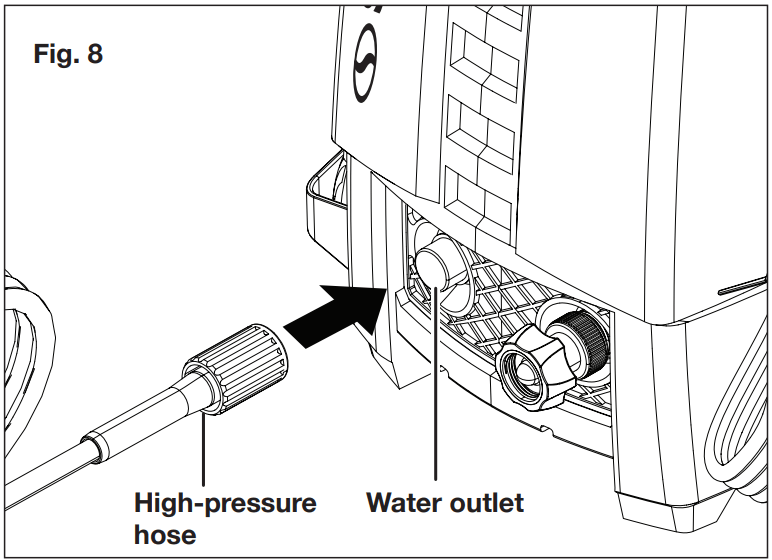
8. Connect the other end of high-pressure hose to the water outlet on the washer and tighten securely (Fig. 8).
WARNING! Keep hose away from sharp objects. Bursting hoses may cause injury. Examine hoses regularly and replace if damaged. Do not attempt to mend a damaged hose.
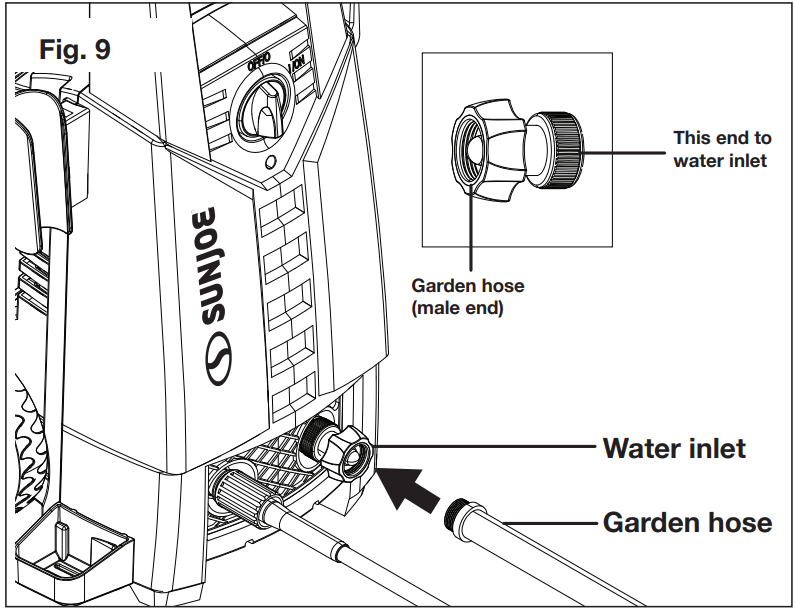
9. Connect the garden hose adapter (female coupler) to the water inlet of the pressure washer, then thread your garden hose (male end) into the garden hose adapter (Fig. 9). The garden hose must have an internal diameter of at least 1/2 in. (13 mm) and must be reinforced.
The water supply must be at least equal to the washer delivery capacity.
NOTE: The machine is not suitable for connection to the potable water main.
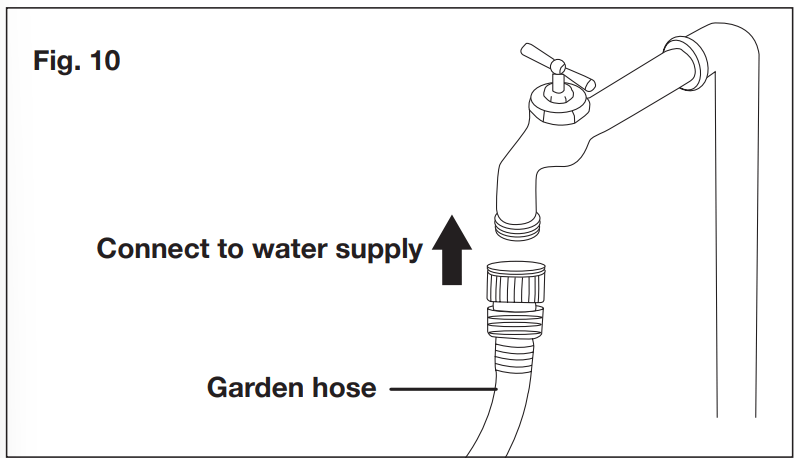
10. Attach garden hose to water supply (Fig. 10).
WARNING! Do not connect to potable water system.
WARNING! If connection is made to a potable water system, the system shall be protected against backflow.
WARNING! The intake water temperature must not exceed 104ºF/40ºC. The water supply must not exceed
CAUTION! The washer must only be used with clean water; use of unfiltered water containing corrosive chemicals will damage the washer.
CAUTION! To prevent damage to the appliance, do not allow it to operate dry. Before starting the appliance, make sure that it has proper and stable supply of water
Operation
Using the Pressure Washer
IMPORTANT! This pressure washer is equipped with a micro-switch sensitive to water flow. This Total Stop System (TSS) senses water flow in the pump. When the trigger is released, water stops flowing through the pump. The TSS then automatically turns the motor off to protect the pump from overheating, thus saving energy and prolonging pump life.
1. Position the washer as CLOSE as possible to the water supply.
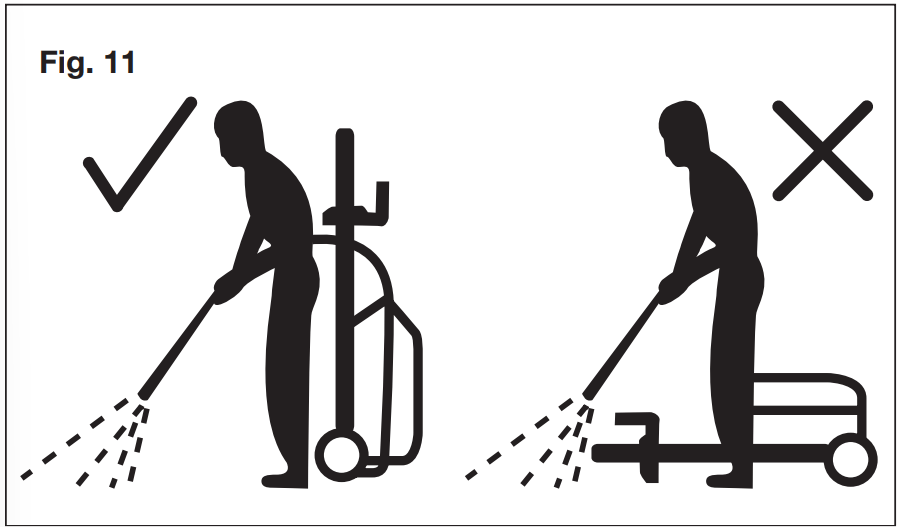
2. The washer must be used on a secure and stable surface in a standing, upright position (Fig. 11).
3. Make sure the unit is switched off before plugging the unit into the power outlet.
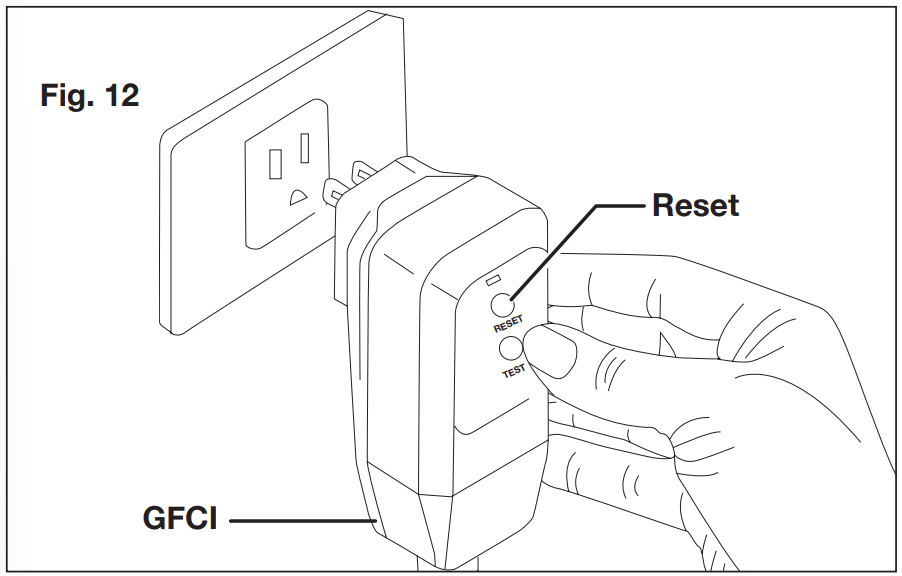
4. Check that the electrical supply voltage and frequency (Volt/Hz) correspond to those specified on the rating plate. If the power supply is correct, you may now plug the pressure washer into the power outlet (Fig. 12).
NOTE: The GFCI may need to be reset when first plugged into the electric outlet. Press the "Reset" button until the power light indicator on the GFCI illuminates when plugged in.
5. Turn the water supply tap on completely.
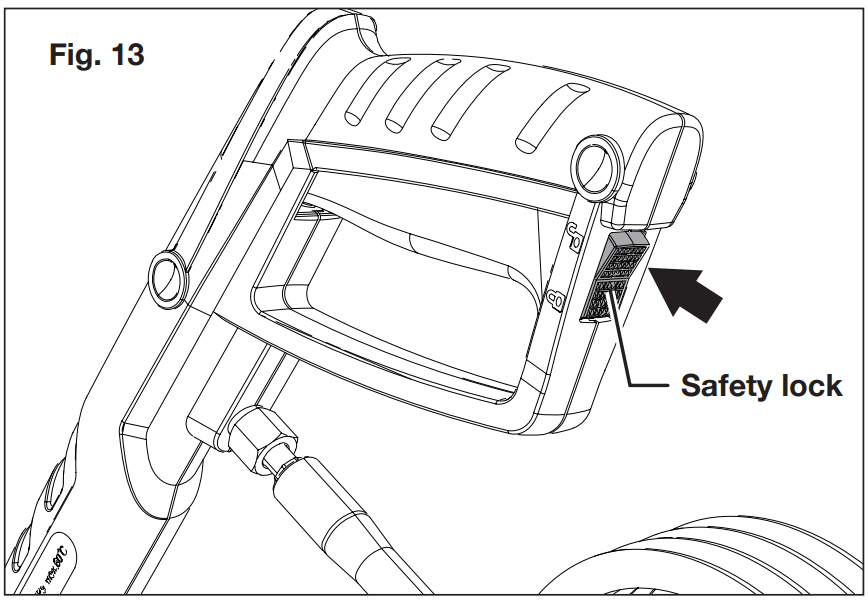
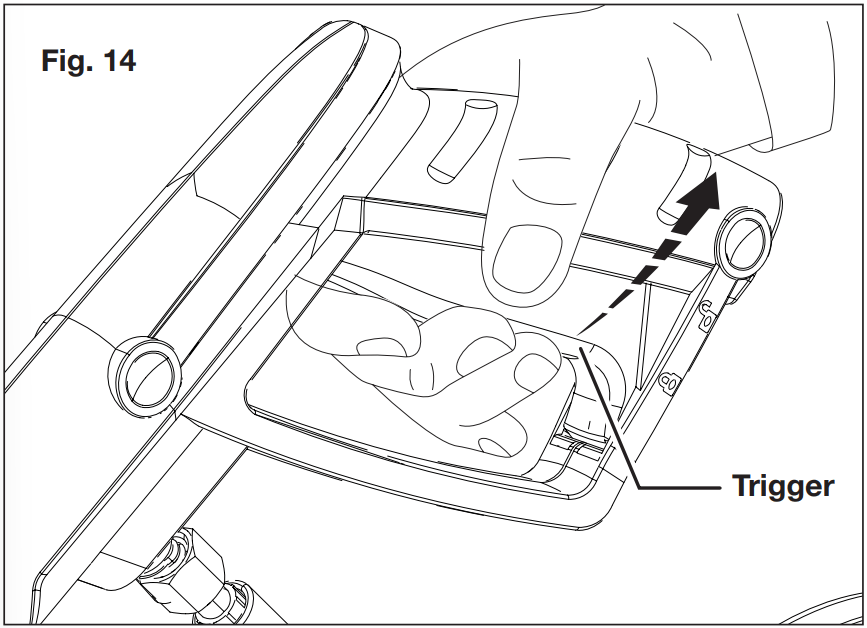
6. Release the safety lock, then press the trigger for a few seconds until the water flow is steady. Operating the pressure washer in this manner will allow air to escape and discharge residual pressure in the hose (Figs. 13 – 14).
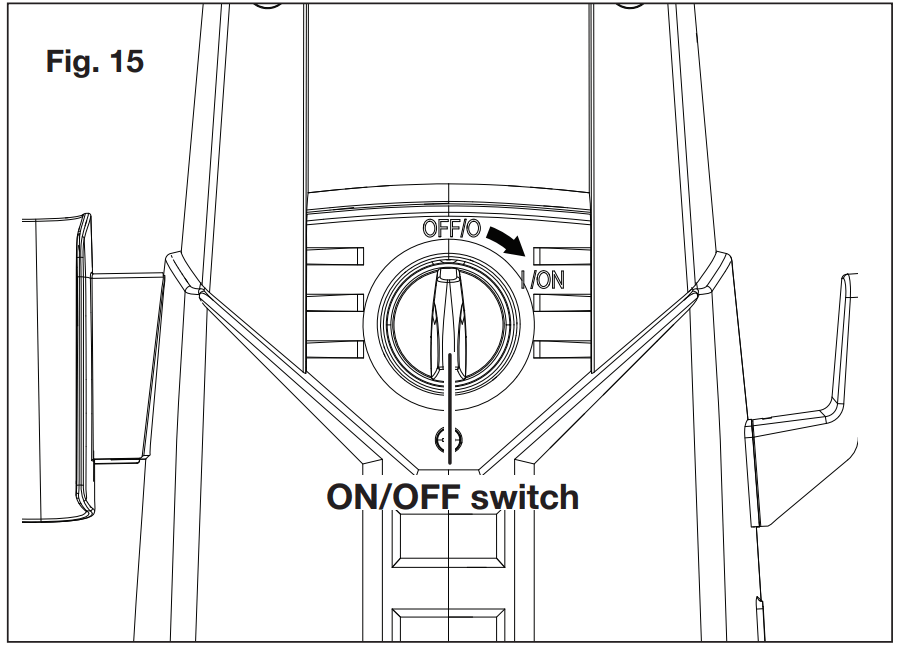
7. Turn the ON/OFF switch to the ON (I) position to start the pressure washer (Fig. 15).
8. When re-starting the motor, always keep the trigger pressed.
NOTE: The motor only runs when the trigger is operated and shuts off when the trigger is released.
Using Nozzles
Before beginning any cleaning task, determine the best nozzle for the job. Each of the nozzles has a different spray pattern.
The nozzle patterns are 40˚ (for gentle cleaning), 15˚ (for tough jobs), 0˚ (for spot cleaning or hard-to-reach areas), and the turbo nozzle. The turbo nozzle is a zero-degree rotary nozzle that spins the spray in a circle so it has a wider cleaning swath.
CAUTION! NEVER change nozzles without locking the safety lock on the trigger handle.
WARNING! High-pressure jets can be dangerous if subject to misuse. The jet must not be directed at persons, pets, live electrical equipment, or the appliance itself.
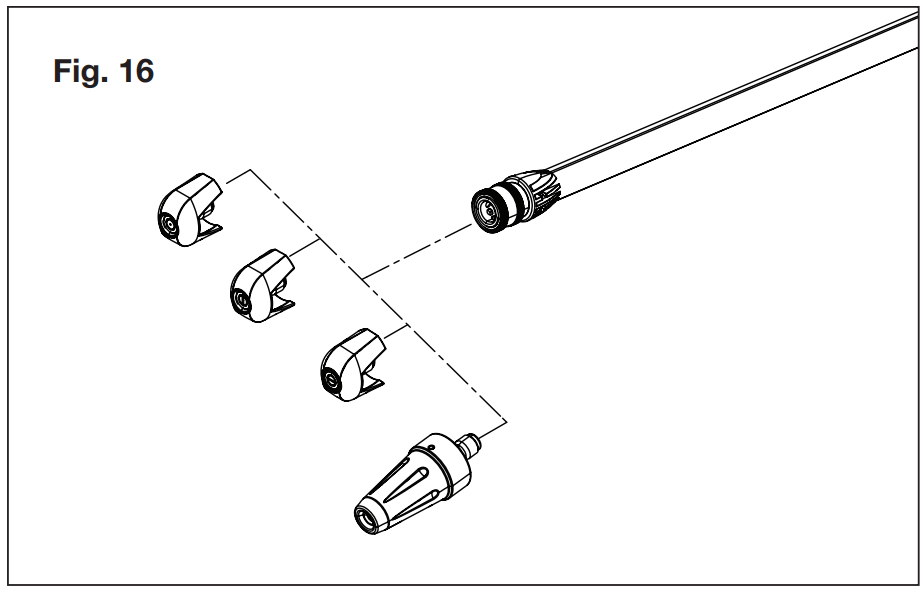
This electric pressure washer is equipped with four (4) Quick-Connect nozzles that easily snap onto the Quick-Connect collar of the spray wand (Fig. 16).
To connect a nozzle to the spray wand:
Turn off the pressure washer and shut off the water supply. Pull the trigger to release water pressure.
Engage the safety lock on the trigger handle.
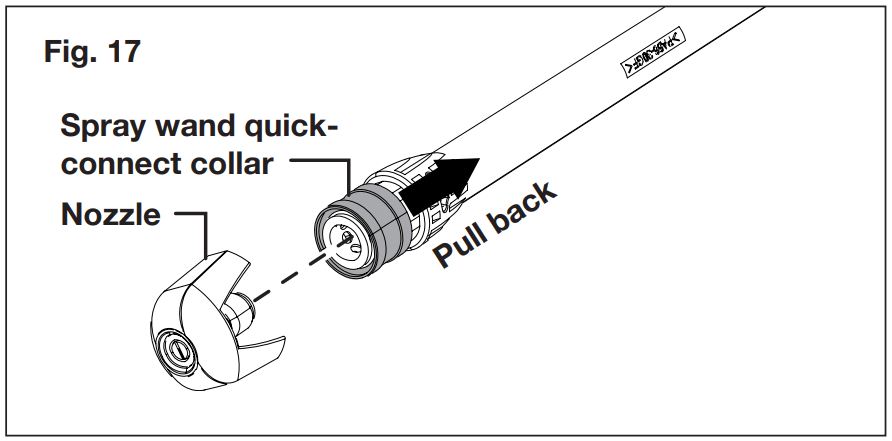
Pull back the brass Quick-Connect collar and insert the desired nozzle into the collar. Release the collar and the nozzle will click into place (Fig. 17).
To disconnect a nozzle from the spray wand once the cleaning job is complete:
Turn off the pressure washer and shut off the water supply. Pull the trigger to release water pressure.
Engage the safety lock on the trigger handle.
Remove the nozzle by disconnecting it while pulling back the brass Quick-Connect collar.
WARNING! Do not make changes to the nozzle while the trigger is engaged. Doing so could result in damage to the pressure washer or injury to the user.
Working with Detergents
When cleaning with the pressure washer, some cleaning tasks can be solved with water alone, but for most tasks cleaning with detergent allows for more effective dirt removal.
WARNING! Use only detergents specifically designed for use with pressure washers, such as Sun Joe® HOUSE +
DECK WASH (SPX-HDC1G), Sun Joe® SNOW FOAM AUTO WASH (SPX-FCS1G), or Sun Joe® HEAVY DUTY CLEANER (SPX-APC1G). DO NOT USE household detergents, acids, alkaline solutions, bleaches, solvents, flammable material, or industrial grade solutions. These could damage the pressure washer. Many detergents may require mixing prior to use. Prepare the cleaning solution as instructed on the solution bottle.
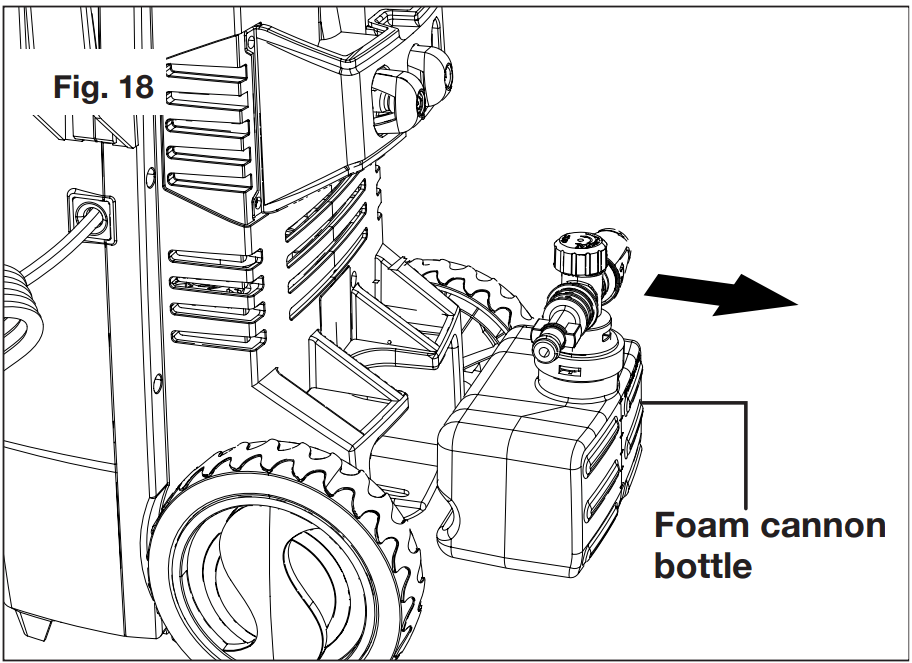
1. Gently pull the foam cannon bottle out of its storage position (Fig. 18)
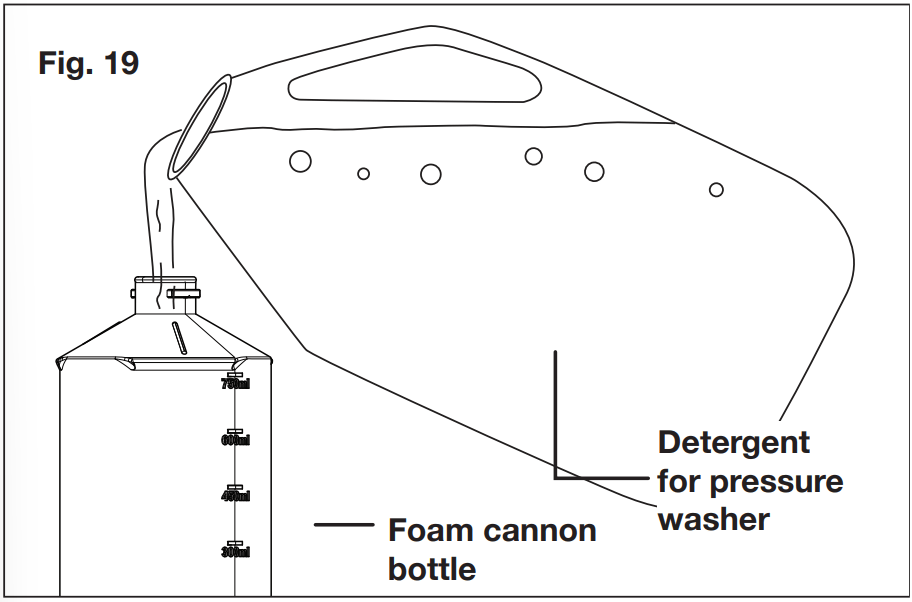
2. Remove the cap. Fill the bottle or mix as recommended by detergent instructions (Fig. 19), and secure the cap back into place. Replace it back on the unit.
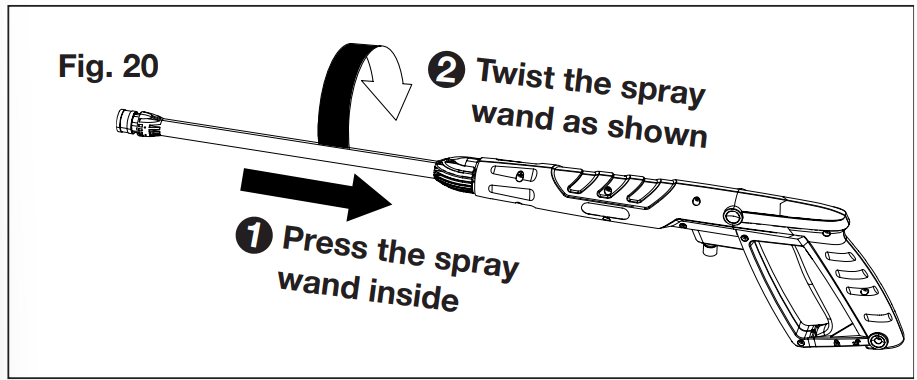
3. Disconnect the spray wand from the trigger gun by pressing it in firmly and twisting clockwise until the 2 wings of the spray wand can be removed from the slot (Fig. 20).
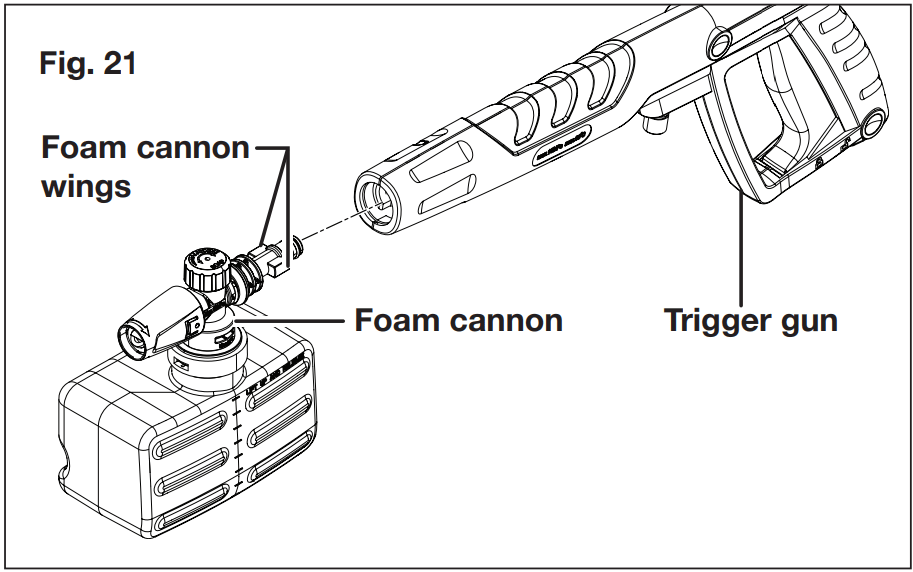
4. To connect the foam cannon with the trigger gun, press the wings of the foam cannon into the slot of the trigger gun, then twist counterclockwise until the 2 parts are completely locked (Fig. 21).
5. Turn on the pressure washer. Pull the trigger to operate the unit. The liquid detergent will automatically mix with water and be discharged through the nozzle.
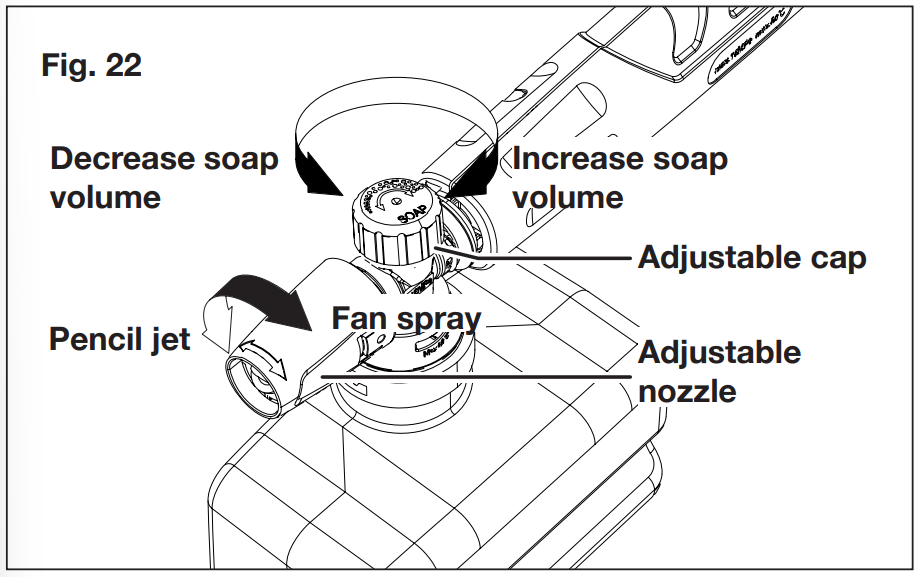
NOTE: The spray angle can be adjusted from 0° to 45° by rotating the foam cannon nozzle. The foam volume can be adjusted by rotating the adjustable cap, as indicated below (Fig. 22).
WARNING! Do not adjust the foam cannon while the trigger is squeezed. Failure to do so could result in damage.
CAUTION! Always test the detergent in an inconspicuous area before use.
6. Apply detergent from the bottom to the top of the dry surface to be cleaned.
NOTE: Wetting the surface first is not recommended as it dilutes the detergent and reduces its cleaning ability.
7. Allow the detergent to remain on the surface for a short time before rinsing. Do not allow the detergent to dry on the surface. mCAUTION! Damage may occur to painted surfaces if the detergent is allowed to dry on the surface. Wash and rinse a small section at a time. Avoid working on hot surfaces or in direct sunlight.
8. When finished using the pressure washer, you must first drain and rinse the foam cannon bottle. Run the pressure washer until all of the soap is drained from the foam cannon bottle.
CAUTION! Failure to follow these cleaning instructions will cause the injection system to become clogged and inoperable.
IMPORTANT! NEVER USE:
Bleach, chlorine products, and other corrosive chemicals
These chemicals will harm the unit and will damage the cleaning surface.
Using the Feather Bristle Pressure Washer Utility Brush
Sun Joe® feather bristle pressure washer utility brush safely cleans painted, topcoat, and delicate surfaces. Compatible with all Sun Joe® SPX series pressure washers.
1. If not already done, detach your spray wand from your trigger gun (Fig. 20).
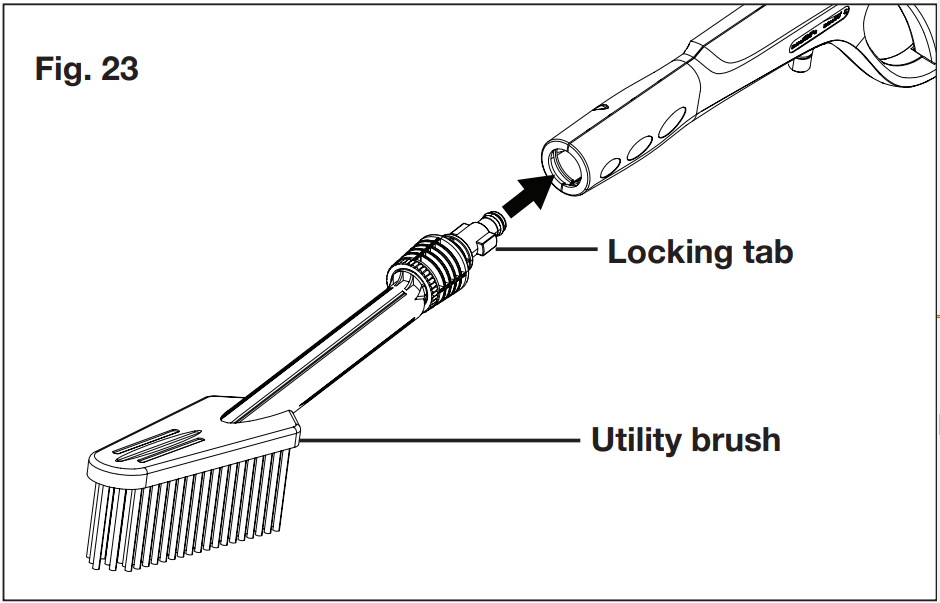
2. Take the utility brush and align the two tabs with the inside of the trigger gun (Fig. 23).
3. Once aligned, push the utility brush into the trigger gun, twist counterclockwise to lock into place.
Shutting down
Turn the switch to the OFF (0) position and unplug the power cord from the outlet.
Turn off the water source.
Hold the trigger to release water pressure.
Disconnect the garden hose from the water inlet on the unit.
Disconnect the high-pressure hose connection on the trigger gun handle.
Release the trigger and engage the gun safety lock.
WARNING! Turn off the water supply and squeeze the trigger to depressurize the unit. Failure to do so could result in personal injury due to discharge of high-pressure water.
Taking a break
If you are taking a break of five minutes or more between cleaning tasks:
Engage the gun safety lock on the back.
Turn the switch to the OFF (0) position.
Unplug the power cord from the outlet.
Storage
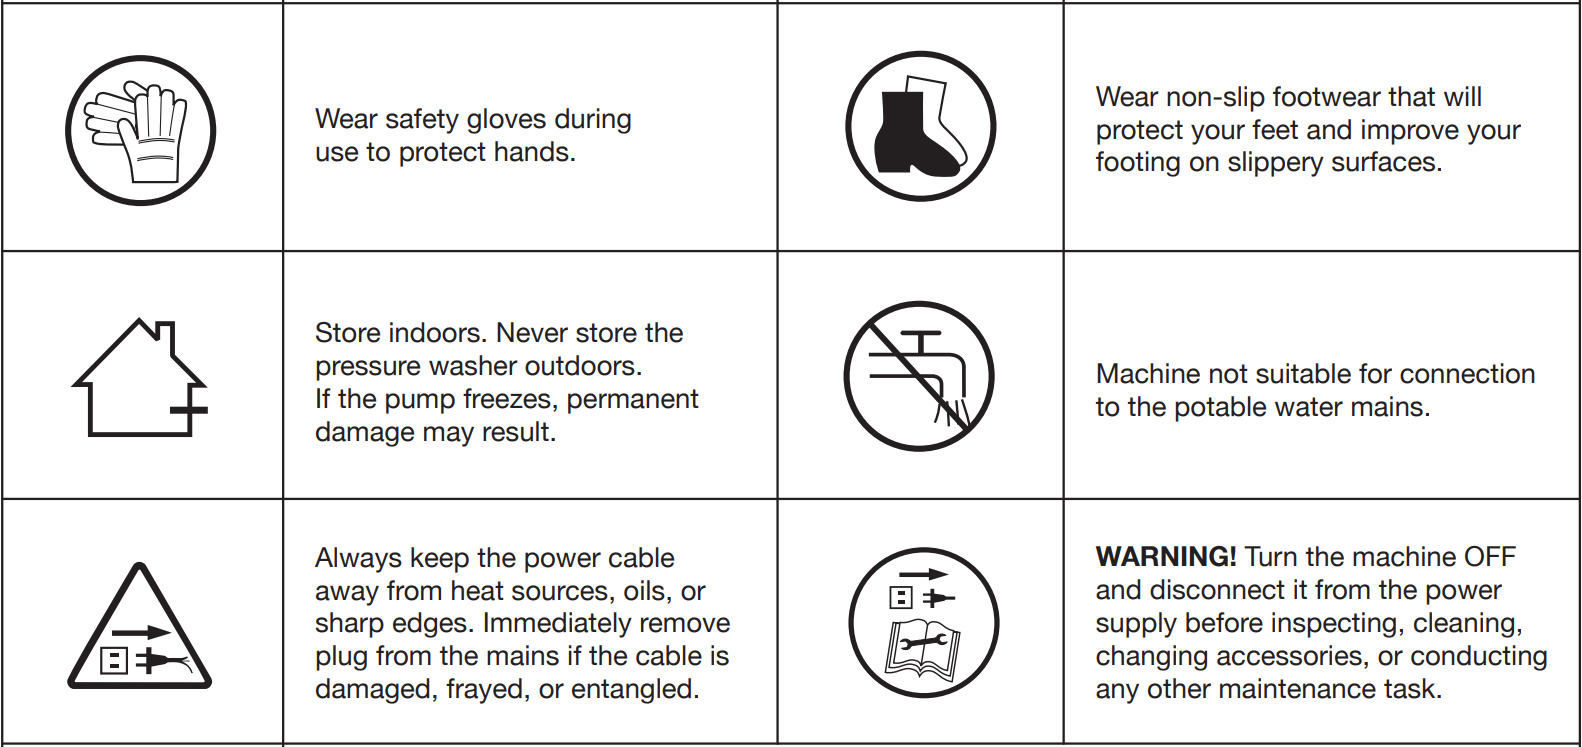
CAUTION! Always store your pressure washer in a location where the temperature will not fall below 32ºF (0ºC).
The pump in this machine is susceptible to permanent damage if it freezes. FREEZE DAMAGE IS NOT COVERED BY THE WARRANTY.
Store the pressure washer indoors in a dry, covered area where it is not subject to adverse weather conditions.
It is important to store this product in a frost-free area.
Always empty water from the hoses, the pump, and the foam cannon bottle (if using) before storing.
CAUTION! The use of a pump protector is recommended to prevent cold weather damage during storage over the winter months.
Winterizing + long-term storage
If you must store your pressure washer in a location where the temperature falls below 32ºF (0ºC), you can minimize the chance of damage to your machine by utilizing the following procedure:
Disconnect all water connections.
Turn on the pressure washer for a few seconds until the remaining water in the pump exits. Turn off immediately.
Do not allow the high-pressure hose to become kinked.
Store the machine and accessories in a room that does not reach freezing temperatures.
Do not store near a furnace or other sources of heat that may dry out the pump seals.
Operate the pressure washer with non-corrosive/non-toxic anti-freeze, a pump saver, or a pump protector before storing for the winter.
WARNING! Before reusing, completely flush the unit out with clear water. Anti-freeze products can damage paintwork, so you must ensure there is no anti-freeze left in the system before using it again.
Maintenance
CAUTION! Before working on the pressure washer, disconnect the plug from the power supply socket.
Clean the Adapter Filter and the Nozzle
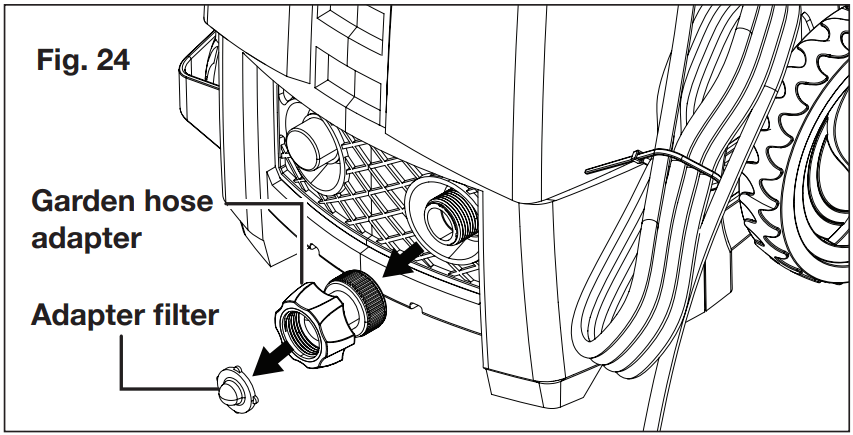
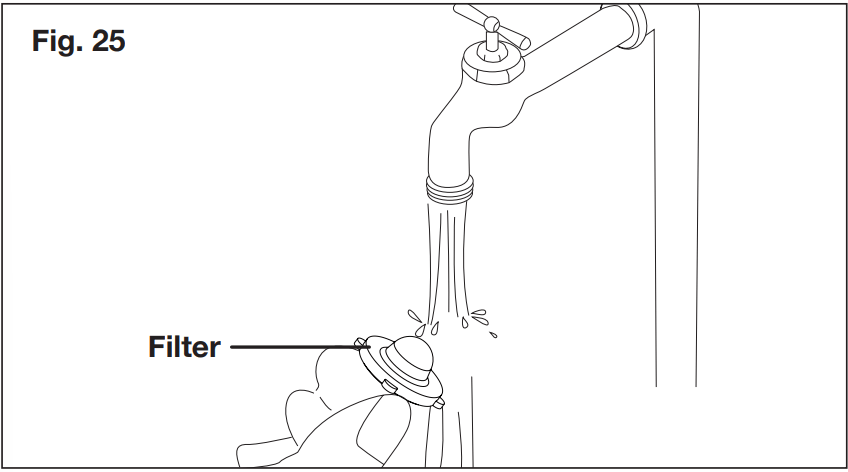
1. To ensure good performance, check and clean the adapter filter (Fig. 24). Remove the filter and rinse with warm water to prevent any foreign matter from clogging the pump (Fig. 25).
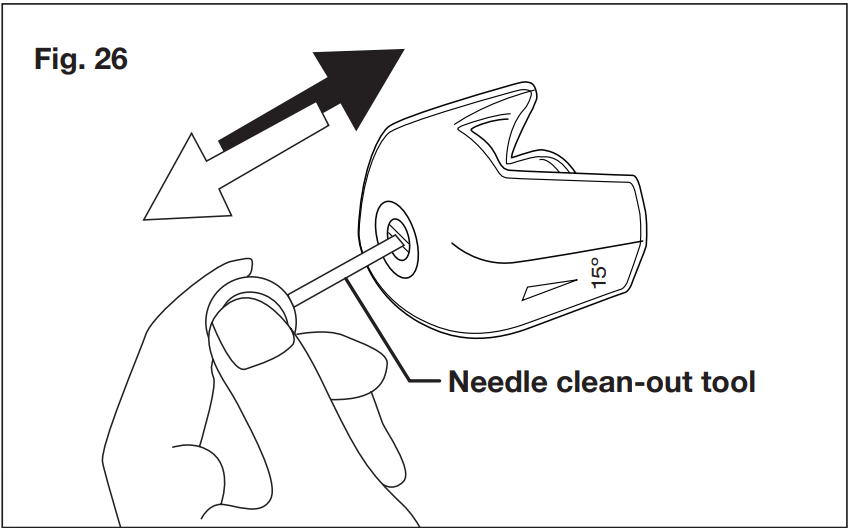
2. Clean the nozzle with the needle clean-out tool provided (Fig. 26). Remove the nozzle from the spray wand; remove any dirt from the nozzle hole and rinse.
Disposal
Recycling the Pressure Washer
Do not dispose of electrical appliances as unsorted municipal waste. Use separate collection facilities.
Contact your local government agency for information regarding the collection systems available.
If electrical appliances are disposed of in landfills or dumps, hazardous substances can leak into the groundwater and get into the food chain, damaging your health and well-being.
Service + Support
If your Sun Joe® SPX2599-MAX-RM electric pressure washer requires service or maintenance, please call the Snow Joe® +
Sun Joe® customer service center at 1-866-SNOWJOE
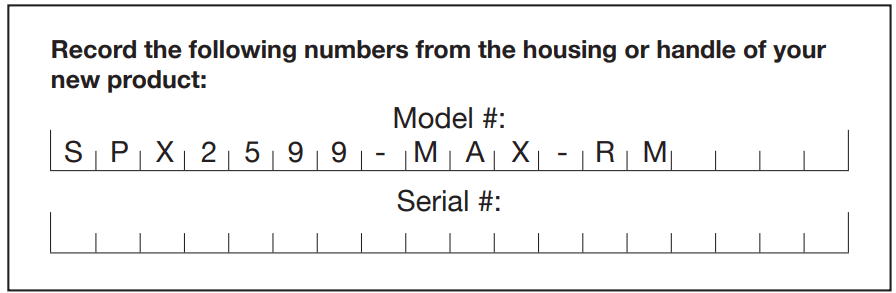
Model + Serial Numbers
When contacting the company, reordering parts, or arranging service from an authorized dealer, you will need to provide the model and serial numbers, which can be found on the decal located on the housing of the unit. Copy these numbers into the space provided below.
Troubleshooting
Problems
Possible Cause
Possible Solution
Machine refuses to start
• Power failure/machine not plugged into a working receptacle.
• Defective socket.
• Fuse has blown.
• Defective extension cord.
• Check to make sure machine is plugged into a working outlet.
• Check the power cord and reset the GFCI. Try a different outlet.
• Replace fuse. Switch off any other machines that are using the same circuit.
• Try the unit without an extension cord.
Fluctuating pressure
• Pump sucking air.
• Valves dirty, worn out, or stuck.
• Pump seals worn out.
• Check the hoses and connections are airtight.
• Clean or replace valves/seals.
• Please call the Snow Joe® + Sun Joe® customer service center at 1-866-SNOWJOE (1-866-766-9563) for assistance.
Machine stops
• Fuse has blown.
• Incorrect mains voltage.
• Thermal sensor activated.
• Nozzle partially blocked.
• Replace fuse. Switch off other machines using the same circuit.
• Check that the mains voltage corresponds to specification on the model tag.
• Let the washer cool down for 5 minutes, then restart.
• Clean the nozzle.
Fuse blows
• Fuse too small.
• Install a fuse with a higher amp rating than the amp consumption of the machine. Try the unit without an extension cord.
Machine pulsating
• Air in inlet hose.
• Inadequate supply of mains water.
• Nozzle partially blocked.
• Water filter blocked.
• Hose kinked.
• Allow machine to run by holding the trigger until regular working pressure resumes.
• Check that the water supply corresponds to the specifications required.
• WARNING! Avoid using long, thin hoses (minimum 1/2 in. diameter).
• Clean the nozzle.
• Clean the water inlet filter.
• Straighten out the hose to remove any kinks/blockages.
Machine often starts and stops by itself
• Pump/spray gun is leaking.
• Trigger mechanism is broken.
• Please call the Snow Joe® + Sun Joe® customer service center at 1-866-SNOWJOE (1-866-766-9563) for assistance.