Loading ...
Loading ...
Loading ...
InstallationInstallation
Installation Steps
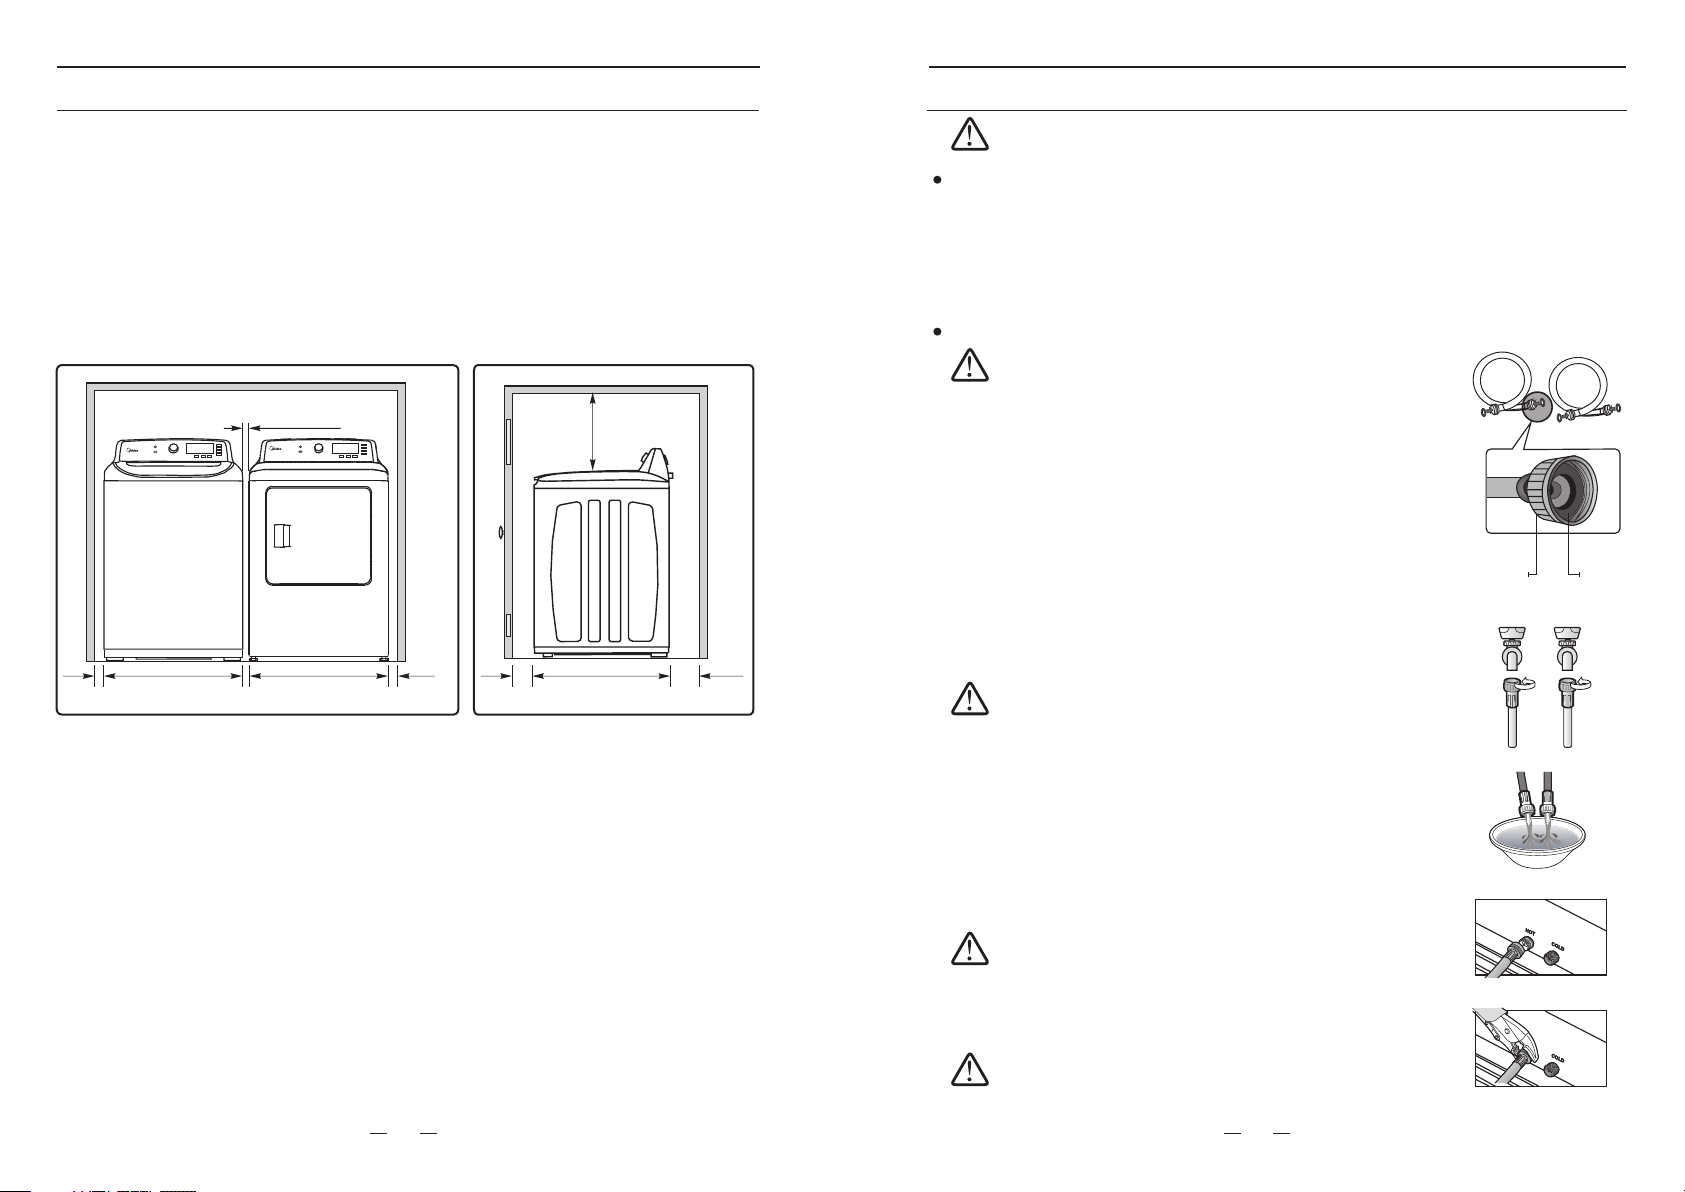
STEP 1: Select a location
Before you install the washer, make sure the location:
- Has a hard, level surface without carpeting or flooring that may obstruct ventilation.
- Is away from direct sunlight.
- Has adequate ventilation.
- Is not exposed to freezing temperatures (temperature under 32 F or 0 C).
- Is away from heat sources such as oil or gas.
- Has enough space so that the washer doesn’t rest on its power cord.
These instructions should be retained for future reference.
Follow the followings STEP by STEP to ensure a successful installation.
CAUTION
o o
STEP 2: Connect the water hose
1. Connect the ends of the water supply hoses to the HOT and
COLD faucets.
2. Tighten the fittings by hand until they are snug, and then tighten
them an additional two-thirds of a turn with a wrench.
The water supply hoses are not supplied with your washer
and must be purchased separately. Before installing the
water supply hoses, make sure there are rubber gaskets
inside the fittings at both ends of each new water hose.
Installing the water supply hoses without rubber gaskets
can cause water leakage.
When you initially install the washer, be sure to use new
hoses. Failing to do so may result in a water leakage or
overflow and may damage your property.
Do not connect multiple water supply hoses together to
increase the length of the supply hose. Hoses connected
this way can leak and the leakage can cause electrical shock.
If a hose is too short, replace the hose with a longer, high
pressure hose.
CAUTION
Coupling
Rubber
gasket
Cold Hot
When you fasten the fittings, do not fasten them too tightly
or apply tape or sealant to the faucets or water supply
intakes. This can damage the fittings.
After you have connected the water supply hoses to the
faucets, ensure that they are connected correctly by pulling
the water supply hoses downwards.
CAUTION
3. Place the unconnected ends of the hoses into a bucket and open
the faucets connected to the two water supply hoses for 10 or 15
seconds to remove any foreign substances from the hoses.
Close the faucets before continuing.
4. Connect the ends of the water supply hoses to the water supply
intake connections at the back of the washer.
The water supply hose connected to the HOT faucet must be
connected to the hot water supply intake and the water hose
connected to the COLD faucet must be connected to the cold
water supply intake.
CAUTION
5. Tighten the fittings by hand until they are snug, and then tighten
them an additional two-thirds of a turn with a wrench.
Confirm that the water supply hoses are not twisted or bent.
If the hoses are twisted or bent, the hoses can leak and
cause electric shock due to the water leakage.
CAUTION
Location Requirements
A. Recessed area
B. Side view - closet or confned area
24 in.
Case 1. 3.9
in (10 cm).
Case 2. 2
.8 in (7
cm).
A
Minimum clearances for closet and alcove installations
Sides - 1 in. / 2.5cm Closet Front - 2 in. / 5.1cm
Rear - 6 in. / 15.2cm Top - 24 in. / 61cm
Gap between end of water valve and the wall.
- Case 1. Assemble supply hose after installing: Over 3.9 in. (10cm)
- Case 2. Assemble supply hose before installing: Over 2.8 in. (7cm)
If the washer and dryer are installed together, the closet front must have at least a 72 in
(465 cm ) unobstructed air opening. Your washer alone does not require a specific air
opening.
2
2
B
1 in. (2.5cm)
1 in.
2.5cm
27 in.
68.6cm
1 in.
2.5cm
27 in.
68.6cm
61cm
2 in.
5.1cm
29 in.
73.6cm
13
14
Loading ...
Loading ...
Loading ...