Loading ...
Loading ...
Loading ...
44 45
ninjakitchen.eu
ninjakitchen.eu
USING THE COOKING FUNCTIONS
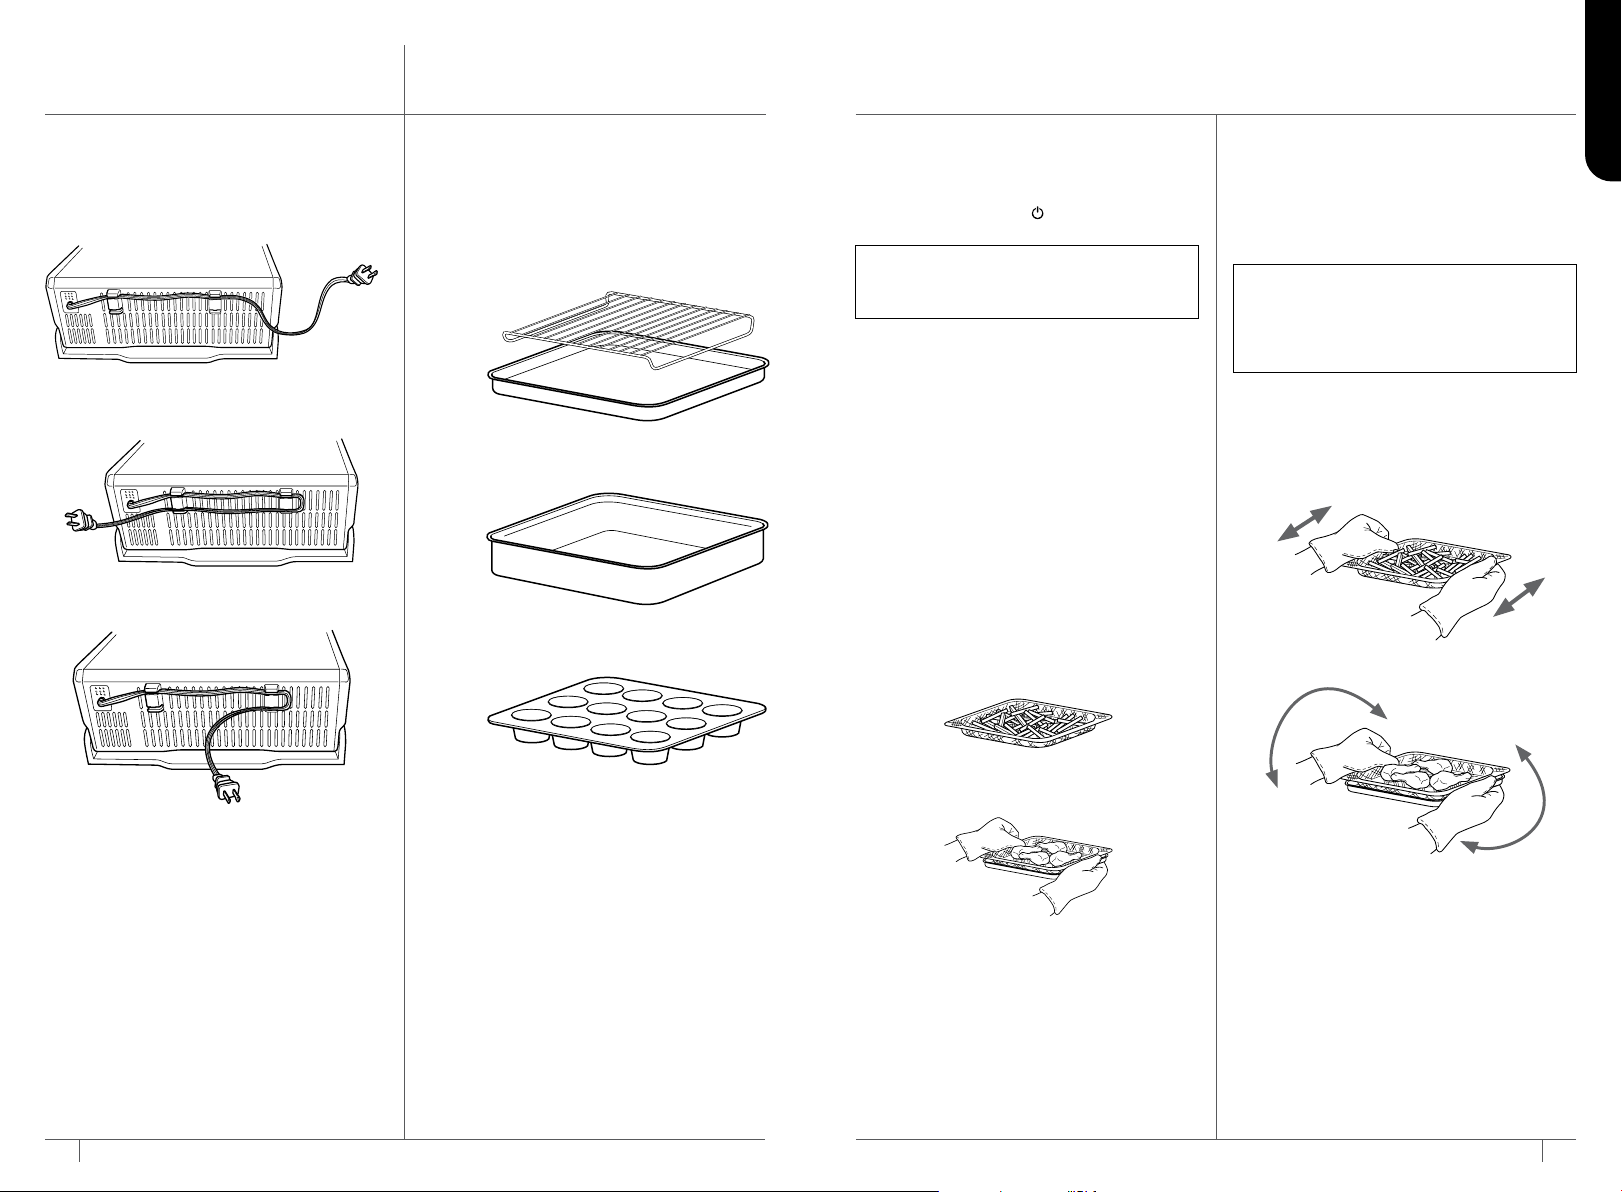
To turn on the unit, plug the power cord
into the wall, flip oven down into cooking
position, and press the button.
Air Fry
1 To select the function, turn the dial until
AIR FRY illuminates. The default time
and temperature settings will display.
2 Press the TIME/SLICE button and use
the dial to select your time up to
1 hour. To set the time, press the
TIME/SLICE button again.
3 Then press the TEMP/DARKNESS
button and use the dial to select a
temperature between 120°C–200°C.
To set the temperature, press the
TEMP/DARKNESS button again.
4 Press START/PAUSE to begin preheating.
5 Place ingredients in the air fry basket.
If ingredients are fatty, oily, or marinated,
place the basket on the oven tray.
6 Slide the basket into the upper rails of
the oven. If also using the oven tray,
slide both into the oven at the same
time, with the basket in the upper rails
and the pan on the wire rack beneath
the basket. Close oven door.
7 For more even browning and crispiness,
toss ingredients or turn the basket 180°
halfway through cooking cycle.
8 When cook time is complete, the unit
will beep.
USING YOUR Foodi® MULTIFUNCTION OVEN
NOTE: The unit preheats quickly, so we
recommend prepping all ingredients
before turning on the oven.
NOTE: The timer will start counting
down as soon as the unit has preheated.
If ingredients are not ready to go into
the oven, simply turn the dial to add
more time.
Shake basket.
or
Turn basket
and oven tray 180°.
Use air fry basket
for dry ingredients.
Use air fry basket with oven tray underneath
for fatty, oily or marinated ingredients.
ENGLISH
We oer a range of accessories custom
made for your Ninja® Foodi® Multifunction
Oven. Visit ninjakitchen.eu to expand your
capabilities and take your cooking to the
next level.
• Grilling Rack
• Casserole Dish/Baking Pan (5cm deep)
• Egg Bite/Mun Tray
ACCESSORIES FOR
PURCHASE
POWER CORD
MANAGEMENT
Our cord-management system is designed
so it will not interfere with the oven’s
flip-away functionality.
Option 1 Socket on the left
Option 2 Socket on the right
Option 3 Socket behind the oven
Loading ...
Loading ...
Loading ...