Loading ...
Loading ...
Loading ...
3
If necessary, select View to view the decompression plan,
then select BACK.
4
Select Apply to replace your current dive settings with the
decompression plan settings.
Editing a Decompression Plan
1
Select > Plan Dive > Deco Plans.
2
Select a decompression plan.
3
Select an option:
• Select Edit to change the decompression plan details.
• Select Rename to edit the name of the decompression
plan.
4
Edit the information.
Deleting a Decompression Plan
1
Select > Plan Dive > Deco Plans.
2
Select a decompression plan.
3
Select Delete > .
No-Fly Time
After a dive, appears on the default watch face, along with a
no-fly time estimate in hours. You should not fly in an airplane
during this time. After a gauge dive or a dive that violated the
decompression plan, the no-fly time is set to 48 hours.
TIP: You can add the no-fly indicator to a custom watch face
(Customizing the Watch Face, page 27).
Tips for Wearing the Device with an
Exposure Suit
• Use the extra long silicone diving band to wear the device
over a thick exposure suit.
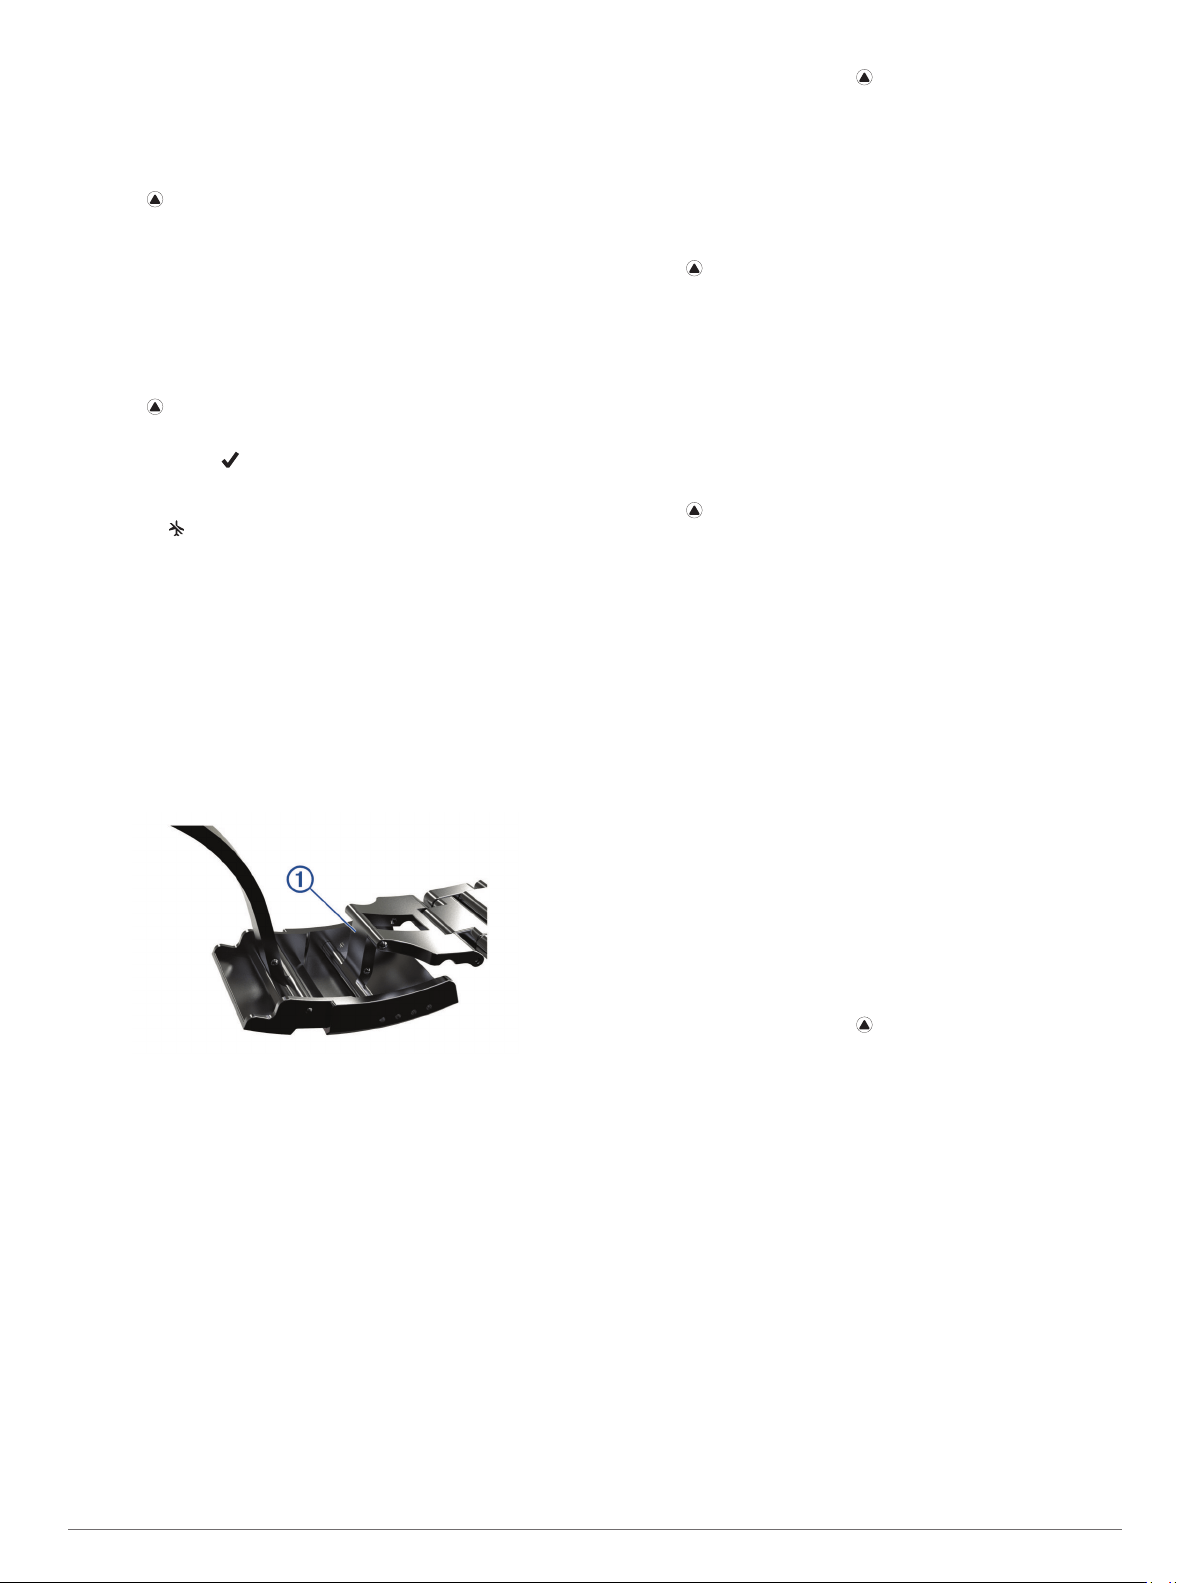
• Use the extension
À
on the titanium watch band to increase
the length of the band.
• For accurate heart rate measurements, make sure the
exposure suit and other wrist-worn devices do not interfere
with the wrist-based heart rate monitor (Wearing the Device
and Heart Rate, page 8).
Activities
Your device can be used for indoor, outdoor, athletic, and fitness
activities. When you start an activity, the device displays and
records sensor data. You can save activities and share them
with the Garmin Connect community.
You can also add Connect IQ
™
activity apps to your device using
your Garmin Connect account (Connect IQ Features, page 23).
For more information about activity tracking and fitness metric
accuracy, go to garmin.com/ataccuracy.
Starting an Activity
When you start an activity, GPS turns on automatically (if
required). When you stop the activity, the device returns to
watch mode.
1
From the watch face, select .
2
Select an activity.
3
If necessary, follow the on-screen instructions to enter
additional information.
4
If necessary, wait while the device connects to your ANT+
®
sensors.
5
If the activity requires GPS, go outside, and wait while the
device locates satellites.
6
Select to start the timer.
NOTE: The device does not record your activity data until
you start the timer.
Tips for Recording Activities
• Charge the device before starting an activity (Charging the
Device, page 1).
• Select BACK to record laps.
• Select UP or DOWN to view additional data pages.
Stopping an Activity
1
Select .
2
Select an option:
• To resume your activity, select Resume.
• To save the activity and return to watch mode, select
Save.
• To suspend your activity and resume it at a later time,
select Resume Later.
• To mark a lap, select Lap.
• To navigate back to the starting point of your activity along
the path you traveled, select Back to Start > TracBack.
NOTE: This feature is available only for activities that use
GPS.
• To navigate back to the starting point of your activity,
select Back to Start > Route.
NOTE: This feature is available only for activities that use
GPS.
• To discard the activity and return to watch mode, select
Discard.
NOTE: After stopping the activity, the device saves it
automatically after 25 minutes.
Creating a Custom Activity
1
From the watch face, select > Add.
2
Select an option:
• Select Copy Activity to create your custom activity
starting from one of your saved activities.
• Select Other to create a new custom activity.
3
If necessary, select an activity type.
4
Select a name or enter a custom name.
Duplicate activity names include a number, for example:
Bike(2).
5
Select an option:
• Select an option to customize specific activity settings. For
example, you can select an accent color or customize the
data screens.
• Select Done to save and use the custom activity.
6
Select Yes to add the activity to your list of favorites.
Indoor Activities
The Descent device can be used for training indoors, such as
running on an indoor track or using a stationary bike. GPS is
turned off for indoor activities.
Activities 5
Loading ...
Loading ...
Loading ...