Loading ...
Loading ...
Loading ...

4
installation to avoid the use of an extension cord. If an extension cord must be used, it must be a
minimum 14-ga, 3-wire with a grounding-type plug and connector, and rated not less than 1875-
watts. The extension cord shall not be more than 20-feet in length.
CAUTION
There are no serviceable parts inside (except for the lightbulbs).
PRE-INSTALLATION
To avoid scratching the finish, assemble the product on a soft, non-abrasive surface, such as carpet
or cardboard. Assembly of this product may require more than one person.
INSTALLATION
Attach top electric fireplace trim piece with the screws provided. Please refer to the detailed
instructions that came with the manual that you purchased.
OPERATION
The electric fireplace “ON/OFF” switch must be switched to “ON” before any of the control functions
will operate. The main switch does not have to be turned off when the electric fireplace is not being
used for brief time periods. If, however, you are not planning to use the electric fireplace for
extended periods of time, we recommend the main power “ON/OFF” be switched off.
This electric fireplace insert features convenient separate controls for the flame effect and heat
control. This feature allows you to operate the unit in two different ways. 1.) as a full featured
fireplace insert with both flame effect and heater operating simultaneously and 2.) as a visual effect
with flame affect only. NOTE: This electric fireplace insert is not designed to operate in “heat” mode
without a flame effect.
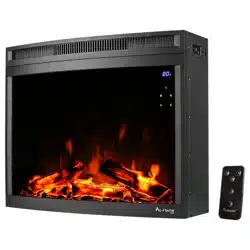
ELECTRIC FIREPLACE CONTROLS
MANUAL CONTROLS
The digital manual controls are easily accessible on the top right of the console.
1. Room Temperature
2. Power ON/OFF
3. Adjust the brightness of the flame effect
4. Power to the heater, which will start within 10 seconds. LOW is 700W, and HIGH is 1400W.
5. Timer – this can be set for anywhere between 1 and 9 hours. Press button once for each
hour increment you desire.
6. Temperature adjustment
Loading ...
Loading ...
Loading ...