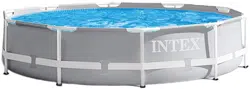
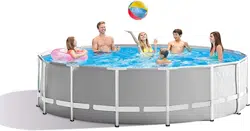
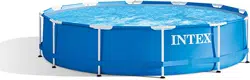
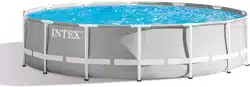
Intex 26339EH Frame Pool Set
Product's Documents
Below are documents related to this product, you can read online or download:
- Owner's manual - (English) Read Online | Download pdf

Owner's manual
For Pools with Dual Suction Outlets Configuration:
In order to comply with the requirement of the Virginia Grahame Baker Act (for USA and Canada), your pool is designed with dual suction outlets and one inlet fittings. Overview of the dual suction outlets configuration is as follow:
NOTE: Drawings for illustration purpose only. Actual product may vary. Not to scale
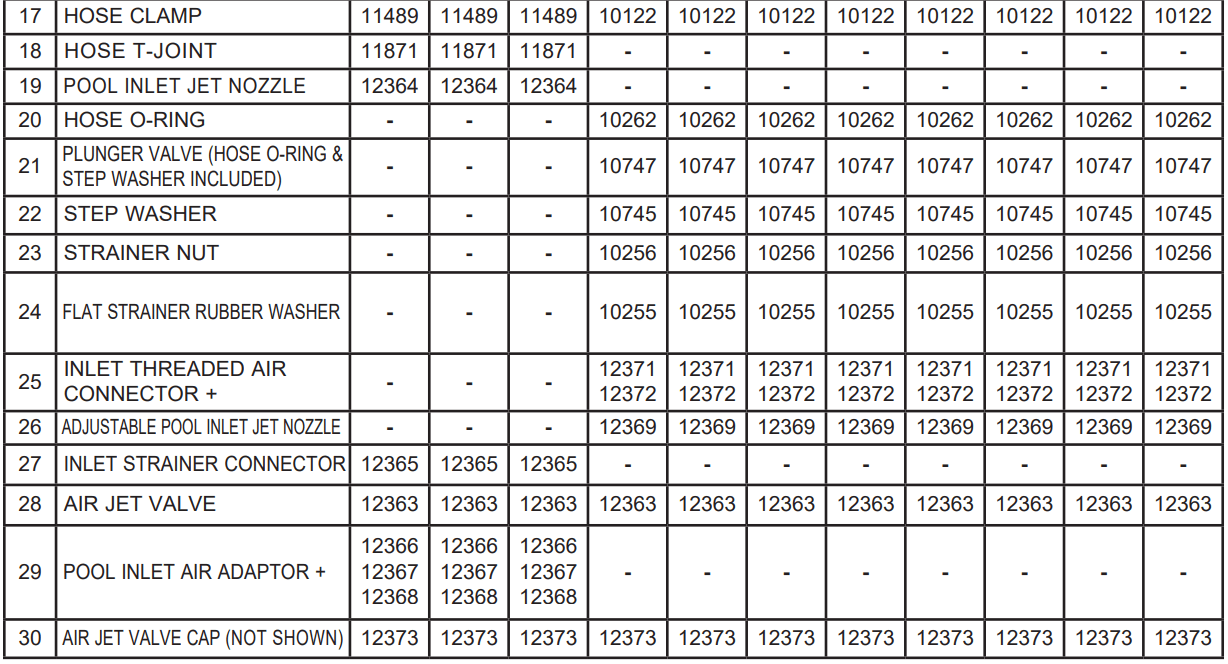
+ If applicable, depending on the size of the filter pump fitted with your pool, you must quote the model number shown on the filter pump housing to order the correct size of “Pool Inlet Air Adaptor” or “Inlet Threaded Air Connector” replacement part.
+ If applicable, depending on the size of the filter pump fitted with your pool, you must quote the model number shown on the filter pump housing to order the correct size of “Pool Inlet Air Adaptor” or “Inlet Threaded Air Connector” replacement part.
Non-USA & Canada:
NOTE: Drawings for illustration purpose only. Actual product may vary. Not to scale.
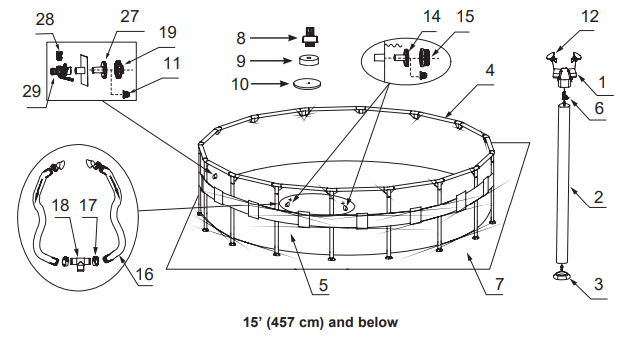
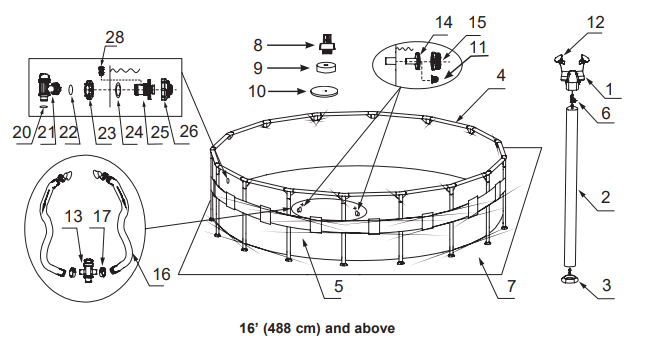
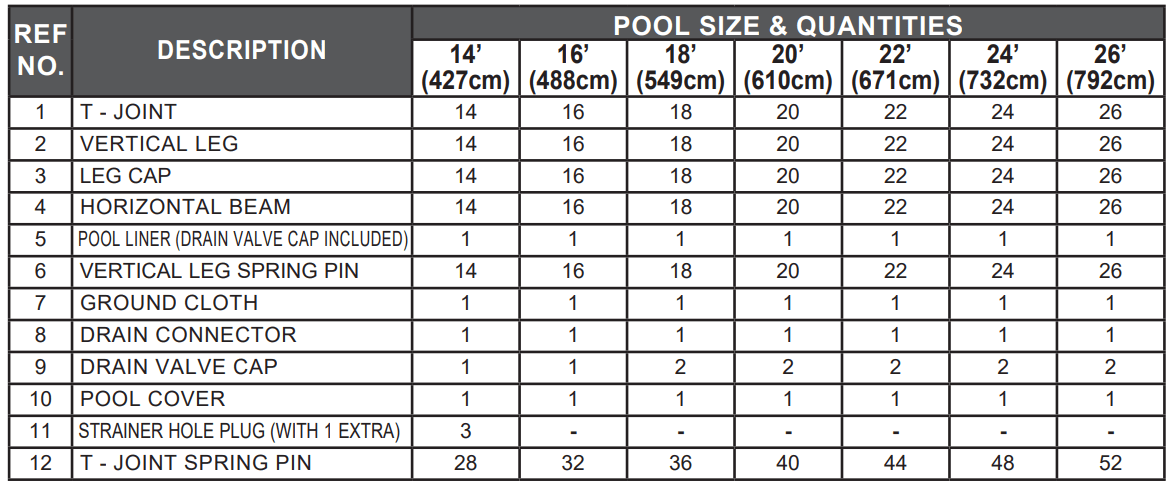
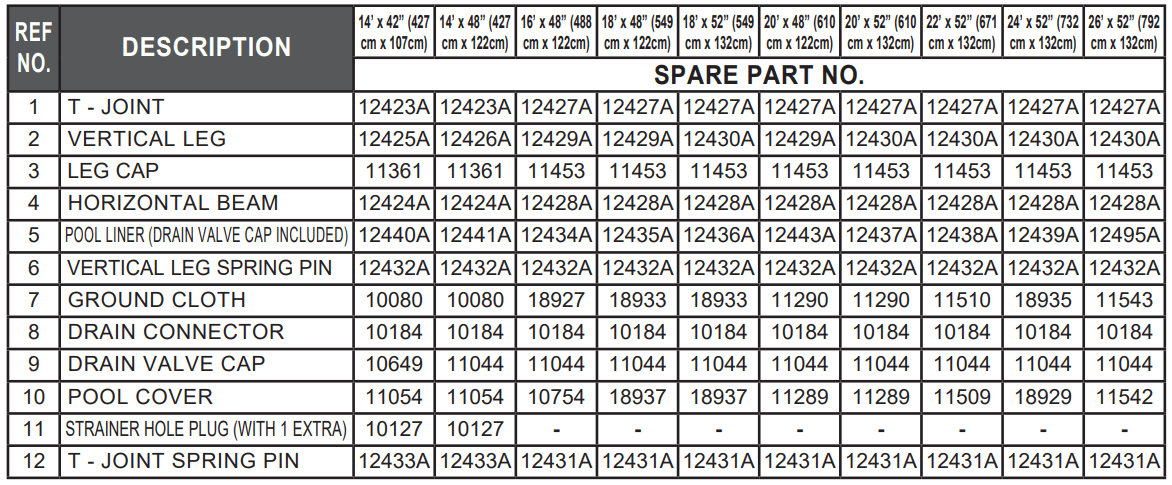
14' (427 cm), 16' (488 cm), 18' (549 cm), 20' (610 cm), 22' (671 cm), 24' (732 cm) & 26' (792 cm) models
Select an outdoor location for the pool with the following requirements in mind:
1. The area where the pool is to be set up must be absolutely flat and level. Do not set up the pool on a slope or inclined surface.
2. The ground surface must be compacted and firm enough to withstand the pressure and weight of a fully set up pool. Do not set up the pool on mud, sand, soft or loose soil conditions.
3. Do not set up the pool on a deck, balcony or platform, which may collapse under the weight of the filled pool.
4. The pool requires at least 4 feet of space all around pool from objects that a child could climb on to gain access to the pool.
5. Grass under the pool will be damaged. Splash out chlorinated pool water could damage the surrounding vegetation.
6. Above ground storable pools shall be located at a minimum distance of 6 ft (1.83 meters) from any receptacle, and all 125-volt 15- and 20-ampere receptacles located within 20 ft (6.0 meters) of the pool shall be protected by a ground fault circuit interrupter (GFCI), where distances are by measuring the shortest path the supply cord of an appliance connected to the receptacle would follow without piercing a floor, wall, ceiling, doorway with hinged or sliding door, window opening, or other effective permanent barrier.
7. Eliminate all aggressive grasses first. Certain types of grass such as St. Augustine and Bermuda, may grow through the liner. Grass growing through the liner it is not a manufacture defect and is not covered under warranty.
8. The area shall facilitate drainage of the pool water after each use and/or for long term pool storage.
You may have purchased this pool with the Intex Krystal Clear™ filter pump. The pump has its own separate set of installation instructions. First assemble your pool unit and then set up the filter pump. Estimated assembly time 45-60 min. (Note the assembly time is only approximate and individual assembly experience may vary.)
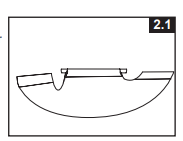
1. Liner preparation
IMPORTANT: Always set up the pool unit with at least 2 persons. Do not drag the liner across the ground as this can cause liner damage and pool leakage (see drawing 1).

During the setup of this pool liner, point the hose connections or openings in the direction of the electric power source. The outer edge of the pool should be within reach of the pump’s electrical connection.
2. Frame assembly
NOTE: Sprinkle some talcum powder over the horizontal beams before sliding them into the pool liner sleeve. This will make removal of the beams from the liner easier during the disassembly of the pool.
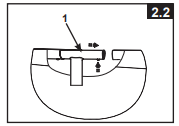
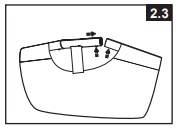
The last joint connection may be difficult to complete, but can be easily done by simultaneously raising this last joint and beam more than 2 inches (5 cm), and connect the beam to the joint while lowering these pieces to their normal position. The joint will slide into the beam (see drawing 2.3). Make sure the last joint is fully assembled before proceeding to assembling the legs.
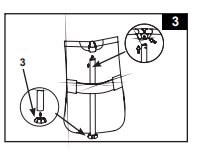
3. Filling of the pool

4. Posting aquatic safety signs
Select a highly visible area near the pool to post the Danger No Diving or Jumping sign included later in this manual.
IMPORTANT Before allowing anyone to use the pool, hold a family meeting. Establish a set of rules that include, at a minimum, the important safety rules and general aquatic safety information in this manual. Review these rules on a regular basis and with all users of the pool including guests. The installer of the vinyl liner shall affix on the original or replacement liner, or on the pool structure, all safety signs in accordance with the manufacturer’s instructions. The safety signs shall be placed above the water line.
REMEMBER TO
The maintenance of a proper water balance through appropriate use of sanitizers is the single most important factor in maximizing the life and appearance of the liner as well as ensuring clean, healthy and safe water. Proper technique is important for water testing and treating the pool water. See your pool professional for chemical, test kits and testing procedures. Be sure to read and follow the written instructions from the chemical manufacturer.
1. Never let chlorine come in contact with the liner if it is not completely dissolved. Dissolve granular or tablet chlorine first in a bucket of water, then add it to the pool water. Likewise with liquid chlorine; mix it immediately and thoroughly with the pool water.
2. Never mix chemicals together. Add the chemicals to the pool water separately. Thoroughly dissolve each chemical before adding another one to the water.
3. An Intex pool skimmer and an Intex pool vacuum are available to assist in maintaining clean pool water. See your pool dealer for these pool accessories.
4. Do not use a pressure washer to clean the pool
CAUTION ALWAYS FOLLOW THE CHEMICAL MANUFACTURER'S DIRECTIONS, AND THE HEALTH AND HAZARD WARNINGS
Do not add chemicals if the pool is occupied. This can cause skin or eye irritation. Concentrated chlorine solutions can damage the pool liner. In no event is Intex Recreation Corp., Intex Development Co. Ltd., their related companies, authorized agents and service centers, retailers or employees liable to the buyer or any other party for costs associated with the loss of pool water, chemicals or water damage. Keep spare filter cartridges on hand. Replace cartridges every two weeks. We recommend the use of a Krystal Clear™ Intex Filter Pump with all of our above-ground-pools. To purchase an Intex Filter Pump or other accessories see your local retailer, visit our website or call the Intex Consumer Services Department listed in the separate "Authorized Service Centers" sheet and have your Visa or Mastercard ready.
EXCESSIVE RAIN: To avoid damage to the pool and over filling, immediately drain rain water that causes the water level to be higher than the maximum.
How to Drain Your Pool and Long Term Storage
1. Check local regulations for specific directions regarding disposal of swimming pool water.
2. Check to make sure that the drain plug inside the pool is plugged in place.
3. Remove the cap from the drain valve on the outside pool wall.
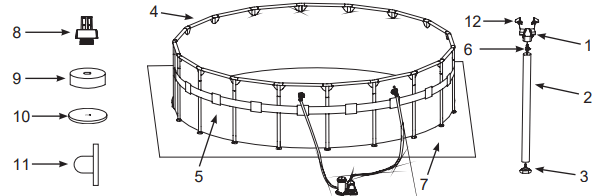
4. Attach the female end of the garden hose to the drain connector (8).
5. Place the other end of the hose in an area where the water can be safely drained away from the house and other nearby structures.
6. Attach the drain connector to the drain valve. NOTE: The drain connector will push the drain plug open inside the pool and water will start to drain immediately.
7. When the water stops draining, start lifting the pool from the side opposite the drain, leading any remaining water to the drain and emptying the pool completely.
8. Disconnect hose and adapter when finished.
9. Re-insert drain plug in drain valve on inside of pool for storage.
10. Replace drain cap on outside of pool.
11. Reverse set-up instructions to disassemble the pool, and remove all connecting parts.
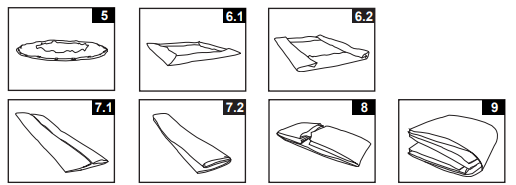
12. Be sure that the pool and all parts are completely dry before storage. Air dry the liner in the sun until completely dry before folding (see drawing 5). Sprinkle some talcum powder to prevent the vinyl from sticking together and to absorb any residual moisture.
13. Create a square shape. Starting at one side, fold one-sixth of liner in on itself twice. Do the same on the opposite side (see drawings 6.1 & 6.2).
14. Once you have created two opposing folded sides, simply fold one over the other like closing a book (see drawings 7.1 & 7.2).
15. Fold the two long ends to the middle (see drawing 8).
16. Fold one over the other like closing a book and finally compact the liner (see drawing 9).
17. Store the liner and accessories in a dry, temperature controlled, between 32 degrees Fahrenheit (0 degrees Celsius) and 104 degrees Fahrenheit (40 degrees Celsius), storage location.
18. The original packing can be used for storage.
After usage, you can easily empty and store away your pool in a safe place. You must drain, disassemble and properly store the pool when the temperature drops below 41 degrees Fahrenheit (5 degrees Celsius) to prevent ice damage to the pool and related components. Ice damage can result in sudden liner failure or pool collapse. Also see the section ‘’How To Drain Your Pool’’.
Should temperatures in your area not drop below 41 degrees Fahrenheit (5 degrees Celsius), and you choose to leave your pool out, prepare it as follows:
1. Clean the pool water thoroughly. If the type is an Easy Set Pool or an Oval Frame Pool, make sure that the top ring is properly inflated.
2. Remove the skimmer (if applicable) or any accessories attached to the threaded strainer connector. Replace strainer grid if necessary. Be sure all accessories parts are clean and completely dry before storage.
3. Plug the Inlet and Outlet fitting from the inside of the pool with the plug provided (sizes 16' and below). Close the Inlet and Outlet Plunger Valve (sizes 17' and above).
4. Remove the ladder (if applicable) and store in a safe place. Be sure the ladder is completely dry before storage.
5. Remove the hoses that connect the pump and filter to the pool.
6. Add the appropriate chemicals for the winter period. Consult your local pool dealer as to which chemicals you should use and how to use them. This can vary greatly by region.
7. Cover pool with Intex Pool Cover.
IMPORTANT NOTE: INTEX POOL COVER IS NOT A SAFETY COVER.
8. Clean and drain the pump, filter housing and hoses. Remove and discard the old filter cartridge. Keep a spare cartridge for the next season.
9. Bring pump and filter parts indoors and store in a safe and dry area, preferably between 32 degrees Fahrenheit (0 degrees Celsius) and 104 degrees Fahrenheit (40 degrees Celsius).
| PROBLEM | DESCRIPTION | CAUSE | SOLUTION |
| ALGAE |
|
|
|
| COLORED WATER |
|
|
|
| FLOATING MATTER IN WATER |
|
|
|
| CHRONIC LOW WATER LEVEL |
|
|
|
| SEDIMENT ON POOL BOTTOM |
|
|
|
| SURFACE DEBRIS |
|
|
|
| PROBLEM | CAUSE | SOLUTION |
| POOL INLET AIR ADAPTOR LEAKING |
|
|
| INLET TREADED AIR CONNECTOR LEAKING |
|
|
| AIR JET VALVE LEAKING |
|
|