Loading ...
Loading ...
Loading ...
∙ 11 ∙∙ 10 ∙
Once your food is cooked to your preference, open the Cover and
carefully remove the waffle(s) with a heat-resistant nylon or silicone
cooking utensil. When you have finished cooking, unplug your
No-Drip Waffle Maker and allow it to cool before moving or cleaning.
Plug the Power Cord into a power outlet.
The Red Indicator Light will illuminate, signaling that the
No-Drip Waffle Maker is heating up.
Once the Cooking Surface reaches its optimal temperature, the
Green Indicator Light will illuminate. Now, you’re ready to get cooking!
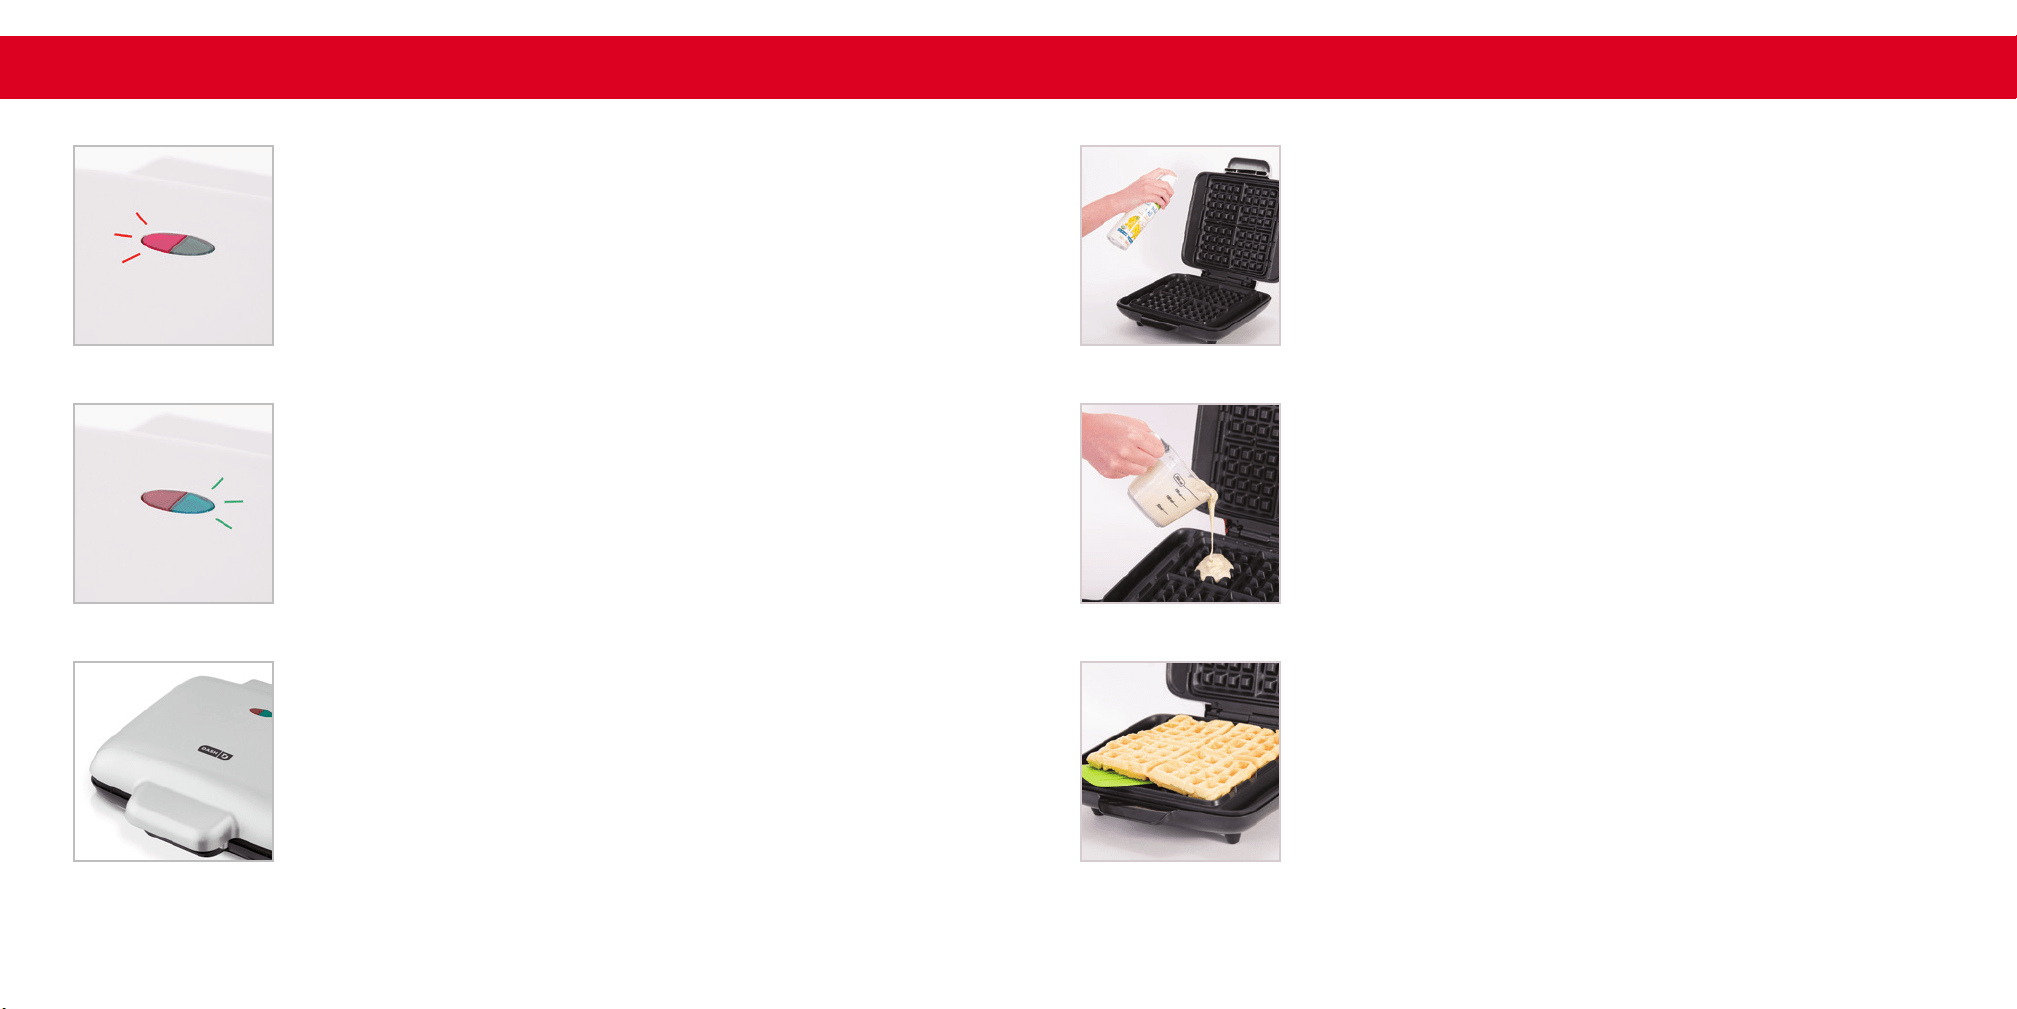
Carefully lift the Cover by the Cover Handle.
Spray both Cooking Surfaces with a small amount of cooking spray,
or grease lightly with butter.
Pour your batter onto the lower Cooking Surface and close the Cover.
The No-Drip Wafe Maker is designed to accommodate a certain amount
of overow into the edges surrounding the Cooking Surface. Use no more
than 1 ½ cups of batter per batch of 4 wafes in order to avoid overow
coming from the appliance. The lower Cooking Surface is divided into
four quarters for individual wafes. You may divide your batter between
the four quarters depending on how many wafes you wish to make.
1
4
2
5
3 6
USING YOUR No-Drip WAFFLE MAKER USING YOUR No-Drip WAFFLE MAKER
Loading ...
Loading ...
Loading ...