
Loading ...
Loading ...
Loading ...
9
When to Charge the iON+ 24VBAT-LTE
Lithium-iON Battery
NOTE: The iON+ 24VBAT-LTE lithium-iON battery pack does
not develop a "memory" when charged after only a partial
discharge. Therefore, it is not necessary to run down the
battery pack before inserting the charger plug.
• Use the battery indicator lights to determine when to charge
your iON+ 24VBAT-LTE lithium-iON battery pack.
• You can "top-o" your battery pack's charge before starting
a big job or after a long day of use.
Charging the Battery
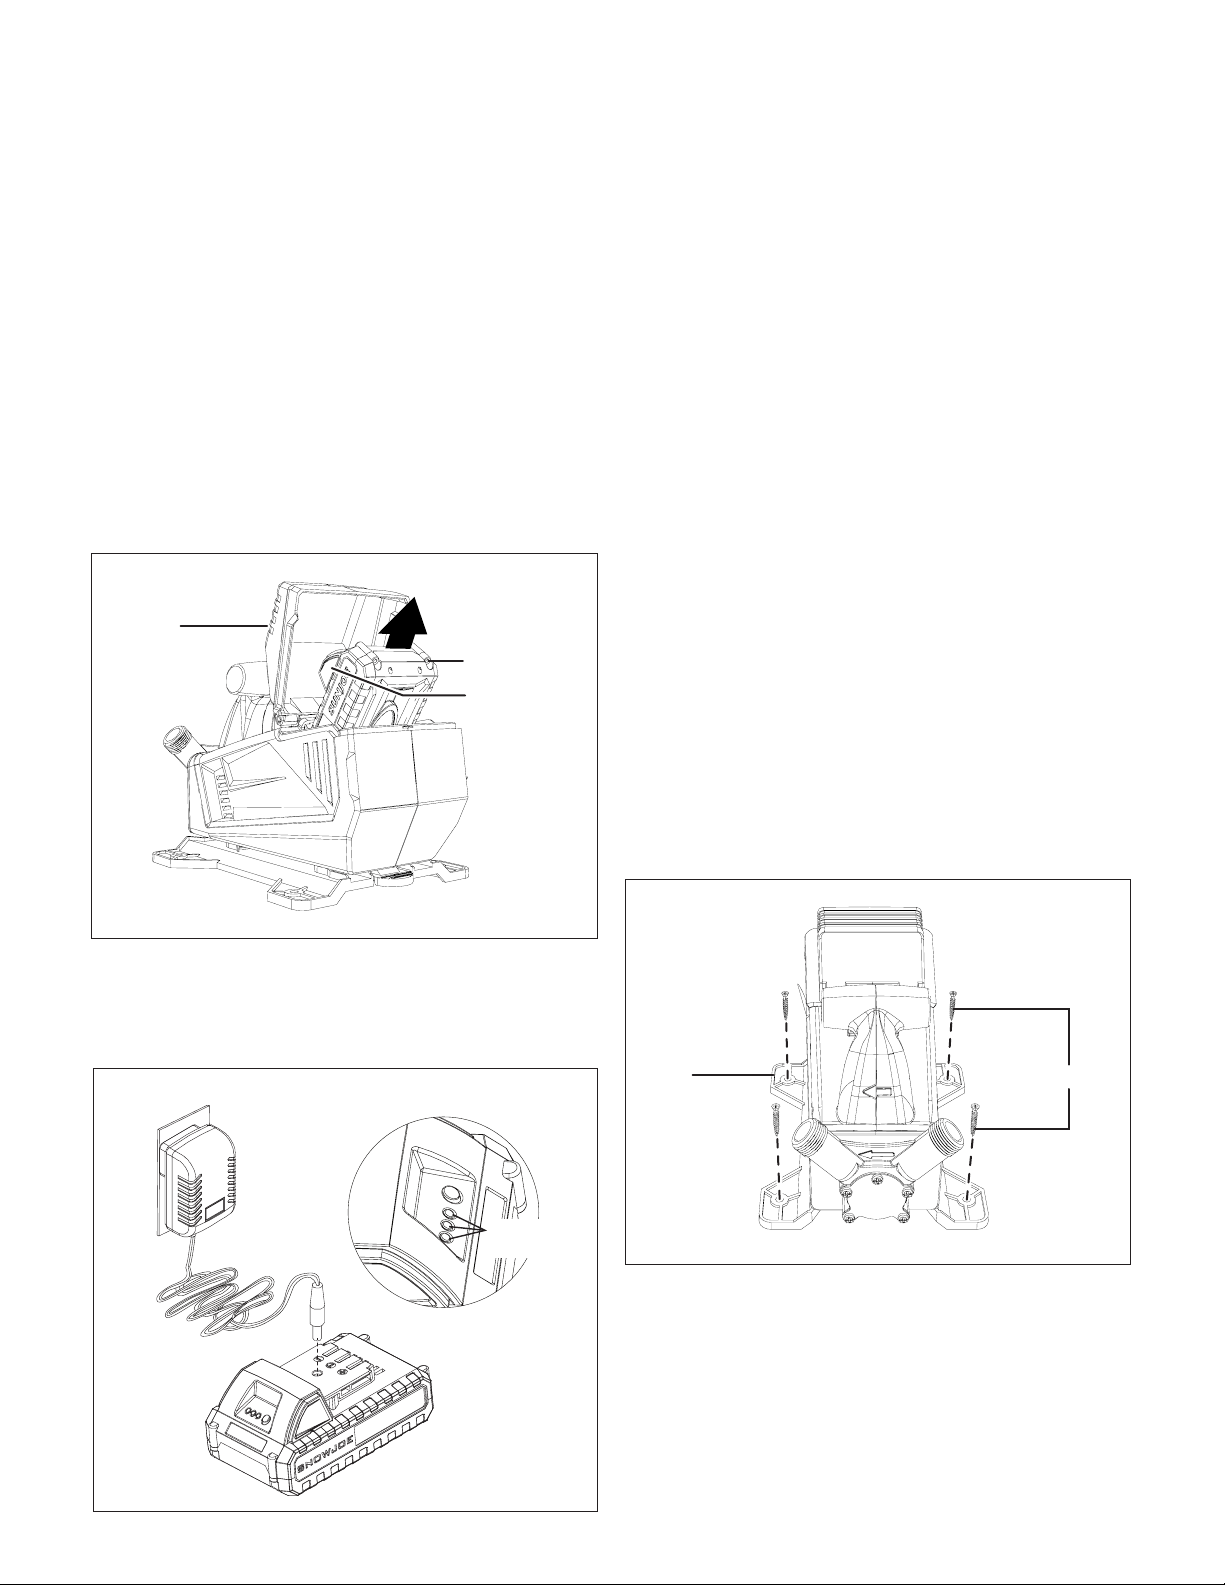
1. Open the battery compartment cover, and push the push
lock buttons on the battery to pull the battery pack out
from the battery compartment (Fig. 1).
2. Check that the mains voltage is the same as that marked
on the rating plate of the battery charger. Then, plug the
charger adapter into an appropriate AC power outlet.
Connect the charger plug into the charge socket of the
battery to start charging (Fig. 2).
3. The battery will take approximately 80 minutes to charge.
The battery indicator LEDs will twinkle and illuminate one
by one during the charging process. Unplug the charger
immediately when the 3 LEDs are all illuminated.
mCAUTION! FIRE HAZARD. When disconnecting the
charger from the battery, be sure to unplug the charger from
the outlet rst, then disconnect the charger from the battery.
mWARNING! This charger does not automatically
turn o when the battery is fully charged. Please take care
not to leave the battery plugged into the charger. Switch
o or unplug the charger at the mains when charging is
complete.
4. Timely recharging of the battery will help prolong the
battery's life. You must recharge the battery pack when
you notice a drop in the equipment's power.
IMPORTANT! Never allow the battery pack to become fully
discharged as this will cause irreversible damage to the
battery.
Assembly
mWARNING! Do not insert the battery before the unit is
fully connected with hoses and ready for use.
1. The equipment comes fully assembled. If needed, fasten
it securely to a suitable surface (e.g., a work-bench) in a
suitable place (protected against dust, dry, well-lit) with
the 4 provided M5 tapping screws (Fig. 3). Otherwise,
place the pump on a level, dry surface securely.
2. Connect a discharge hose onto the water outlet. It's
recommended to use a garden hose with standard 3/4"
GHT female connector. Thread to secure (Fig. 4).
Fig. 1
Battery
compartment
cover
Battery pack
Push lock
button
Fig. 2
Battery
indicators
Fig. 3
Base
Screws
Loading ...
Loading ...
Loading ...