Loading ...
Loading ...
Loading ...
Installation
Tronic 3000 – 6 721 803 545 (2020/02)
10
▶ Connect the cables to the terminal block (Fig. 10):
insulation needs to be through the end of the grommet to
provide a good seal.
Fig. 10
▶ Ensure that all the terminal block screws are tightened
securely.
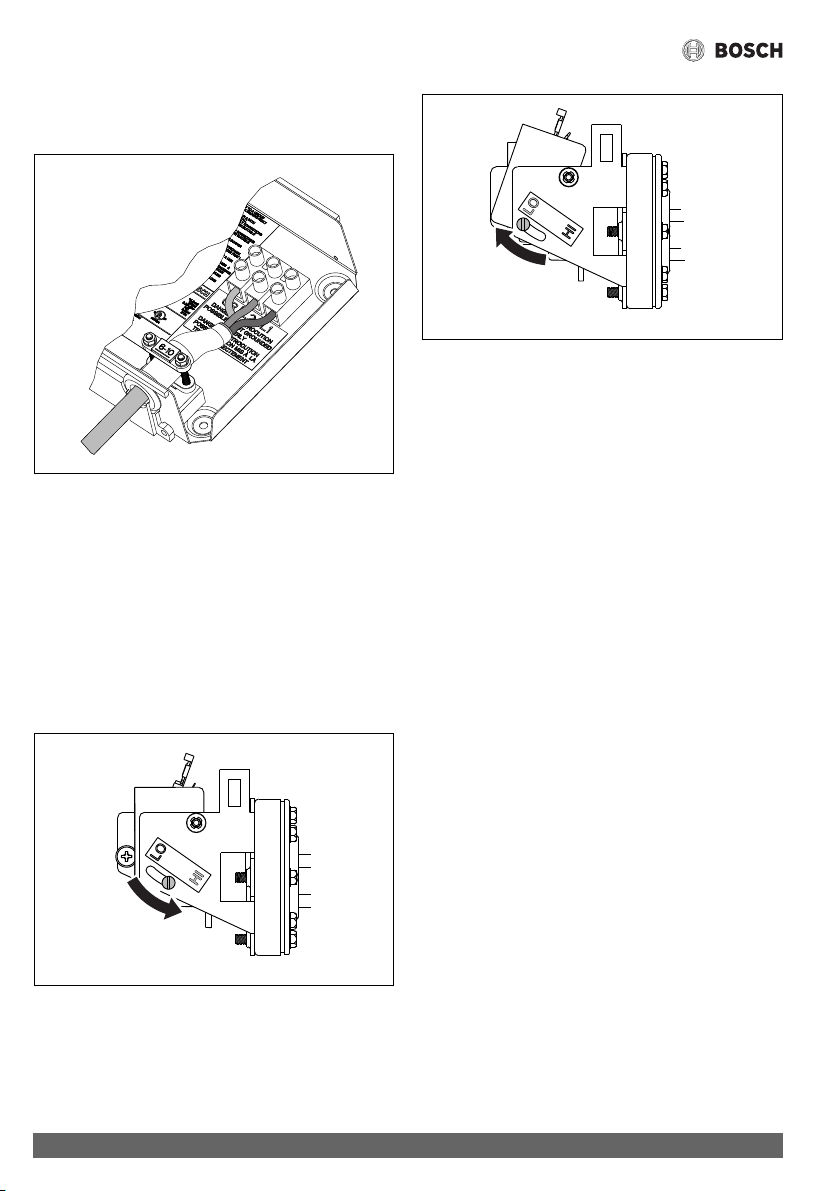
▶ Set the Power Selector Screw to the desired setting. If it is
set to LO ( Fig. 12), only one heating element will
operate and the output will be half power. See the Table 3
for temperature rise at various flow rates. If the element is
set on HI ( Fig. 11), both heating elements will operate
and the output will be full power (default setting). When
setting the Power Selector Screw, ensure that the screw is
adjusted all the way to the end of the slot and that it is well
tightened.
Fig. 11 Full power (HI)
Fig. 12 Half power (LO)
4.5 Securing the unit to the wall
4.5.1 Deciding the position
▶ If being used in a public place, position the unit out of reach
to discourage vandalism.
▶ Mount the unit onto a flat section of wall away from any
potential splashes of water or spray.
Keep the lengths of hot water pipe to a minimum in order to
reduce thermal loss.
▶ If the unit is to supply a sink, install it either above or below
the sink.
6721803545-18.1V
6721803545-21.1V
6721803545-22.1V
Loading ...
Loading ...
Loading ...