Loading ...
Loading ...
3
SECTION III
ASSEMBLY OF BACKSPLASH TO RANGE
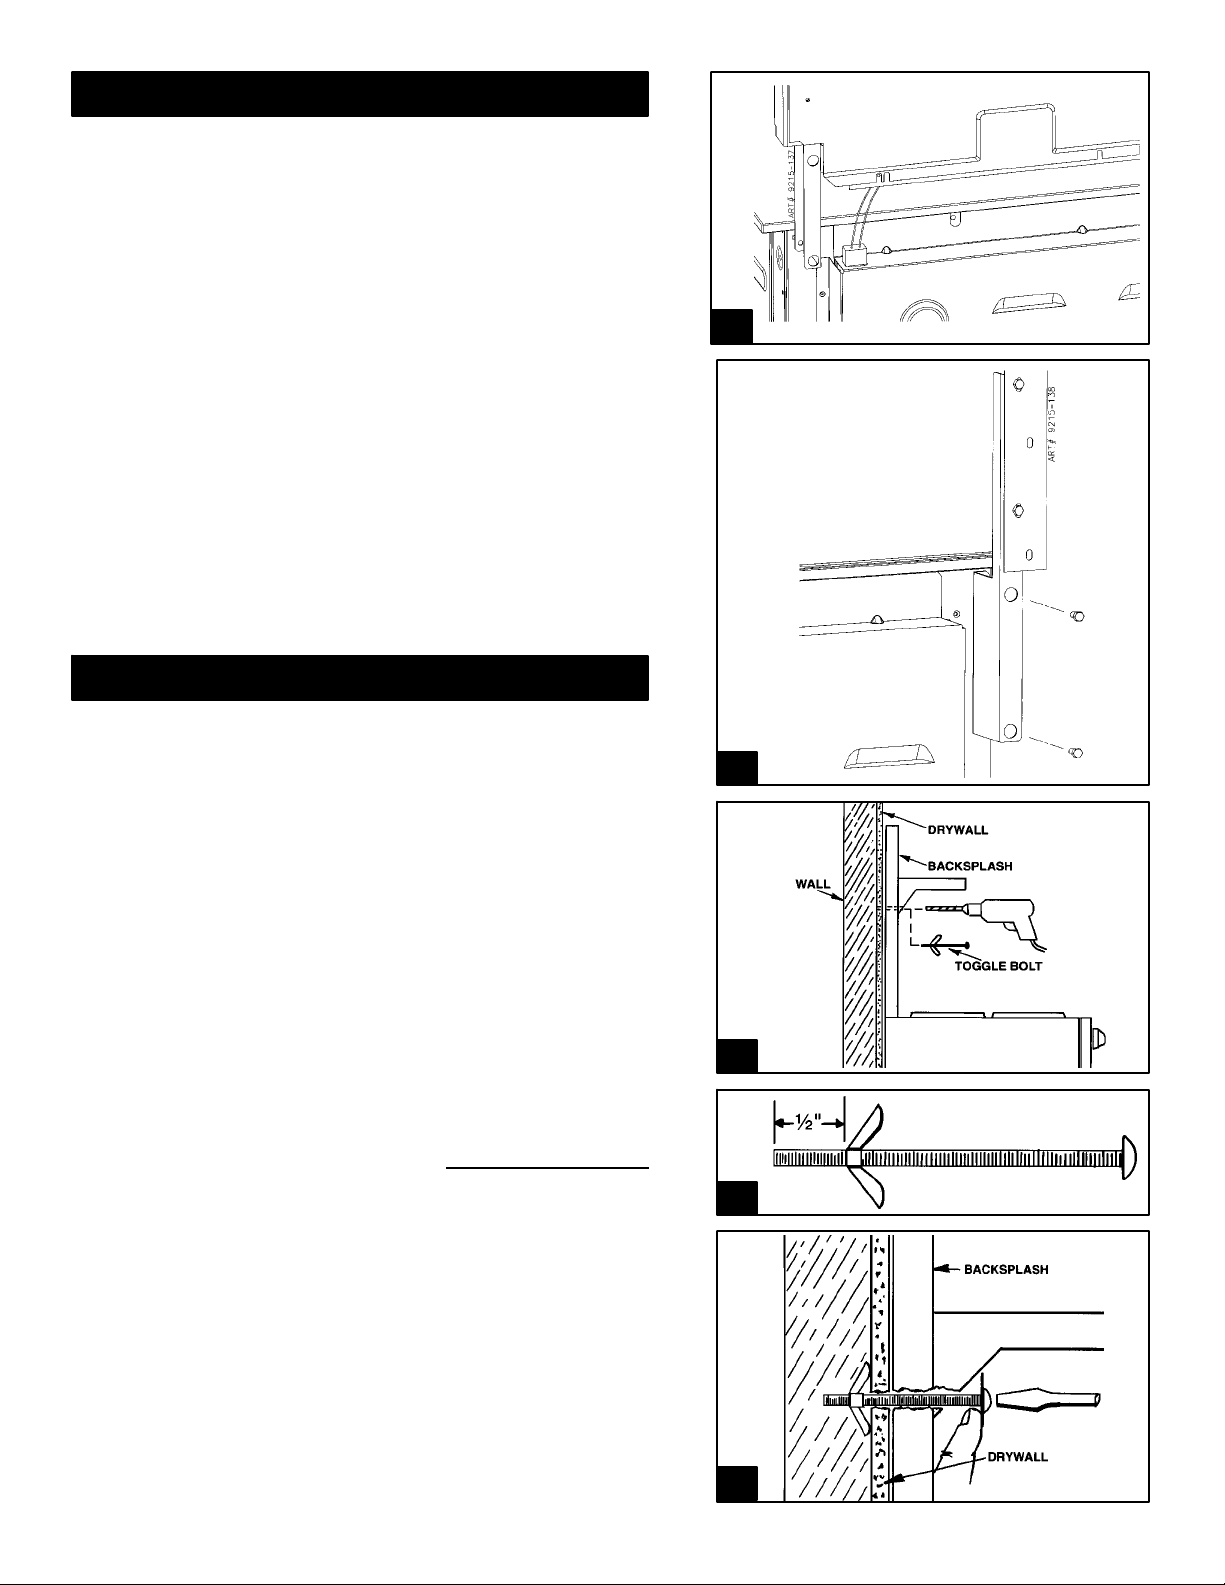
39. Working with an assistant, position
backsplash assembly above and along rear of range. Plug
wire connector from backsplash into mating connector
on range as shown in figure (8). Connector is polarized
to prevent misconnection. Slide backsplash until flange
on backsplash bottoms out against range top.
40. Install (2) hex-head screws through back
supports into the rear of range as shown in figure (9).
(4 screws total).
THIS COMPLETES MOUNTING OF BACKSPLASH TO
RANGE.
8
9
10
11
12
SECTION IV
MOUNTING B ACKSPLASH TO WALL
DUE TO THE SIZE AND LOADED WEIGHT ON THE
SHELF, THE BACKSPLASH MUST BE SECURED TO
THE BACK WALL FOR STABILITY.
1. With backsplash mounted to range as described in Section
III, push assembly back into cabinet opening until it
bottoms out against the wall. Adjust legs under range
until range top reaches desired level next to countertop.
2. Using a 3/8″ diameter bit, insert through hole in
backsplash under each end of shelf and drill through wall.
(Drywall only -- not stud) as shown in figure (10).
3. Pre-thread toggle on toggle bolts to 1/2″ from end of bolt
as shown in figure (11).
4. Push toggle bolt through holes in shelf and drilled holes
in drywall. Tighten toggle bolts until backsplash issecured
to back wall.
NOTE: It may be necessary to provide tension under head
of toggle bolt while tightening screw as shown in figure
(12).
If a wall stud is behind the drilled holes, use the 3″ wood
screws and washers to secure backsplash to wall.
Loading ...
Loading ...
Loading ...