
Loading ...
Loading ...
Loading ...
Product Assembly
16
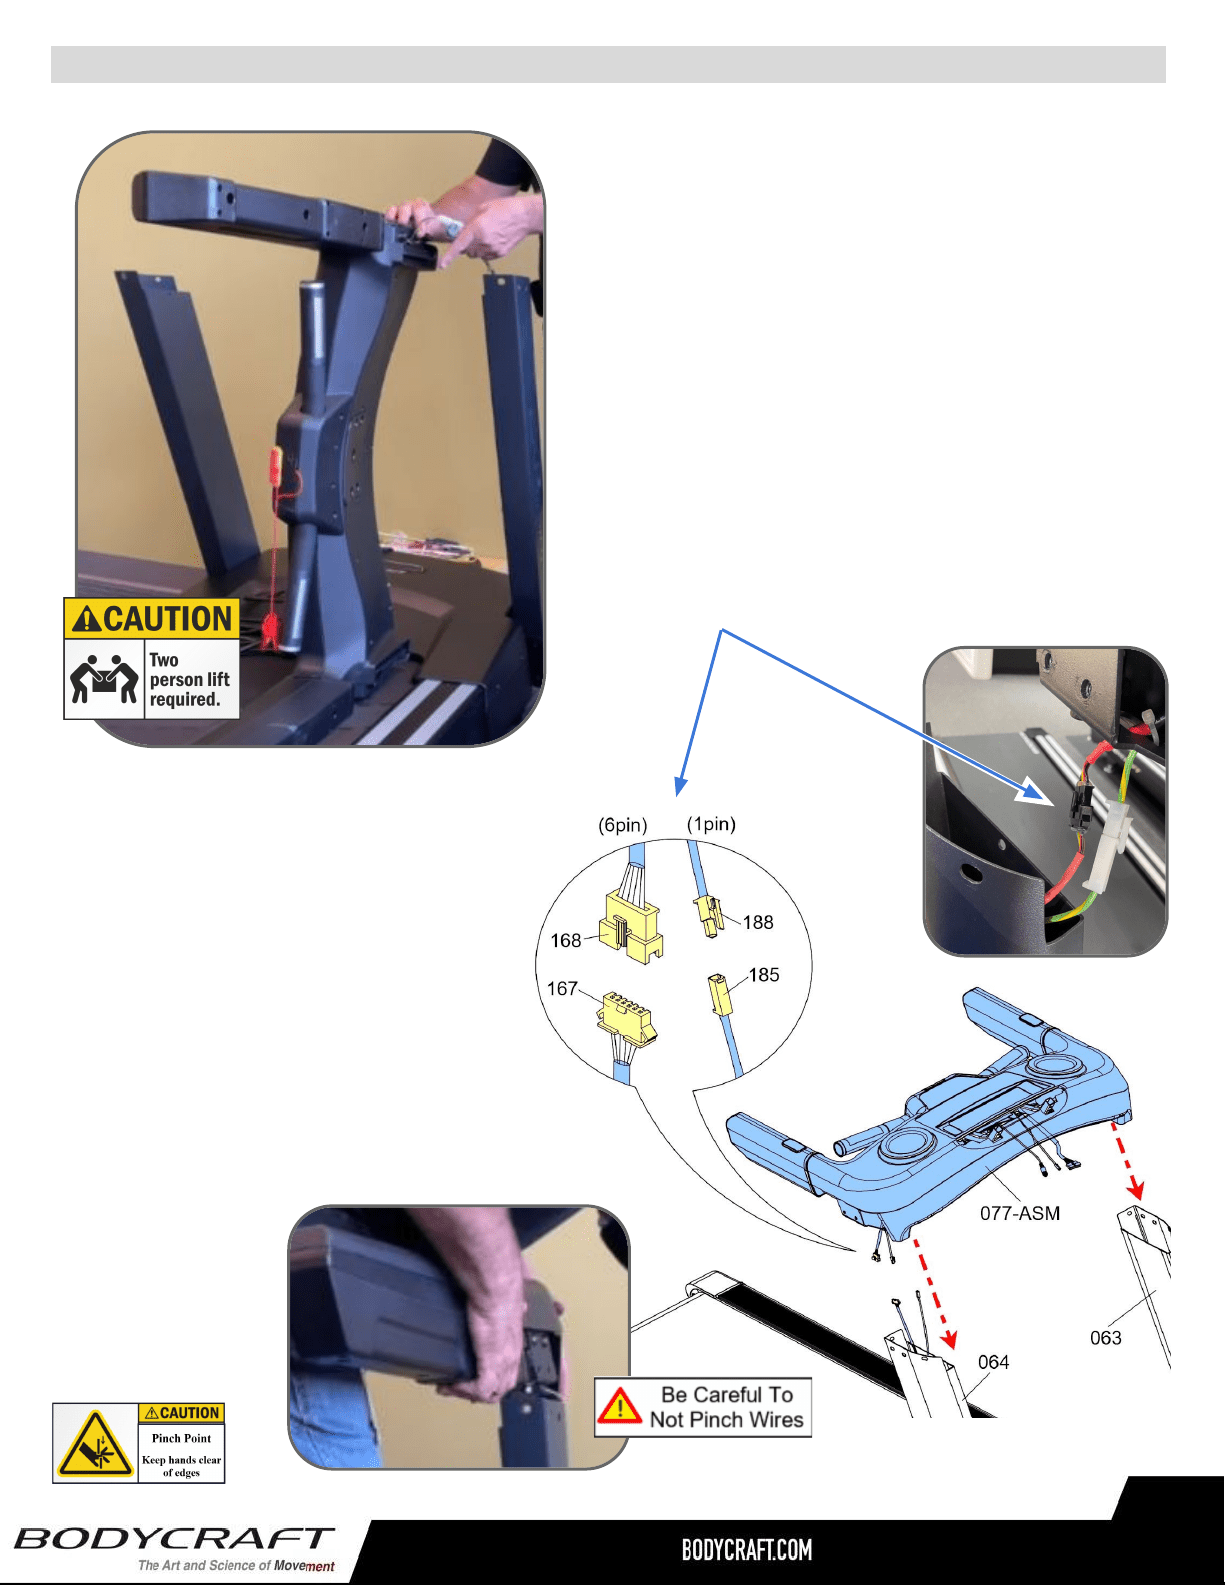
STEP 5 – Installing the Dashboard Assembly
c. After both cables are connected, confirm
they are fully locked together. Then lift up
the Dashboard Assembly and GENTLY
slide into both the Right & Left Sides of
the Upright Tubes. See pic on Fig. 7.
NOTE: Easier & SAFER for two people to
perform this task. Pinched or severed
cables during assembly
is not covered
under warranty.
Fig. 6
a. Gently lay the Left Side of the Dashboard
Assembly (077-ASM) on the running belt area.
See example pic. on Fig. 6.
b. Then connect the following cables from the
Dashboard Assembly (077-ASM) - Right Side
to the Upright Post - Right (064):
i. Cable - Upper (#168 w/6pin) <<< --
-- >>> Cable - Mid (#167 w/6pin)
ii. Grounding Cable (#188 w/1pin) <<< --
-- >>> Grounding Cable (#185 w/1pin)
a. Lay the Left Side of the Dashboard
Assembly (081-ASY) on the running belt
area. See example pic. on (Fig. 6 )
b. Then connect the following cables from
the Dashboard Assembly (081-ASY) -
Right Side to the Upright Post - Right
(126):
i. Cable - Upper (#094 w/8pin) to the
Cable - Mid (#133 w/8pin)
ii. Grounding Cable (#183 w/ 1pin) to
the Grounding Cable (#180 w/1pin)
Fig. 7
Loading ...
Loading ...
Loading ...