Loading ...
Loading ...
Loading ...
LOGO BADGE RELOCATION
ENGLISH
SELECT MODELS MAY INCLUDE AN EXTRA LOGO BADGE IN THE PARTS-INCLUDED BAG.
NOTE: Use care when removing and relocating logo badge to avoid scratching the exterior surface.
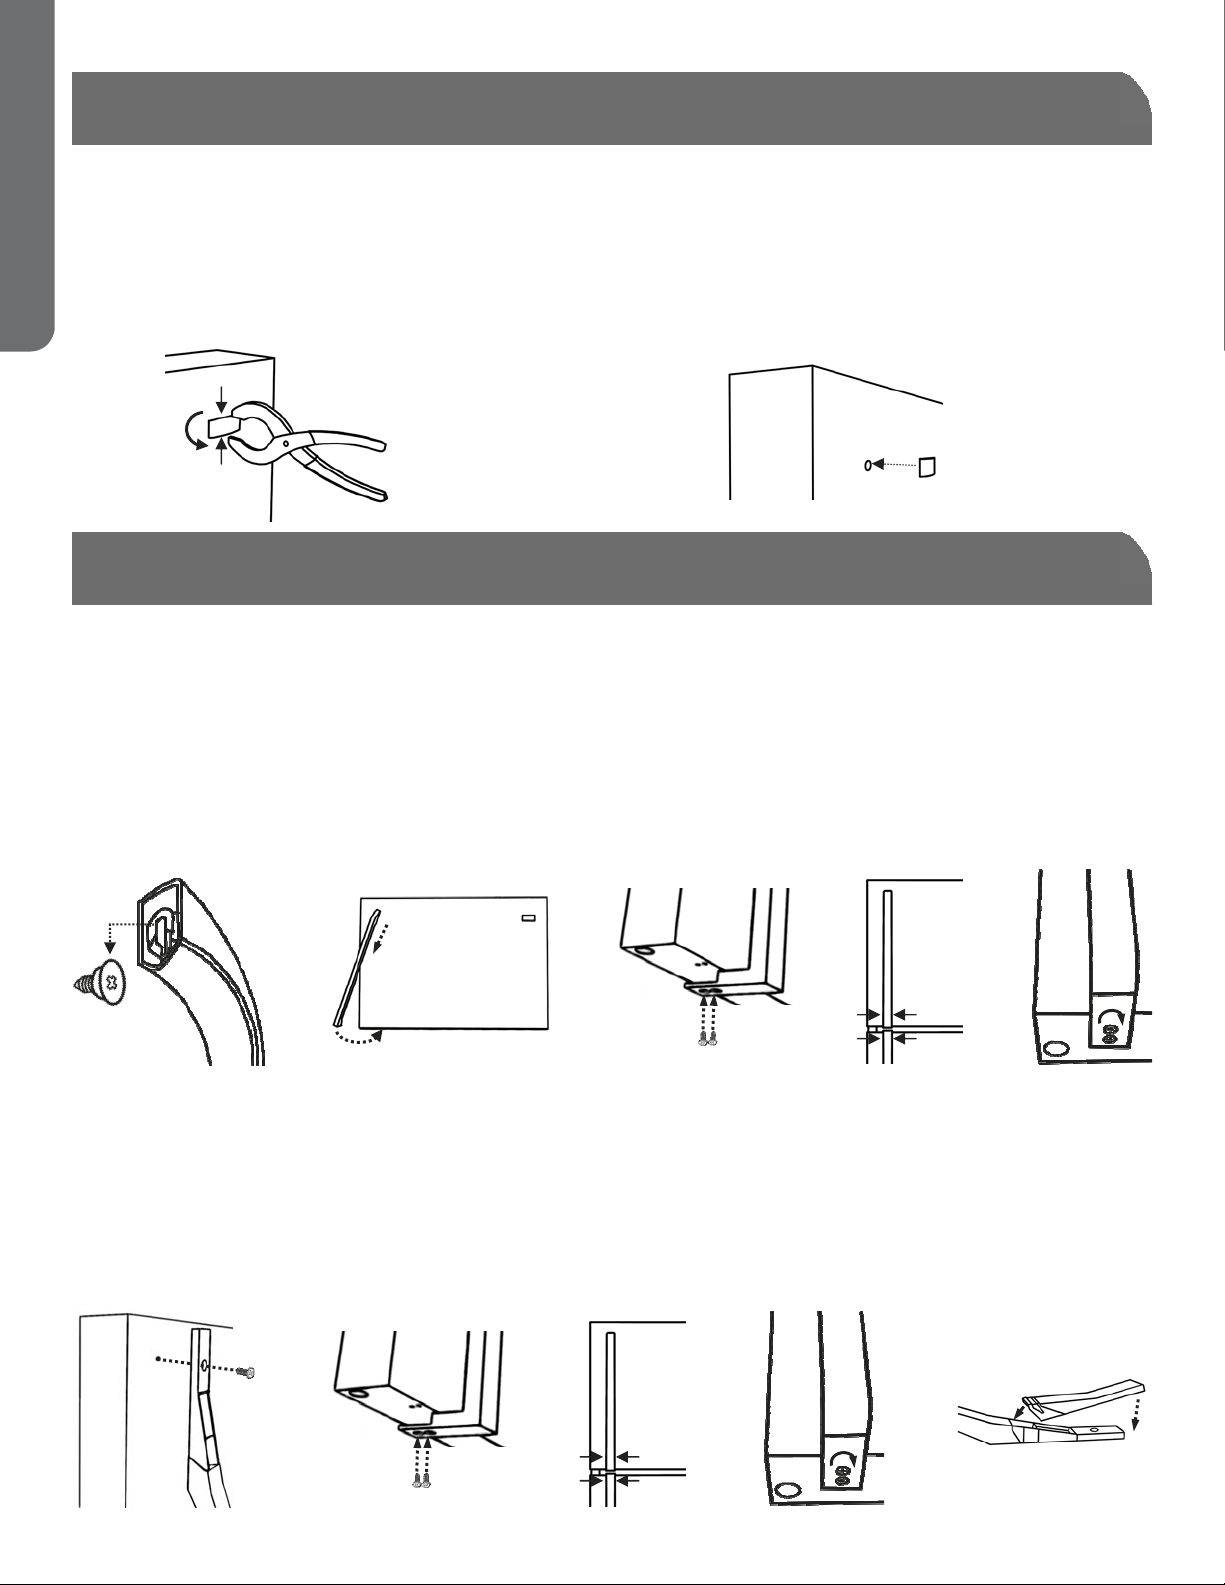
WHEN REVERSING DOORS:
1. Place a piece of thin cloth such as a handkerchief over logo badge, grasp badge firmly with pliers and twist.
2. Immediately center the badge over screw hole in opposite side of door and press firmly.
3. Any adhesive residue left on door surface should be removed using WD-40
®
or Goo Gone
®
and a soft cloth.
DOOR HANDLE INSTALLATION
FOR MODELS WITH PRE-INSTALLED HANDLE-MOUNTING SCREWS ON THE FACES OF THE DOORS:
1. Remove door handles and screws from plastic bags.
2. Place flared end of handle over pre-installed door face mounting screw. Slide handle down to secure it.
(Screw may need to be loosened slightly if handle is difficult to slide on).
3. Rotate door handle toward gap between doors.
4. Install screws from parts-included bag but do not tighten fully.
5. Repeat above steps for remaining door.
6. With both handles mounted, visually align handles, carefully open door and tighten screws.
FOR MODELS WITHOUT PRE-INSTALLED HANDLE-MOUNTING SCREWS ON THE FACES OF THE DOORS:
1. Remove door handles, screws and handle trim pieces from plastic bags
2. Mount tapered end of handle to door face using one of the two door face screws from door handle bag.
3. Install screws from parts-included bag into handle bottom/top flange but do not fully tighten.
4. Repeat above steps for remaining door.
5. With both handles mounted, visually align handles, carefully open door and tighten screws.
6. Attach handle trim pieces to handles.
PAGE 8 ● SET UP & USE
2
2
3
Loading ...
Loading ...
Loading ...