4.HELPFULL HINTS
1.The thermometer is designed for temporary, hand
held use. Do not use in an oven. Do not leave it in
extremely hot foods or liquid (anything over 572°F)
for more one minute.
2.Always take your reading in the thickest available
portion of meat. Thin portions of meat are difficult to
measure because they tend to cook through fast.
Avoid touching bone. If the tip touches the bone or
heavy fat area of the meat, or if the tip is not deep
enough, take a second reading to ensure accuracy.
3.Not intended for use by persons under age 12.
4.Do not touch the stainless portion of the
thermometer during or right after measuring
temperatures since it will be very hot.
5.Do not place the unit in dishwasher or immerse in
any liquid to clean, wipe the probe tip with a damp
soapy cloth or sponge and then dry.
6.Do not leave exposed to extreme high or low
temperatures since this will damage electronic
parts and plastics.
7.You can change the battery use coin as shown in
the picture below.
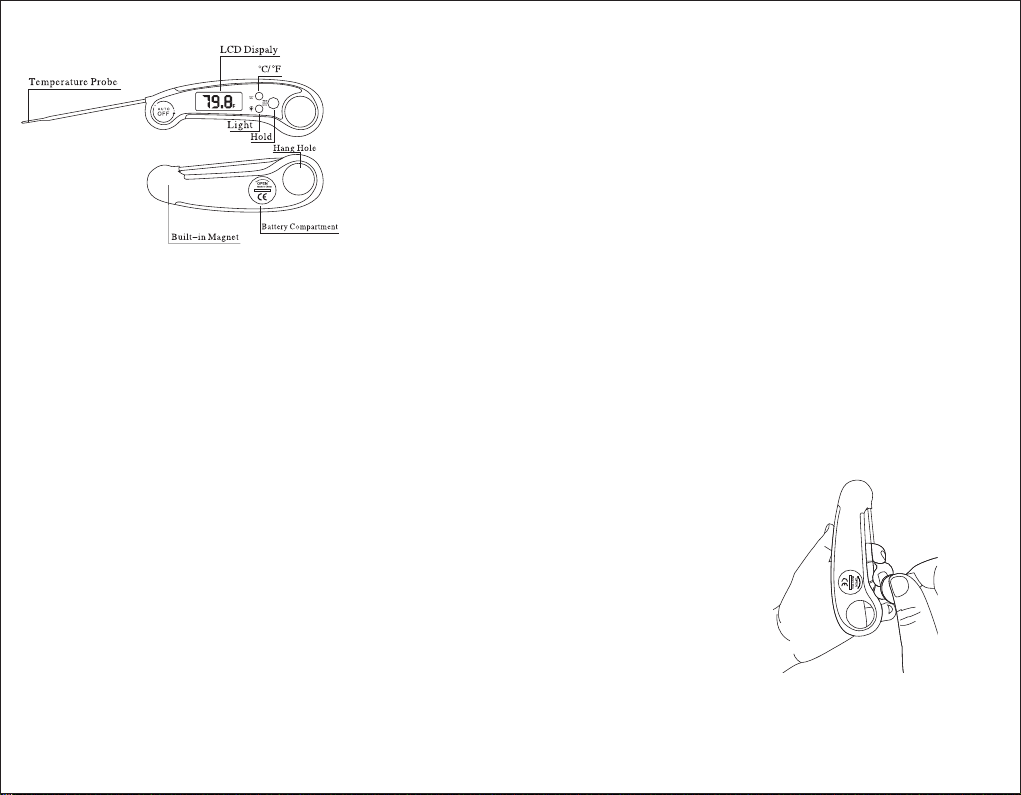
1.PRODUCT
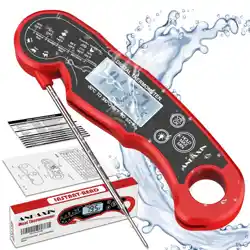
1.LCD Display: Displays the current temperature.
2.°C/ °F (CAL): Press once to switch between °C and
°F. Press and hold it for 3 seconds to calibrate the
unit.
3.HOLD(MAX MIN): Press once to lock the current
temperature , press again to unlock. Press and hold
it for 3 seconds it will firstly display the saved
maximum temperature, press again to display the
saved minimum temperature.
4.Light: Press once to turn on the backlight.
5.Temperature Probe: Insert the probe into food to get
the internal meat temperature. It has a high
precision sensor, you can get the temperature within
3~5 seconds.
6.Hang Hole: Large hang hole.
7.Built-in Magnets: It has two magnets can be
vertically attached to refrigerator and other iron
appliance.
8.Battery Compartment: Use one CR2032 button
battery to power the unit.
9.Waterproof: IPX7.
10.Auto-off: The unit will automatically turn off after
10 minutes if no other buttons are pressed.
11.Temperature range: -58°F~ 572°F (-
50°C~ 300°C).
12.Resolution: 0.1°C / °F.
13.Temperature accuracy: ±1°F (±1°C) at 45°F-302°F
(-20°C-150°C).
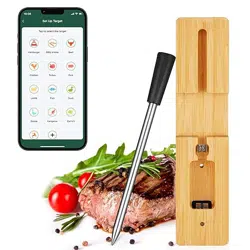
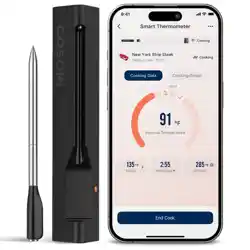
2.TO MEASURE FOOD TEMPERATURE
1.Pull the probe away from the body of the
thermometer to turn on the thermometer, and fold in
the probe to turn off the thermometer.
2.Press the °C/ ° F button once to switch between °C
and ° F.
3.Insert the tip of the probe into food being cooked to
measure the internal food temperature.
4.Press the HOLD button once to hold the
temperature.
5.Press the light button once to light up the screen to
read the temperature.
3 CALIBRATION.
The thermometer comes with a calibration feature. In
most cases, it was calibrated precisely at our
manufacturing facility, you do not need to calibrate
it. However, after a long period of use and you
believe it is not accurate, you may follow the
process below to re-calibrate it.
1.Use distilled or purified water to make ice cubes in
your refrigerator.
2.Get a thermal insulated bottle.
3.Fill the bottle with ice cubes(no less than 70% of
the volume), then top off with cold distilled or
purified water(no greater than 30% of the volume).
4.Stir the mixture and let it sit for 10 minutes to allow
the ice and water to reach its temperature
equilibration.
5.Immerse the probe in the mixture and make sure
not to touch the sides of the container. Wait till the
temperature reading drops to its lowest value,
which should be around 32°F or 0°C. If the
temperature of the mixture is not within 28°F to 36°F
(or-2°C to 2°C), the calibration can’t be continued.
You will need to re-make the mixture.
6.Press and hold the call button for 5 seconds to
enter the Calibration mode. After 5 seconds, the
display will flash " CALL" on the screen, then the
unit will calibration itself. If the temperature of the
ice/water mixture is not within 28°F to 36°F (or-2°C
to 2°C), the display will flash " Err " on the screen.
You will need to re-make the mixture.
1)Turn the battery cover counterclockwise use coin.
2)Open the battery cover to change the battery.
3)Turn the battery cover clockwise and lock.
°
C
/
°
F
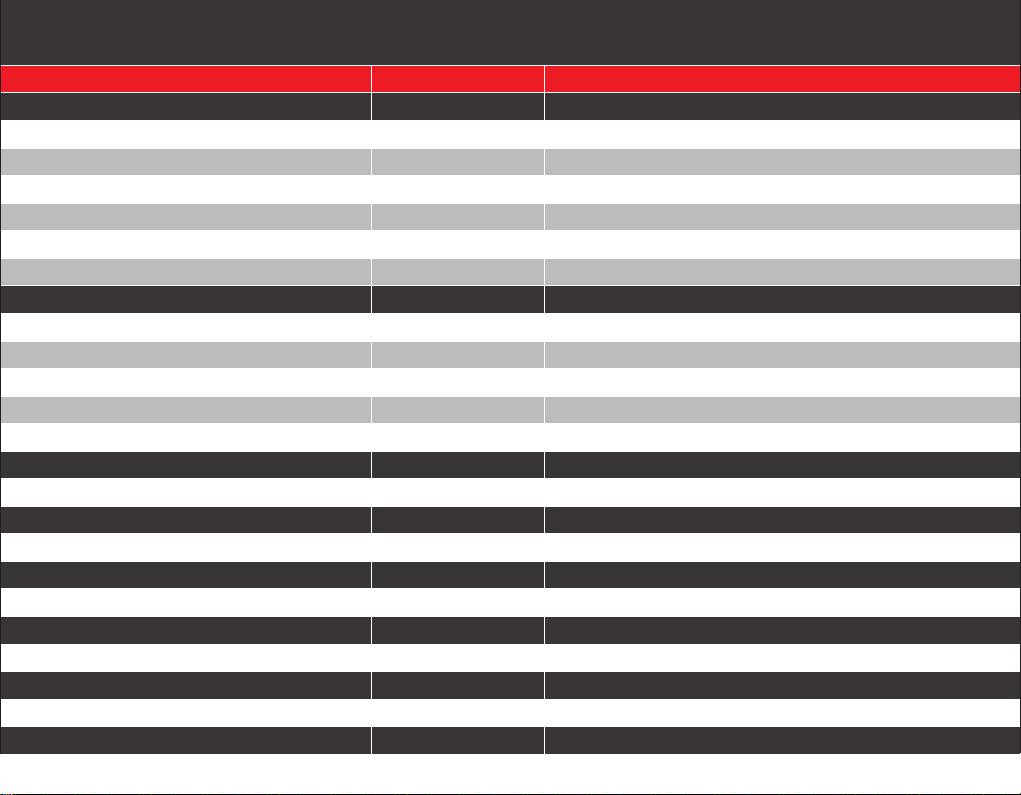
MEAT TEMPERATURE GUIDE
DONENESS
BEEF,LAMB,VENISON STEAKS.CHOPS,ROASTS
Extra Rare,Bleu,Pittsburgh
Rare
RECOMMENDED Medium rare
Medium
Medium Well
Well Done
PORK&VEAL STEAKS,CHOPS,ROASTS,FRESH HANS
Rare
Medium Rare
RECOMMENDED Medium
Medium Well
Well Done
CHICKEN & TURKEY,WHOLE OR GROUND INCLUDING STUFFING
RECOMMENDED
GROUND MEATS, BURGERS,MEAT LOAF,SAUSAGES
RECOMMENDED
PRE-COOKED HAMS,HOT DOGS,SAUSAGES
RECOMMENDED
PORK RIBS,PORK SHOULDERS,BEEF BRISKETS
RECOMMENDED
FISH
RECOMMENDED Medium
CASSEROLES& LEFTOVERS
SERVING TEMPERATURE
110-120°F(43-49°C)
120-130°F(49-54°C)
130-135°F(54-57°C)
135-145°F(57-63°C)
145-155°F(63-68°C)
155°F(68°C) plus
120-130°F(49-54°C)
130-135°F(54-57°C)
135-145°F(57-63°C)
145-155°F(63-68°C)
155°F(68°C) plus
165°F(74°C)
Except Chicken&Turkey
165°F(74°C)
140°F(60°C)
190-205°F(88-96°C)
130-145°F(57-63°C)
COLOR IN CENTER,MOISTURE,TEXTURE
(USDA Minimum 145°F(63°C))
Deep red,slightly juicy,cool,stringy,fell soft and squishy
Bright red center,juicy,warm,tender,fells soft
Bright red/pink center,very juicy,warm,tender,yields only slightly to touch
Rich pink center,slightly juicy,hot,beginning to firm up
Grey-brown`with slight pink in center,some juice,slightly fibrous,firm
Grey-brown, no pink, little juice, chewy, firm to hard
(USDA Minimum 145°F(63°C))
Pale pink center,very juicy,warm tender
Creamy pink colored, juicy, tender
Cream Colored,some pink in center, juicy,yielding slightly to touch
Cream colored,some clear juices,firm
Cream colored,dry,tough,hard
(USDA Minimum 165°F(74°C))
Cream colored,moist,slightly tender,clear juices,leg moves easily
(USDA Minimum 160°F(71°C))
Keep juicy by using 80% lean meat 20% fat
USDA Minimum 140°F(60°C))
Cear juices,juicy,tender
(USDA Minimum 145°F(63°C))
High in fat & collagen,best cooked low and slow,done when meat pulls apart easily
(USDA Minimum 145°F(63°C))
Slightly translucent,tender,flakes easily
(USDA Minimum 165°F(74°C))
CARRY OVER HEATING:Meat will continue to cook after it has been removed from the grill,so take it off a `few degrees below your target temperature. More important the thicker the cut.