Loading ...
Loading ...
Loading ...

EN
For best results, you are advised to use very fresh, cold (39°F) pasteurized or UHT milk, recently opened.
Unpasteurised milk does not produce the best results.
Preparing and installing a milk jug
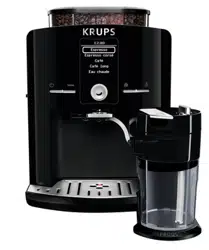
The milk jug is composed of a plastic container, a lid (including a cassette) and a exible pipe connecting it to the machine’s drinks
outlet. Before the rst use, carefully clean the dierent elements.
Pour milk into the jug (at least 5 oz) (16). Put the lid on the jug by screwing it down with light pressure (17). Lift the locking lever
(18). Install the milk jug on the machine by connecting it to the steam outlet (19), then lowering the locking lever (20). Insert the
exible pipe into the intended opening in the cassette (21) then place the other end beneath the magnetic drink outlet (22). Ensure
that the system’s lid button is in the cappuccino position (23).
Making a cappuccino
While the screen is displaying the drinks selection menu, give a short press (< 3 seconds) on the machine’s cappuccino button
(24). A pre-heating phase will take place, then the milk is frothed, and nally the espresso is poured. Your drink is ready (25).
You can interrupt the cycle by pressing the rotating dial.
Please note that the cycle does not stop immediately.
A message appears on the screen telling you to clean the system. We recommend you to carry this out, referring to the
paragraphs CAPPUCCINO SYSTEM RINSING and/or MANUAL MAINTENANCE OF THE CAPPUCCINO SYSTEM.
The machine enables you to set the quantities of milk and coee according to your preferences for a perfectly personalized
cappuccino.
You can change these settings via the Cappuccino Settings menu.
While the screen is displaying the drinks selection menu, give a long press (> 3 seconds) on the machine’s cappuccino button.
1. Select Standard for the factory settings
2. Select New to personalize your recipe. The following steps take place:
a. Pre-heating of the machine
b. Milk frothing phase: press OK when the volume of milk required is reached.
c. Coee phase: press OK when the volume of coee required is reached.
The machine will indicate that the new volumes have been recorded for the next cappuccinos.
PLEASE NOTE: MILK FROTHING DOES NOT STOP IMMEDIATELY
PREPARING A CAPPUCCINO
CAPPUCCINO SETTINGS
Warning! To comply with the warranty conditions, it is essential to carry out the cleaning or descaling cycle when the
appliance requests it. Carefully follow the instructions given on the screen. You can continue to use the appliance but it is
recommended that you carry it out as soon as possible.
Emptying the used coee collector, the coee drawer
(1)
and the drip collector tray
Remove the cappuccino system (26).
If the message is displayed, remove, empty and clean the drip collector tray (27).
Remove, empty and clean the used coee collector (28).
Remove the coee drawer
(1)
(28), and wipe clean the area where the coee drawer sits.
The drip collector tray is equipped with oats to indicate when it needs emptying (29).
Once you have removed the used coee collector, you must empty it completely to avoid any later overow.
The warning message does not disappear if the coee drawer area is not cleaned thoroughly and if the used coee
collector is not pushed rmly into place or is incorrectly installed.
While the message is displayed, it is not possible to prepare an espresso or a coee. The used coee collector has a
capacity of nine coee cakes.
Circuit rinsing: see 5
MAINTAINING YOUR APPLIANCE
7
Loading ...
Loading ...
Loading ...
