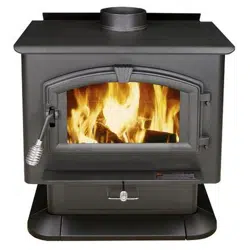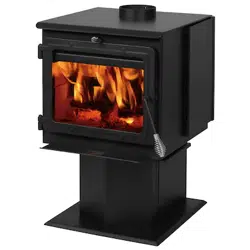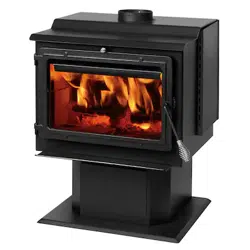
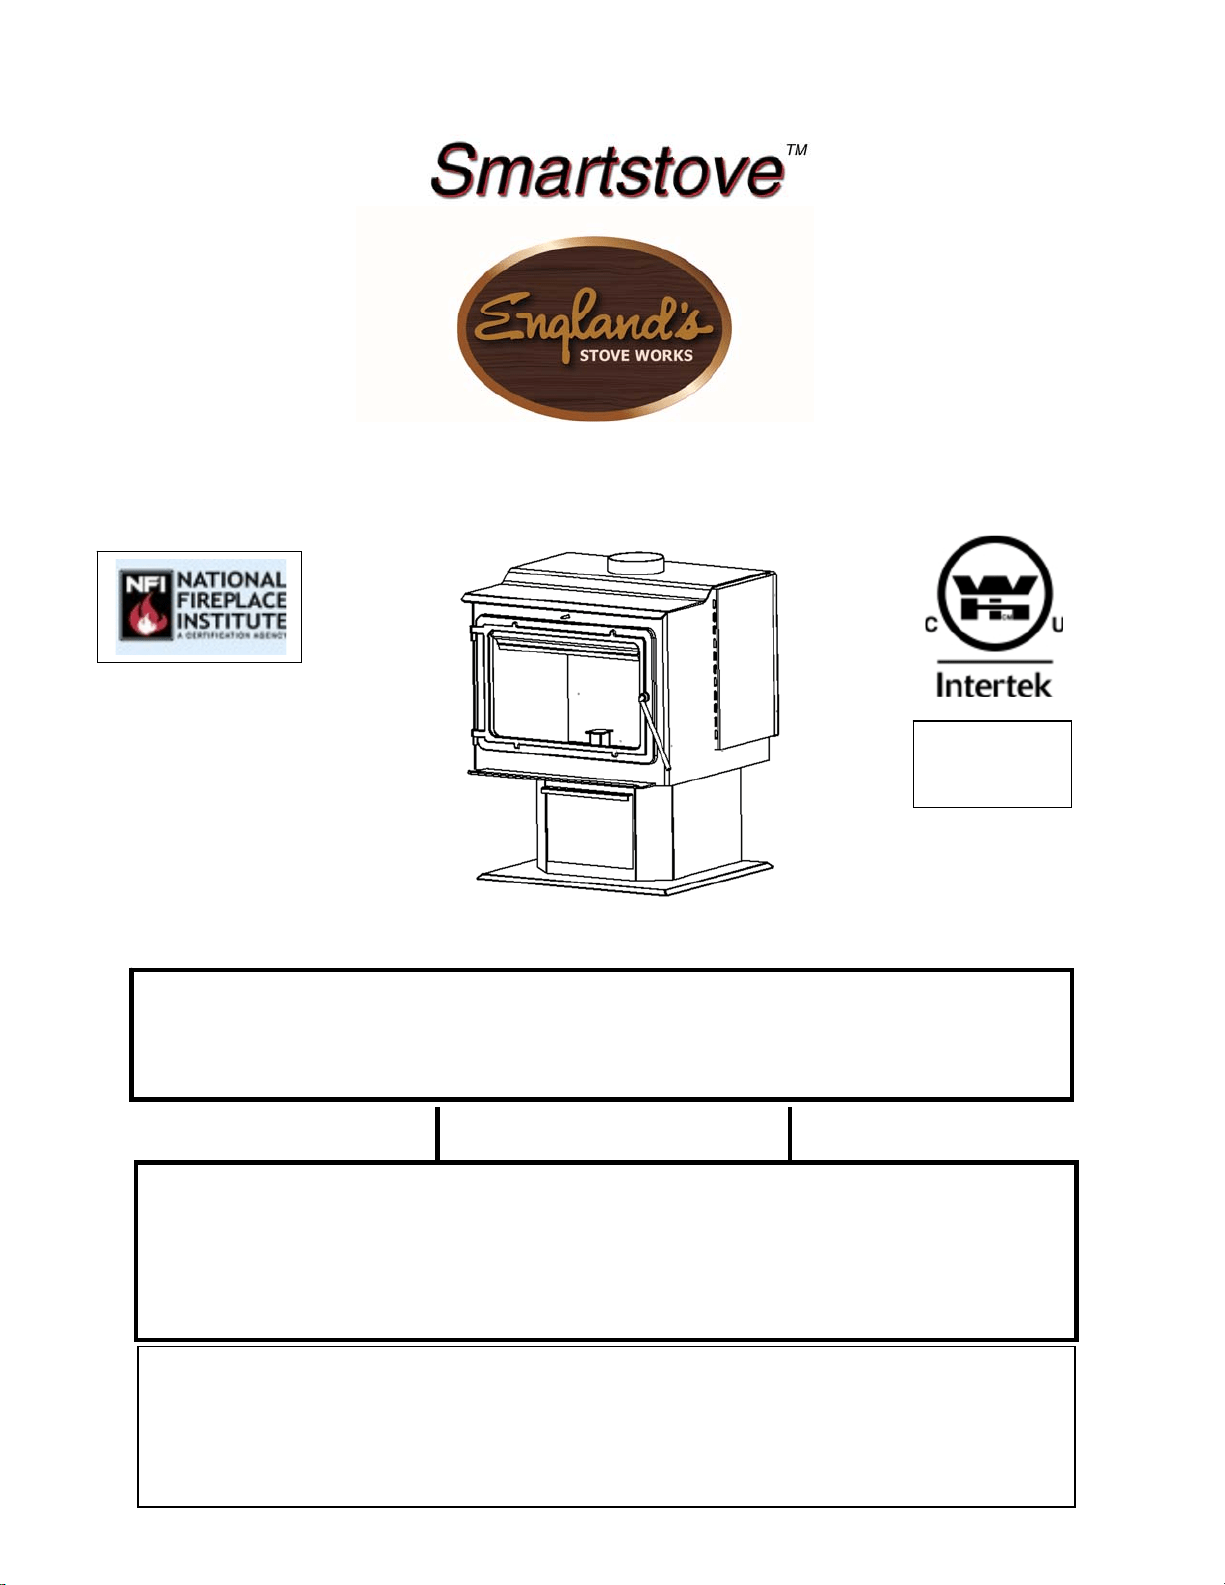
15‐SSW02,50‐SHSSW02,
50‐TRSSW02
INSTALLATION&OPERATION
MANUAL
CAUTION
Pleasereadthisentiremanualbeforeinstallationanduseofthiswood
fuel‐
burning
appliance. Keepchildren,furniture,fixturesandallcombustibles
away
from
anyheating
appliance.
SAVETHESEINSTRUCTIONS
SAFETY
NOTICE
Failuretofollowtheseinstructionscanresultinpropertydamage,bodily
injury
orevendeath. Foryoursafetyandprotection,followthe
installation
instructionsoutlined
inthismanual. Contactyourlocalbuildingorfire
officials
aboutrestrictionsand
installationinspectionrequirements(including
permits)
inyour
area.
Rev.
10/13/2015
THISWOODHEATERNEEDSPERIODICINSPECTIONANDREPAIRFORPROPEROPERATION.
CONSULTTHEOWNER’SMANUALFORFURTHERINFORMATION.ITISAGAINSTFEDERAL
REGULATIONSTOOPERATETHISWOODHEATERINAMANNERINCONSISTENTWITHTHE
OPERATINGINSTRUCTIONSINTHEOWNER’SMANUAL.
Manufactured
By:
England’sStoveWorks,
Inc.
POBox
206
Monroe,VA
24574
Page | 2
IMPORTANT:IFYOUHAVEAPROBLEMWITHTHISUNIT,DO
NOTRETURNITTOTHEDEALER. CONTACTTECHNICAL
SUPPORT@1‐800‐245‐6489
MobileHomeUse(ApprovedforUSAonly):
Thisfreestandingwoodunitisapprovedformobilehomeor
doublewideinstallationwiththeoutsidecombustionairhook‐
up. Seethe“Installation”sectionofthismanualfordetails
pertainingtomobilehomeinstallations. Mobilehome
installationmustbeinaccordancewiththeManufactured
HomeandSafetyStandard(HUD),CFR3280,Part24.
Retainforyour
files
Model
Number
Date
of
Purchase
Date
ofManufacture
Serial
Number
*Thisinformationcanbefoundonthesafetytagattachedtotherearoftheunit.
Havethisinformationonhandifyouphonethefactoryoryourdealerregardingthis
product.
•
Keepchildrenaway.
CAUTION
•
Supervisechildreninthesameroomasthisappliance.
•
Alertchildrenandadultstothehazardsofhightemperatures.
•
DoNOToperatewithprotectivebarriersopenorremoved.
•
Hotwhileinoperation!Keepclothing,furniture,draperiesandother
combustiblesaway. Contactmaycauseskinburns!
DoNOTover‐fireyourunit.
•
InstallationMUSTcomplywithlocal,regional,stateandnationalcodesand
regulations.
•
Consultlocalbuilding,fireofficialsorauthoritieshavingjurisdictionabout
restrictions,installationinspection,andpermits.

Page | 3
TABLEOF
CONTENTS
Introduction
•
Introduction.................................4
Specifications
•
HeatingSpecifications..................5
•
Dimensions...................................5
•
EPACompliance...........................5
Installation
•
Installation
Overview
...................6
•
ClearancestoCombustibles.........7
•
VentingIntroduction....................8
•
VentingGuidelines.......................8
•
AdditionalVenting
Information
...9
•
Wall
Pass
‐Throughs.....................10
•
ApprovedVentingMethods
o ThroughtheWall...........11
o ThroughtheCeiling........12
o MasonryChimney...........13
o MasonryFireplace..........14
•
MobileHomeInstallation...........15
•
OutsideAir
Hook‐Up
...................15
•
FloorProtection..........................16
Operation
•
Break‐InFires.............................17
•
ContinuousOperation...........17‐18
•
Safety
Notes
...............................19
Maintenance
•
StoveMaintenance....................21
•
Inspecting
Gaskets
......................22
•
Finish..........................................22
Replacing Components
•
Glass...........................................23
•
BurnerTubes..............................24
•
CeramicFiberboard....................24
•
HeatShield&BackPanel...........24
•
OtherComponents.....................25
Optional Accessories
•
AC‐16/AC‐30
Blower
..................25
ImportantInformation
EPAandSafetyInfo………………26
Troubleshooting Guide
•
Troubleshooting.........................31
Illustrated Parts Detail
•
PartsList.....................................32
•
ExplodedPartsDiagram.............33
•
BrickLayout................................34
Warranty
•
SampleTag..................................35
•
Warranty
Details
.........................36
•
ImportantNo
tice
.........................37
•
WarrantyregistrationForm........38
IMPORTANTNOTES:CLEARANCESMAYONLYBEREDUCEDBYMEANSAPPROVEDBYTHE
REGULATORYAUTHORITYHAVINGJURISDICTION
DONOTCONNECTTOANYAIRDISTRIBUTIONDUCTORSYSTEM.
DONOTBURNGARBAGEORFLAMMABLEFLUIDSSUCHASGASOLINE,NAPHTHAORENGINEOIL.
DONOTUSECHEMICALSORFLUIDSTOSTARTTHEFIRE.

Page | 4
INTRODUCTION
ThankyouforpurchasingthisfineproductfromEngland’sStoveWorks!
England’sStoveWorkswasstarted,andisstillownedby,afamilythat
believesstronglyina“DoItYourself”spirit;that’sonereasonyou
foundthisproductatyourfavorite“DoItYourself”store.
Weintentionallydesignandbuildourstovessothatanyhomeowner
canmaintaintheirunitwithbasictools,andwe’realwaysmorethan
happytoshowyouhowtodothejobaseasilyandasinexpensivelyas
possible. However,whileremainingsimple,ourstovesaredesignedto
performextremelyefficiently,
helpingdelivermoreheatfromlessfuel.
PleaselookatourvastHelpsectiononourwebsiteandcallour
TechnicalSupportDepartmentat(800)245‐6489ifyouneedanyhelp
withyourunit. Wearenearlyalwaysableto“walkyouthrough”any
installationissues,repairs,problemsorotherquestionsthatyoumay
have.
Wishingyouyearsofefficient,qualityand“comfy”heating,
EVERYONEATENGLAND’SSTOVEWORKS
Please Note:Whileinformationobtainedfromourwebsiteand
throughourTechnicalSupportlineisalwaysfreeofcharge,therewill
beaservicechargeincurredwithany“on‐site”repairsormaintenance
thatwemayarrange.
Thismanualencompassesallversionsofthe15‐SSW02,includingthe50‐SHSSW02and
the50‐TRSSW02.However,forsimplicityofdescription,thestovewillbereferredtoby
thegeneric15‐SSW02designation.
Page | 5
SPECIFICATIONS
Heating Sp ecifications
•
MaximumBurnTime**
.............................................................................Upto14
hours
•
ApproximateSquareFootageHeated***
...............................................
2,400sq.ft.
•
Firebox
Capacity........................................................................................23
lbs.
•
FlueCollar
.................................................................................................
6.0in.round
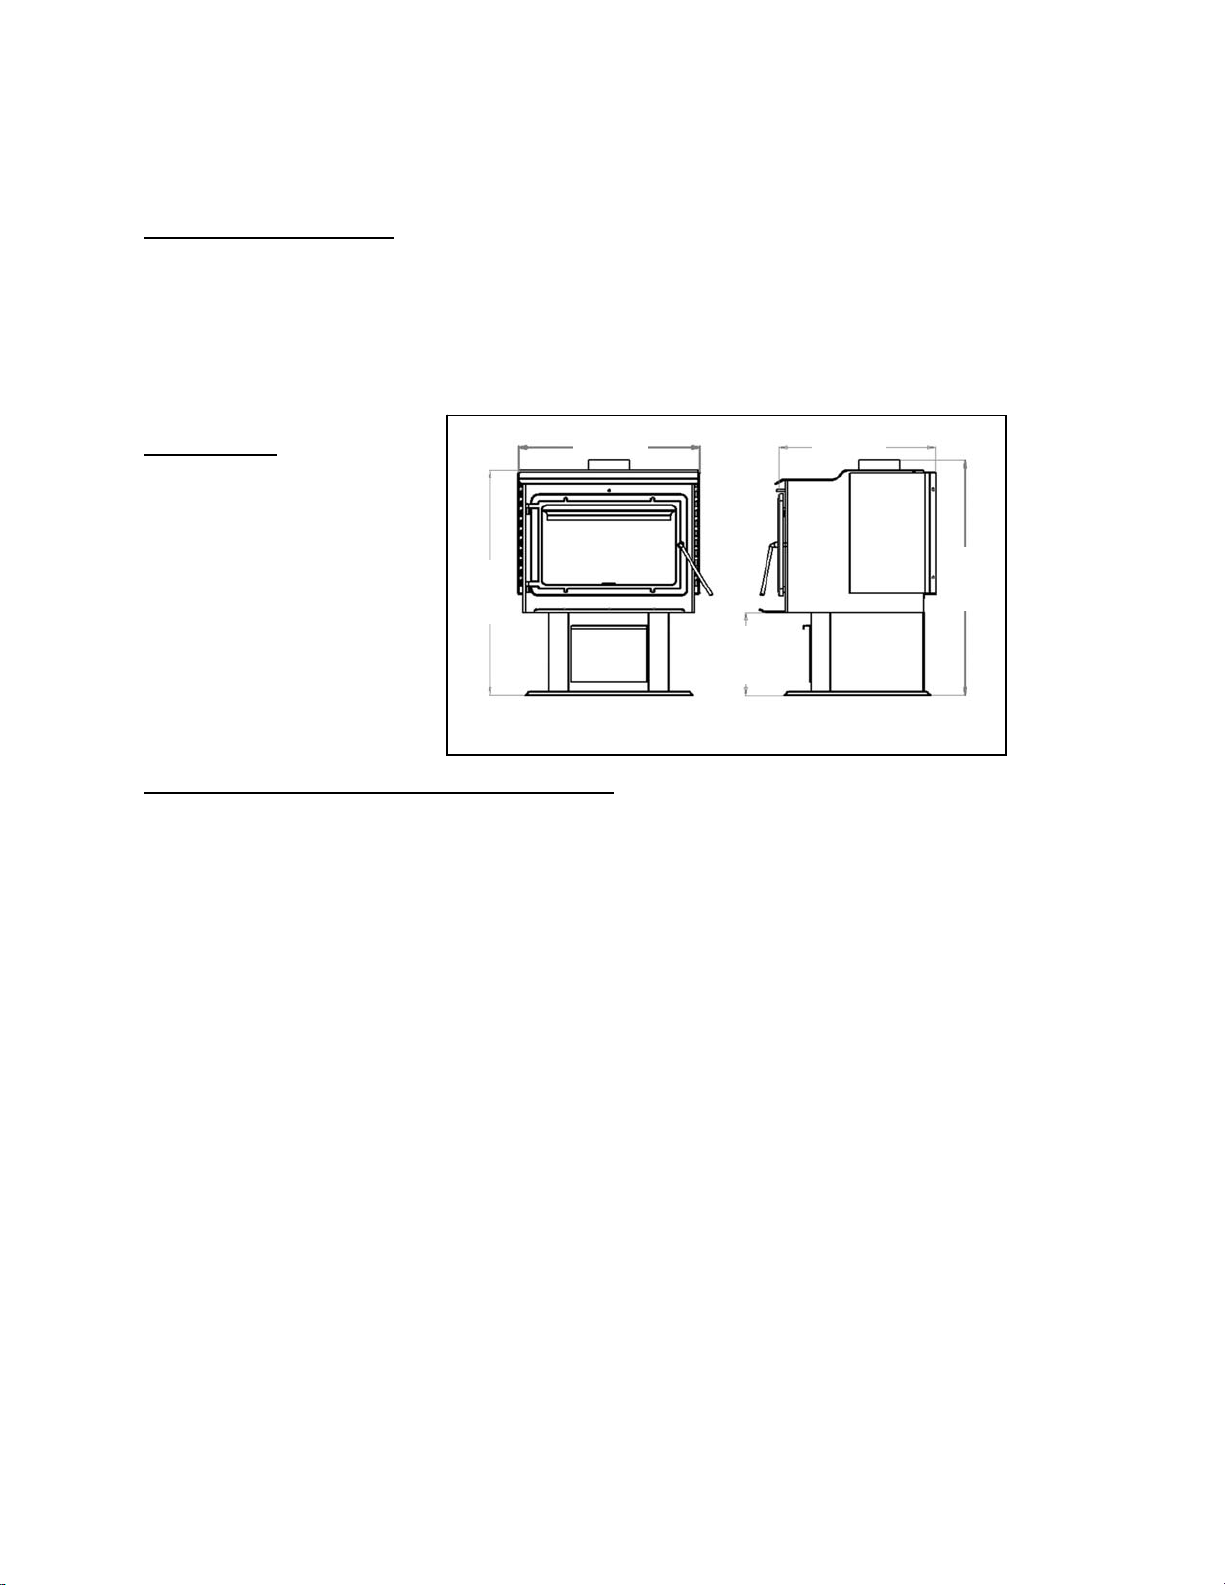
Dimensions(Inches)
EPA and Safety Compliance Specifications
•
EPA
Compliance
......................................................................... ............Certified
•
Particulate
Emissions............................................................................3.472
grams/hr
COEmissions……………………………………………………………………..………….146.09grams/hr
•
Efficiency*
...........................................................................................70.32%HHV
•
Tested
To..................................................................
UL‐1482‐2011,ULC‐S627‐00,
ASTME2515‐11,ASTME2780‐10,EPATestMe thod 28R‐15,CSAB415.1‐10
**‐Maximumburntimesareheavilydependentonthetypeofwoodburnedinthestove;assuch,thesenumbers
mayvary.
***‐Themaximumheatingcapacityofthisunitcanvarygreatlybasedonclimate,constructionstyle,insulation
andamyriadofotherfactors.Usethisinformationinconjunctionwith
aBTUlosscalculationforyourhometo
determineifthisunitwillbesufficientforyourneeds.
“U.S.ENVIRONMENTALPROTECTIONAGENCYCertifiedtocomplywith2015particulate
emissionstandardsforwoodheaters.NotapprovedaftersaleafterMay15,2020.
TAMPERWARNING:“Thiswoodheaterhasamanufacturer‐setminimumlowburnratethat
mustnotbealtered.Itisagainstfederalregulationstoalterthissettingorotherwise
operatethiswoodheaterinamannerinconsistentwithoperatinginstructionsinthis
manual.”
“Thiswoodheaterneedsperiodicinspectionandrepairforproperoperation.Itisagainst
federalregulationstooperatethiswoodheaterinamannerinconsistentwithoperating
instructionsinthismanual.”
34
1
/
4
12
1
/
2
35
3
/
4
27
3
/
8
23
3
/
4

Page | 6
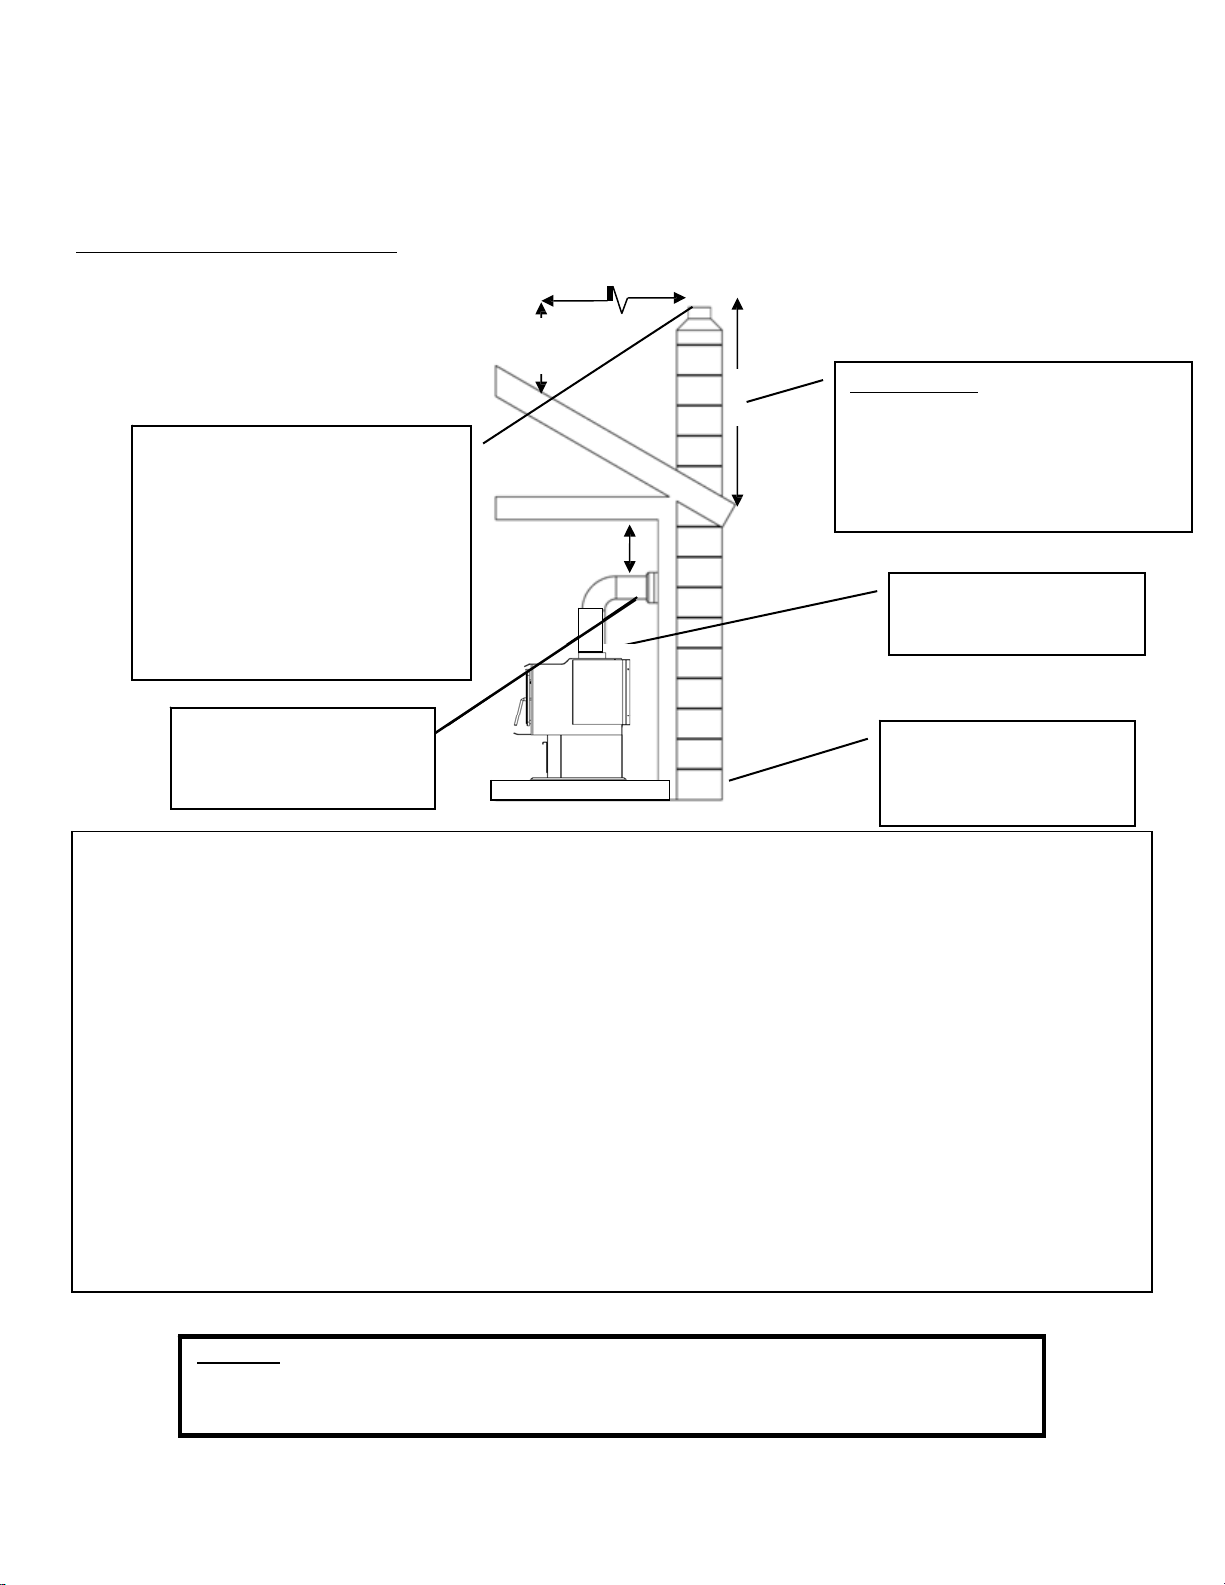
INSTALLATION
Installation Overview
Whenchoosingalocationforyournewstove,thereareamultitudeoffactorsthat
shouldbetakenintoaccountbeforebeginningtheinstallation.
1.TrafficPatterns–Tohelppreventaccidents,thestoveshouldbeplacedinalocation
whereitisoutofthewayofnormaltravelthroughthe home.
2.HeatFlowandEfficiency–Whendecidingonalocationforthestove,considerthe
wayheatmovesthroughout yourhome.Installthestovewhereyouneedtheheat;
basementinstallationsoftendonotallowsufficientheattoflowtotheupperfloors
andatopfloorinstallationwillnotallowanyheattoreachthefloorsbelow. Always
considerthatheatrisesandwilltakethepathofleastresistancewhileitisstillhot.
3.ExhaustLocation–Theenginewhichdrivesawoodstoveisthechimneysystem,so
itisimportanttoconsiderpreciselyhowthechimneysystemwillbeintegratedinto
thestoveinstallation. Ideally,awoodstovechimneywillruncompletelyvertical
fromthefluecollaroftheunitallthewaytotheterminationpointabovetheroof
line. Keepingtheentirechimneysysteminsidetheheatedenvelopeofthehome
willensureastrong,easytoinitiatedraftinthechimney. Althoughexteriorchimney
systemsoftenfunctionproperly,theyaremorelikelytosufferfromcolddowndrafts
atstartuporprovideweakdrafttotheunit. Also,considerthecross‐sectionalarea
ofthechimney;althoughexistingmasonrychimneyscanoftenbe used,alarge
externalmasonrychimneywillresultinaunitthatisdifficultorimpossibleto
operateproperly. Inthatcase,aninsulatedchimneylinerwilloftenberequiredto
supplythenecessarydraft.
4.WallConstruction–Locatingthestovesothattheexhaustsystemcanpassbetween
studswill simplifytheinstallationandeliminatetheneedtoreframeanysectionsof
thewallorceilingtoaccommodatethewallthimbleorceilingbox.
WARNING
•
Donotstoreorusegasolineorotherflammablevaporsandliquidsinthe
vicinityofthisoranyotherappliance.
•
DoNotOver‐fire–Ifanyexternalpartstartstoglow,youareover‐firing.
Reduceintakeairsupply. Over‐firingwillvoidyourwarranty.
•
Complywithallminimumclearancestocombustiblesasspecified.
Failuretocomplymayresultinahousefire.
•
Testedandapprovedforcordwoodonly. Burninganyotherfuelwill
voidyourwarranty.
Page | 7
INSTALLATION
Clearances to Combustibles
Parallel
Wall
Installation
CornerInstallation
Unitto
Side
Wall
*
Chimney
Connector
to
Side
Wall
Chimney
Connector
to
Rear
Wall
Unit
to
Rear
Wall
Unitto
Corner
Chimney
Connector
to
Corner
A
B
C
D
E
F
in.(mm.) in.(mm.) in.(mm.) in.(mm.) in.(mm.) in.(mm.)
SingleWall
Chimney
Connector
Unprotected
Surfacewithside
shields
16(406.4)
26.5(673.1)
15(381)
9(228.6)
13(330.2)
13(330.2)
DoubleWall
Chimney
Connector
Unprotected
Surfacewithside
shields
12(304.8)
22(558.8)
12(304.8)
7(177.8)
10(254)
10(254)

Page | 8
Venting Introduction
INSTALLATION
Venting Guidelines
Thiswoodstoveoperatesona
naturaldraftsystem,inwhichthechimney
systempullsairthroughthestove. Thisunit
mustbeinstalledinaccordancewiththe
followingdetaileddescriptionsofventing
techniques;notinstallingthestovein
accordancewiththedetailslistedherecan
resultinpoorstoveperformance,property
damage,bodilyinjuryordeath. Avoid
make‐shiftcompromiseswheninstallingthe
ventingsystem. England’sStoveWorksis
notresponsibleforanydamageincurred
duetoapoororunsafeinstallation.
Becertainthatallaspectsofthe
ventingsystemareinstalledtotheventing
manufacturer’sinstructions,particularlythe
requiredclearancestocombustibles. Also,
becertaintouseanatticradiationshieldto
preventinsulationfromcontactinga
chimneywhichpassesthroughanattic.
Thechimneysystemisthe“engine”
whichdrivesawoodstove,soitis
imperativeforproperunitfunctionthatthe
ventingsystembeinstalledexactlyas
describedinthefollowingsection.
Ifquestionsarisepertainingtothe
safeinstallationofthestove,ourTechnical
Supportline(800‐245‐6489)isavailable.
Contactyourlocalcodeofficialtobecertain
yourinstallationmeetslocalandnational
firecodes,andifyou’reuncertainabout
howto safelyinstallthestove,westrongly
recommendcontactingalocalNFIcertified
installertoperformtheinstallation.
•
ALWAYSinstallventpipeinstrict
adherencetotheinstructionsand
clearancesincludedwithyour
ventingsystem.
•
DONOTconnectthiswoodstoveto
achimneyfluewhichalsoserves
anotherappliance.
•
DONOTinstallafluepipedamper
oranyotherrestrictivedeviceinthe
exhaustventingsystemofthisunit.
•
USEanapprovedwallthimblewhen
passingandaceilingsupport/fire
stopwhenpassingthroughaceiling.
•
INSTALLthreesheetmetalscrewsat
everychimneyconnectorjoint.
•
AVOIDexcessivehorizontalruns and
elbows,asbothwillreducethedraft
of theventing systemand will result
inpoorstoveperformance.
•
INSPECTyour ventingsystemoften,
tobecertainitisclearofcreosote,
fly‐ashandotherrestrictions.
•
CLEANtheventingsystemas
detailedinthemaintenancesection
ofthismanual.
•
ADHEREtothe10‐3‐2rule regarding
chimneyterminations.
•
INSTALLsinglewallchimney
connectorwiththemaleenddown
topreventcreosoteleakage. Follow
doublewallchimneyconnector
manufacturer’sinstructions
regardingproperpipeinstallation.
WARNING:VentingsystemsurfacesgetHOT,andcancauseburnsif
touched. Noncombustibleshieldingorguardsmayberequired.
Where passage through a wall or partition of combustible construction is desired, the
installation shall conform with CAN/CSA-B365.
Page | 9
FlueGasDirection
Additional Venting Information
INSTALLATION
•
Donotmixandmatchcomponentsfromdifferentpipemanufacturerswhenassembling
yourventingsystem(i.e.DoNOTuseventingpipefromonemanufacturerandathimble
fromanother).
•
Werequireaminimumchimneyheightof15.0ft. Chimneysystemsshorterthanthis
maynotcreatethe amountofdraftwhichisrequiredtooperatethiswoodburningunit.
•
Donotusemakeshiftcompromiseswheninstallingtheventingsystem;haveexisting
chimneysystemsinspectedbeforeuseandbecertainallnewchimneysystemsare
installedtothemanufacturer’sspecificationsandwithonlyULlistedcomponents(ULCif
Canada).
•
PrefabricatedventingsystemsusedforthisstovemustbelistedtoULCS629(Canada)
andUL103HT(US).
•
Neverinstalladraftinduceroranyothersystemwhichincreasesthenaturaldraftofthe
chimney;similarly,donotinstallabarometricorstovepipedamperwiththisunit.
•
Neverusesinglewallordoublechimneyconnectorasachimneysystem;neverpass
eithertypeofchimneyconnectorthroughacombustiblewallwithoutcarefullyfollowing
themanufacturer’sinstructions andthoselistedinthefollowingpageonWallPass‐
Throughs.NEVERpasschimneyconnectorthroughanattic,floor,closetorroof.
•
Onlyuse24gaugeMSGblacksinglewallchimneyconnectororULListed(ULCifCanada)
doublewallchimneyconnector.
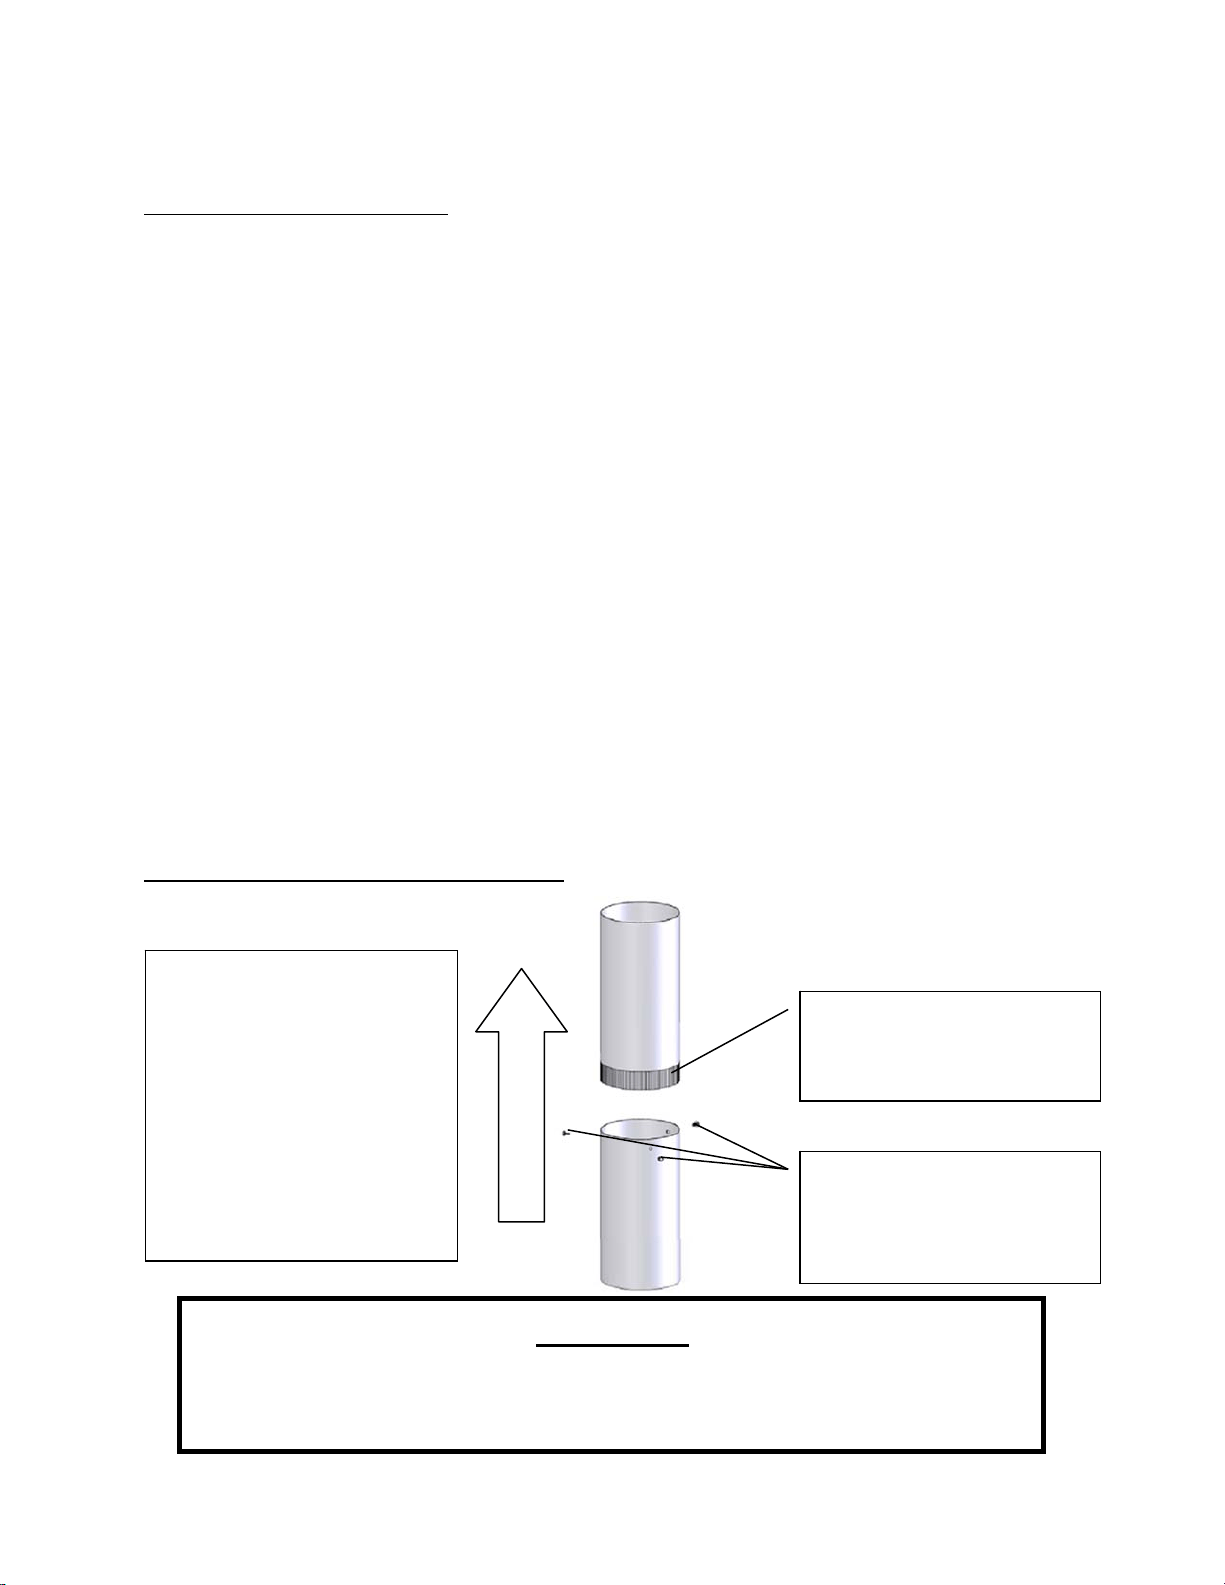
Single Wall Chimney Connector Installation
Themaleendofsinglewall
chimneyconnectoris
installedfacingdownsothat
anyliquidcreosoteinthe
fluewillrunintotheunit
insteadofontotheoutside
ofthepipe(thenaturaldraft
inthechimneysystemwill
preventsmoke leakageat
thejoints).
Crimpedormaleendof
singlewallchimney
connectormustfacedown.
Fasteneachsinglewall
chimneyconnectorjoint
withthreesheetmetal
screws.
WARNING
•
INSTALLVENTATCLEARANCESSPECIFIEDBYTHEVENTMANUFACTURER.
•
HOT!Donottouch! Severeburnsorclothingignitionmayresult.
•
Glassandothersurfacesarehotduringoperation.
INSTALLATION
Wall
Pass-Throughs
In
Canada
, the
installation
must
conform
to CAN/CSA-8365 when passing through
combustible
construction.
Page
10
Page | 11
18.0in.
2.0ft.
3.0ft.
INSTALLATION
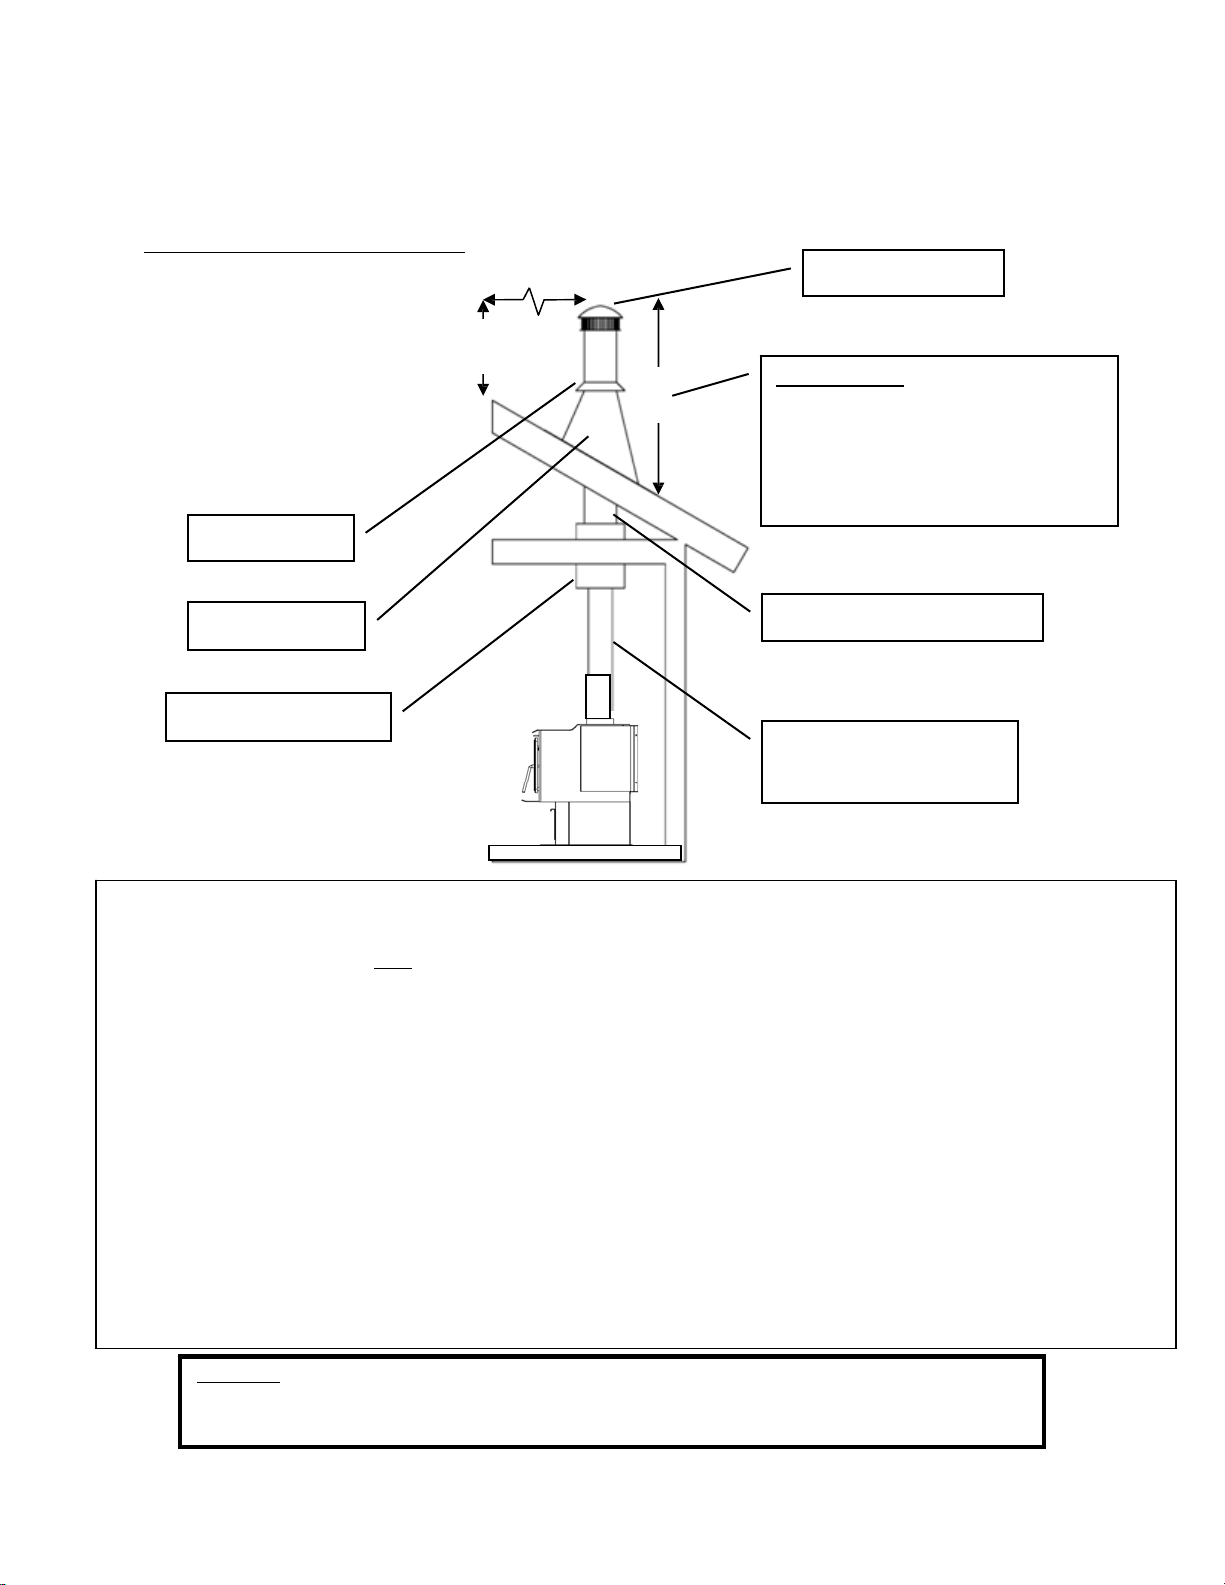
Approved Venting Method 1:ThroughtheWallFactoryBuiltChimney
10
ft.
TerminationCap
StormCollar
RoofFlashing
The 10‐3‐2 Rule:Thechimneysystem
mustterminate3.0ft.abovethepoint
whereitscenterlinepassesthroughthe
roofANDthechimneymustterminate
2.0ft.aboveanypartofthedwelling
withina10ft.radiusofthechimney.
WallThimble
ClassAChimneySystem
ChimneyConnector
(SingleorDoubleWall)
TeeandTeeSupport
•
PrefabricatedchimneysystemsmustconformtoUL‐103HT(2100°F)fortheU.S.andULC‐S629(650°C)for
Canada.
•
Thiswoodburningunitisonlylistedforinstallationwith 6.0”diameterchimneyconnectorandchimneysystems.
Installingthisunitonprefabricatedchimneyslargerthan6.0”diameterwillresultindecreaseddraftandthe
potentialforpoorunitperformance.
•
Followallventingsystemmanufacturer’sinstallationrequir ementsandrequiredclearances.
•
Usethreesheetmetalscrewsateachsinglewallchimneyconnectorjoint(checkmanufacturer’s
recommendationswhendoublewallchimneyconnectorisused).
•
Drillthreeholesinthefluecollaroftheunitandattachthechimneyconnectortotheunitusingsheetmetal
screws(holesshouldbepre‐drilledinfluecollarfromfactory).
•
Properlyattachtheprefabricatedchimneysystemtothehomeinstrictaccordancewiththeprefabricated
chimneysystemmanufacturer’sinstructions.
•
Avoidnumerouselbowsandexcessivehorizontalruns asbothwillleadtopoordraftandincreasedcreosote
accumulation. Horizontalrunsofchimneyconnectormustneverexceed4.0ft. andtheoveralllengthofthe
chimneyconnectormustnotexceed8.0ft.
•
Specialadaptersandslipconnectorsareavailabletoeliminatetheneedtocutsinglewallchimneyconnector.
Doublewallchimneyconnectormustbeusedwiththeseslipconnectors,asitcannotbetrimmedtolength.
Please Note:Installationdiagramsareforreferencepurposesonlyandarenotdrawntoscale,normeanttobeusedasplans
foreachindividualinstallation. Pleasefollowallventingsystemrequirements,maintaintherequiredclearancesto
combustibles,andfollowalllocalcodes.
Page | 12
2.0ft.
3.0ft.
INSTALLATION
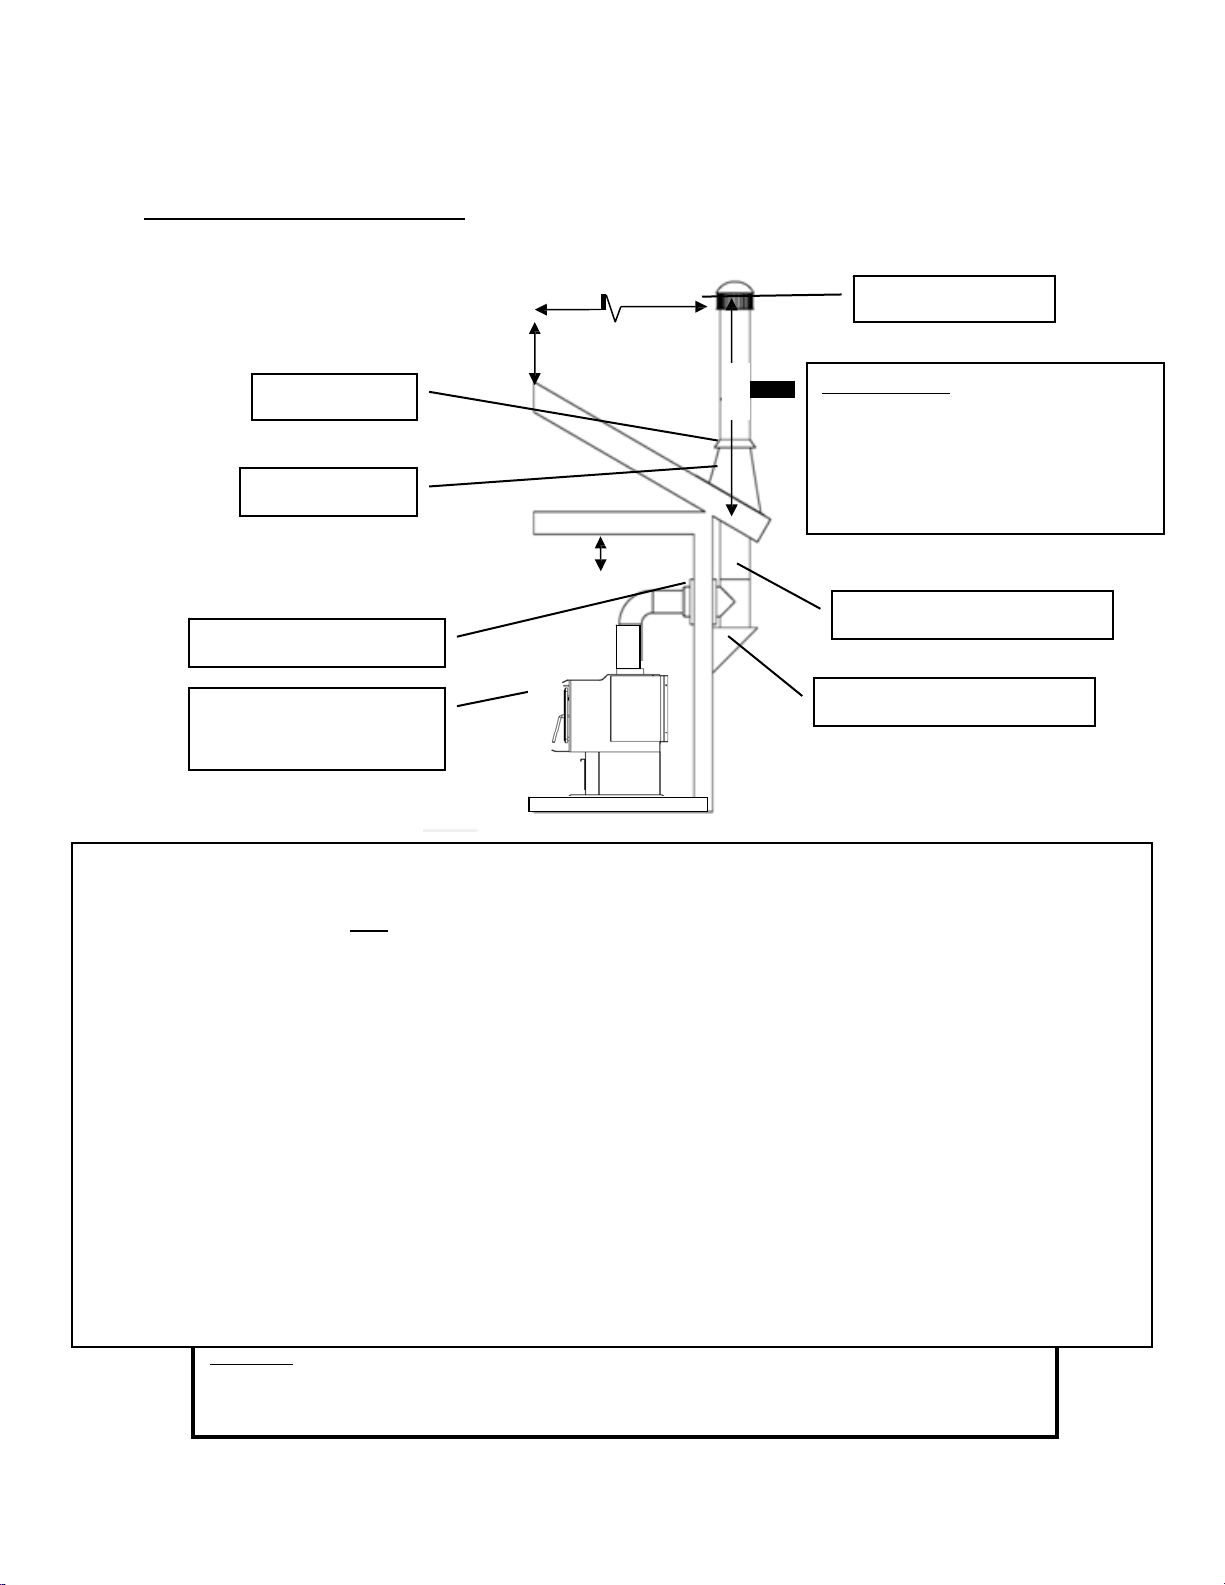
Approved Venting Method 2:ThroughtheCeiling
10
ft.
TerminationCap
StormCollar
The 10‐3‐2 Rule:Thechimneysystem
mustterminate3.0ft.abovethepoint
whereitscenterlinepassesthroughthe
roofANDthechimneymustterminate
2.0ft.aboveanypartofthedwelling
withina10ft.radiusofthechimney.
RoofFlashing
ClassAChimneySystem
CeilingSupportBox
ChimneyConnector
(SingleorDoubleWall)
•
PrefabricatedchimneysystemsmustconformtoUL‐103HT(2100°F)fortheU.S.andULC‐S629(650°C)for
Canada.
•
Thiswoodburningunitisonlylistedforinstallationwith 6.0”diameterchimneyconnectorandchimneysystems.
Installingthisunitonprefabricatedchimneyslargerthan6.0”diameterwillresultindecreaseddraftandthe
potentialforpoorunitperformance.
•
Followallventingsystemmanufacturer’sinstallationrequire mentsandrequiredclearances.
•
Usethreesheetmetalscrewsateachsinglewallchimneyconnectorjoint(checkmanufacturer’s
recommendationswhendoublewallchimneyconnectorisused).
•
Drillthreeholesinthefluecollaroftheunitandattachthechimneyconnectortotheunitusingsheetmetal
screws(holesshouldbepre‐drilledinfluecollarfromfactory).
•
Properlyattachtheprefabricatedchimneysystemtothehomeinstrictaccordancewiththeprefabricated
chimneysystemmanufacturer’sinstructions.
•
Theoveralllengthofthechimneyconnectormustnotexceed8.0ft. Inthecaseofcathedralceilings,the
prefabricatedchimneysystemshouldextendto8.0ft.fromthetopoftheunit.
•
Specialadaptersandslipconnectorsareavailabletoeliminatetheneedtocutsinglewallchimneyconnector.
Doublewallchimneyconnectormustbeusedwiththeseslipconnectors,asitcannotbetrimmedtolength.
Please Note:Installationdiagramsareforreferencepurposesonlyandarenotdrawntoscale,normeanttobeusedasplans
foreachindividualinstallation. Pleasefollowallventingsystemrequirements,maintaintherequiredclearancesto
combustibles,andfollowalllocalcodes
Page | 13
2.0ft.
18.0in.
3.0ft.
INSTALLATION
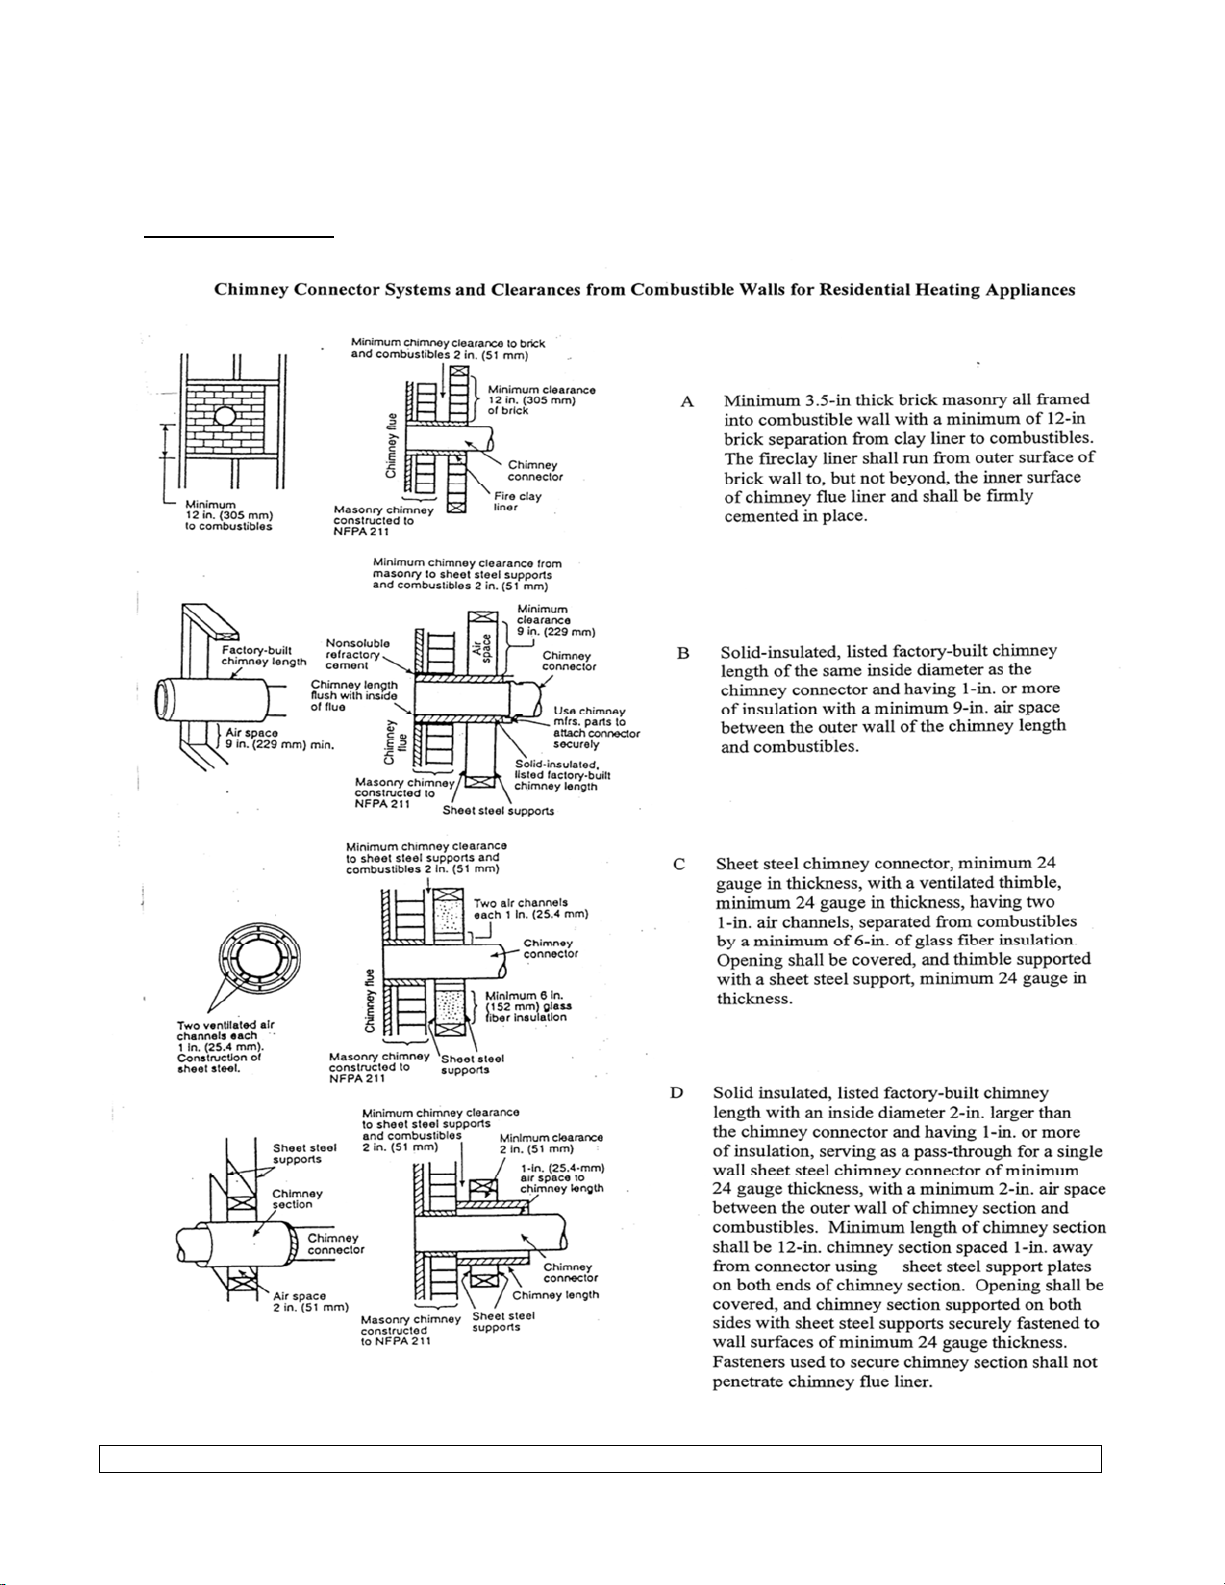
Approved Venting Method 3:InternalorExternalMasonryChimneySystem
10
ft.
Chimneylinercross‐sectional
area(LengthxWidth)must
be
nolargerthantwicethecross‐
sectionalareaofthefluecollar
(2x28.27in
2
=56.55in
2
). If
chimneylinerislargerthan
56.55in
2
,reliningwitha5.5”
or6.0”linerisrequired
The10‐3‐2Rule:Thechimneysystem
mustterminate3.0ft.abovethepoint
whereitscenterlinepassesthroughthe
roofANDthechimneymustterminate
2.0ft.aboveanypartofthedwelling
withina10ft.radiusofthechimney.
ChimneyConnector
(SingleorDoubleWall)
MasonryThimblewith
properclearanceto
combustibles
AshCleanoutsmust
haveanairtightsealto
preventweakdraft.
•
Followtheruleslistedaboveconcerningmaximumpermissiblefluelinersize;installingthisunitonmasonry
chimneysexceeding56.55
in
2
incross‐sectionalareawillresultindecreaseddraftandthepotentialforpoorunit
performance.
•
Usethreesheetmetalscrewsateachsinglewallchimneyconnectorjoint(checkmanufacturer’s
recommendationswhendoublewallchimneyconnectorisused).
•
Drillthreeholesinthefluecollaroftheunitandattachthechimneyconnectortotheunitusingsheetmetal
screws(holesshouldbepre‐drilledinfluecollarfromfactory).
•
Avoidnumerouselbowsandexcessivehorizontalruns asbothwillleadtopoordraftandincreasedcreosote
accumulation. Horizontalrunsofchimneyconnectormustneverexceed4.0ft. andtheoveralllengthofthe
chimneyconnectormustnotexceed8.0ft.
•
Atightsealatthethimbleiscrucialforproperunitperformanceandtocreateasafeinstallation. Usetheproper
adapterdesignedforconnectingsingle ordoublewallchimneyconnectortoamasonrythimble.
•
Haveexistingmasonrychimneysinspectedforsafetyandproperclearancestocombustiblesbeforeputtingthem
intoservice;aqualifiedchimneysweepcanperformthisinspection.
•
Externalmasonrychimney s oftensuffercolddowndraftsandpoordraftperformanceevenwhentheymeetthe
cross‐sectionalarearules. Inthiscase,a6.0”insulatedlinermaybenecessary.
Please Note:Installationdiagramsareforreferencepurposesonlyandarenotdrawntoscale,normeanttobeusedasplans
foreachindividualinstallation. Pleasefollowallventingsystemrequirements,maintaintherequiredclearancesto
combustibles,andfollowalllocalcodes.

Page | 14
INSTALLATION
INSTALLATION INTO A MASONRY FIREPLACE
Preparation
Measure your hearth to ensure it is large enough to accept the unit.
Unit must have a 36” clearance from the top of the stove to a mantel in accordance with NFPA 211
For the USA: Hearth must extend at least 16 in. from the front of the fuel opening.
For Canada: Hearth must extend at least 18 in (450.0 mm) from the front of the fuel opening.
Keep in mind that this type of a installation will make it difficult to change speeds on the
blower frequently. We recommend picking a blower speed and sticking with it, since
adjusting the blower will be difficult because of the tight installation.
WARNING: DO NOT ATTEMPT TO ADJUST BLOWER DURING OPERATION. SKIN BURNS
MAY OCCUR WHEN MAKING CONTACT WITH THE UNIT. WAIT FOR UNIT TO COMPLETELY
COOL BEFORE ATTEMPTING TO ADJUST BLOWER.
Inspect your hearth to be sure it is constructed of a noncombustible material such as brick or
stone. Do not install this stove on a hearth that is constructed of wood framework that is covered
by brick or stone and do not install this unit in a zero (0) clearance fireplace. The manufacturer will
not be held responsible for an accident resulting from this stove being installed on a hearth
constructed of a combustible material.
Inspect your fireplace to ensure it is in proper working order and free of any obstructions.
Prior to installation, remove the existing damper or wire it to fasten it open.
Venting Your Stove - Direct Connect
When this unit is direct connected it will require six inch (6”) diameter 24 gauge pipe from the stove
through the damper opening. (NOTE: The chimney connector must be attached to the appliance
with a minimum of three (3) screws, and 3 screws should be used to attach each adjoining
section.)
We highly recommend having the chimney fully lined with a 6 inch liner to ensure proper draft. This
will make it necessary to block off the open area on both sides of the pipe that passes through the
damper opening, which can be done with sheet metal or by packing flame retardant fiberglass
insulation in the open areas (no paper or combustibles). You must be sure the draft from the
chimney is being pulled through the stove, and not around the connector pipe. .
We highly recommend you have this done by a professional. You should also contact your local
authorities to be sure you are following all codes.
Page | 15
INSTALLATION
WARNING
DONOTINSTALLINASLEEPINGROOM.
CAUTION
THESTRUCTURALINTEGRITYOFTHE
MANUFACTUREDHOMEFLOOR,WALL
AND
CEILING/ROOFMUSTBE
MAINTAINE
D.
Caution
NEVERdrawoutsidecombustionair
from:
Wall,floororceilingcavity
or
enclosedspacesuchasanattic,garageor
crawl
space.
Mobile Home Installation(USAONLY,NOTAPPROVEDFORCANADIANMOBILEHOMEINSTALLATION)
•
ThewoodstoveMUSTbesecuredtothefloorofthemobilehomeusinglagboltsandtheholes
providedinthebottomoftheunitforthis
purpose.Usea#8copperwiretoground
stovetoframeofmobilehome.
•
Thewoodstovemustbeconnectedtothe
chimneysystemwithdoublewallchimney
connectorwhichisULlistedforusein
mobileandmanufacturedhomes.
•
Carefullyfollowallclearanceslistedinthe
appropriatesectionofthismanualANDfollow
theventingmanufacturer’s
minimum
clearance
requirements. Similarly,becertain
theventingsystemusedisapproved
formobile
homeuse.
•
Installationmustbeinaccordancewith
ManufacturersHome&SafetyStandard
ChimneyCap/SparkArrestor
ClassAChimneySystem
RoofFlashingandStormCollar
JoistShield/Firestop
MobileHomeApprovedDouble
WallChimney
Connector
Usesiliconetocreateavapor
barrierwherethechimneypasses
throughtoexterior.
(HUD)CFR3280,Part24aswellasanyapplicablelocalcodes.
Outside Combustion Air
•
Theuseofoutsidecombustionairismandatorywheninstalling thiswoodstoveinamobileor
manufacturedhome.
•
Theoutsideairconnectionpipe protrudesfromthebottomcenterofthestove;akitisavailable
fromEngland’ sStoveWorks,Inc.designedfor connecti ngthis unittooutsidecombustionair.[Part
No.AC‐OAK3]
•
IfitisnotfeasibletousetheAC‐OAK3outsideairhookupkitinyourstoveinstallation,other
materialsmaybeused,providedthefollowingrulesarefollowed:
o Thepipeusedforoutsideairhookupmustbemetal,withaminimumthicknessof.0209in.
(25gaugemildsteel)orgreaterandaninsidediameterofapproximately2.75in.
o Keeppiperunsshortanduseamechanicalfastenerateachpipejoint.
o Ascreenorotherprotectiondevicemustbefittedovertheoutsideairterminationpointto
preventrain,debrisandnuisanceanimalsfromenteringthepipingsystem. Inspectthe
outsidecombustionairinletforblockanddebrismonthly.
Page | 16
FLOORPROTECTION
•
ThiswoodstoverequiresaULlistedtype1sparkandemberfloorprotectorifthestoveistobe
installedonacombustiblefloor. Ifthefloorthestoveistobeinstalledonisalready
non‐combustible(i.e.aconcretefloorinabasement),nofloorprotectionis
needed(althougha
decorativefloorprotectorcanstillbeusedforaestheticreasons).
•
WhenusinganyULlistedtype1sp ar k andemberfloorprotector,co nsiderthatthisstoveisnotonly
heavybutwillinduceheatingandcoolingcyclesonthefloorprotectorwhichcandamagetileand
loosenmortarandgroutjointslocatednearthestove.
•
Thespar kandem berfloorprotectorshouldbeULapprovedorequivalent(ULCifCanada)andmust
benoncombustible. Sincethemajorityoftheheatfromthisunitisradiant,thefloorprotectoronly
servestokeepashesandsparksfromlandingoncombustibleflooringneartheunit. Ahearth
rugis
NOTanapprovedsubstituteforaproperhearthpad.NoRValueisnecessary.
•
FortheUS:Thefloorprotectormustextendatleast16in.fromthefrontofthefuelopening,8in.
fromthesidesofthedooropeningand8in.fromtherearoftheunit.
•
ForCanada:Thefloorprotectormustextendatleast450.0mmfromthefrontofthefuel
opening,
200.0mmfromthesidesofthedooropeningand200.0mmfromtherearoftheunit.
•
Thesparkandemberfloorprotectormustextend2in.(50.8mm.)oneithersideofanyhorizontal
ventingrunsandextenddirectlyunderneathanyverticalventingpipe.
CAUTION
NEVERUSEGASOLINE,GASOLINE‐TYPELANTERNFUEL,KEROSENE,CHARCOALLIGHTER
FLUID,
ORSIMILARLIQUIDSTOSTARTOR“FRESHENUP”AFIREINTHISHEATER. KEEPALL
SUCH
LIQUIDSWELLAWAYFROMTHEHEATERWHILEINUSE. ADDITIONALLY,NEVERAPPLY
FIRE‐
STARTERTOANYHOTSURFACEOREMBERSINTHE
STOVE.
38½in
47in
43
3
/
8
in
49¾in

Page | 17
OPERATION
Break‐In Fires
•
Thiswoodburningunitisconstructedofheavygaugesteelandcastironand isbuilttolastalong
time. However,inordertoensurenoexcessivethermalstressesareinducedonthe
metal
during
thefirstfire,threebreak‐infiresshouldbeburned,eachoneslightlyhotterthanthelast.
Thesebreak‐infireswillnotonlyhelpthestovebodyacclimatetothehightemperaturesofthe
fire,butwillalsoslowlycurethehightemperaturestovepaint,whichwillensurethe
high
qualityfinishlastsforyears.
•
Thisstovehasasingleaircontrolrodwhichregulatesthewoodburnrate;whentheprimaryair
controlslideispulledallthewayoutoftheunit,thestovewillburnmoreslowlyandputout
heatoveralongertimeperiod. Conversely,whentheaircontrolslide
ispushedallthewayin,
theunitwillburnmorequicklyandputoutalargeramountofheatoverarelativelyshorter
time
period. Donotattempttomodifytherangeofaircontroladjustmentforanyreason.
•
Thefirstbreak‐infireshouldbejustalargekindlingfire,gettingthestovetoabout300°Fas
measuredbyamagneticthermometerontherightorleftsideofthestove,abovethe
door.
Once
thistemperatur ehasbeenreached,allowthefiretodieoutwiththeaircontrolopen.The
secondandthirdbreak‐infiresshouldbeabitlarger,withsomesmalldrysplitsaddedtothe
kindlingload. Thetemperaturegoal duringthesefiresisabout35 0°F–450°
F;don’tletthefire
gethotterthanthat.
Continuous Operation
•
Afterthebreak‐infiresarecomplete,thisunitisreadyforcontinuousoperation. Whenburning
thestovecontinuously,donotallowashandcoalstoaccum ulatehigherthantheairholeinthe
dogbox. Excessivecoalingisoftenaresultofburningwoodattoohighaburn
rate,andthecoal
bedshouldbeallowedtoburndownbeforereloadingthestovewithfreshwood.
•
Combustionairisdeliveredtothestoveattwolocations:Themajorityoftheprimarycombustion
airentersthefireboxviatheair‐washsystemwhichkeepstheglasscleanandfeedstheprimary
combustionflamesonthetopsurfacesofthewood;someprimarycombustionairisfedinto
the
coalbedviathedogboxholeinthebottom,frontboxofthestove. (Thisairissuppliedfrom
undertheunit.)Everyeffortmustbetakentomaintaintheareainfrontofthisholefreeofash.
•
Whenloadingthestoveforalongtermburn,itismostusefultorakea“v”inthecenterofthe
coalbed,toallowtheprimaryairbleedholetopushairallthewaytotherearoftheunit.
•
Afterloadingthestovewithafullfireboxoffreshwood,itisimportanttooperatetheunitwith
theaircontrolinthefullopenpositiontoproperlycharthewoodloadanddriveofftheinitial
moistureinthefreshwood. Oncethewoodhasbeenproperlycharred
andiscompletely
ignited,theaircontrolcanthenbesettothedesiredheatoutputlevel.
o AirControlrange:Iftheaircontrolispulledfullyout,thestoveisintheLowBurnsetting.
Pushedapproximately½wayinistheMediumsetting,andwiththeair con trol
pushedall
thewayin,thestoveisintheHighsetting.
•
Thisunitalsooffersanewfeature. Whenloadingthestoveforalonglowburn,youcansetthe
aircontroldampertoallowtheunittoheatupandgetagoodburngoingbeforetheairis
closed
offtotheLowposition. SimplypulltherodouttoLowandturnitcounter‐clockwiseuntil
youhearaslight “click”(aboutaquarterofaturn). Whenitisreadythedamperwillshutitself.
Thiswillworkforlowandmediumlowsettings.Thisensuresgood
combustionattheLowest
burnrate(oreventheMediumburnrate,ifsettoMedium).

age | 18
OPERATION
•
England’sStoveWorks,Inc.alwaysrecommendstheuseofamagneticstovethermometer,so
thatthetemperatureoftheunitcanbemonitored. Whenusingamagneticstovethermometer,
locatethethermometerabovethedooroneithertheleftorrightsideofthestoveandusethe
followingtemperatures
asroughguidelinestodeterminetheburnrateandheatoutputlevelof
thestove:
o Normalwoodstoveoperationshouldoccurbetween350°F(177°C)and550°F(288°C),
with350°F(177°C) to450°F(232°C)beingalowtomediumheatoutputleveland450°F
(232°C)to550°F(288°C)beingamedium
tohighheatoutputlevel. Operatingthestove
at600°F(316°C)wouldbeconsideredthemaximumcontinuousoperatingtemperature
permissibleandunitdamagemayresultfromoperatingatthathighofaburnratefor
extendedtimeperiods. Allowingtheunittoreach750°F(398°C)orhigherisdefinedas
over
‐firingandwillresultinunitdamage.
•
Theoptionalroomairconvectionblowerwasdesignedtoextractthemaximumamountofheat
fromthestove,forthehighestpossibleheattransferintotheroom. Sincetheblowerisso
efficientatremovingheatfromtheunit,itisveryimportanttoonlyoperatetheroomairblower
afterafreshwoodloadhasbeenallowedtoburnforatleastthirty(30)minutes. Allowingafresh
loadofwoodtoburnwithoutthebloweronensuresthattheentireunitreachesproper
operationtemperaturesandthatthesecondarycombustionsystemisfunctioningproperly.
Additionally,followtheguidelinesbelow
foracceptableblowerspeeds.
•
Whenusingtheoptionalroomairconvectionblower(PartNo.AC‐16,oryoucanupgradetothe
AC‐30),theblowershouldbeoperatedasfollowsdependingonheatoutputlevel:
Burn
Rate
High MediumHigh Medium MediumLow Low
BlowerSpeedAC‐16 High
High
Low
Low
Low
BlowerSpeedAC‐30 High MediumHigh Medium MediumLow Low
Creosote – Formation and Need for
Removal
Whenwoodisburnedslowly,itproducestarandotherorganicvapors,
which
combinewithexpelledmoisture toformcreosote. Thecreosote
vapors
condenseintherelativelycoolchimneyflueofaslow‐burningfire. Asa
result,
creosoteresidueaccumulatesonthefluelining. Whenignited,this
creosote
makesanextremelyhotfire. Thechimneyandchimneyconnectorshould
be
inspectedatleastonceeverytwomonthsduringtheheatingseason
to
determineifacreosotebuilduphasoccurred. Ifcreosotehasaccumulated,
it
shouldberemovedtoreducetheriskofchimney
fire.
DONOTUSEGRATESORANDIRONSOROTHERWISEELEVATEFIRE–BUILD
WOODFIREDIRECTLYON
HEARTH
DONOTOPERATEWITHTHEMAINDOOROPEN–OPERATINGTHESTOVEWITHTHE
MAIN
DOOROPENWILLCREATEANOVER‐
FIRE
Intheeventofacreosoteorsootfire(chimneyfire),closetheaircontrolonthe
stove,
contactthelocalfiredepartmentandgetout! Donotthrowwateronthefire!
Contact
yourlocalfireauthorityformoreinformationonhowtohandleachimneyfire
and
P
developasafeevacuationplanforyouandyourfamilyintheeventofachimneyfire.

Page | 19
OPERATION
Additional Safety Guidelines
CAUTION:Whenaddingfueltothestove,theblowermustbeturnedOFF.
•
Theinstallationofsmokedetectorsishighlyrecommendedwheninstallingthisoranyother
solidfuelburningappliance. Smokedetectorsshouldbelocatednearorineveryroomofthe
home,particularlysleepingrooms.
•
Asmokedetectorcanbeinstalledinthesameroomasthiscordwoodburningunit;installingthe
smokedetectortooclosetotheunitcanleadtonuisancealarms duetoslightwispsofsmoke
emittedduringthefirestartingorreloadingprocess. Duetothis,thesmokedetectorin
the
sameroomastheunitwillbemostusefulifitislocatedas farfromtheunitastheroomwill
permit.
•
Thisstoveisdesignedtoburnnaturalwoodonly.Higherefficienciesandloweremissions
generallyresultwhenburningairdried,seasonedhardwoods,ascomparedtosoftwoodsorto
greenorfreshly‐cuthardwoods.DONOTBURNgarbage,lawnclippingsoryardwaste,
materialscontainingrubber,includingtires;Materialscontaining
plastic:Wasterpetroleum
products,paintsor paintthinners,orasphaltprodu c ts;Material scontainingasbestos;
Constructionordemolitiondebris;Railroadtiesorpressure‐treatedwood;Manureor
animalremains;Saltwater driftwoodorpreviouslysaltwatersaturatedmaterials;Paper
products,cardboard,plywood,orparticleboard.Theprohibi tionagainstburningthese
materialsdoesnot
prohibittheuseoffirestartersmadefrompaper,cardboard,sawdust,
waxandsimilarsubstancesforthe purposeofstartingafireinanaffectedwoodheater.
Burningthesematerialsmayresultinreleaseof toxicfumesorrendertheheaterineffective
andcausesmoke.
•
Burningfuelsotherthancordwood,particularlycoalandcharcoal,canresultinhazardous
concentrationsofcarbonmonoxidebeingemittedintothedwelling. Forthesereasons,NEVER
burncoalorcharcoalinthiscordwoodstove.Installingacarbonmonoxidedetectorandbeing
awareofthesymptomsofcarbonmonoxidepoisoningcan
helpreducetheriskofcarbon
monoxiderelatedissues.
•
Thisunitwasdesignedforoperationonlywiththeloadingdoorclosedandtightlylatched.
Operatingthisunitwiththeloadingdoorlatchedlooselyoropenwillallowexcessivecombustion
airtoreachthefireandwillresultindangerouslyhighunittemperatures. Highunit
temperaturescan damagetheunit,
voidthewarrantyorignitecreosotedepositedinthe
chimneysystembyprevious,slowburningfires.
•
Thenaturaldraftthatpullsairthroughthis unitandallowsthefiretoburnusestheindoorairof
thedwellingforcombustion,unless theunitisconnectedtoanoutsidecombustionairsource.
Kitchenrangeventhoods,furnacesandotherairmovementappliancesinthehomeareoften
alsoremovingairfromthedwelling;iftheamountofairfiltrationorleakagebackintothehome
isexceededbytheairbeingremoved,negativepressuremaybecreatedinthehome.
•
Sincethisisanaturaldraftappliance,itwilloftenbethefirstappliancetohaveproblemsrelated
tonegativepressure. Ifsmokeisforcedoutthechimneyconnectorjointsoroutoftheair
inductionsystemoftheunit,theunitislikelyfightingnegativepressureinthedwelling.
Crackingawindowordoorneartheappliancecanhelpequalizethenegativepressure;
DONOTSTOREFUELCLOSERTHANSPECIFIEDCLEARANCESTOCOMBUSTIBLESOR
WITHINTHESPACENEEDEDFORLOADINGTHESTO
V
EANDFORASHREMO
V
AL.

Page | 20
ultimately,anunrestrictedsourceofoutsidecombustionmaybenecessaryforproperunit
function.
•
Iftheunitisconnectedtooutsideair,becertaintomonitortheexteriorinlettothecombustion
systemforicingorsnowaccumulation. Allowingtheoutsideairconnectionto
becomerestricted
willresultinairstarvationtotheunit.
SafeWood‐BurningPractices
Onceyourwood‐burningapplianceisproperlyinstalled,followtheseguidelinesfor
safeoperation:
Keepallflammablehousehoulditems‐drapes,furniture,newspapers,andbooks‐
farawayfromtheappliance.
Startfiresonlywithnewspaper,drykindlingandallnaturalororganicfire
starters.Neverstart
afirewithgasoline,kerosene,orcharcoalstarter.
Donotburnwetorgreen(unseasoned)logs.
Donotuselogsmadefromwaxandsawdustinyourwoodstove‐theyaremadeforopen
hearthfireplaces.Ifyouusemanufacturedlogs,choosefromthosemadefrom100
percentcompressed
sawdust.
Buildhotfires.Formostappliances,asmolderingfireisnotasafeorefficientfire.
Keepthedoorstoyourwood‐burningapplianceclosesunlessloadingorstokingthelive
fire.Harmfulchemicals,likecarbonmonoxide,canbereleasedintoyourhome.
Regularlyremoveashesfromyourwood
‐burningapplianceintoametalcontainerwitha
cover.Storethecontainerofashesoutdoorsonacementorbrickslab (notonawood
deckornearwood).Seeashremovalinstructionsinyourowner’smanual.
Keepafireextinguisherhandy.
Remembertocheckyourlocalairqualityforecast
beforeyouburn.
Page | 21
Daily Maintenance
MAINTENANCE
•
Inspectthefireboxforashaccumulation;removeexcessashandfollowinstructions
belowregardingdisposal .Ashshouldnotbeallowedtoaccumulateinthestovetothe
pointthatitcoversthedogboxhole.
Monthly Maintenance
•
Checktheblowerfordustaccumulation(ifinstalled);checkthedoorhandleforproper
operationandtobecertainanairtightsealisstillbeingmadebythedoor.
•
Inspectthechimneysystemandchimneyconnectorandsweepifnecessary. Although
cleaningmayberequiredlessthanmonthly,ALWAYSinspecttheventingsystem
monthlytodecreasethechanceofachimneyfire.
•
Visuallyinspecttheceramicfiberinsulatingboardsinthefireboxforcracksand/or
breakage. Slightsurfacecrackswillnotaffecttheperformanceoftheboards,but
crackedorcrumblingboardsshouldbereplacedimmediately.
•
Visuallyinspectthesecondarycombustiontubesforcracks,warpingandcorrosion.
Althoughthesetubesareconstructedfromstainlesssteel,theyoperateatveryhigh
temperaturesandcaneventuallywearoutfromnormaluse.
Yearly Maintenance
•
Checkallgaskets(windowanddoor)forwearandtobecertaintheystillmaintainan
airtightseal. Seethefollowingpageforinstructions.
•
Thoroughlycleanthechimneysystemandthechimneyconnectorsystem. Sincethe
chimneyconnectorisgenerallyexposedtohighexhausttemperatures,inspectit
carefull
y
forleaksandweakspots;replaceanyquestionablepieces.[Inthecaseof
straightthroughtheroofchimneysystem,becertaintoremovetheceramicfiberbaffles
beforepushingthechimneysweepingbrushdownintothefirebox. Forcefullyhitting
thetopofthebafflewithacleaningbrushorrodcandamageordestroythebaffle.]
•
Removeallashfromthestove,including the ashwhichaccumulatesonthetopofthe
fireboxbaffles. Leavetheaircontrolopenduringthenon‐heatingmonthstoallow
someairtoflowthroughthestovetohelppreventcorrosion.Asmallopencontainerof
catlitterinthestovecanhelppreventcorrosionduringthehumidsummermonths;be
certaintoremoveitbeforebuildingafireinthefall.
IMPROPERGASKETMAINTENANCE,INCLUDINGFAILURETOREPLACEGASKETS,CAN
CAUSEAIRLEAKSRESULTINGINANUNCONTROLLABLEFIREINTHEUNIT.
DisposalofAshes–Ashesshouldbeplacedinametalcontainerwithatightfittinglid. The
closedcontainerofashesshouldbeplacedonanoncombustiblefloororontheground,well
awayfromallcombustiblematerials,pendingfinaldisposal. Iftheashesaredisposedofby
burialinsoilorotherwiselocallydispersed,theyshouldberetainedintheclosedcontainer
untilallcindershavebeenthoroughlycooled.

Page | 22
Inspecting Gaskets
MAINTENANCE
Anairtightsealatthedooropeningiscrucialtoproperstoveperformance. Anyairleakage
atthisareacancauseanover‐firesituationandisthereforeaserioussafetythreat. Becauseof
this,gasketsshouldalwaysbemaintainedingoodcondition. Gaskettightnesscanbechecked
usingthe“dollar‐bill”method:
•
Placeadollarbillbetweenthegasketandthestovebody(atthelocationwherethe
gasketmeetsthestove).
•
Closeandtightenthedoorthenattempttopullthedollarbillout. Ifthedollarbillslides
inandouteasily,thegasketneedstobereplaced. Thistestshouldberepeatedaround
theentiregasketperimeter,asgasketswillsometimessealtightlyononeside,butwill
be
wornandsealpoorlyonanotherside.
•
Performthistestaroundtheentireperimeterofthedoor,andvisuallyinspectthe
windowgasketforanyleaks. Leaksinthewindowgasketcangenerallybelocatedby
followingtheprevailingsoottrailsleftonthewindowafterburningtheunit.
•
Ifanyareafailsthetest,theentiregasketshouldbereplaced. Thepartnumber
appropriatetothegasketbeingreplacedcanbefoundinthe“IllustratedParts”section
ofthismanual.
•
Gasketsshouldonlybereplacedwithequivalentfiberglassgasketspurchasedfrom
England’sStoveWorks®specificallyforthisunit.
Gaskets
1. Door‐Thisunitcomeswitha¾“ropegasketaroundthedoorthatshouldbereplaced
atleasteveryyear.Toreplacethedoorgasket(Part#AC‐DGKHD),theoldgasketmust
firstberemovedentirely—priortoaddingthenewadhesive,youmayhavetoscrape
theoldcementfromthedoorchannel.Oncethecementandgaskethavebeenadded,
thedoorshouldbeclosedandlatchedfortwenty‐fourhourstoallowthecementto
harden.
2. Window‐Ifyouarereplacingthewindowgasket(Part#AC‐GGK),thenewgasketwill
alreadyhaveadhesiveononeside. First,removetheoldgasket. Next,removethe
paperontheadhesivesideandplacethegasketaroundtheoutsideedgeoftheglass,
centeredovertheedge. Foldthegasketedgesoverontheglass,forminga“U”shape.
Finish
ThisnewunithasbeenpaintedwithHigh‐TemperaturePaintthatshouldretainits
originallookforyears.Iftheunitshouldgetwetand rustspotsappear,thespotscanbesanded
withfinesteelwoolandrepainted.ItiscrucialthatonlyHigh‐TemperatureSprayPaintisused
(Part#AC‐MBSP),asothersmaynotadheretothesurfaceorwithstandthehightemperatures.
Similarly,somebrandsofpaintwillnotadheretodifferentbrandsofpaint,sowehighly
recommendusingourproprietaryHigh‐TemperatureSprayPaint.

Page | 23
Glass
REPLACINGCOMPONENTS
Thisunithasaceramicglasspanel(PartNo.AC‐G70)intheviewingdoor;selfadhesiveglass
gasketisincludedwithreplacementglass(purchasedirectlyfromEngland’sStoveWorks).Never
replaceceramicglasswithtemperedoranyothertypeofglassandneveroperatethisunitwith
crackedorbrokenglass.
•
GlassSize:20.75in.(527.05mm)x12.625in.(320.67mm)
•
GlassType:5mmCeramicGlass(KeralitePyroceram)
•
GlassManufacturer:Eurokera
Glass Precautions
1.Neverreplaceceramicglasswithtemperedoranyothertypeofglass.
2.Neveroperatethisunitwithcrackedorbrokenglass.
3.Donotsl amthedoororstriketheglasswithanyobjects.
4.Donotbuildthefiredirectlyagainsttheglass.
Glass Cleaning
1.Becertainthestoveandtheglassarecompletelycool.
2.Thebuild‐upontheglasswillgenerallybelightandwaterisnormallysufficientto
removethedeposits.Ifstubbornsootpersists,useacleanermadespecificallyforthis
purpose. Donotscrapetheglassoruseabrasivecleaners.
3.Rinsetheglasswithcleanwateranddrytheglassbeforeresumingnormaloperation.
Glass Replacement
1.Removethedoorfromthestoveandrestitfacedownonafirmworksurface.
2.Usinga5/16”wrench,removethefourwindowbracketretainingscrews.
3.Removethefourwindowtabsfromthedoor. Takeextracaretoavoidshardsofglassif
theglasswindowhasbeenbroken.
4.Lifttheoldglasspaneloutofthedooranddiscard.
5.Theglasspanelmustbewrappedwithaself‐adhesivefiberglasstapegasket(AC‐GGK).
Ifyoupurchasedanewglass,itwillcomealreadywrapped. Ifreusingthesamepieceof
glass,removeoldgasket,scrapeoffoldadhesiveandwrappedwiththeAC‐GGK. This
gasketservestocushiontheglassfromthecastirondoor.
6.Reinstallthewindowretainingtabsusingthefourscrewspreviouslyremoved. Donot
over‐tightenthescrews.
Page | 24
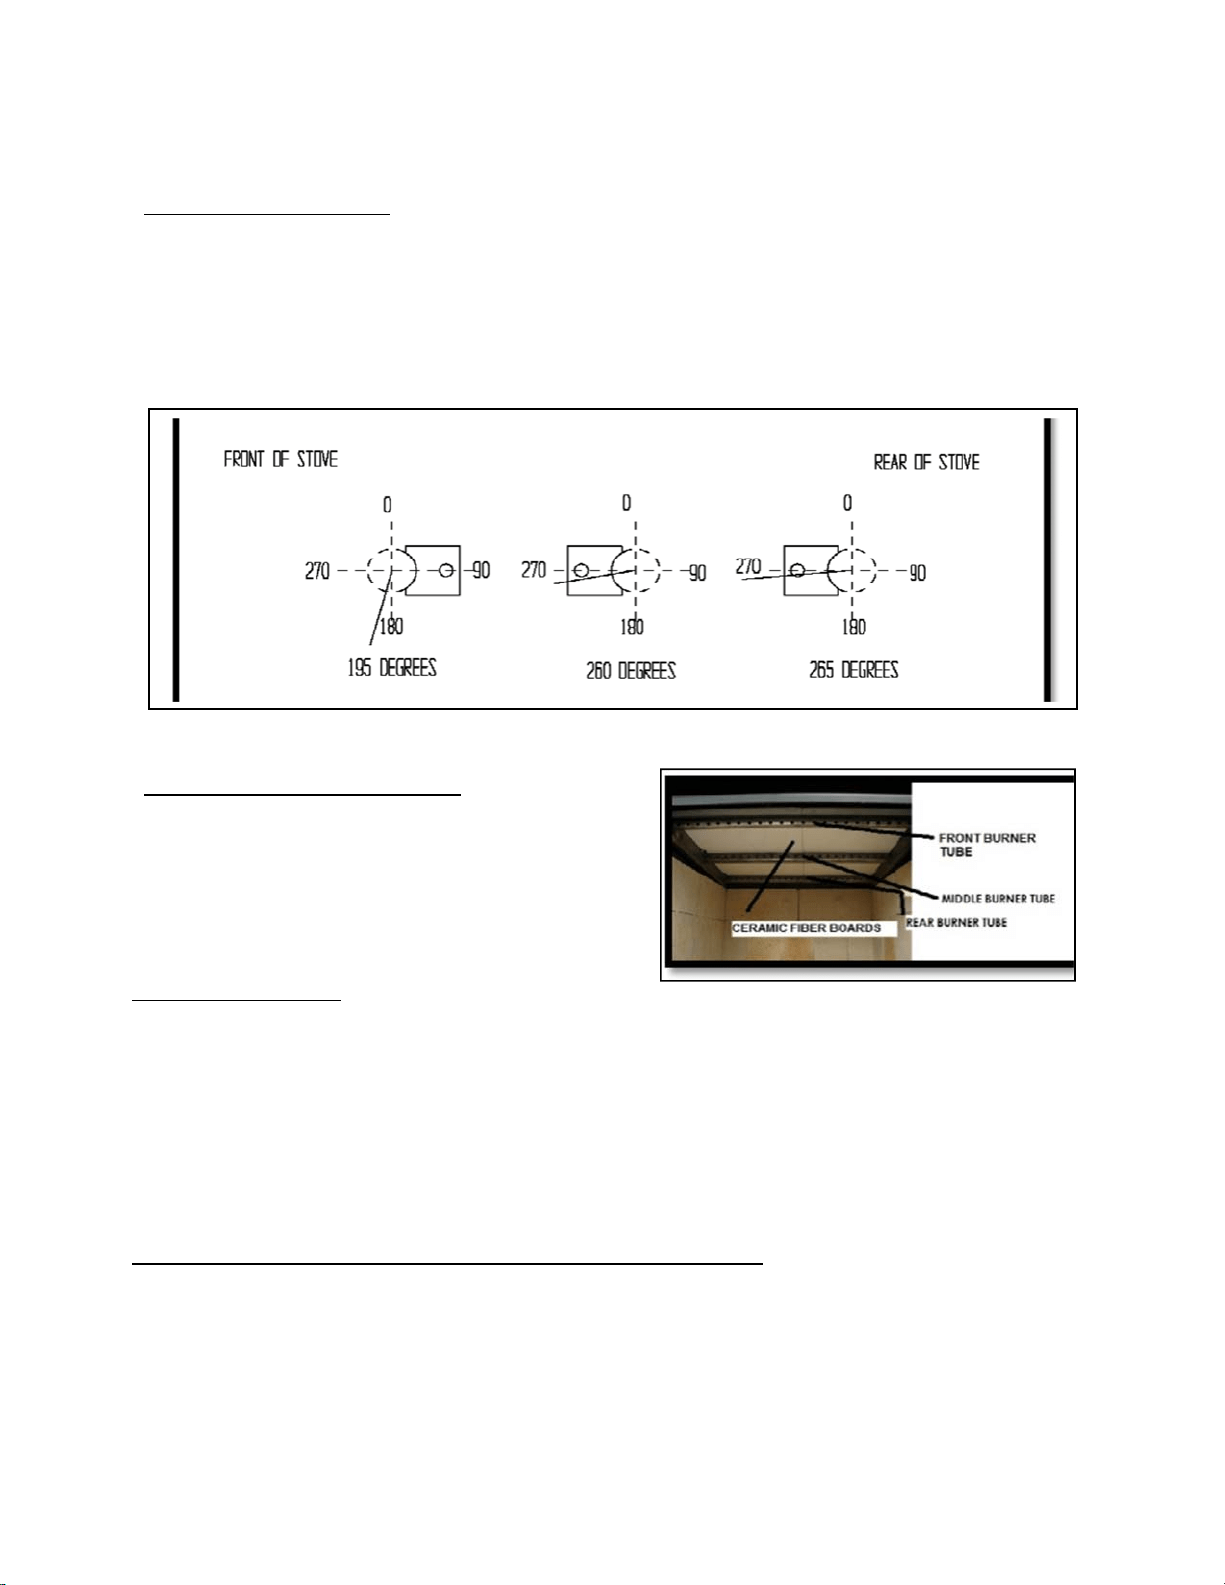
Burner tube replacement
REPLACINGCOMPONENTS
Therearethreedifferentburnertubesinthetopofthestove. Toreplaceatube,first
besurethatyou orderthecorrecttubeyouneedtoreplace. Thenusinga5/16”socketor
openendwrench,removethescrewlocatedontheleftsideofthetube. Besuretokeepthe
screw.
Push the tube to the right then remove the tube (pulling the tube back to the left
after that side
has been removed from the hole). To replace, reverse the above
procedure...makesuretoinstallthetubesinthecorrectorder.(FronttoBack)
Ceramic fiberboard replacement
Toreplaceacrackedorbrokenboard,first
removethefrontburnertube. Thenremovethe
boardyouneedtoreplace. Install thenewboard
(thetwoboardsshouldsitflushonthetubesside
byside). Replacethetubepreviouslyremoved.
Dogboxreplacement
Toreplacethedogbox,firstremovethe
ashpan.Thenremovethetwo9/16”nutsthat
holdthecarriageboltsinplace.Openthefront
doorofthestoveandliftuponthedogbox.
Installneworexistingcarriageboltsintotheholes
ontheflangeofthedogboxandre‐install inthe
reversemannerinwhichitwasremoved.
Heatshieldandbackpanelremoval(toaccessothercomponents)
Therearetwo5/16”screwsthatareontherearoftheheatshield. Toremovethe heat
shield,usinga5/16”socketoropenendedwrench,removethetwoscrews. Thenpulltheheat
shieldupandbackoffthebackpanel. Nexttoremovethebackpanel,therearethree5/16”
screwsontherearofthepanel. Usinga5/16”socketoropenendedwrench,removethethree
screws. Itmaybenecessarytoprythetopofthepanelwithaflatheadscrewdriver(atthetop
ofthestove). Liftthepanelupandoffthestove.
Page | 25
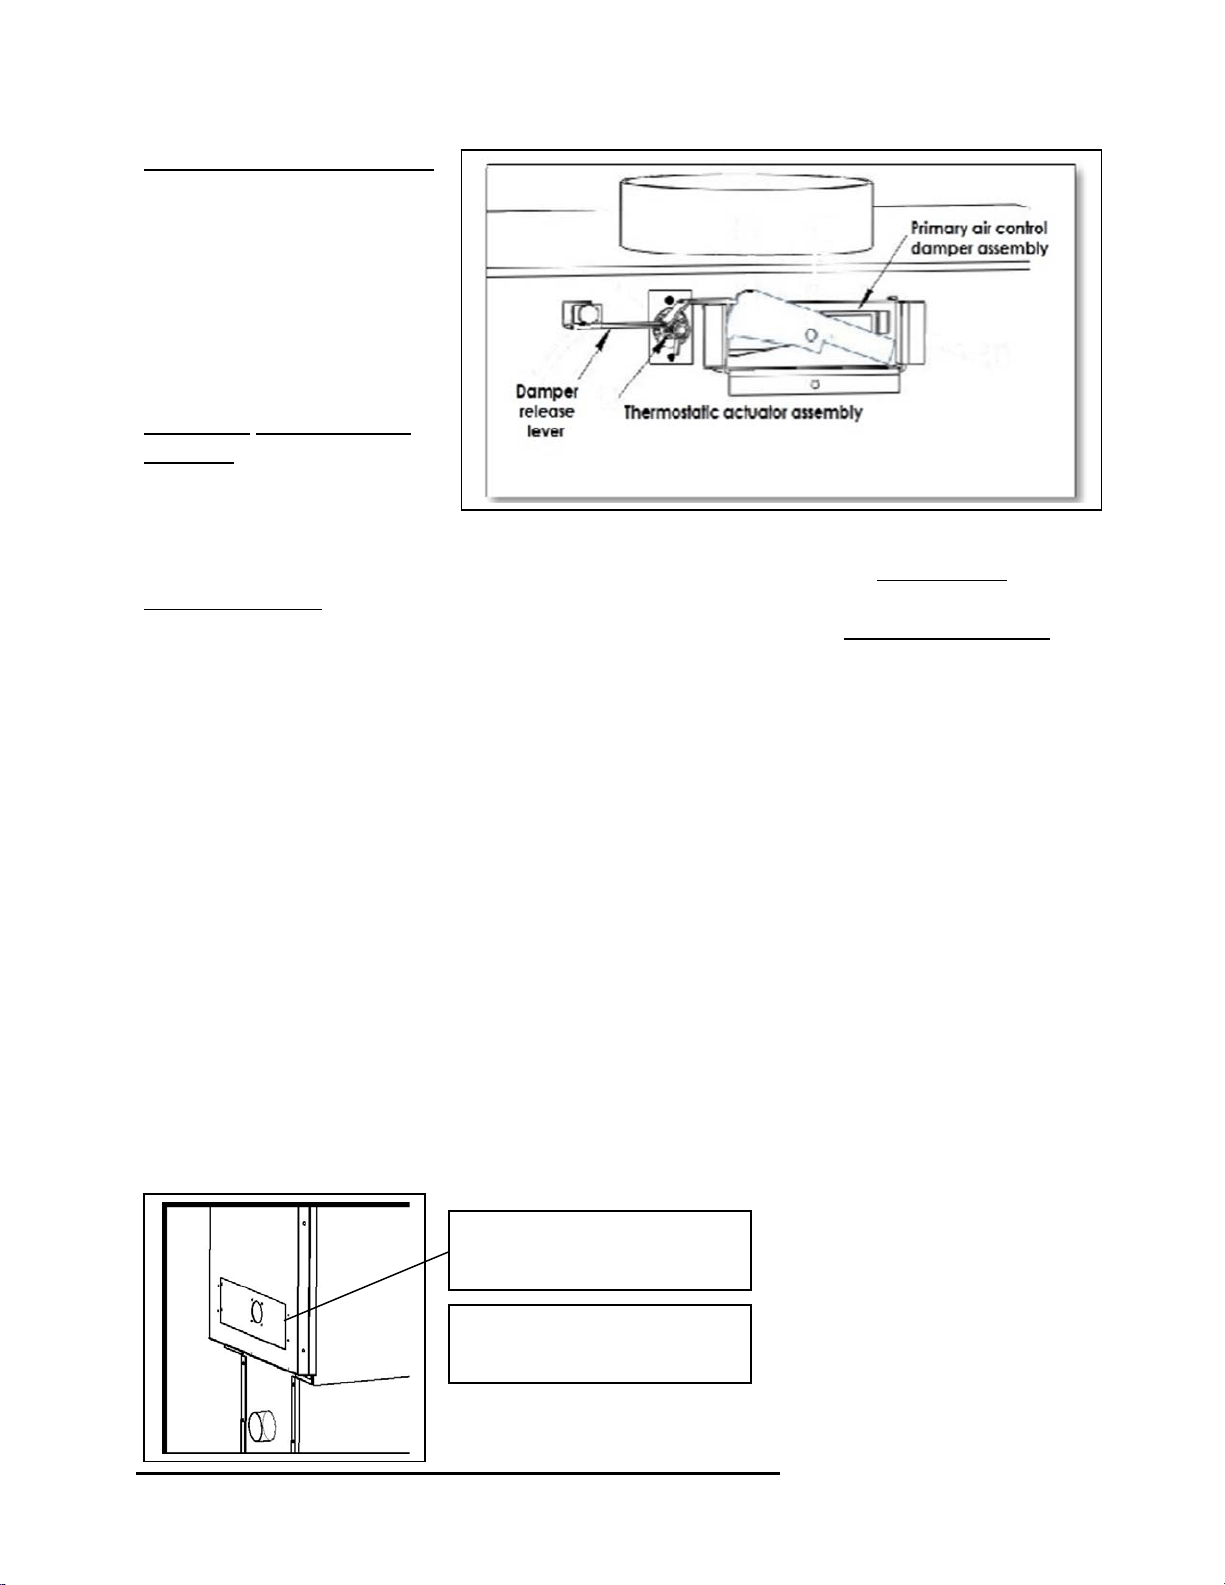
Other Components continued:
Atthispointyoucanaccess
theprimaryaircontrol
damperassembly,
thermostaticactuator
assemblyandthedamper
releaselever. Althoughthese
shouldn’tneedtobereplaced,
theycanbeeasily. The
primary aircontrol damper
assemblycanbereplacedby
removingthesmallspring
handlefromthefrontofthe
unit,thenslidingtheassemblyout. Replacebyslidingthenewassemblythroughthesamehole
andtherod
throughthe
frontofthestove. Replacethespringhandle. Thethermostatic
actuator assemblycanbereplacedbyusinga5/16”sockettoremovethetwoscrewsthathold
theassembly.Installthenewassemblyusingthe
sametwo
screws. Thedamper release lever
canbereplacedbyremovingthe½”bolt. Whenreinstallingthedamperbesureitisinstalled
thesameaswhenremoved.
OPTIONALACCESSORIES
Blower:Thewoodstovewasalsodesignedforusewithaconvectionblowerforadditionalheat
circulation. Thestoveisconstructedwithsideconvectionchannelswhichallowtheroomair
blowertopickupheatfromthehottestregionsofthestoveandtransferitintothehome. The
mountingscrewsfortheblowerareinstalledintotherearconvectionchannelatthefactory;
mountingthebloweronlyrequiresa5/16”openendorsocketwrenchtoremovethese screws
andinstalltheblower.
Whenroutingthepowercord,takecaretokeepawayfromhotareasoftheunitandremember
thatthisblowerisforuseonlywiththestove. Pleaseseethediagrambelowforclarificationon
theroomairblowerinstallation.
ThisunitcanusetheAC‐16(whichcomesstandardwiththeunit)ortheAC‐30upgradeblower.
Bothareinstalledusingthefourfactoryinstalled5/16”screws.
Theoptionalheatcirculationbloweronthisstoverequiresperiodiclubrication;thislubricationshouldbeperformed
nolessthaneverythreemonthsofnormaloperation. Toproperlylubricatetheblower,useaneyedropperor
similardispensingdevicetodrip5‐7dropletsofSAE20oilinto
theoil
portonthesideoftheblowermotor
Warning:Disconnectpower
fromfanbeforeinstallation.
(4)5/16”head,self‐tapping
screws(pre‐installedinunit).

Page | 26
EPAINFORMATION
Thefollowingadditionstoyourowner’smanualwillenableyoutoachieveoptimal
emissionsperformancefromyourstove.Importantsafetytipsarealsoincluded.
‐ ProperInstallation–PleaserefertotheInstallationsectionofyourowner’smanualand
followtheguidelineslistedthereinforsafetyandforoptimalemissionsperformance.
Additionalinformation:
VentingIntroduction:
Draft:Draftistheforcewhichmovesairfromtheappliance upthroughthe chimney.The
amount ofdraftin your chimneydepends on thelength of the chimney,local geography,
nearbyobstructions andotherfactors. Toomuchdraftmay causeexcessivetemperatures
in the appliance and may damage the catalytic combustor. Inadequate draft may cause
backpuffingintotheroomand‘plugging’ofthechimneyorthecatalyst.
Inadequate draftwillcause the appliance toleak smoke intothe room through appliance
andchimneyconnectorjoints.
Anuncontrollableburnorexcessivetemperatureindicatesexcessivedraft.
Pleasebemindfulofinstallationlocation:Inversionandotherairqualityissuescanarisein
valleysorifunitisinstalledclosetoneighboringhomes.
Thiswoodstoveoperatesonanaturaldraftsystem,inwhichthechimneysystempulls
airthroughthestove. Thisunitmustbeinstalledinaccordancewiththefollowingdetailed
descriptionsofventingtechniques;notinstallingthestoveinaccordancewiththedetailslisted
herecanresultinpoorstoveperformance,propertydamage,bodilyinjuryordeath. Avoid
make‐shiftcompromiseswheninstallingtheventingsystem. England’s StoveWorksisnot
responsibleforanydamage incurred
duetoapoororunsafeinstallation.
Becertainthatallaspectsoftheventingsystemareinstalledtotheventing
manufacturer’sinstructions,particularlytherequiredclearancestocombustibles. Also,be
certaintouseanatticradiationshieldtopreventinsulationfromcontactingachimneywhich
passesthroughanattic.
Thechimneysystemisthe“engine”whichdrivesa woodstove,soitisimperativefor
properunitfunctionthattheventingsystembeinstalledexactlyasdescribedinthefollowing
section.
Ifquestionsarisepertainingtothesafeinstallationofthestove,ourTechnicalSupport
line(800‐245‐6489)isavailable.Contactyourlocalcodeofficialtobecertainyourinstallation
meetslocalandnationalfirecodes,andifyou’reuncertainabouthowtosafelyinstallthestove,
westronglyrecommendcontactingalocalNFIcertifiedinstallertoperformtheinstallation.
Meetsthe2015U.S.EnvironmentalProtectionAgency’scribwoodemission
limitsforwoodheaterssoldafterMay15,2015

Page | 27
VentingGuidelines:
ALWAYSinstallventpipeinstrictadherencetotheinstructionsandclearancesincludedwith
yourventingsystem.
•
DONOTconnectthiswoodstovetoachimneyfluewhichalsoservesanotherappliance.
•
DONOTinstallafluepipedamper
oranyotherrestrictivedeviceintheexhaustventingsystemofthisunit.
•
USEanapprovedwallthimblewhenpassingthroughawallandaceilingsupport/firestop
whenpassingthroughaceiling.
•
INSTALLthreesheetmetalscrewsateverychimneyconnectorjoint.
•
AVOID excessive horizontal runs and elbows, as both will reduce the draft of the venting
systemandwillresultinpoorstoveperformance.
•
INSPECTyourventingsystemoften,tobecertainitisclearofcreosote,fly‐ashandother
restrictions.
•
CLEANtheventingsystemasdetailedinthemaintenancesectionofthismanual.
•
ADHEREtothe10‐3‐2ruleregardingchimneyterminations.
•
INSTALLsinglewallchimneyconnectorwiththemaleenddowntopreventcreosote
leakage. Followdoublewallchimneyconnectormanufacturer’sinstructionsregardingproper
pipeinstallation.
WARNING:VentingsystemsurfacesgetHOT,andcancauseburnsiftouched. Noncombustible
shieldingorguardsmayberequired
The10‐3‐2Rule:Thechimneysystemmustterminate3.0ftabovethepointwhereit’scenterline
passesthroughtheroofANDthechimneymustterminate2.0ft.abovepartofthedwelling
withina10ft.radiusofthechimney.
‐ OperationandMaintenance–Pleaserefertothe‘Operation’(OperatingInstructions)and
Maintenance(includingAshRemoval/Disposal)sectionsofyourowner’smanualand
followtheguidelineslistedthereinforsafetyandforoptimalemissionsperformance.
AdditionalInformation:
Followingtheinstructionsinyourowner’smanualforBuildingaFirewillensureaproperfire,as
wellashelpingminimizevisibleemissions.
More:
‐ Fuelloadingandre‐loading:PracticalTipsforBuildingaFire–Seeyourowner’smanual
forinformationonloading(andre‐loading)yourfuel,aswellasforfire‐starting
procedures(i.e.‘BuildingaFire’).
‐ Top‐DownFires:TheUSEPArecognizes‘theeffectivenessofthetop‐downapproachfor
startingfires.’Agoodtutorialforthisapproachmaybefoundat
http://woodheat.org/top‐down‐steps.html.Whenbuildingtop‐downfires,besureto
followtheinstructionsfoundinyourowner’smanualandcontactourTechnicalSupport
ifyouhaveanyquestions.

Page | 28
‐ FuelSelection:Onceyourwood‐burningapplianceisproperlyinstalled,buildingan
effectivefirerequiresgoodfirewood(usingtherightwoodintherightamount)andgood
firebuildingpractices.Thefollowingpracticalstepswillhelpyouobtainthebest
efficiencyfromyourwoodstoveorfireplace.
Seasonwoodoutdoorsthroughthesummerforatleast6monthsbeforeburningit.
Properlyseasonedwoodisdarker,hascracksintheendgrain,andsoundshollowwhen
smackedagainstanotherpieceofwood.
Storewoodoutdoors,stackedneatlyoffthegroundwiththetopcovered.
Burnonlydry,well‐seasonedwoodthathasbeensplitproperly.
Startfireswithnewspaperanddrykindlingasdiscussedearlierinthemanual.
Burnhotfires.
Tomaintainproperairflow,regularlyremoveashesfromyourwood‐burningappliance
intoametalcontainerwithacoverandstoreoutdoors.
MoistureMeterInformation
Firewoodisreadyat10‐25%moisturecontent.
Newly‐cutlogscanhaveamoisturecontent(MC)of80%ormore,dependingonspecies.
Sincewoodshrinks,andcanalsosplit,twistorotherwisechangeshapeasitdries,most
woodisdriedbeforebeingused.Airdrying,or‘seasoning,’isthemostcommonmethod
usedforcordwood.InmostpartsoftheUnitedStates,theminimummoisturecontent
thatcanbegenerallyobtainedinairdryingisabout12to15percent.Mostair‐dried
materialisusuallycloserto20percentmoisturecontentwhenused
Totestyourfirewood,simplypushthepinsintothewoodandwaitforareading.
Remember,don'tjuststickthemeterintotheendsofyourfirewood.Togetthemost
accuratereading,splitthewoodandtestthecenter.Thecenterofthelogwillcontain
themostmoisture.
HowFarShouldIDriveNon‐InsulatedPinsintoWood?
Tofulldepthifpossible.However,atmoisturelevelsbelow10%,itisusuallysufficientto
makegood,positivecontactwiththewood.Athigherlevelsofmoistureandespeciallyif
youhaveasteepgradient,fullpenetrationisamust.

Page | 29
‐ WHATFUELSNOTTOUSE:
CAUTION
NEVERUSEGASOLINE,GASOLINE‐TYPELANTERNFUEL,KEROSENE,CHARCOALLIGHTER
FLUID,ORSIMILARLIQUIDSTOSTARTOR“FRESHENUP”AFIREINTHISHEATER.KEEP
ALLSUCHLIQUIDSWELLAWAYFROMTHEHEATERWHILEINUSE.ADDITIONALLY,
NEVERAPPLYFIRE‐STARTERTOANYHOTSURFACEOREMBERSINTHESTOVE.DONOT
USECHEMICALSORFLUIDS
TOSTARTTHEFIRE.
DONOTBURNFLAMMABLEFLUIDSSUCHASGASOLINE,NAPHTHAORENGINEOIL.
DONOTBURNGARBAGE;LAWNCLIPPINGSORYARDWASTE;MATERIALSCONTAINING
RUBBER,INCLUDINGTIRES;MATERIALSCONTAININGPLASTIC;WASTEPETROLEUM
PRODUCTS,PAINTORPAINTTHINNERS,ORASPHALTPRODUCTS;MATERIALS
CONTAININGASBESTOS;CONSTRUCTIONORDEMOLITIONDEBRIS;RAILROADTIESOR
PRESSURE‐TREATEDWOOD;MANUREORANIMALREMAINS;SALTWATERDRIFTWOOD
OROTHERPREVIOUSLYSALTWATERSATURATEDMATERIALS;UNSEASONEDWOOD;
PAPERPRODUCTS,CARDBOARD,PLYWOODORPARTICLEBOARD.THEPROHIBITION
AGAINSTBURNINGTHESEMATERIALSDOESNOTPROHIBITTHEUSEOFFIRESTARTERS
MADEFROMPAPER,CARDBOARD,SAWDUST,WAXANDSIMILARSUBSTANCESFOR
THEPURPOSEOFSTARTINGAFIREINANAFFECTEDWOODHEATER.BURNINGTHESE
MATERIALSMAYRESULTINRELEASEOFTOXICFUMESORRENDERTHEHEATER
INEFFECTIVEANDCAUSESMOKE.
‐ SafeWood‐burningPractices
Onceyourwood‐burningapplianceisproperlyinstalled,followtheseguidelinesforsafe
operation:
Keepallflammablehouseholditems—drapes,furniture,newspapers,andbooks—far
awayfromtheappliance.
Startfiresonlywithnewspaper,drykindlingandallnaturalororganicfirestarters.Never
startafirewithgasoline,kerosene,orcharcoalstarter.
Donotburnwetorgreen(unseasoned)logs.
Donotuselogsmadefromwaxandsawdustinyourwoodstove–theyaremadefor
openhearthfireplaces.Ifyouusemanufacturedlogs,choosethosemadefrom100
percentcompressedsawdust.
Buildhotfires.Formostappliances,asmolderingfireisnotasafeorefficientfire.
Keepthedoorsofyourwood‐burningapplianceclosedunlessloadingorstokingthelive
fire.Harmfulchemicals,likecarbonmonoxide,canbereleasedintoyourhome.
Regularlyremoveashesfromyourwood‐burningapplianceintoametalcontainerwitha
cover.Storethecontainerofashesoutdoorsonacementorbrickslab(notonawood
deckornearwood).Seeashremovalinstructionsinyourowner’smanual.
Keepafireextinguisherhandy.
Remembertocheckyourlocalairqualityforecastbeforeyouburn.

Page | 30
‐ AirControls:SEEYOUROWNER’SMANUALforinformationontheProperUseofAir
Controls(intheOperationsection).
‐ ASHREMOVAL–FollowyourOwner’smanual’sinstructionsregardingremovaland
disposalofashes.
‐ REPLACEMENTofpartsthatarecriticaltoemissionsperformance–FollowyourOwner’s
manual’sinstructionsregardingreplacementofgasketsandotherpartsthatarecriticalto
emissionsperformance.
Remember:“This
woodheaterneedsperiodicinspectionandrepairforproperoperation.Itis
againstfederalregulationstooperatethiswoodheaterinamannerinconsistentwithoperating
instructionsinthismanual.”
More:BurnerTubes–Toreplaceatube,firstbesurethatyouorderthecorrecttubeyouneedto
replace. Thenusinga5/16”socketoropenendwrench,removethescrewlocatedontheleft
sideofthetube. Besuretokeepthescrew.
Pushthetubetotherightthenremovethetube
(pullingthetubebacktotheleftafterthatside
hasbeenremovedfromthehole). Toreplace,
reversetheaboveprocedure…makesuretoinstallthetubesinthecorrectorder.(FronttoBack)
‐ SmokeDetectors
England’sStoveWorks,Inc.highlyrecommendstheuseofsmokedetectorsineveryroomofthe
house.However,locatingasmokedetectordirectlyabovethisunitcanresultinnuisance
alarms.
CAUTION
Thisunitismeanttooperateonlywithdoorclosed.Smokespillageandaninefficient,lazy
burnwillresultfromattemptingtooperatethestovewiththedooropen.
Additionally,usingprohibitedfuelscancreateanunsafesituationandcanalsogenerateexcess
carbonmonoxide.Carbonmonoxideisanodorless,colorlessgaswhichcanbedeadly.
Theuseofacarbonmonoxidedetectorisstronglyrecommended.
‐ Compliance:“Thisnon‐catalyticwoodheatermeetsthe2015U.S.Environmental
ProtectionAgency’scribwoodemissionlimitsforwoodheaterssoldafterMay15,2015.”
‐ TamperWarning:“Thiswoodheaterhasamanufacturer‐setminimumlowburnratethat
mustnotbealtered.Itisagainstfederalregulationstoalterthissettingorotherwise
operatethiswoodheaterinamannerinconsistentwithoperatinginstructionsinthis
manual.”
‐ Warranty:SeeyourOwner’smanualforaWarrantyRegistrationinstructionpage,aswell
asinstructionsforwarrantyprocedures.Forparts,warrantyreplacementproceduresmay
befoundatourpartsstoresite:www.store.heatredefined.com
TROUBLESHOOTING

Page | 31
Issue Cause Solution(s)
Stovesmokesintoroom 1.WeakDraft 1.1Becertainchimneyissufficientlytallto
meetthe10‐3‐2rule.
1.2Addadditionalheighttothechimney.
2.NegativePressurein
theHome
2.1Addanoutsidecombustionairhookupto
theunit.
Fireishardto
start 3.WeakDraft 3.1Becertainchimneyissufficientlytallto
meet10‐3‐2rule.
3.2Addadditionalheighttothechimney
system.
4.ColdChimney 4.1Heatthefluefirstbyburningcrumbled
newspaperinthestove.
4.2Installaninsulatedchasearoundexternal
chimneys.
5.Downdraftin
Chimney
5.1Becertainchimneyissufficientlytallto
meet10‐3‐2rule.
5.2Tryheatingthefluewithahair‐dryerto
correctthedraft.
Glassisdirty 6.WetorGreenWood 6.1Onlyburnwoodthatisseasonedforat
leastoneyearandthatis
dryandfreeofice
andsnow.
7.OperatingStoveat
LowBurnRate
8.WoodLoadedToo
ClosetoGlass
Coalsbuildupinfirebox 9.OperatingStoveat
HighBurnRates
7.1Operatethestoveathigherburnratesto
allowtheair‐washsystemtokeeptheglass
clean.
8.1Neverloadwoodsothatitistouchingthe
ceramicglassviewing
window.
9.1Reducecombustionaircontrolandallow
coalstoburndownbeforereloading.
Fireburnsoutofcontrol 10.ExcessiveDraft 10.1Reducechimneyheight.
11.AirLeakage 11.1Inspectwindowanddoorgasketsand
replaceifnecessary.
12.BurningExcessively
DryWood
Excessivesmokefromstack 13.Operating
Stoveat
LowBurnRate
14.WetorGreen
Wood
15.NotCharringFresh
WoodLoad
12.1Onlyburnseasonedcordwood.Donot
burnkilndriedwoodorpalletwood.
13.1Operatethestoveatahigherburnrate
whichwillcreatesecondarycombustion.
14.1Onlyburnwoodthatisseasonedforat
leastoneyearandthat isdry
andfreeofice
andsnow.
15.1Charthefreshwoodloaduntilitis
completelyignitedandactivesecondary
combustionispresentinthefirebox.

Page | 32
REPLACEMENT PARTS LIST
Diagram
No.
Description
PartNo.
Per
Unit
7
Rearheatshield(BOLTON) AC‐W02HS
1
6
Rearpanel(BOLTON) AC‐W02RP
1
1
Primaryaircontroldamperassembly AC‐W01PDA
1
Notshown Damperreleaselever AC‐W01DRL
1
Notshown Thermostaticactuatorassembly AC‐W01TAA
1
9
Ash
drawer
AC‐ADW01
1
10
Door
CA‐W02
1
Notshown Sideheatshields
AC‐W01SHS 2
Notshown LargeUpgradeBlower(optional)
AC‐30
1
Notshown Smallstandardblower
AC‐16
1
12
Glassgasketkit3/4"flat AC‐GGK
1
16
Doorgasketkit3/4"highdensity AC‐DGKHD
1
3
Frontburnertube AC‐W02FBT
1
17
Middleburnertube AC‐W02MBT
1
4
Rearburnertube AC ‐W02RBT
1
13
Glasssize20.75”X12.625” AC‐G51
1
2
Ceramicfiberboard AC‐W02CFB
1
Notshown SmallspringhandleNickel/Brass AC‐SH4N/AC‐SH4
1
Notshown LargespringhandleNickel/Brass AC‐SHN/AC‐SH
1
8
Blowerbackcover AC‐BBC30
1
15
Glass
tabs
AC‐W01GT
4
11
Hinge
pins
AC‐HP
2
Notshown
OutsideAirKit
AC‐OAK3 1
Notshown
AirDogBox
AC‐DB02 1
*FOR BRICK LAYOUT AND PART NUMBERS PLEASE
SEE PAGE 34.*
Page | 33
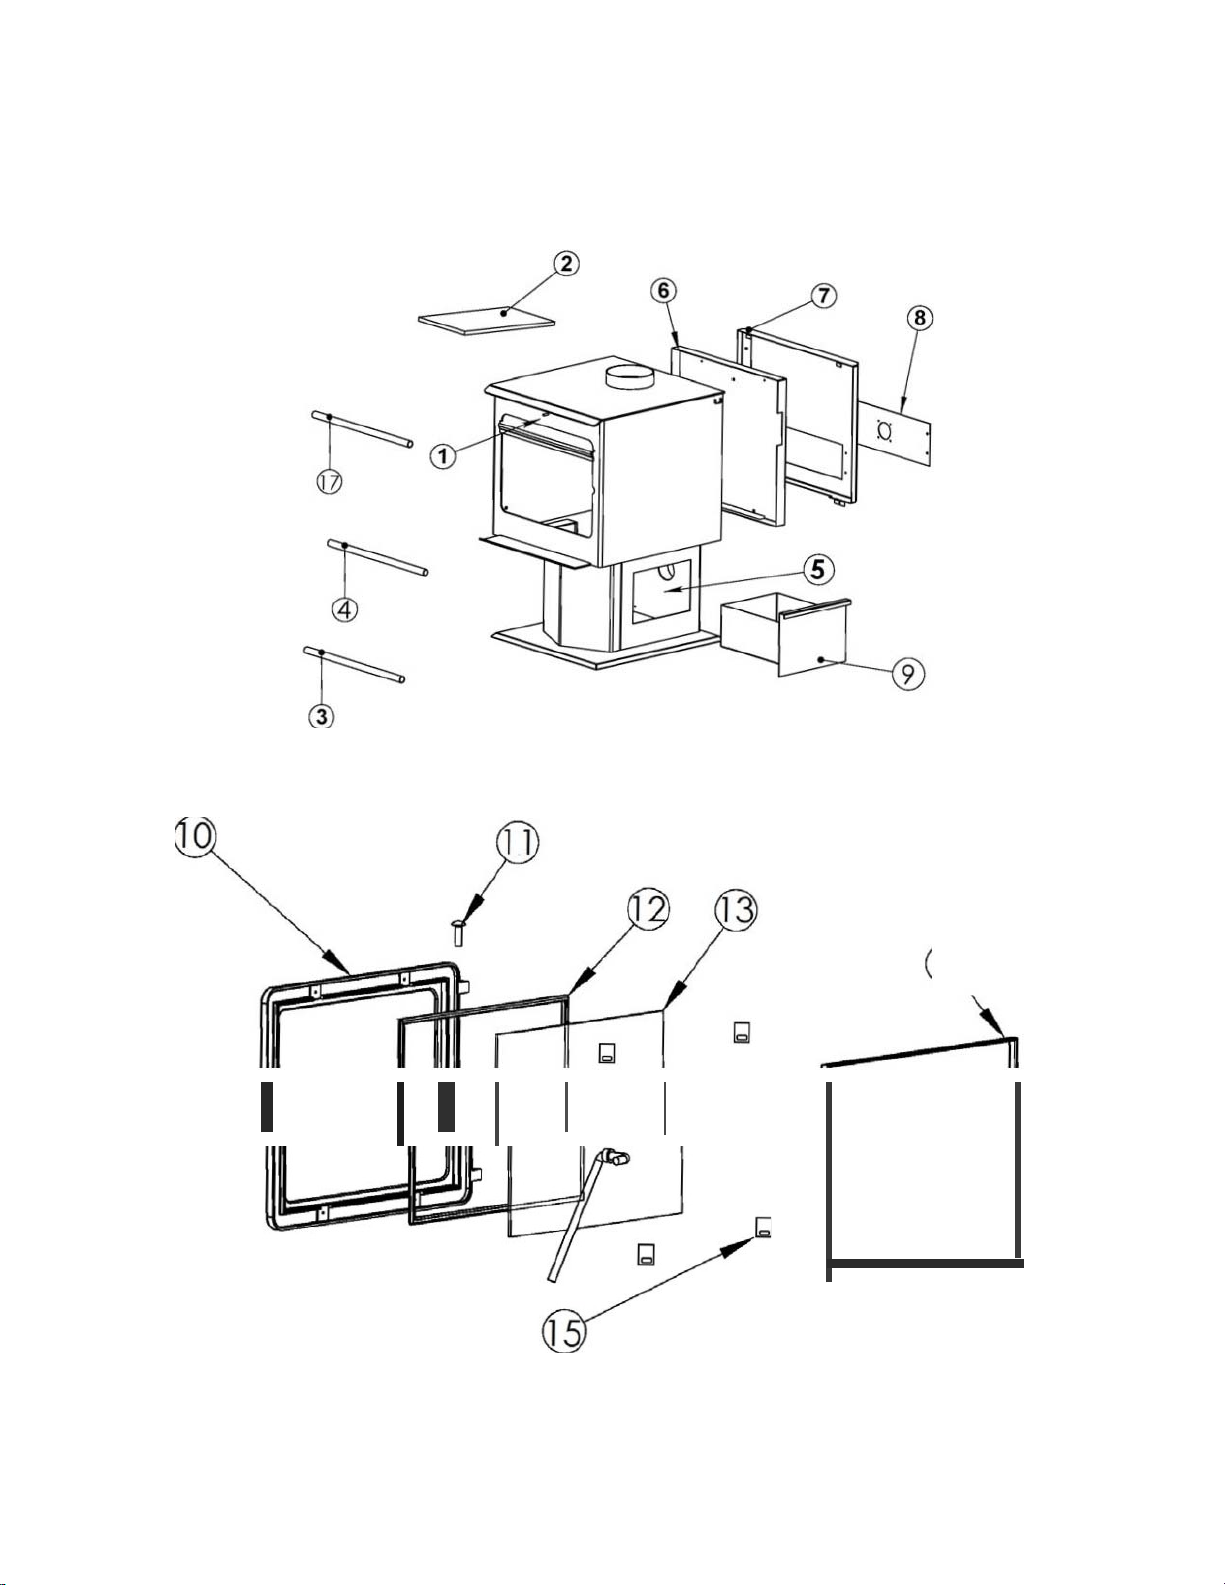
ILLUSTRATED PARTS
DIAGRAM
16
Page | 34
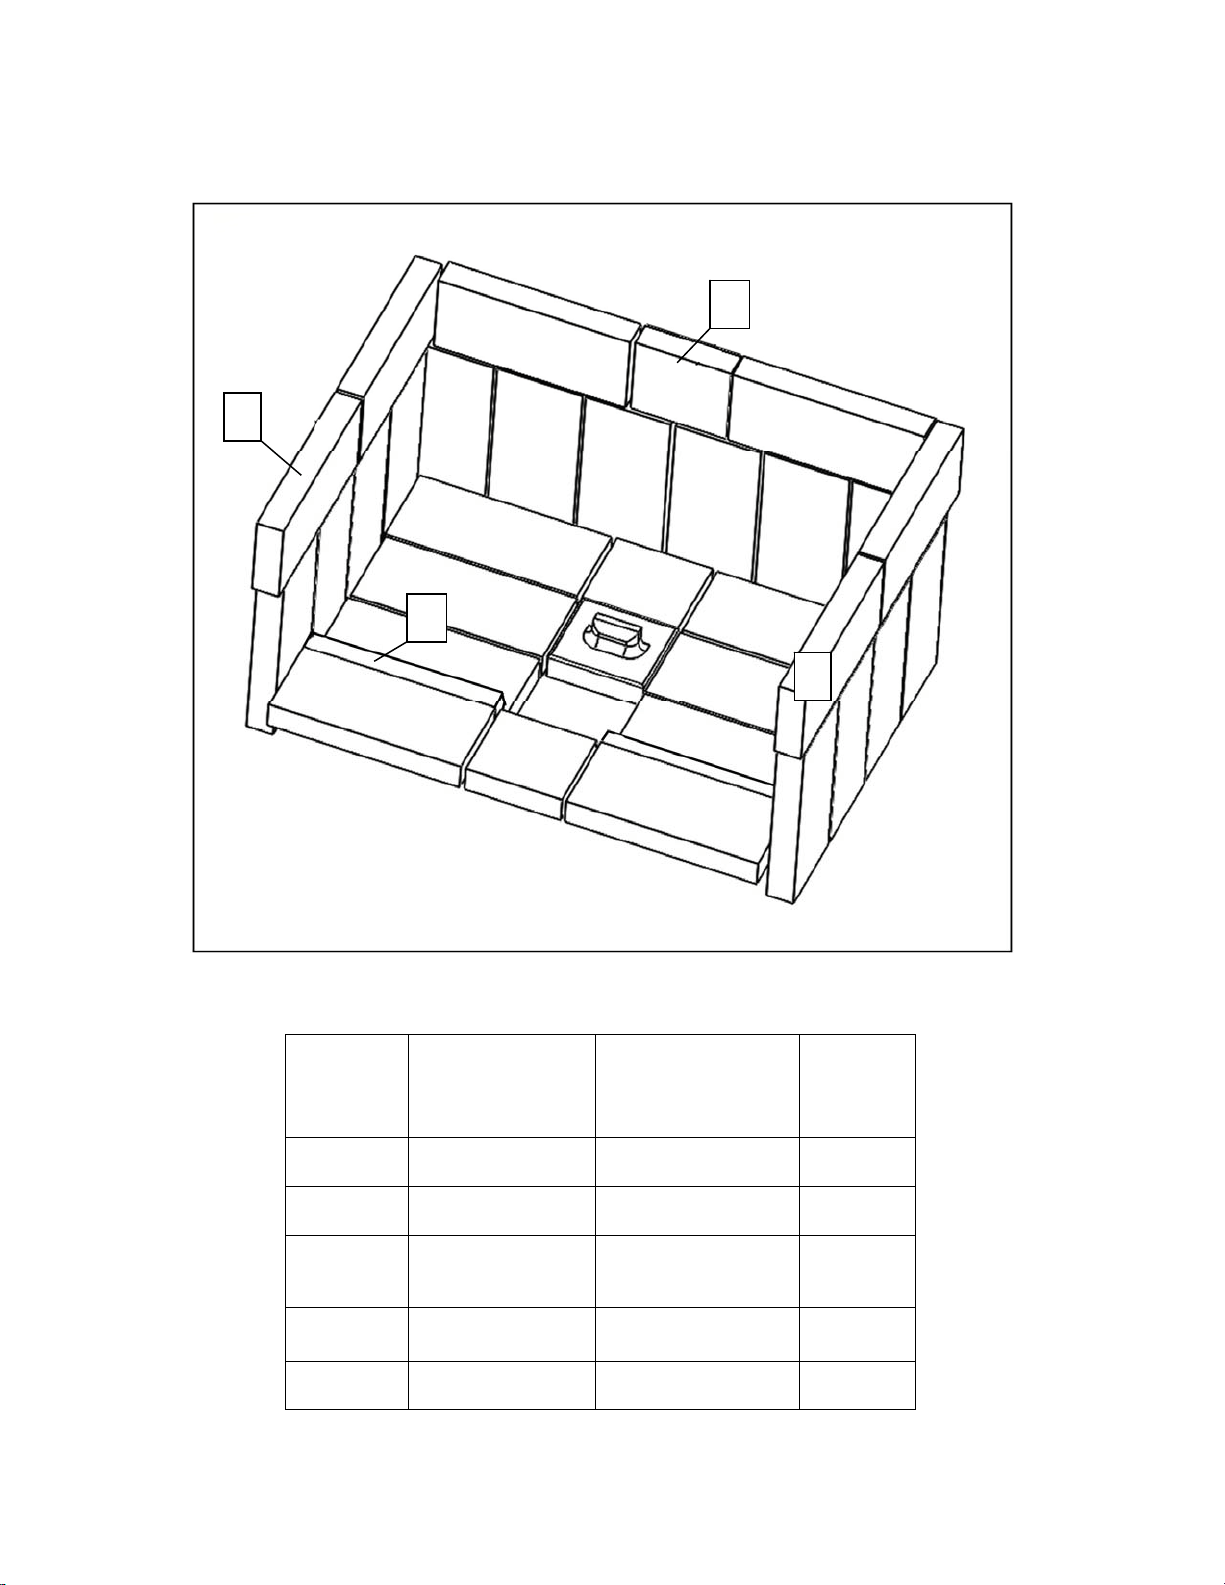
BRICK LAYOUT AND REPLACEMENT
NOTE:Thebricksonthesidesandrearwillneedtobeinstalledafterdelivery
DIAGRAM
NUMBER
BRICKSIZE
PARTNUMBER
QUANTITY
PER
STOVE
1 9"X4"X1.25"
AC‐SB
27
2 4.5”X4”X1.25” AC‐SB4.5
3
3 9”X4”X1.25”
withNotch
AC‐SBN1X3
1
4 9”X2.5”X1.25” AC‐SB9X2.5
2
ASHDUMPPLUG
CA‐30ADP
1
1
2
3
4
Page | 35
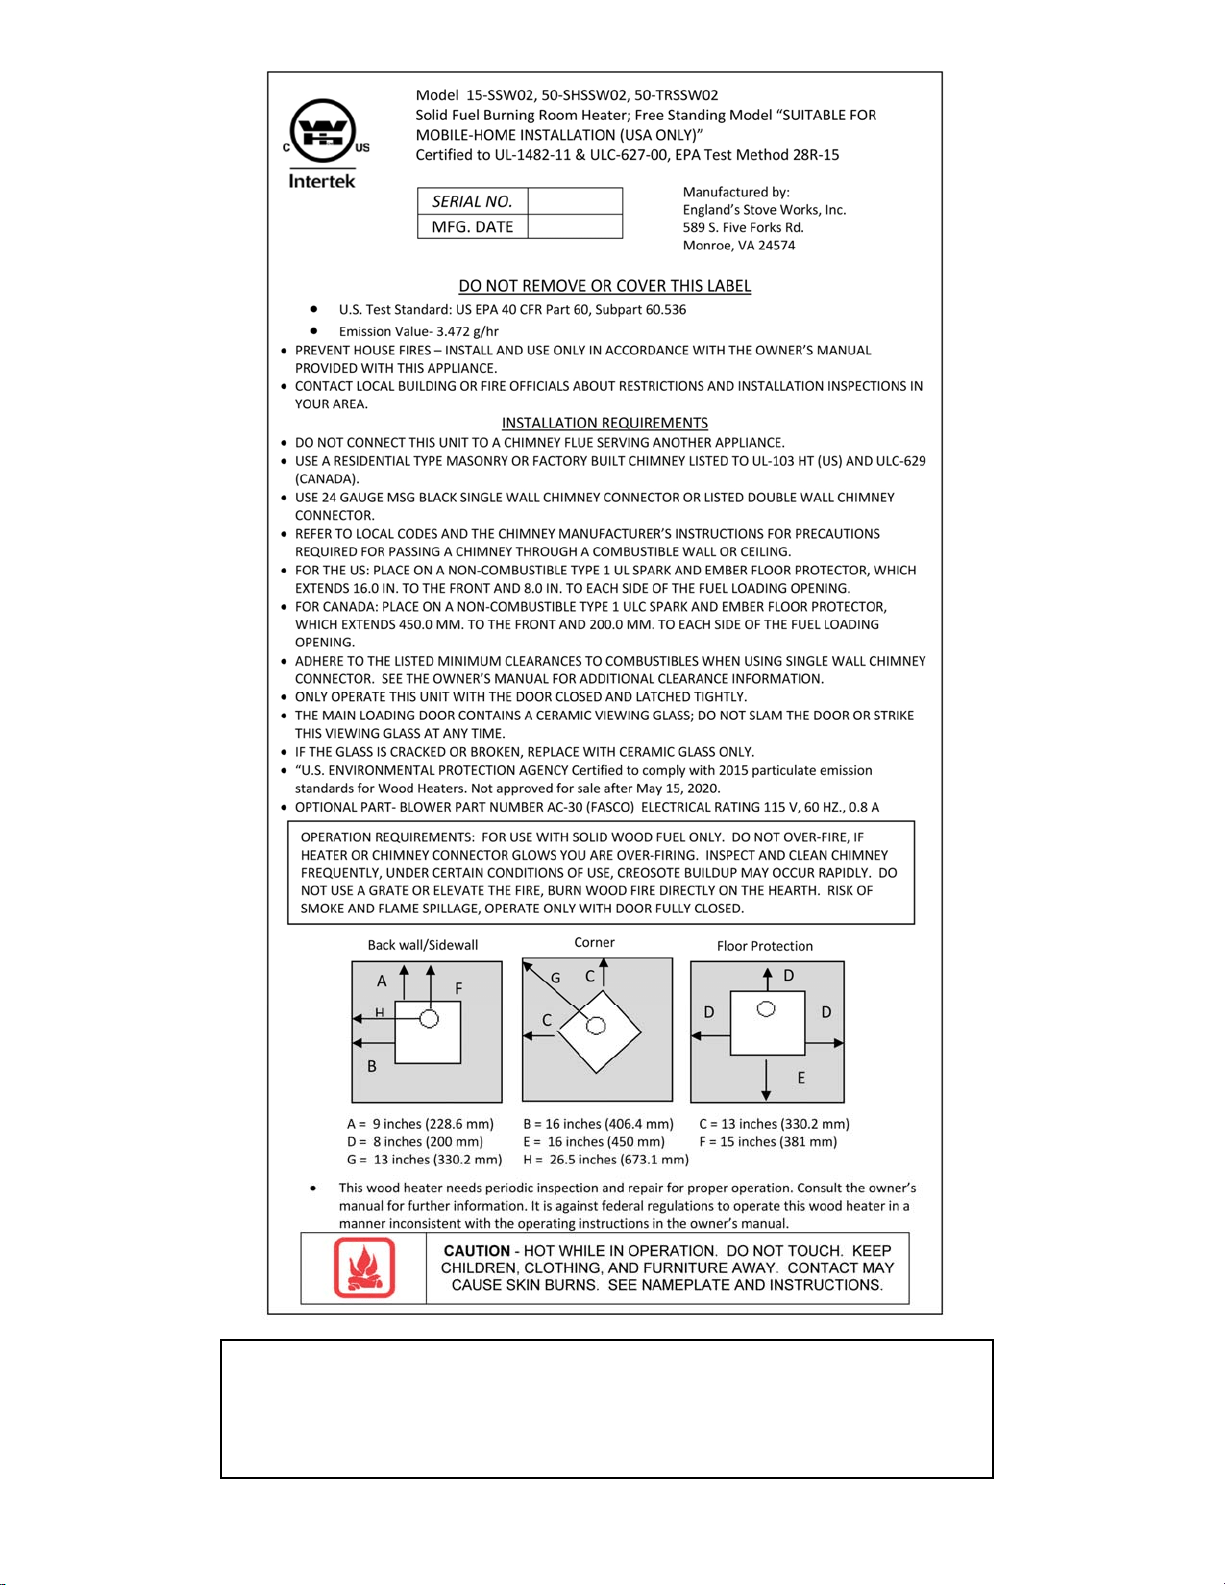
You may write your unit’s Manufacture Date and Serial Number in the blank
spaces on this sample tag, for future reference. This sample tag also
shows
the
safety info. such as UL (ULC) testing standard, etc. for your local
officials, or anyone else who may need reference information.

Page | 36
LIMITED FIVE (5) YEAR
WARRANTY
Fromthedateofpurchasetotheoriginal
owner
Themanufacturerextendsthefollowingwarranties:
Five Year Period:
1. Carbonsteelandweldedsea msinthefireboxarecoveredforfive(5)
yearsagainstsplitting.
2. Thecastirondoorandhingesarecoveredforfive(5)yearsagainst
cracking.
One Year Period:
1. Electricalcomponents,accessoryitems,glassandthepaintedsurface
ofthestovearecoveredforone(1)yearfromthedateofpurchase.
Conditions and Exclusions
1. Damageresultingfromover‐firingwillvoidyourwarranty.
2. Thiswarrantydoesnotapplyifdamageoccursbecauseofan
accident,improperhandling,improperinstallation,improperoperation,
abuseorunauthorizedrepairmadeorattemptedtobemade.
3. Themanufacturerisnotliableforindirect,incidental,or
consequentialdamages
inconnectionwiththeproductincludinganycost
orexpense,providingsubstituteequipmentorserviceduringperiodsof
malfunctionornon‐use.*
4. Allliabilityforanyconsequentialdamageforbreachofanywrittenor
impliedwarrantyisdisclaimedandexcluded.
5. Thiswarrantydoesnotcoverinternalwearparts
ofthecombustion
system,includingthefirebrickliningandgaskets.
6. Warrantyisvoidifunitisnotusedaccording totheowner’smanual.
**Somestatesdonotallowtheexclusionoflimitationsofincidentalorconsequentialdamages,sotheabovemaynotapplyto
you.**
Procedure
Purchasermustgivenoticeofclaimofdefectwithinthewarrantyperiod
andpaytransportationtoandfromaservicecenterdesignatedbythe
manufacturer. Thedealerfromwhichtheunitwaspurchasedorthefactory,
atouroption,willperformthewarrantyservice.
Other Rights
Thiswarrantygivesyouspecificlegalrights;youmayalsohaveotherrights,
whichmayvaryfromstatetostate.
Forparts,warrantyreplacementproceduresmaybefoundatourpartsstoresite:
store.heatredefined.com

Page | 37
Important Notice
This registration information MUST be on file for this warranty to be valid. Please
mail this information, along with a copy of the sales receipt, within thirty (30) days from
the original date of purchase.
Use any of these three easy ways to send your warranty information in!
Mailing
Address
England’s Stove Works,
Inc.
Technical Support
Department
P.O. Box
206
Monroe, Virginia
24574
Fax
Number
(434) 929-4810 – Twenty-four hours a
day.
Online
Registration
Visit our warranty registration website
at:
http://www.englanderstoves.com/warranty/warranty.html
(WARRANTY CARD LOCATED ON NEXT PAGE)
For parts, warranty replacement procedures may be found at
our parts store site: store.heatredefined.com

Page | 38
WARRANTY REGISTRATION for England’s Stove Works®
Purchaser Information
I.
Purchased
By
(Name)
II.
Address
III.
City
State
Zip
Code
IV.
Telephone
Number
V.
Email
Address
Dealer Information
VI.
Purchased
From
VII.
Address
VIII.
City
State
Zip
Code
Unit Information
*Refer to the sticker on the back of the manual or box to complete this section.
IX.
Model
Number
Purchase
Date
X.
Purchase
Price
XI.
Serial
Number
Mfg.
Date
Purchase Questions
How did you first hear about our product? (Please check one)
Word
of
Mouth
Burn
Trailer
Demonstration
Internet
Other:
Where did you receive information about our product?
Via
Telephone
Dealer
(Name
of
dealer)
Internet
Other: