
Futuro Futuro
Futuro Futuro
Installation Instructions
REMOTE BLOWER KIT
Range hood accessory
INSTALLATION INSTRUCTIONS - REMOTE BLOWER KIT
ISTRUZIONI MONTAGGIO - ASPIRATORE SOTTOTETTO
WARNINGS:
1.) Only specialized technicians are authorized to carry out installation work.
2.) Before connecting the equipment to the power supply line, make sure the line voltage corresponds to the voltage indicated on the equipment's rating label.
3.) The equipment must be used exclusively with the 4-speed control panel installed on the hood.
4.) Do not connect the equipment to combustion fume outlet pipes of boilers, stoves, fireplaces, etc.
5.) Check that the air pipe and outlet pipe are not obstructed.
6.) Use the pipe fitting supplied to connect the fume outlet pipe of the hood to the external suction unit. Do not use pipes with smaller diameter. Avoid using
angled pipes. Make sure that the length of the pipes meets minimum pipe length requirements.
7.) Do not use the Remote Blower Kit for outdoor blower motor installation.
SAFETY:
1.) Do not allow children or impaired persons to operate the equipment unless they are supervised by a person who shall make sure the equipment is used
safely.
2.) The hood is designed exclusively to extract cooking fumes from household kitchen appliances. The manufacturer shall not be liable for damage caused by
different uses of the hood.
3.) Before cleaning or maintenance, make sure that the equipment is disconnected from the power supply line.
4.) The manufacturer shall not be liable for any damage caused by an incorrect installation, or incorrect use of the equipment, in which case the warranty shall
be void and no request for damage shall be accepted.
WARRANTY:
1.) The new equipment is covered by warranty in compliance with the current regulations.
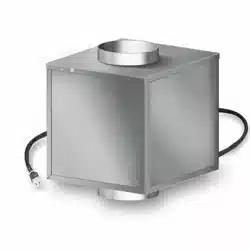
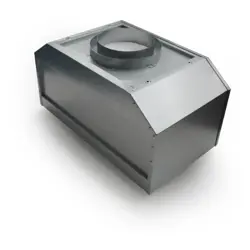
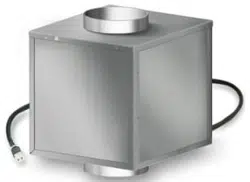
INSTALLING THE REMOTE UNIT:
The Remote Blower Kit may be installed on any horizontal or vertical surface that will provide a secure, stable mounting location which will
bear the weight of the Remote Blower Kit with the blower installed.
NOTE: the orientation of the horizontal axis of the blower motor must remain parallel to the ground (see Figure 1).
1.) Remove the mounting brackets, and find a suitable mounting location. Place the Remote Blower Kit with the brackets facing outward, and
mark the location of the screw holes on the mounting surface.
2.) Drill the holes to the appropriate diameter of the mounting screws, OR if attaching to a masonry/concrete/brick surface, use the plastic
screw anchors provided and drill the holes to the appropriate size of the plastic anchors.
3.) Remove the blower motor from the range hood (see following diagrams). Do NOT remove the (white plastic) blower chamber.
4.) Remove the (shiny metal) Duct Collar Adapter, and install it in the range hood, in order to replace the (just-removed) blower output collar.
5.) Install the blower inside the Remote Blower Kit, using the mounting hardware provided. Make sure the direction of the air inlet and outlet
are correct.
6.) Confirm the intended location of the Remote Blower Kit, as well as the relevant ductwork and 110-volt power outlet.
7.) Connect the 6-pin control cable (C1) to the 6-pin connector (C2) inside the range hood.
8.) Attach the Remote Blower Kit to the mounting surface, connect the ductwork, and plug in the 3-pin power cable into the 110-volt, 3-pin,
properly grounded power outlet.
9.) Check the operation of the range hood and the blower, and finalize your installation as appropriate.
NOTE:
Do NOT use flexible type ductwork - only rigid type.
Ductwork must maintain 6-inch diameter throughout the entire duct run, including any angles, adapters, and the end-cap.
Do NOT cut off the 3-pin power plug and hard-wire the blower directly to the power source.
CORRECT -
Blower axis parallel to ground
CORRECT -
Blower axis parallel to ground
CORRECT -
Blower axis parallel to ground
INCORRECT!
Blower axis perpendicular to ground
FIGURE 1 - BLOWER ORIENTATION
Futuro Futuro
Futuro Futuro
Installation Instructions
REMOTE BLOWER KIT
Range hood accessory
INSTALLATION INSTRUCTIONS - REMOTE BLOWER KIT
ISTRUZIONI MONTAGGIO - ASPIRATORE SOTTOTETTO
STEP 1
STEP 4
STEP 2 (optional)
STEP 3
A.) Disconnect the 6-pin plug from the blower.
B.) Using a long Philips (cross) screwdriver, remove
the 4 screws holding the blower motor inside the
blower chamber.
NOTE: do NOT remove the (white plastic) blower
chamber itself.
Remove metal filters. Remove carbon filter (if present).
Connect the 21-foot extension cable to the 6-pin plug in
the range hood, and connect the 3-pin power cord to a
standard 110-volt outlet. Please note: the outlet should
be on a separate, dedicated line, not shared with other
appliances, dimmable lights, or GFI outlets.
Install the Remote Blower Kit in an accessible indoor
location (in the attic, between the joists, under the
eaves, etc.) Please note: the Remote Blower Kit is
NOT rated or designed for outdoor installation.
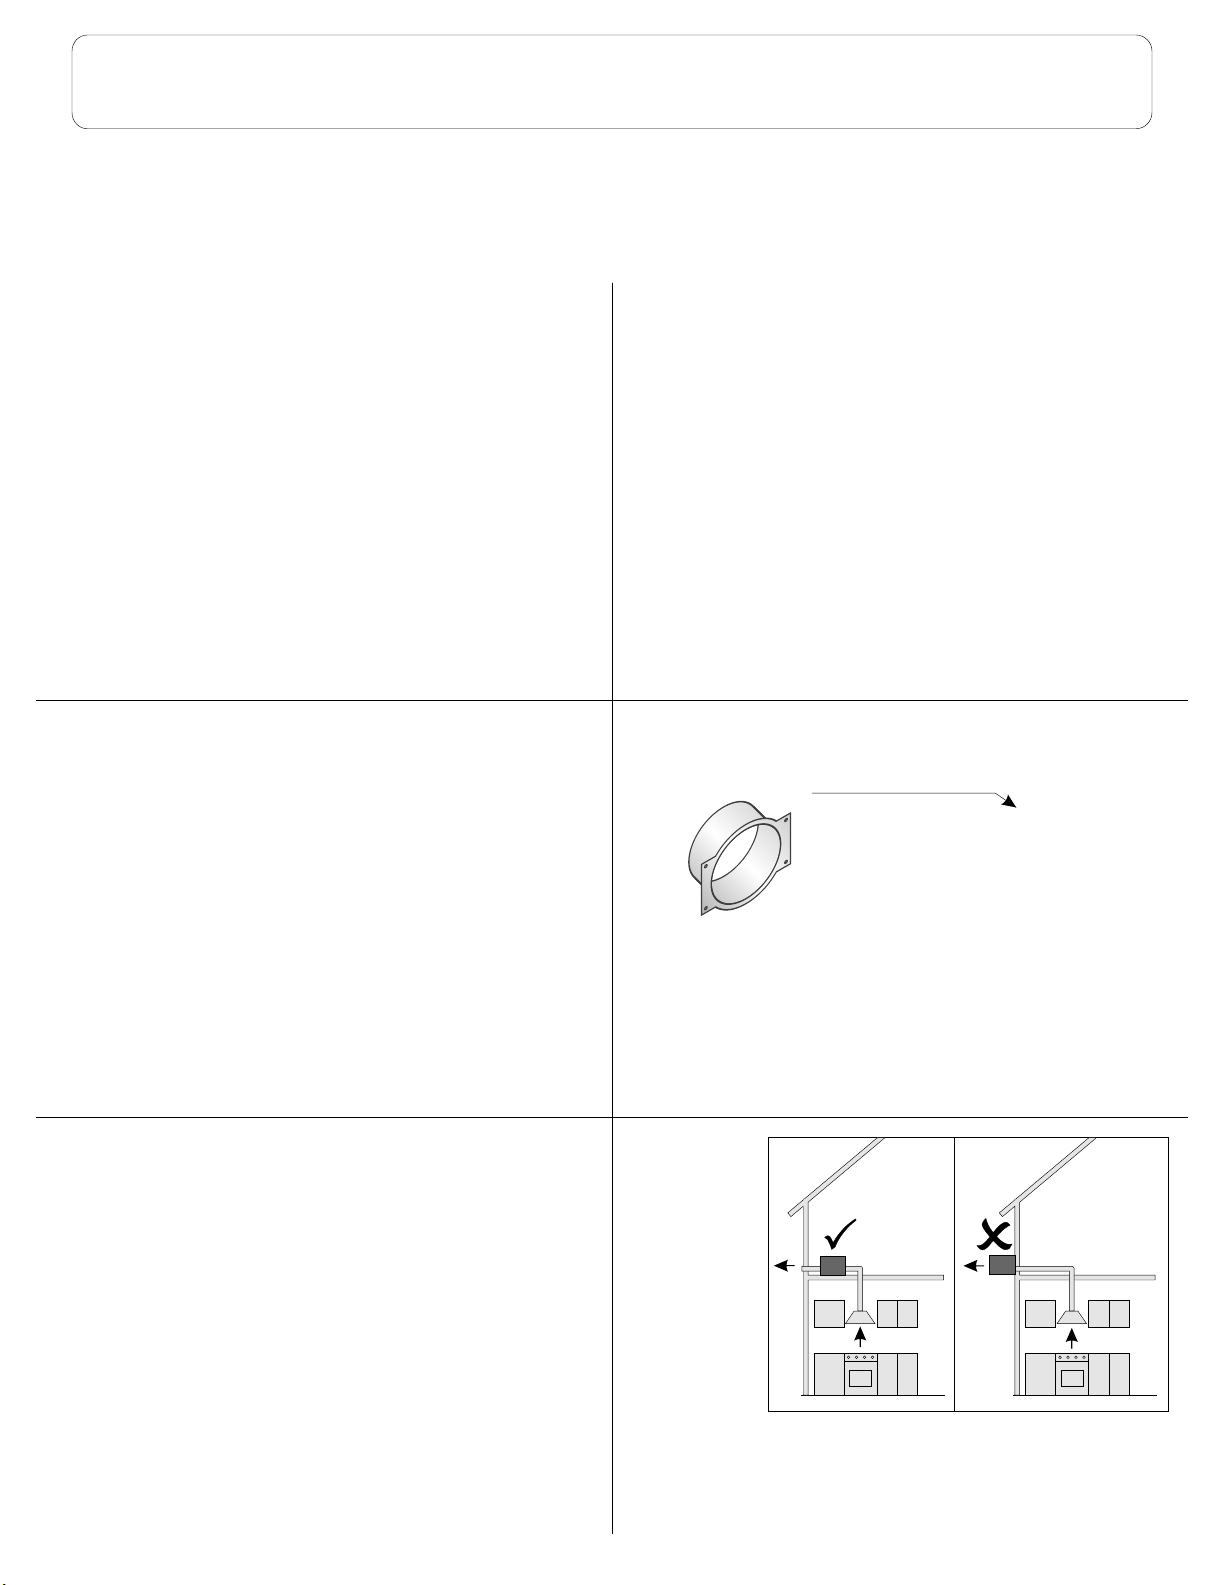
Remove the Duct Collar Adapter included with the
Remote Blower Kit, and install it in the blower chamber
inside the range hood, to replace the blower output
collar.
Duct Collar Adapter
STEP 5 STEP 6
CORRECT -
Installed in
INDOOR location
INCORRECT -
Do NOT install in
OUTDOOR location