
KP-S1 / KPT-S1
ENGLISH
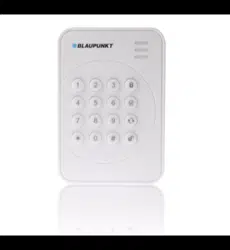
Remote Keypad (With Tag
Reader)
Follow instruction in this document to
setup and use the accessory, refer to
illustration on the right for detail. For
further setting or operation information,
please visit Blaupunkt website
http://www.blaupunkt.com to download
the complete manual.
Getting Started
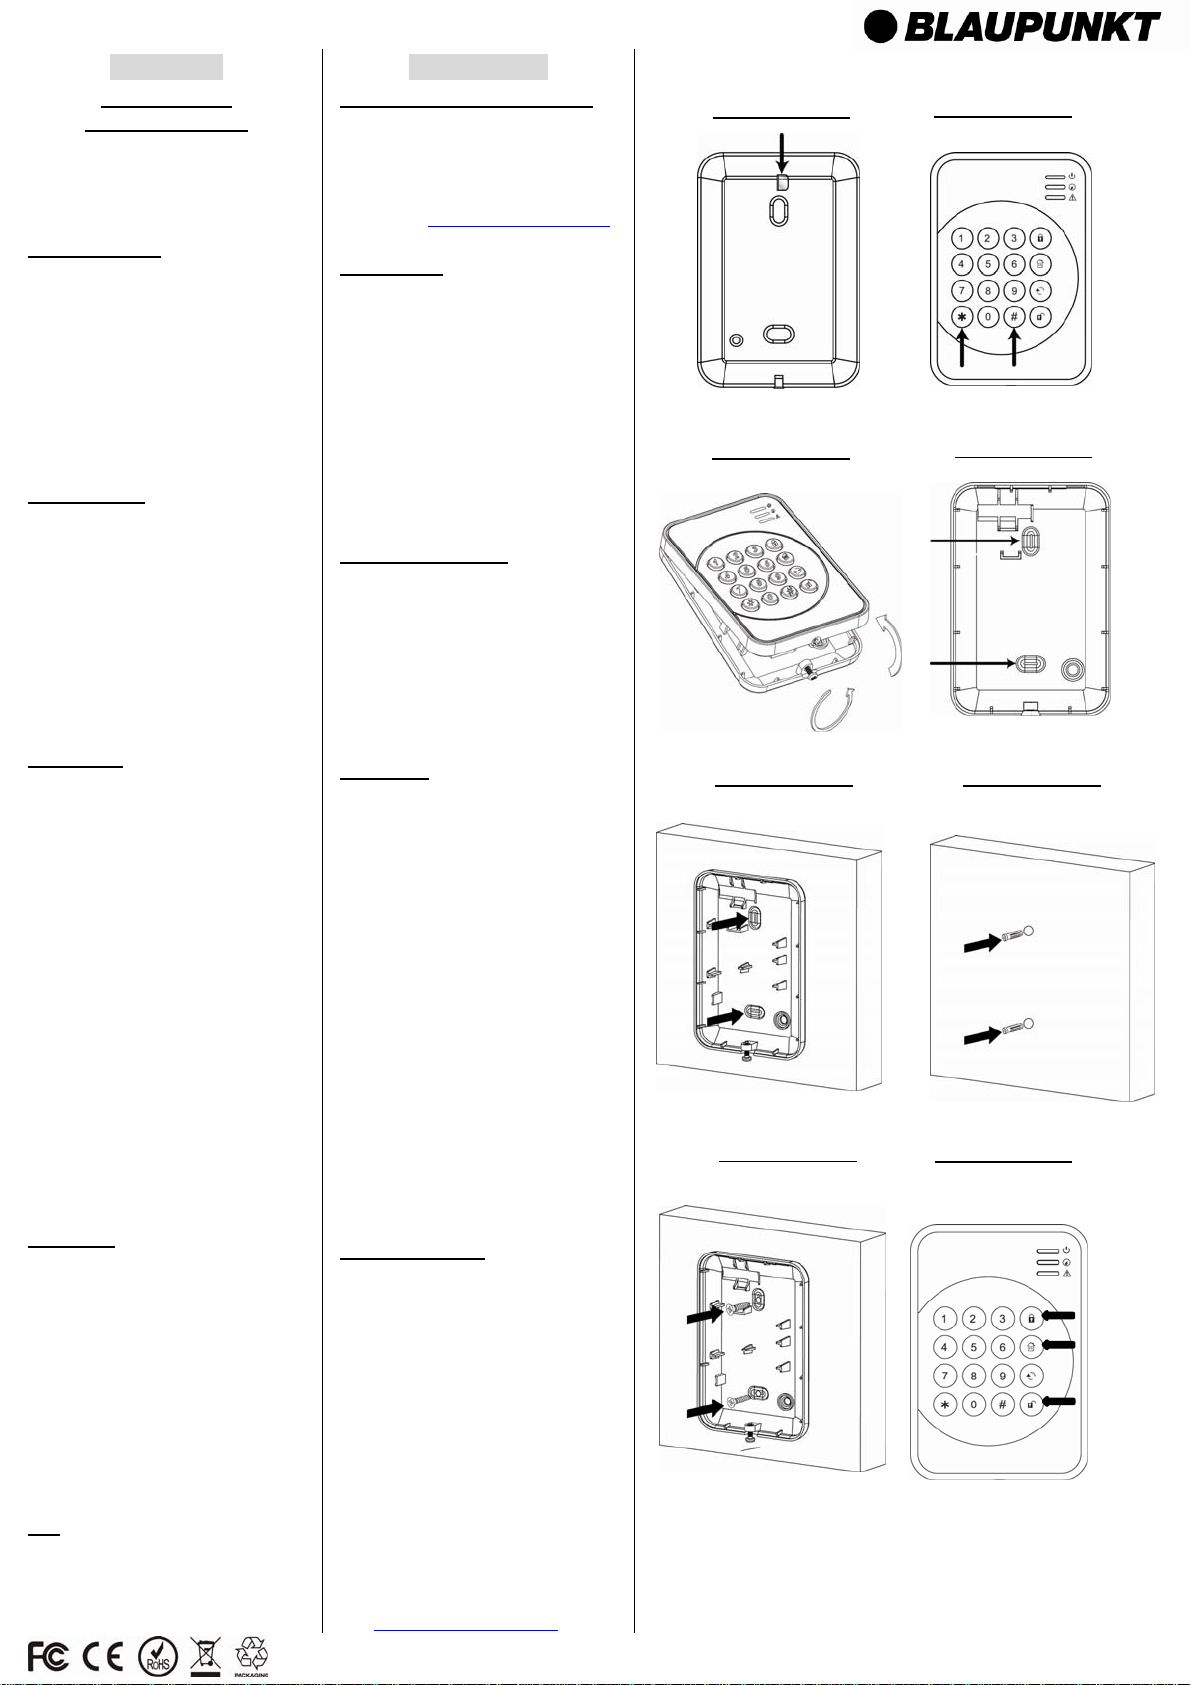
1. Pull out the battery insulator to
activate battery. (Figure 1)
2. Put the Control Panel into learning
mode.
3. Press both # and keys to learn
the keypad, the keypad will emit a
long beep (Figure 2).
4. Refer to Control Panel manual to
complete learning process.
Mounting Location
Mount at door way or back door
for extra entry control.
Mount in your bedroom for easy
access of alarm system at night.
Mount at chest height for ease of
operation
Installation
Before installation, put the Control
Panel into Walk Test mode and press
both # and keys at mounting
location to test signal range
1. Remove the screw at bottom of
keypad to flip open the cover.
(Figure 3)
2. The back cover has 2 knockouts for
mounting. (Figure 4)
3. Break through the knockouts; mark
the mounting location on using
knockouts as template. (Figure 5)
4. If required, drill holes into marked
location and insert wall plug.
(Figure 6)
5. Screw the back cover onto the
mounting location. (Figure 7)
6. Replace the front cover onto the
base.
Basic Operation
Enter a User PIN Code and press
the Away Arm key to away arm
your alarm system. (Figure 8)
Enter a User PIN Code and press
the Home Arm key to home arm
your alarm system.
Enter a User PIN Code and press
the Disarm key to disarm your
alarm system.
For advanced operation
instruction, please download the
complete manual from
http://www.blaupunkt.com
ESPAÑOL
Teclado remoto
(con lector de chip)
Siga las instrucciones del documento
para configurar y operar éste accesorio,
consultando las gráficas de la derecha
para ver detalles. Para obtener más
información de configuración y operación,
por favor visite la página web
http://www.blaupunkt.com para descargar
el manual completo.
Pasos iniciales
1. Retirar el aislante de la pila para
activarla. (Figura 1)
2. Colocar el panel de control en
modo de aprendizaje.
3. Oprimir ambas teclas # y para el
aprendizaje del teclado, éste
emitirá un pitido largo (Figura 2).
4. Consulte el manual del panel de
control para completar el proceso
de aprendizaje.
Ubicación de montaje
Ubicarlo en entradas adicionales
para controlar el acceso.
Ubicarlo en su dormitorio para
facilitar el acceso en las noches.
Ubicarlo a la altura del pecho para
fácil operación.
Instalación
Antes de instalarlo, ajustar el panel de
control en modo Prueba de cobertura y
oprimir ambos botones # and en su
ubicación de montaje para verificar la
intensidad de señal.
1. Aflojar el tornillo de la parte inferior
para poder abrir y voltear la tapa
posterior. (Figura 3)
2. La tapa posterior tiene 2 orificios
para hacer el montaje.(Figura 4)
3. Romper los orificios ciegos y
usarlos como plantilla para marcar
los puntos sobre el sitio. (Figura 5)
4. Si es necesario, perforar los
orificios de montaje sobre las
marcas realizadas e insertar los
tacos de pared.(Figura 6)
5. Atornillar la tapa posterior al sitio
elegido. (Figura 7)
6. Poner la tapa frontal sobre la base.
Operación básica
Introduzca el código PIN usuario y
oprima la tecla Activado para
armar su sistema de alarma.
(Figura 8)
Introduzca el código PIN usuario y
oprima la tecla Activado Casa
para armar parcialmente su
sistema de alarma.
Introduzca el código PIN usuario y
oprima la tecla Desactivado para
desarmar su sistema.
Para operaciones avanzadas,
favor descargar el manual desde
http://www.blaupunkt.com
Figure 1 / Figura 1
Figure 5 / Figura 5
Figure 2 / Figura 2
Figure 3 / Figura 3
Figure 4 / Figura 4
Figure 6 / Figura 6
Figure 7 / Figura 7
Figure 8 / Figura 8
Arm /
Activado
Home
/ Activado Casa
Disarm /
Desactivado
KP-S1 / KPT-S1
FRANCAIS
Clavier déporté
(avec lecteur RFID)
Suivre les instructions de cette notice
pour enregistrer et utiliser l’accessoire ;
pour plus de détails, voir les images
sur la droite.
Enregistrement
1. Retirer la languette de protection
pour activer la pile. (Figure 1)
2. Mettre la centrale en mode
Enregistrement.
3. Appuyer simultanément sur # et
pour enregistrer le clavier, le clavier
émet un long bip. (Figure 2)
4. Se référer à la notice de la centrale
pour finir l’enregistrement.
Emplacement
Nous recommandons les
emplacements suivants :
Installer à l’intérieur près de la
porte d’entrée ou de la porte
arrière.
Installer dans votre chambre pour
disposer d’un accès facile à la
centrale pendant la nuit.
Installer à hauteur de poitrine pour
une meilleure utilisation.
Installation
Avant installation, mettre la centrale en
mode Test et appuyer simultanément
sur # et , une fois le clavier à son
emplacement, pour tester la portée du
signal.
1. Dévisser la vis du bas pour ouvrir le
clavier. (Figure 3)
2. La face arrière a 2 pré-trous de
fixation. (Figure 4)
3. Percer les pré-trous ; marquer
l’emplacement sur le mur en
utilisant les pré-trous comme
repère. (Figure 5)
4. Si nécessaire, percer des trous à
l’emplacement marqué et insérer
des chevilles. (Figure 6)
5. Visser la face arrière du clavier à
l’emplacement prévu. (Figure 7)
6. Refermer le clavier.
Utilisation
Taper le code Utilisateur puis
appuyer sur la touche Marche
totale pour mettre le système en
Marche totale. (Figure 8)
Taper le code Utilisateur puis
appuyer sur la touche Marche
partielle pour mettre le système
en Marche partielle.
Taper le code Utilisateur puis
appuyer sur la touche Arrêt pour
mettre le système en Arrêt.
Pile
1 x 3V lithium (déjà insérée)
PORTUGUÊS
Teclado Remoto (Tag Reader)
Siga as instruções neste documento
para instalação e uso do acessório.
Para mais configuração e detalhes de
operação, por favor visite o site
Blaupunkt http://www.blaupunkt.com
para baixar o manual completo.
Começando
1. Retire o isolador da bateria para
ativar bateria. (Figura 1)
2. Coloque o Painel de Controle no
modo de aprendizagem.
3. Pressione # e chaves para
aprender o teclado, o teclado irá
emitir um sinal sonoro longo
(Figura 2).
4. Consulte o manual do painel de
controle para concluir o processo
de aprendizagem.
Local de Montagem
Monte a caminho da porta ou porta
dos fundos para o controle de
entrada extra.
Monte em seu quarto para facilitar
o acesso de sistema de alarme
durante a noite.
Monte na altura do peito para
facilitar a operação.
Instalação
Antes da instalação, colocar o Painel
de Controle no modo Walk Test e
pressione tanto teclas # e no local
de montagem para testar o alcance do
sinal
1. Remova o parafuso na parte
inferior do teclado para abrir o flip
tampa. (Figura 3)
2. A tampa traseira tem 2 aberturas
para a montagem. (Figura 4)
3. Romper os nocautes; marcar o
local de montagem no uso
nocautes como modelo. (Figura 5)
4. Se necessário, fazer furos em local
marcado e inserir ficha de parede.
(Figura 6)
5. Parafuso da tampa de volta para o
local de montagem. (Figura 7)
6. Recoloque a tampa frontal na base.
Operação básica
Introduzir um código PIN do
usuário e pressione a tecla braço
para fora armar o seu sistema de
alarme. (Figura 8)
Introduzir um código PIN do
usuário e pressione a tecla Home
Braço de casa armar o seu
sistema de alarme.
Introduzir um código PIN do
usuário e pressione a tecla
Disarm para desarmar o sistema
de alarme.
Para obter instruções de
operação avançada, faça o
download do manual completo de
http://www.blaupunkt.com
Figure 1 / Figura 1
Figure 5 / Figura 5
Figure 2 / Figura 2
Figure 3 / Figura 3
Figure 4 / Figura 4
Figure 6 / Figura 6
Figure 7 / Figura 7
Figure 8 / Figura 8
Marche totale
/ Armar
Marche partielle
/ Home
Arrêt / Disarm