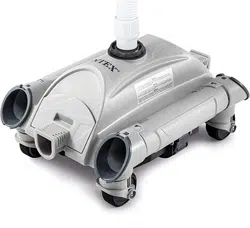
USER'S MANUAL Auto Cleaner
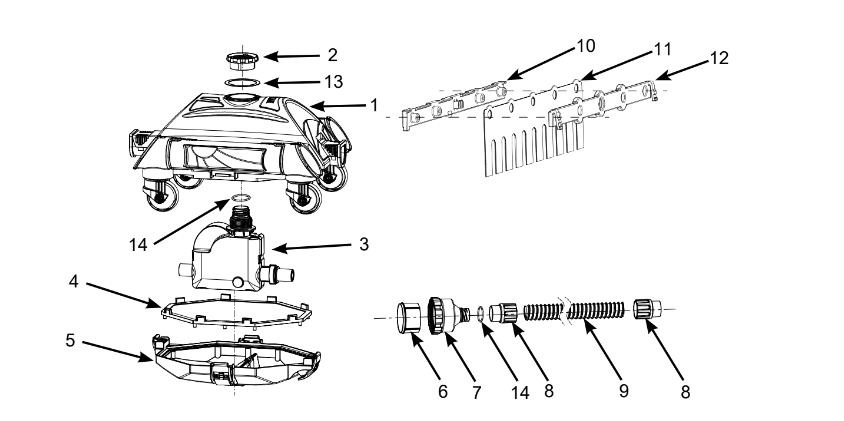
Parts Reference
Before assembling your product, please take a few minutes to check the contents and become familiar with all the parts.
Set Up Instructions
IMPORTANT PREPARATION INFORMATION
Please read, understand, and follow all instructions carefully before installing and using this product.
General
- The Auto Cleaner must be connected to a filter pump with a flow rate between 1600 - 3500 gallons/hour (6056 - 13248 liters/hour).
- For Intex® above ground pools with 1-1/2” (38 mm) threaded strainer connector hose fitting.
- The cleaning performance depends on the filter pump flow rate, the higher the flow rate the better the performance.
- First assemble your filter pump and then set up the auto cleaner.
- If using a sand filter, ensure the sand media is clean by backwashing it first. Run the filter pump for 10-15 minutes before connecting the auto cleaner to the water return connector.
- The auto cleaner will not work if the filter pump is not operating.

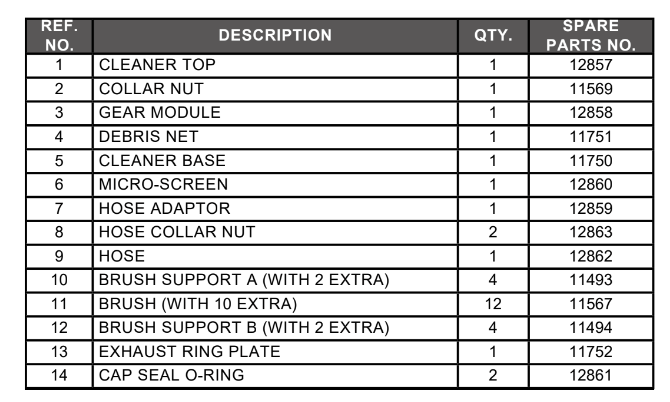
1. Turn off the filter pump. From inside of the pool, unscrew the nozzle from the water return connector. See Fig. 1.
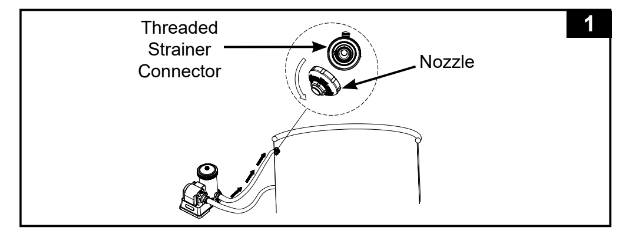
2. Make sure the micro-screen (6) is inside the hose adaptor (7), then screw the hose adaptor to the threaded strainer connector, from inside of the pool. See Fig. 2.
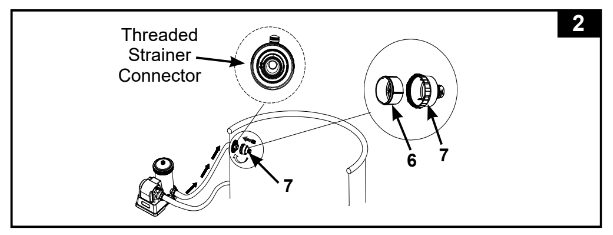
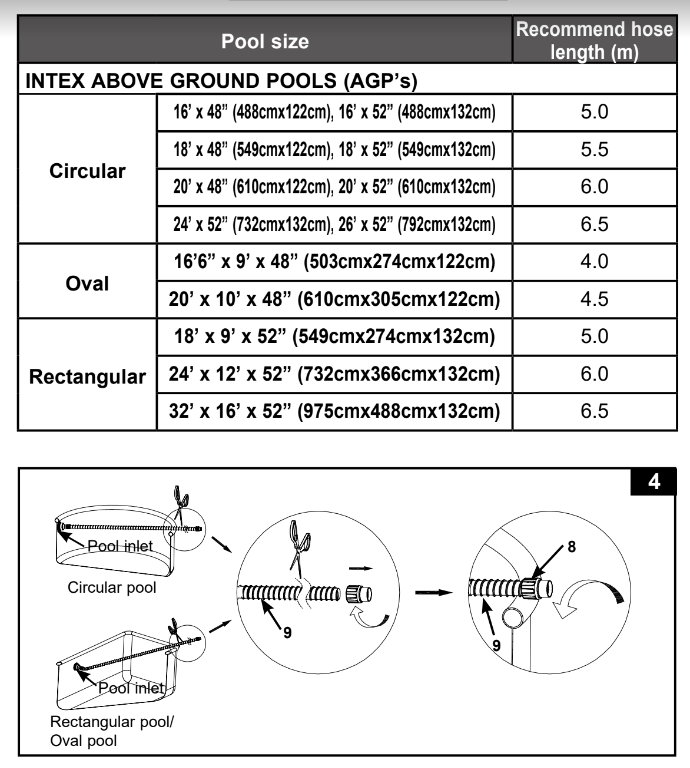
3. Screw the hose (9) with the hose collar nut (8) to the hose adaptor (7). See Fig. 3.
4. Extend the hose (9) to the opposite side of the pool wall so that it over hang the wall and cut the excess hose with a scissor, refer to below table and fig 4.
Note: unscrew (clockwise direction) the hose collar nut (8) from the other end of the hose (9) before cutting the excess hose. screw counter-clockwise direction) the hose collar nut (8) back onto the main hose (9) after cutting.
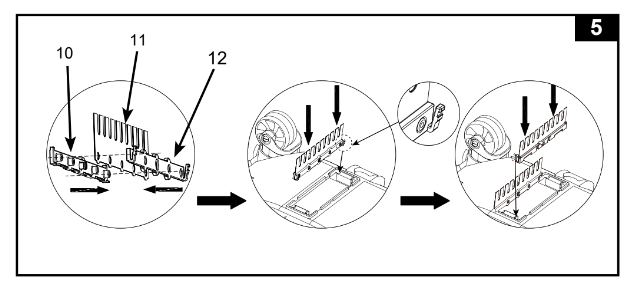
5. Brush assembly. See Fig. 5.
NOTE: Remove the brushes from underneath the device when vacuuming large debris or leaves on the pool floor.
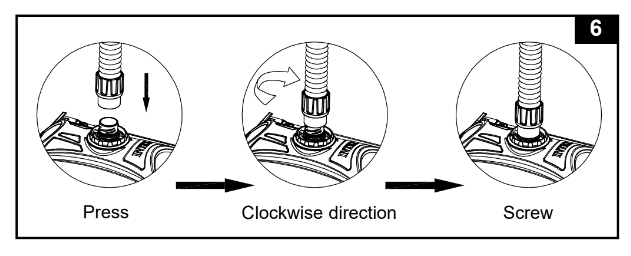
6. From outside of the pool, connect the end of hose with the hose collar nut (8) to the auto pool cleaner inlet.
Vertically insert the hose collar nut (8) into the inlet opening, while pushing down the hose collar nut, turn the inlet rim clockwise to tighten the hose. To remove the hose, turn the inlet rim counter-clockwise. See Fig. 6.
7. Hold the auto cleaner upside down below the water surface to jet out the water. See Fig. 7. This will evacuate all the air in the hose and auto cleaner, so the cleaner will sink to the bottom of the pool floor.

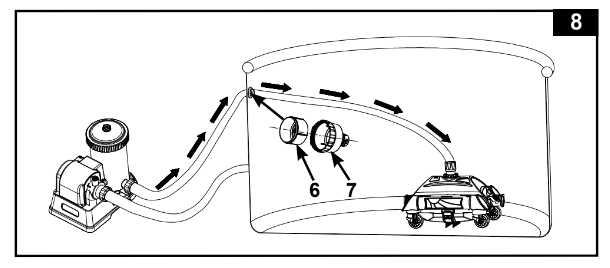
8. Turn on the filter pump and make sure water is flowing through the micro-screen (6) and the hose adaptor (7). The auto cleaner is now moving and vacuuming the pool floor. See Fig. 8.
Note: The cartridge filter pump and sand filter pump will clean the pool water. It’s essential to clean or replace the filter cartridge or backwash sand media frequently to keep the water clean.
Debris Net Cleaning
1. Make sure the filter pump is turned off, and disconnect the power cord from the electrical outlet.
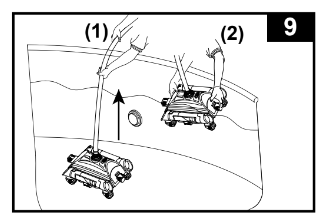
2. Lift the auto cleaner’s hose slowly then hold the auto cleaner up with both hands. See Fig. 9.
CAUTION: Do not pull the hose directly which could damage the auto cleaner hose connection fitting.
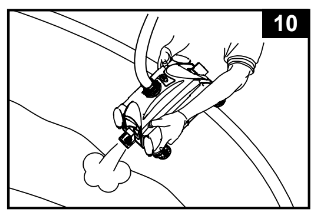
3.Grasp the cleaner base with two hands, lift the auto cleaner up slowly with an angle (either head or tail up). See Fig.10. After the water has been fully released from the auto cleaner, carry the auto cleaner out of the pool and put it on the ground.
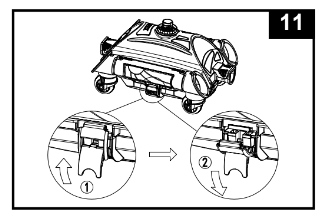
4. Unlock the four buckles located on the four sides. See Fig. 11.
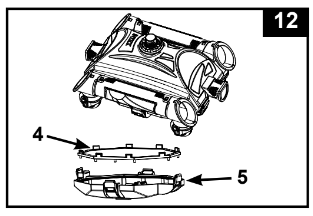
5. Remove the debris net (4) from the cleaner base (5). If debris is on the debris net and cleaner base, use garden hose to flush the debris off. See Fig. 12.
6. Reassemble auto cleaner reversing steps 1, 2, 3, 4 and 5.
Micro-screen cleaning
- Make sure the filter pump is turned off, and disconnect the power cord from the electrical outlet.
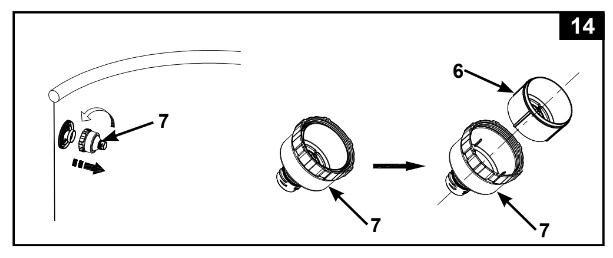
- To remove the hose, unscrew (counter-clockwise direction) the hose collar nut (8) from the hose adaptor (7). See Fig. 13.

3. Unscrew (counter-clockwise direction) the hose adaptor (7) from the threaded strainer connector. Remove the micro-screen (6) from the hose adaptor. use a garden hose to clean and flush out any debris from the micro-screen and hose adaptor. See Fig. 14.
4. Reassemble all the components back by reversing previous steps.
Troubleshooting Guide
| TROUBLE |
SOLUTION |
| Auto Cleaner doesn’t move |
- Ensure the filter pump is operating. Lift the auto cleaner out of the water and check if water is flowing out from either end of the device.
- Tighten hose and hose collar nut securely, and connect the hose to the water return connector, see “Setup” section. If you are not sure which return connector is, try connecting the auto cleaner to each pool outlet until water is flowing out of either end of the device.
- Lift the auto cleaner out of the wrinkled area, and make sure the pool floor is as smooth as possible.
- Contact Intex Service Center.
|
Movement is
very slow |
- Check and clean the debris net and micro-screen.
- Clean or replace the filter pump cartridge.
- If using a sand filter, ensure the sand media is clean by backwashing it. See sand filter owner’s manual.
- If you are still not satisfied with the speed, a higher flow rate filter pump is recommended.
|
Lifts off from
the pool floor |
- Release the air from the auto cleaner by following the Setup” instructions.
- Pool water too dirty. Ensure the pool water chemistry is balanced. If the pool water is green, brown or black, adjust the chlorine and pH level. See pool owner’s manual.
- Check if the pump flow rate is within the specified range, if the flow rate is more than 3500 gal/h, change pump with lower flow rate.
|
| CAN NOT pick up the Leaves on pool floor |
- Remove the brushes from the underside and put the Auto Cleaner back into the pool, see “Setup” section.
- Clean all the debris from the Auto Cleaner after operating for 2-3 hours continuously.
|
Long Term Storage
- Make sure the filter pump is turned off, and disconnect the power cord from the electrical outlet.
- Using the Set Up instructions in reverse, disassemble the auto cleaner.
- Clean and air dry all the accessories and parts thoroughly.
- Loosely roll up and avoid twisting the hose during storage. Do not put heavy objects on top of the hose.
- Remove the brushes and keep them flat and straight during storage.
- The original packaging can be used for storage. Store in a dry, cool storage location.