Loading ...
Loading ...
Loading ...
DUST BAG CHANGING
DO NOT bend or crease the middle of the
cardboard when installing the bag into the
bag mount slots.
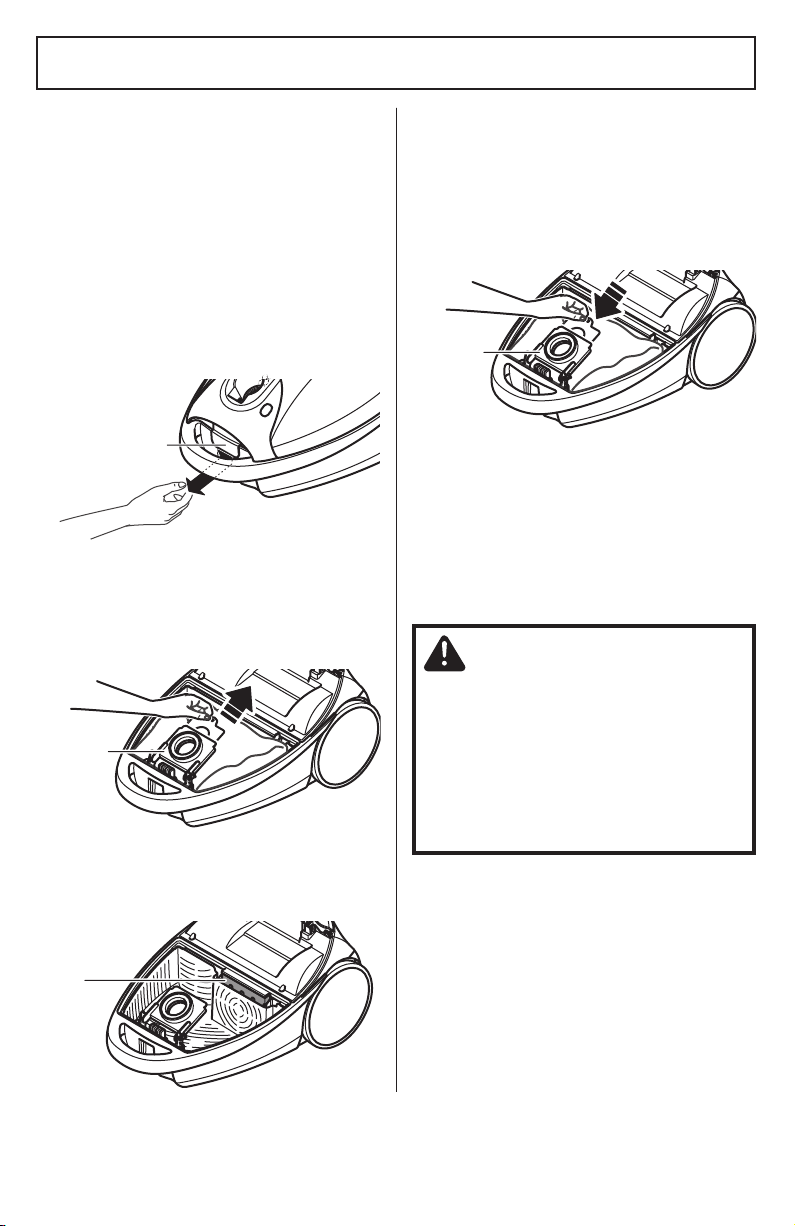
6. Rotate bag mount down and install bag
into slots per illustration, pushing down until
the cardboard tab locks into position and
the holes align.
7. Tuck the bag securely into the bag cavity
so that none of the bag is able to be
pinched by the hood.
8. Close and latch canister hood.
9. Insert hose into canister until it snaps in
place.
10. Plug cord into wall outlet.
For best cleaning results, the dust bag
should be changed often. The CHECK BAG
indicator will come on when the bag needs
to be changed or the airflow is blocked.
NOTE: See REPLACEMENT PARTS for part
number detail (page 5).
1. Turn off and unplug vacuum cleaner.
2. Remove hose from canister.
3. Pull hood release out and up, then lift
canister hood.
4. Pull bag out of the bag mount.
NOTE:
The bag mount will flip forward
after removing bag. This will prevent the
hood from closing until a new bag is
installed.
5. Check the motor safety filter and
replace, if necessary.
See MOTOR SAFETY
FILTER CHANGING (page 20).
Hood
Release
Bag
Mount
Bag
Mount
Motor Safety
Filter
CAUTION
NEVER REUSE A DUST BAG. Very fine
materials, such as carpet freshener, face
powder, fine dust, plaster, soot, new car-
pet lint, etc. can clog the bag and cause it
to burst before it is full and may cause
damage to vacuum cleaner motor.
Change bag more often when vacuuming
these materials.
- 19 -
Loading ...
Loading ...
Loading ...