
Loading ...
Loading ...
Loading ...
Power Kit Installation
6 FEIT ELECTRIC COMPANY | PICO RIVERA, CA | www.feit.com
3
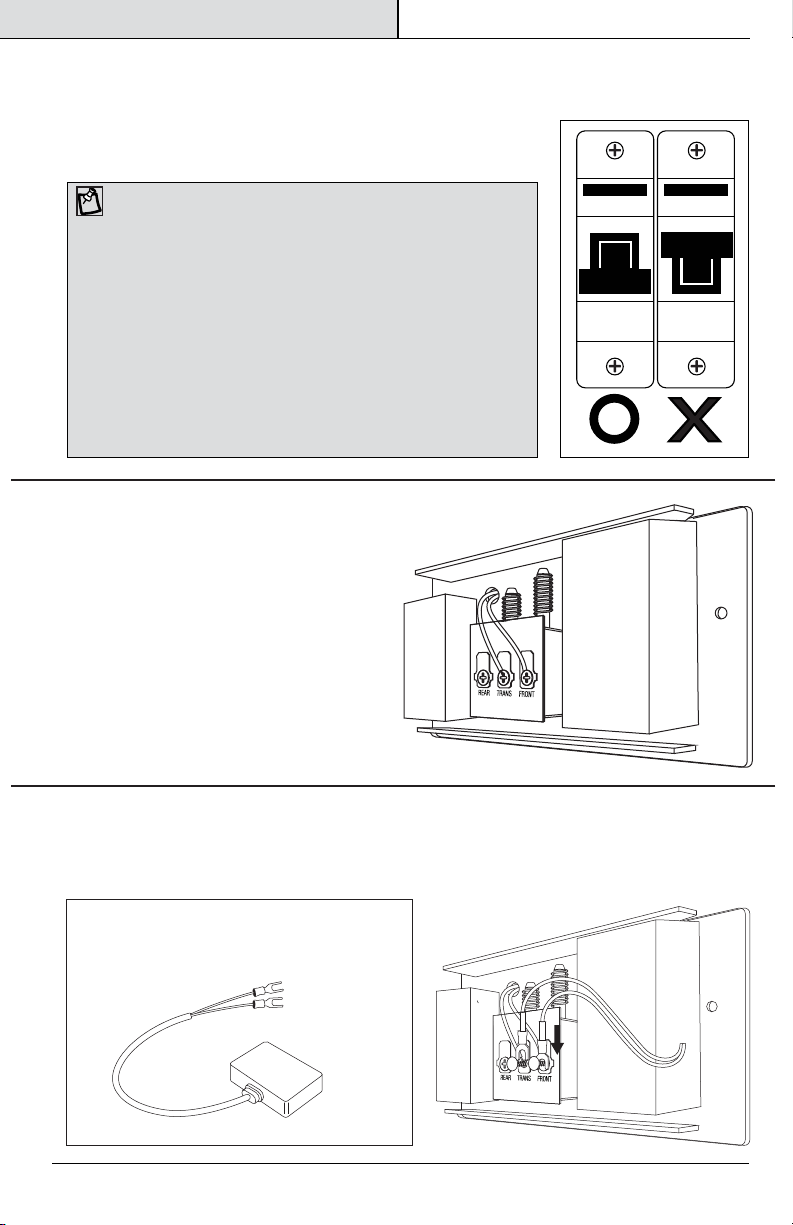
Slightly unscrew the “FRONT” terminal and “TRANS” terminal. Connect each wire of the
Power Kit (DD) to each screw. It does not matter which wire connects to which screw.
Leave the existing doorbell wires and tighten both screws.
Install Power Kit
Locate the Power Kit (DD) included in the packaging.
The transformer terminal is usually labeled TRANS,
T, AC or 0. The front terminal is usually labeled
FRONT, F, 1 or C1.
1
Shut Off power to your doorbell and mechanical
chime at the circuit or fuse breaker before installing.
Ring your doorbell again to confirm the power is Off.
You will not be able to hear any sound.
Turn Off Power
2
Locate Existing Mechanical Chime
Locate your existing mechanical chime. It is a
box that produces the sound when your
doorbell is pressed. Remove the cover (here is
an example of a mechanical chime).
ON
OFF
NOTE: Your transformer should match the normal operation
voltage. Do not use DC power supplies with wired chimes. Not all
chimes are compatible with the Smart Doorbell.
Mechanical Chime – For 12-24VAC normal operation, install the Power
Kit to give consistent power to your Smart Doorbell. Choose “Mechanical
Chime” setting in the app after pairing the device to function properly.
Check your installation if the Power Kit is buzzing or hot to touch. Your
wiring may be wrong. Consult a professional electrician for further
assistance.
Digital Chime – For 12-24VAC normal operation, DO NOT install the
Power Kit. Choose “None” setting in the app after pairing the device to
function properly.
Intercom System – Incompatible with the Smart Doorbell.
Loading ...
Loading ...