
Loading ...
Loading ...
Loading ...
NOTE: Feed your doorbell wires through
the center hole before mounting.
Mounting & Installation
2
4
Mark screw positions using the Mounting
Plate (BB) on your wall.
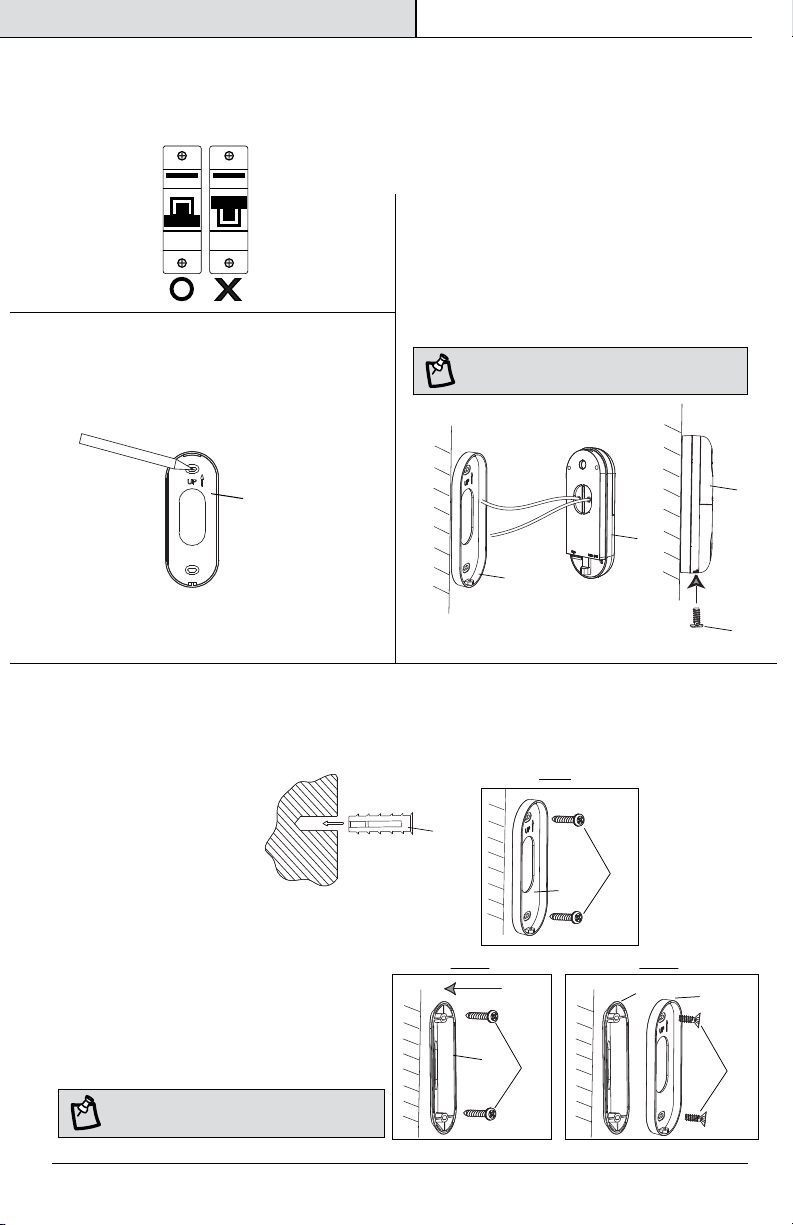
Shut Off the power to your doorbell at the
circuit or fuse breaker before installing.
Attach your doorbell wires to the External
Power Port on the back of your Smart Video
Doorbell (AA). Use the provided Wire
Extenders (MM) and Wire Terminal Block
(LL) if your existing doorbell wires are too
short. Tighten the Terminal Screws (NN)
with the screwdriver. Attach the Smart
Video Doorbell (AA) onto the Mounting Plate
(BB). Then secure it with a Star-Shaped
Screw (HH) at the bottom of the Smart
Video Doorbell (AA), using the Star-shaped
Screwdriver (JJ).
Mark Screw Positions
1
Shut Off the Power
Installing the Smart Video Doorbell
3
Installing the Mounting Plate
Drill holes at the marked points if installing on a hard surface such as concrete or
brick. Insert Mounting Anchors (FF) into holes. You can skip this step if installing on
wood or siding.
BB
AA
Use the Mounting Screws (EE) to
attach the Mounting Plate (BB) to
the wall (see Fig.1).
Optional Angled Wall Mount: Use the Mounting
Screws (EE) to attach the Angle Wall Mount (CC) to
the wall, then attach the Mounting Plate (BB) to the
Angle Wall Mount (CC). Use the Angle Wall Mount
Screws (GG) to screw in the Mounting Plate (BB)
(see Fig. 2a & 2b).
FF
Fig. 1
Fig. 2a Fig. 2b
EE
GG
EE
CC
BB
BB
CC
AA
HH
NOTE: Your existing doorbell wires can go
to any terminal on the External Power Port.
ON
OFF
5 FEIT ELECTRIC COMPANY | PICO RIVERA, CA | www.feit.com
12-24VAC
BB
Loading ...
Loading ...
Loading ...