Loading ...
Loading ...
Loading ...
Version 3/15 - Page 4
Please perform these steps before proceeding with
normal installation
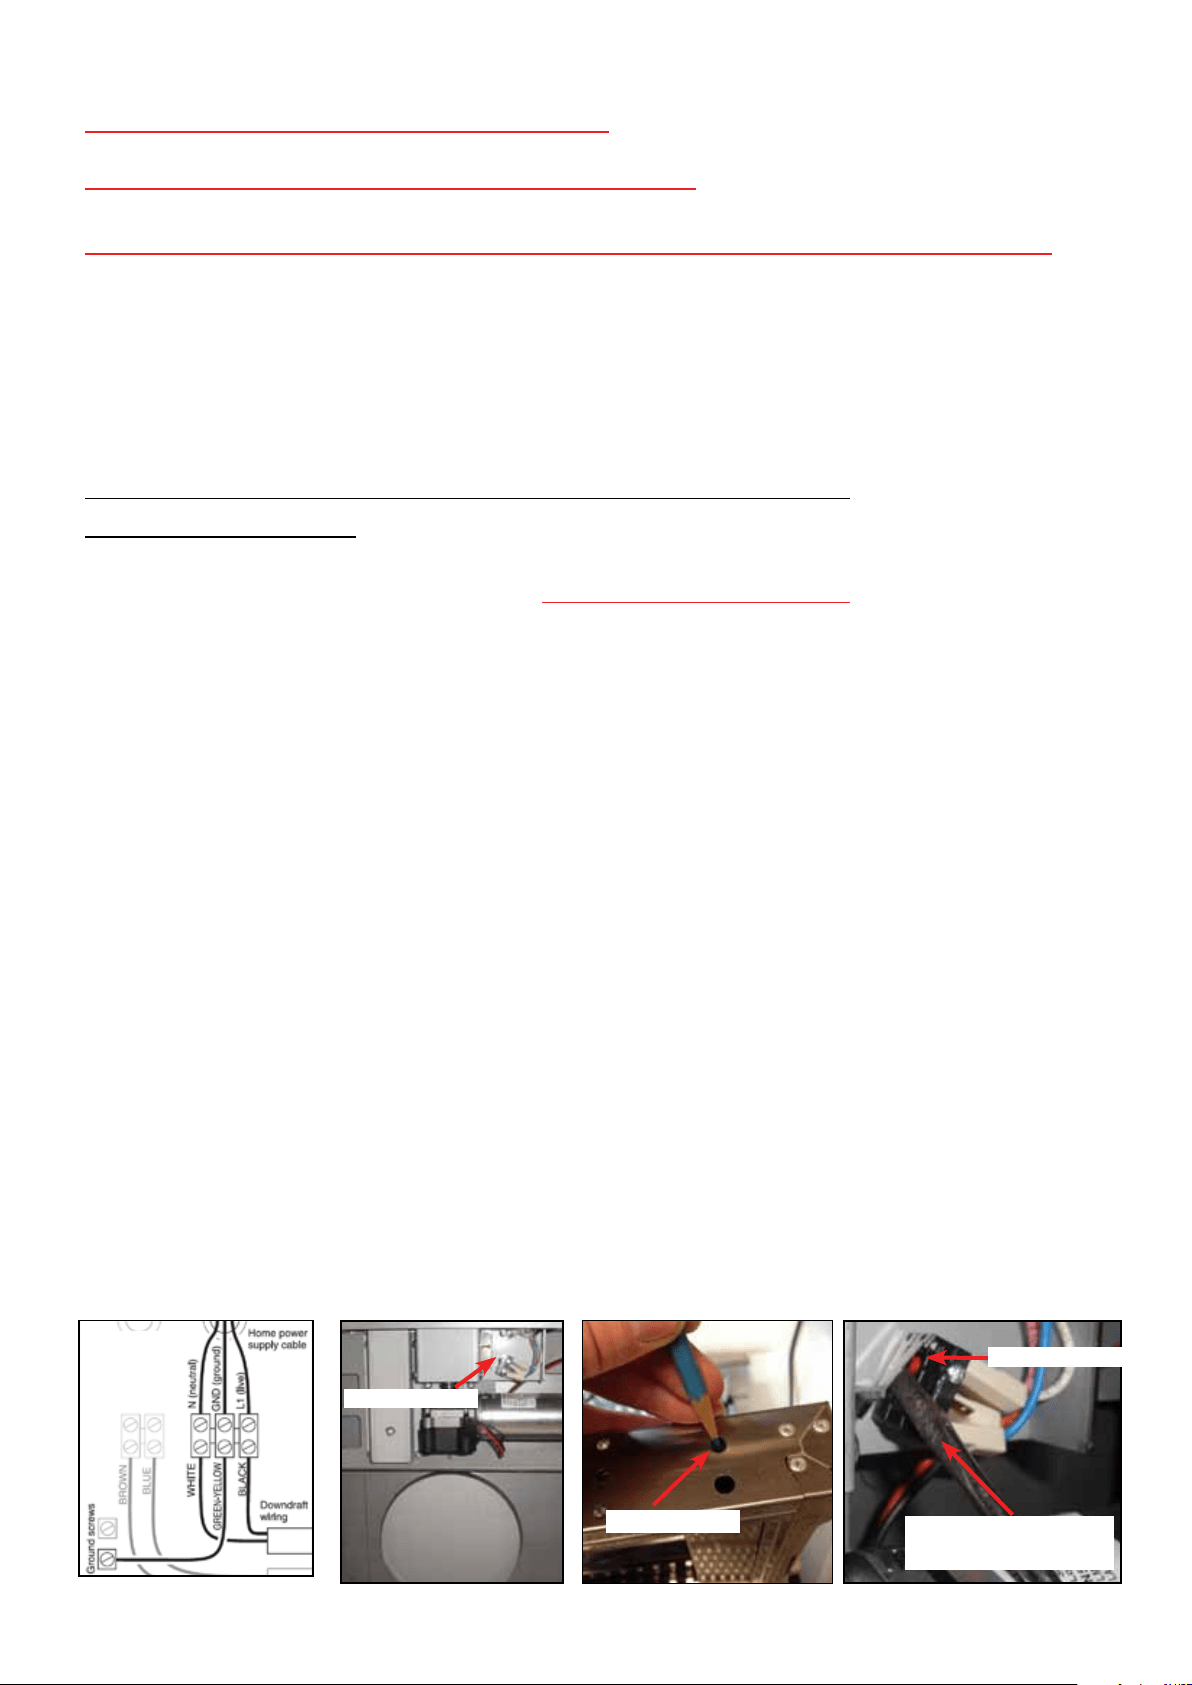
Step 1) Remove the product from the box and (with the electrical circuit OFF) connect the house power
to the hood by connecting the green, white and black wires into the hood wiring box, located on the bot-
tom left side of the hood. Once the electrical connections are made and the wiring box is closed, turn the
circuit back on.
Step 2) Remove the entire front access panel from the hood to expose the internal gears and switches by
removing the screws holding the panel in place (see photo)
Step 3) Press and hold the on/off button (with a pointy object) on the top / right of the hood (see photo)
Step 4) While holding the on/off button, place a small flat head screwdriver underneath the safety
switch to disengage the lever from the safety switch button (see photo). This switch is the front switch in
the pair of switches on the bottom of the hood (in front of lower limit switch). By pulling this lever away
from the depressed safety switch button, this will return the hood to normal operation and the hood
will now rise and fall down normally. These steps should only be required once and the safety switch will
operate normally going forward.
Step 5) Test the hood by pressing the on / off button on top of the hood for several up and down cycles
to ensure the hood is operating without holding the switch on the bottom. Disconnect the power
Step 6) Proceed with the rest of the steps to install the product per the installation instructions
Important Please read before beginning installation
A safety switch, which stops the hood from rising up for safety reasons, will also stop the rise
if it moves into the locked or “activated” position during shipment. These steps will put the
safety switch in the “deactivated” or unlocked position to complete installation.
on/off button
Step 2 Step 3 and 4 Step 4
flat head screwdriver
pushing lever up
safety switch
ATTENTION INSTALLERS
Step 1
INSTALLATEURS ATTENTION
wiring box
safety switch
Loading ...
Loading ...
Loading ...