OPERATION - COIN SLIDE OPERATED AND NONMETERED WASHWER
IMPORTANT: Prior to first wash, use an all-purpose cleaner, or a detergent and water solution, and a damp cloth to remove shipping dust from inside of washer.
IMPORTANT: Remove all sharp objects from laundry to avoid tears and rips to items during normal machine operation.
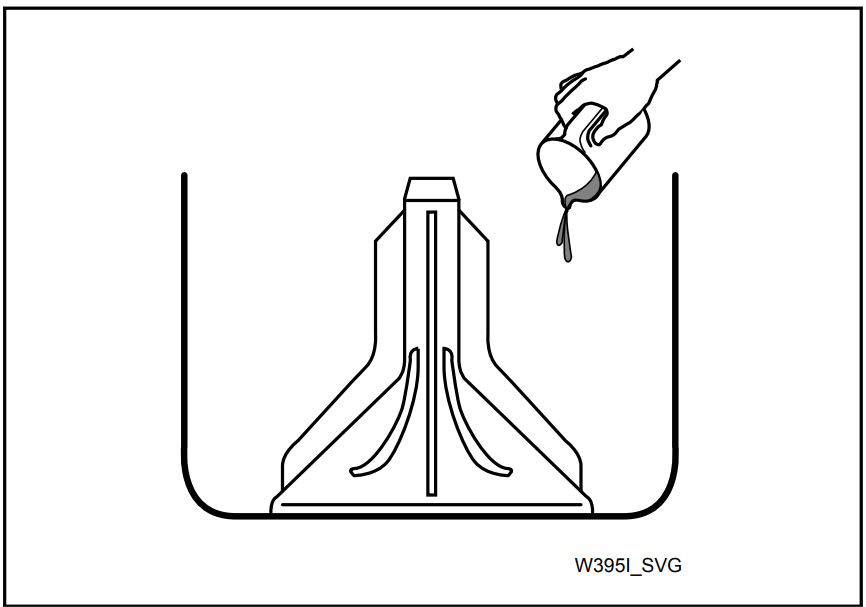
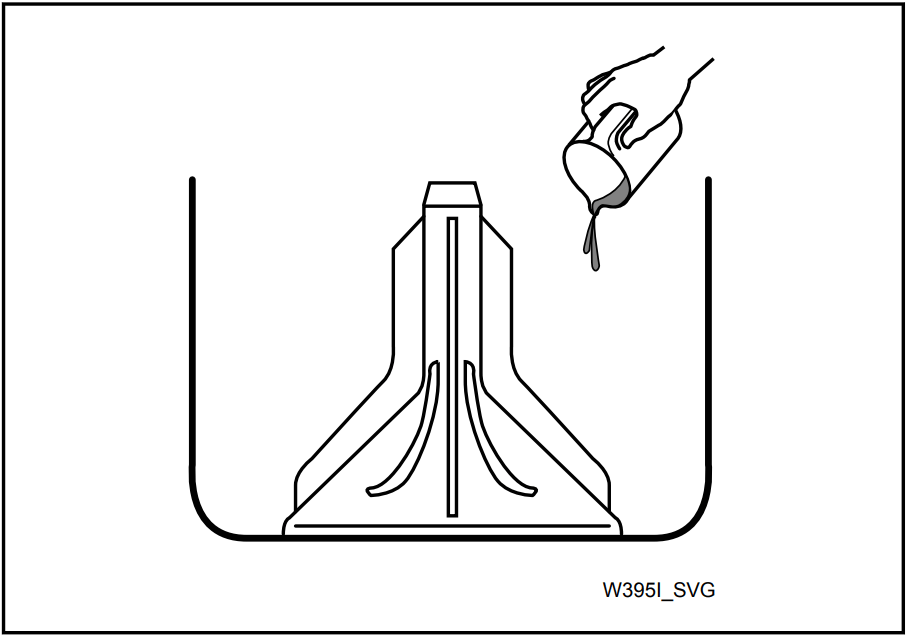
Add Detergent
Pour measured amount of detergent into washtub. Refer to package directions.
NEVER POUR UNDILUTED BLEACH DIRECTLY ON LAUNDRY. Follow package directions when using bleach.
Figure 20
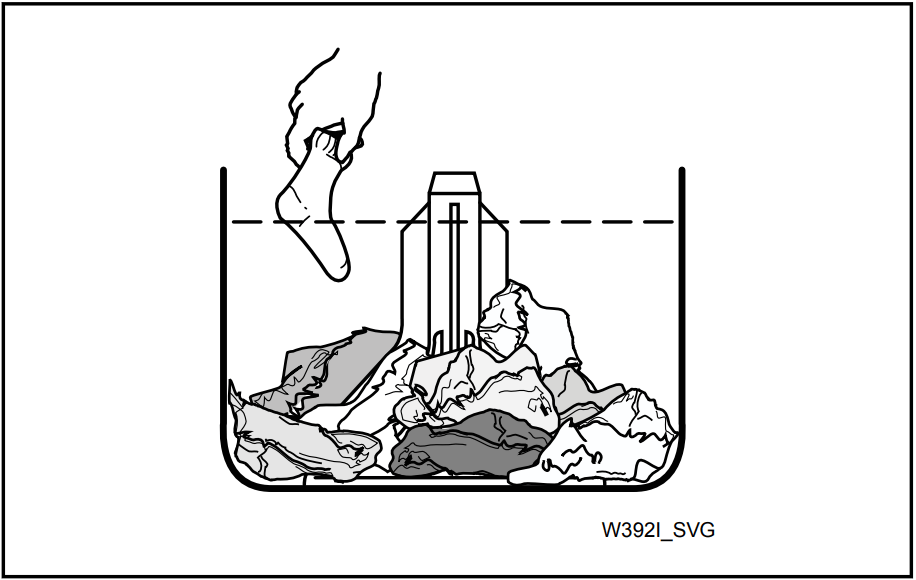
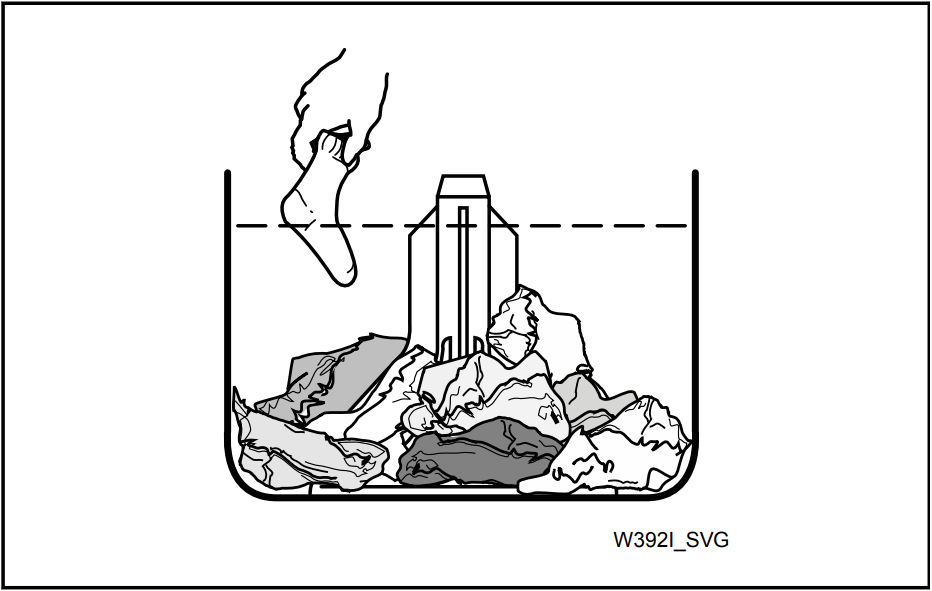
Load Laundry
Load dry clothes loosely into washtub – DO NOT overload! lbs. [6.3 kg] maximum dry clothes load)
When washing large items such as shag rugs and bedspreads, add several small items to balance wash load.
Figure 21
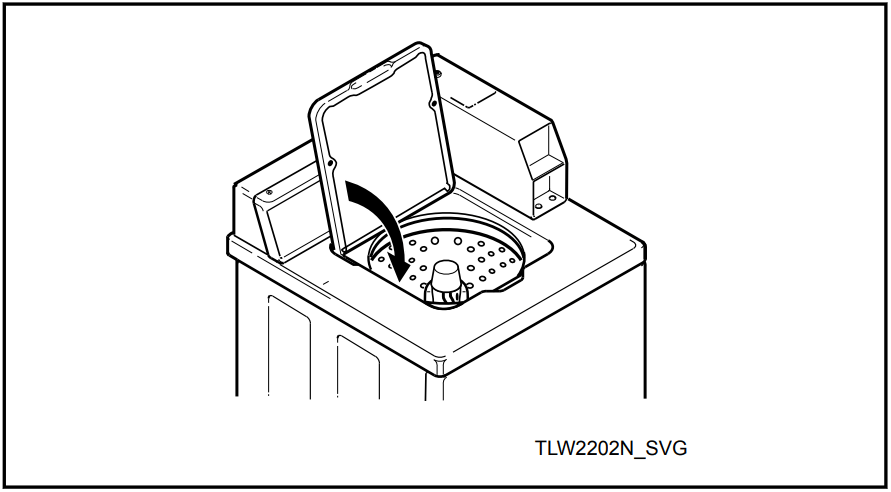
Close Lid
Washer will not operate with lid open
Figure 22
Set Cycle
Selector Turn the cycle selector knob to the desired setting
NOTE: Cycle Selector may be changed any time before first wash fill is complete.
Start Washer
Metered Models
Insert money by placing coin(s) in slide.
Carefully push slide in as far as possible and then pull slide out as far as possible.
The IN USE light will come on indicating start of cycle.
Figure 23
Nonmetered Models
Push start switch.
The IN USE light will come on indicating start of cycle.
Figure 24
Indicator Lights
IN USE
This light will remain on while washer is in use.
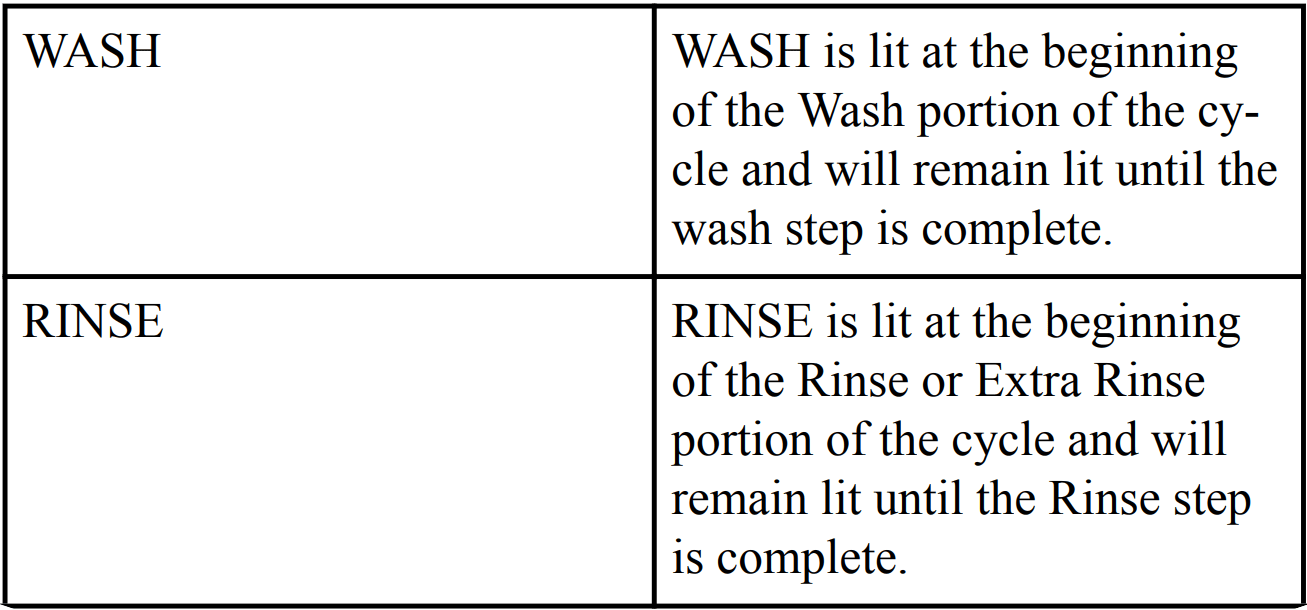
RINSE
This light will be on during the rinse portion of the cycle.
SPIN
This light will be on during the rinse/ final spin only. Washer will stop automatically at end of cycle. (SPIN and IN USE lights will go out indicating end of cycle.) Leave lid open after removing laundry.
Should washer stop, but IN USE, RINSE or SPIN light remain on, the motor overload protector may have cycled. Refer to Maintenance section.
WARNING To reduce the risk of bodily injury, do not remove laundry from washer until all lights are out, and all moving parts have stopped.
The washer will stop (pause) shortly before the first spin.
Control Modes
1. Power-Up Mode
The control enters this mode after power is applied to the washer.
In Power-Up Mode, the control will detect the state it was in at power-down to determine what mode to enter. After the control completes operation in the Power-Up Mode, it will enter either the Ready, Test or Run Modes.
2. Ready Mode
In Ready Mode, the control will wait for the vend to be satisfied before entering Run Mode.
3. Run Mode
In Run Mode, the control is running a cycle. The IN USE LED will be lit.
4. Lid Open Mode
The control enters Lid Open Mode when the lid is opened during Run Mode. All cycle activity is stopped. The cycle time count down stops unless the lid is opened during the last three minutes of the final spin step. In this case the time will continue to count down.
5. End of Cycle Mode
The control enters End of Cycle Mode when a cycle is complete. The IN USE LED will be off. The control will remain in this mode until the lid is opened or vend has been satisfied.
6. Error Mode
In Error Mode, a combination of LEDs flash to display error codes (refer to paragraphs below). Error Mode is either exited by powering down washer or it will clear itself after an amount of time. The Water Leak errors can be turned off by setting dipswitch 4 to the OFF position. Refer to Table 1.
Fill Error
If the desired fill level is not reached within 30 minutes of starting the fill, the control will enter a Fill Error. The IN USE LED will flash two times. This can occur during any Fill or Agitate Step in the cycle. For an Agitate step, the control must be in refill in order for this error to occur.
Drain Error
If the control detects that the tub still has an inch or greater water level when the cycle is completed, the control will enter a Drain Error. The control will turn off all outputs and the IN USE LED will flash three times. Power must be cycled to clear this error.
Slow Drain Detection Error
Poor drain conditions will cause the control to sense a longer than normal period of time for the water level to drop from the global level value of “1” to below the empty level. Causes of this slower than normal draining could be a pump malfunction, a foreign object jammed in the pump, a poor drain connection between the machine drain hose and the building drain system, or an oversudsing condition.
Slow Drain Detection Errors can only occur when the control has the dipswitch set to Leak and Slow Drain Errors On. Refer to Table 1 for setting the dipswitch.
Whenever the control is in a Drain step and the proper dipswitch is set, the control keeps track of the time required for the water level to fall. If the control senses a drain time greater than the amount specified, the control will generate a Slow Drain Error.
When the cycle has been completed and if the control has saved a slow drain error status, the IN USE LED flashes five times to indicate this condition.
Slow Leak Detection Error
Water leaks in the machine will cause the control to sense a water level that drops below or above the target water level. Causes of this condition could be a leak in the pump, a foreign object jammed in the pump, or a faulty fill valve that allows water to enter the machine even when turned off.
Slow Leak Detection Errors can only occur when the control has the dipswitch set to Leak and Slow Drain Errors On. Refer to Table 1 for setting the dipswitch.
When the cycle reaches the last pause step, the control will pause the machine cycle for 60 seconds if the appropriate dip switch is set to allow water leak detection. The control will record the current water level from the pressure sensor input and continue to monitor the water level in the system for 60 seconds. If the water level has dropped or raised more than an acceptable amount the control will save a water leak error status and will continue the machine cycle. If the water level has not dropped or raised more than the acceptable amount, the control will not save a water leak error status. When the cycle has been completed and if the control has saved a water leak drain error status, the IN USE LED will flash six times.
Overflow Error
The Overflow Error occurs when the machine has an overflow level of 15 inches and does not drain the water level 0.8 inches below the overflow water level. The IN USE and RINSE LEDs will flash two times to indicate the condition.
If overflow level is reached while running a cycle, the control will enter Overflow Running mode. If the machine is unable to empty the water 0.8 inches below the overflow level within five minutes, the Overflow Error is set.
Pressure Error
If the control does not detect a valid water level sensor input for seconds while in Run Mode during a Fill/Agitate step, the control will enter a Pressure Sensor Error. The control will turn off all outputs and the IN USE LED will flash once. Power must be cycled to the machine to clear this error.
No Flow Error
During a Fill step, the control will wait 30 seconds for the pressure sensor to stabilize and then take an initial water level reading. The control takes a second reading after 4.5 minutes. If the difference between the two readings is not greater than 1.5 inches, the control will set a No Flow Error. This usually indicates that the machine does not have enough water pressure or the pressure value is not changing. The IN USE LED will flash four times to indicate this condition.
Communication Error
This error occurs when there is a problem with communications between the front-end control and the output board. The control will turn off all outputs and the IN USE, RINSE, and SPIN LEDs will flash continuously to indicate this error. The machine must be powered down to clear the error.
Output Board Error
If the front-end control receives the output failure signal from the output board, the control will turn off all outputs to indicate this error. The IN USE, RINSE, and SPIN LEDs will flash continuously. The machine must be unpowered to clear the error.
Board Shorted Error
The control will perform a check while the drive board enable relay is disabled to see whether the enable relay is shorted. The front-end control sends requests to the drive board when the drive board should be off. If any response is received from the drive board, the RINSE and SPIN LEDs will flash 4 times. The machine must be unpowered to clear this error.
Drive Not Ready Error
The front-end control will check if communication is established with the drive board. If 30 seconds pass after communication has been established and no drive errors exist, the control will try resetting the drive board up to three times. The IN USE, RINSE, and SPIN LEDs will flash two times to indicate this condition.
Power must be cycled to the machine to clear this error.
Board ID Error
The control will check the output board to ensure that it matches the front-end control machine type. The IN USE and SPIN LEDs will flash two times to indicate the wrong machine type. The machine must be unpowered to clear this error.
Rapid Advance
The Rapid Advance feature allows the owner to quickly advance into a cycle and advance an active cycle to a specific cycle step.
To enter Rapid Advance on metered models through Serial No. open the meter case service door. Press the service door switch to advance to the next step. On models starting Serial
No. 1810000001, open the meter case service door and unplug the white bullet connector for at least one second and then reconnect it. Each time the connector is unplugged and reconnected, the control will advance to the next step.
To enter Rapid Advance on nonmetered models open the control hood, unplug the white bullet connector with the white and gray/ yellow wires connected to the H8-9 pin on the control for at least one second, and then reconnect it. Each time the connector is unplugged and reconnected, the control will advance to the next step.
The cycle will advance through each individual cycle step.
Setting Dipswitches
Machine settings can be changed using the 8-Position dipswitches mounted on the control. Dipswitch 1 is labeled "SW1" on the control. Dipswitch 2 is labeled "SW2" and is not used. The control reads the dipswitch settings at power-up. The control must be powered down to change the dipswitch settings. Refer to table below for dipswitch settings. All switch numbers not listed are not used at this time.
Table 1
OPERATION - MDC WASHERS
IMPORTANT: Prior to first wash, use an all-purpose cleaner, or a detergent and water solution, and a damp cloth to remove shipping dust from inside of washer.
IMPORTANT: Remove all sharp objects from laundry to avoid tears and rips to items during normal machine operation.
Add Detergent
Pour measured amount of detergent into washtub. Refer to package directions.
NEVER POUR UNDILUTED BLEACH DIRECTLY ON LAUNDRY. Follow package directions when using bleach.
Figure 25
Load Laundry
Load dry clothes loosely into washtub – DO NOT overload! lbs. [6.3 kg] maximum dry clothes load)
When washing large items such as shag rugs and bedspreads, add several small items to balance wash load.
Figure 26
Close Lid
Washer will not operate with lid open.
Figure 27
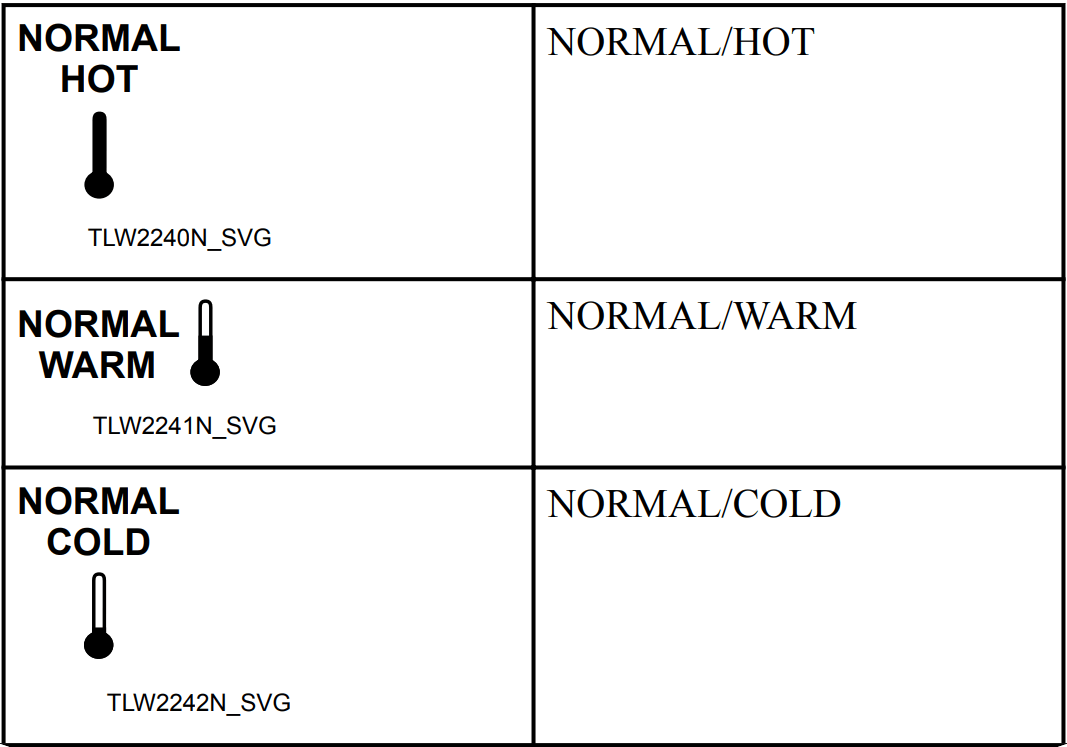
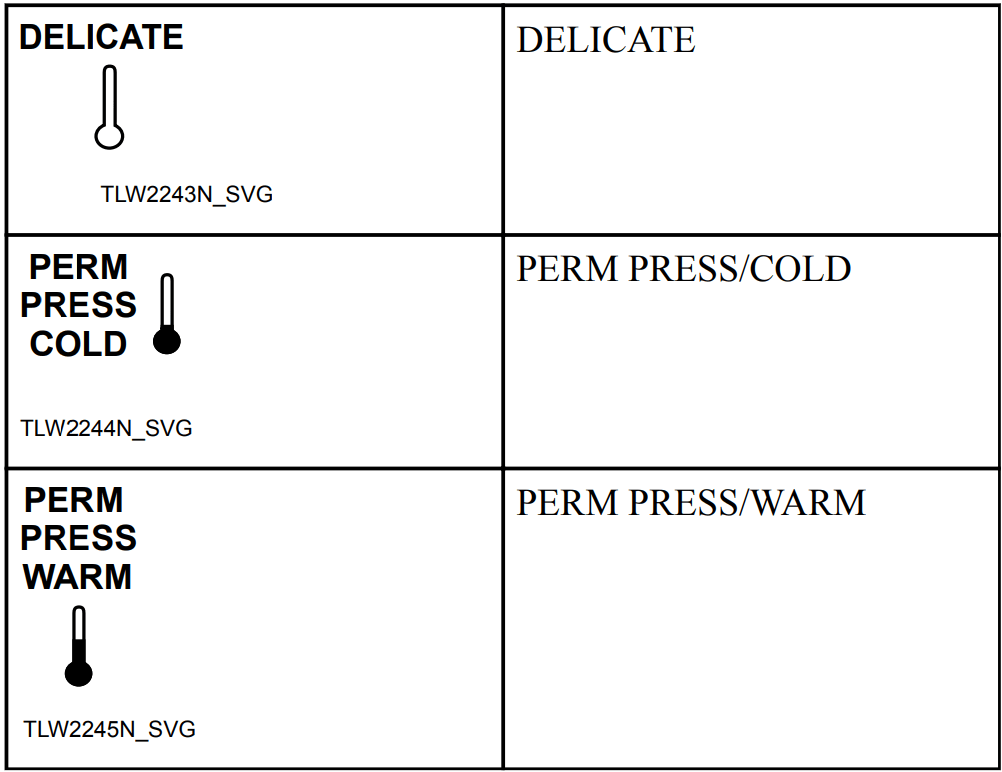
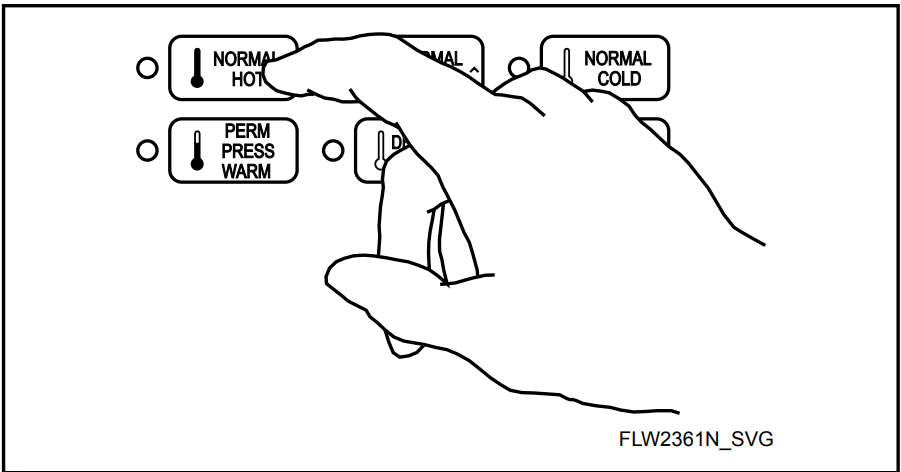
Set Fabric Selector and Wash Temperature
Push touchpad for NORMAL/HOT, NORMAL/WARM, NORMAL/COLD, PERM PRESS/WARM or DELICATES/COLD cycle. Light indicates selection.
NOTE: Changes can be made to Fabric Selector setting up until the first fill is complete.
Figure 28
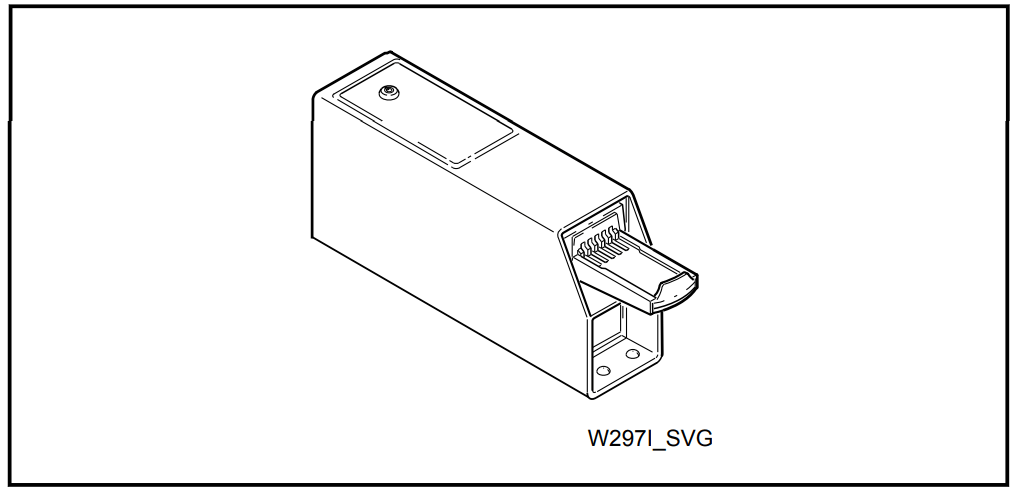
Insert Coins or Card
To Insert Coins
Insert coin(s) in coin slot.
Check pricing as seen on digital display.
Figure 29
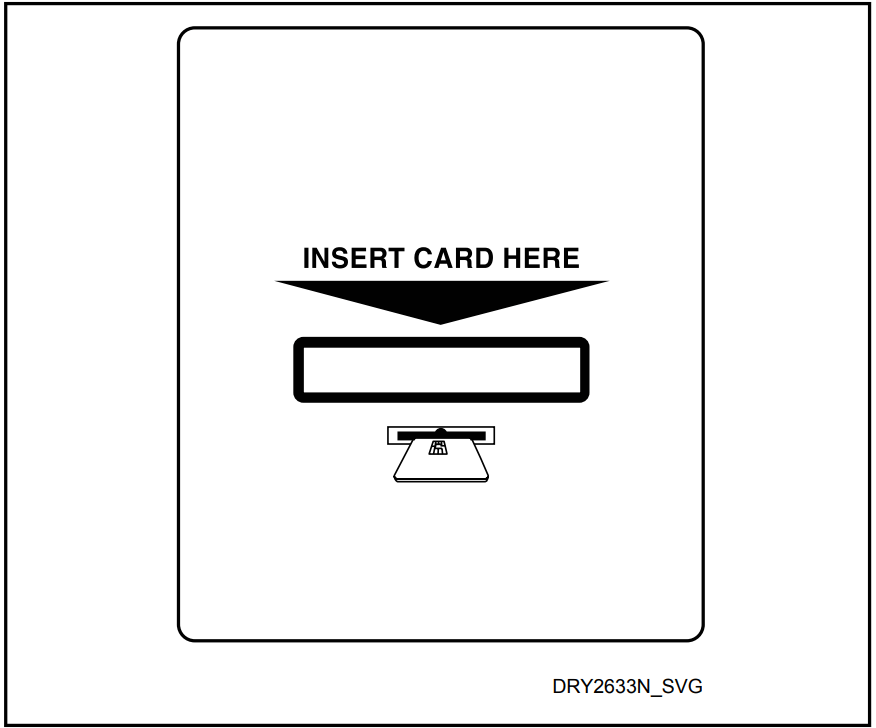
To Insert Card
Insert card into opening.
Figure 30
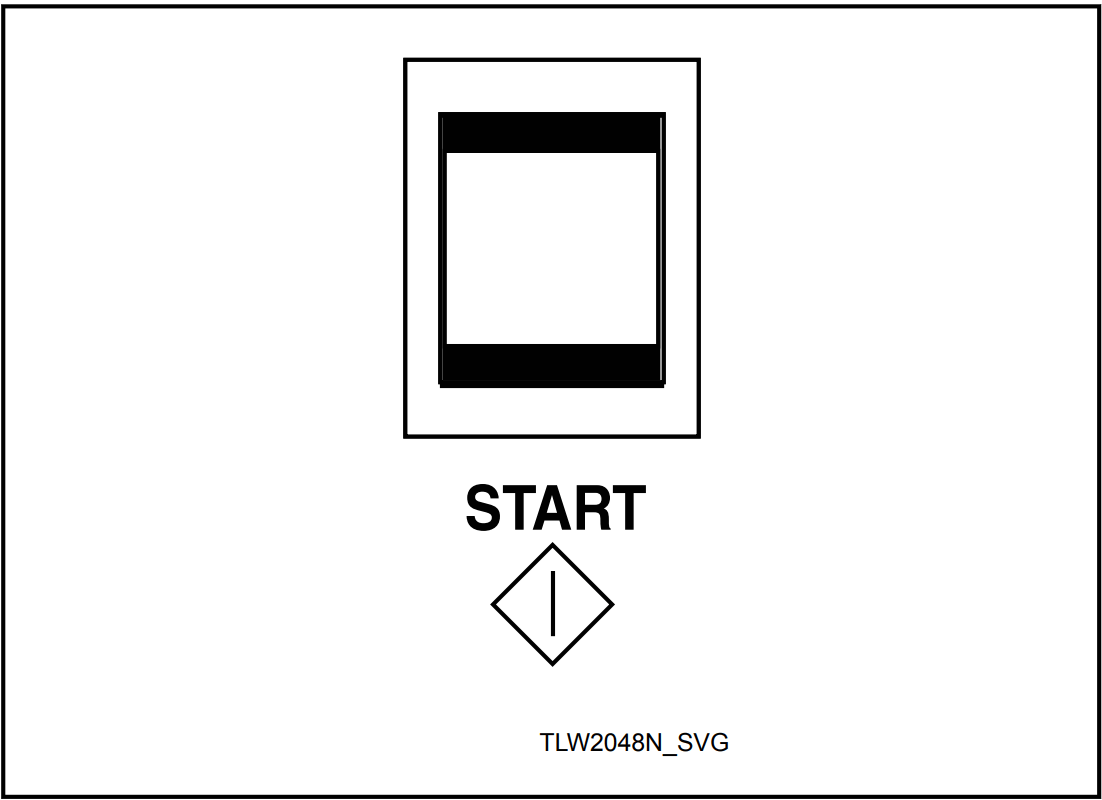
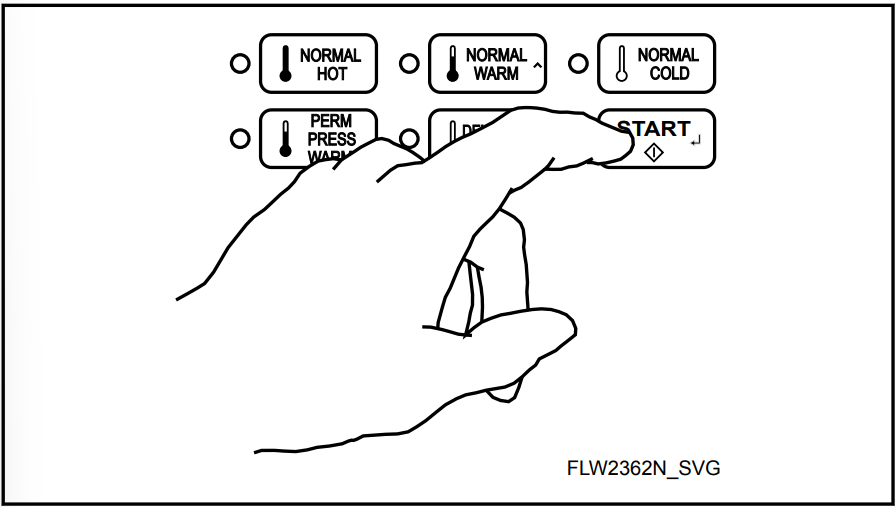
Start Washer
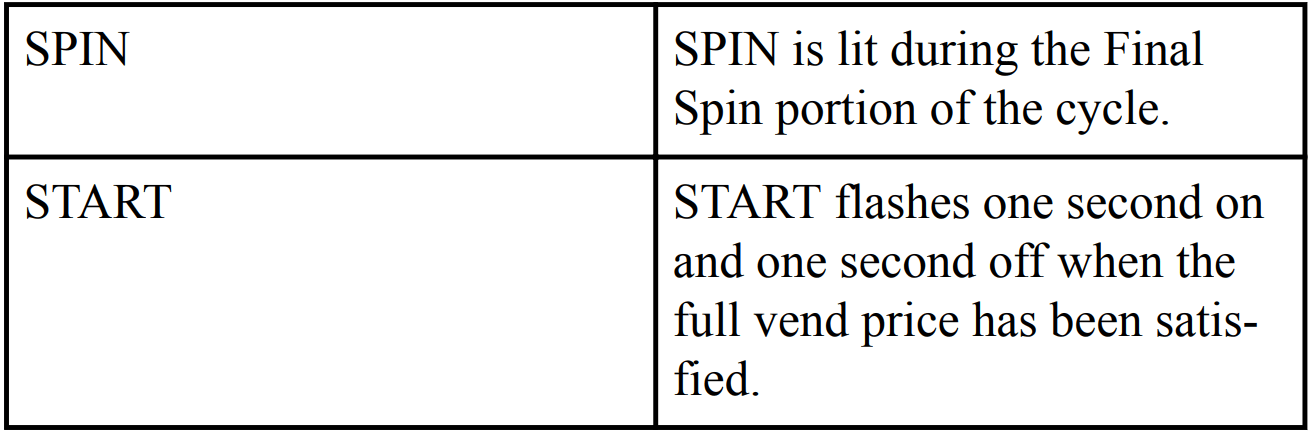
After vend price has been satisfied, push the START pad.
Door must be closed to start washer.
Figure 31
Indicator Lights
WARNING To reduce the risk of bodily injury, do not remove laundry from washer until all lights are out, and all moving parts have stopped.
The washer will stop (pause) shortly before the first spin.
MAINTENANCE
User-Maintenance Instructions
Cold Weather Care
If the unit is delivered on a cold day (below freezing), or is stored in an unheated room or area during the cold months, do not attempt to operate the washer until it has had a chance to warm up. Water from the previous cycle may remain.
Care of Your Washer
Use only a damp or sudsy cloth for cleaning the control panel. Some cleaning products may harm the finish on the control panel or damage the interior. DO NOT use products that contain alcohol on the control panel. Wipe the panel dry after cleaning.
Wipe the washer cabinet as needed. If detergent, bleach or other washing products are spilled on the cabinet, wipe immediately. Some products will cause permanent damage if spilled on the cabinet.
Do not use scouring pads or abrasive cleansers on control panel or cabinet.
The washtub will need no particular care though it may need rinsing or wiping after some unusual loads have been washed. This also may be necessary if too little detergent has been used.
Leave the lid open to allow the inside of the washer to dry out after use. This helps prevent musty odors from developing.
The agitator should not be removed except for service. The washtub is designed to be self cleaning.
Replacing Hoses
Hoses and other rubber parts deteriorate after extended use. Hoses may develop cracks, blisters or material wear from the temperature and constant high pressure they are subjected to.
All hoses should be checked on a monthly basis for any visible signs of deterioration. Any hose showing the signs of deterioration listed above should be replaced immediately. All hoses should be replaced every five years.
Filter Screens
Check the filter screens in the fill hoses for debris or damage every six months. Clean or replace them if necessary.
If the washer is filling with water slower than normal, check the filter screens. Clean or replace them if necessary.
Order filter screen Part No. 803615 from the nearest authorized parts distributor.
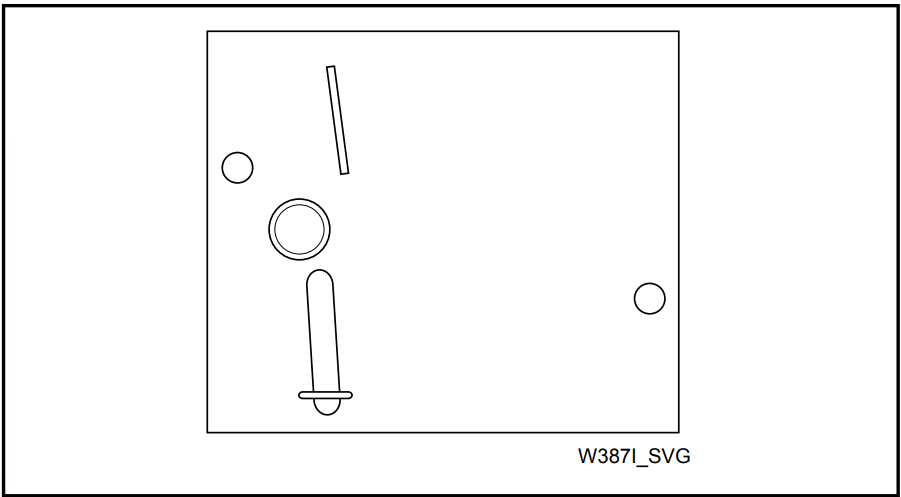
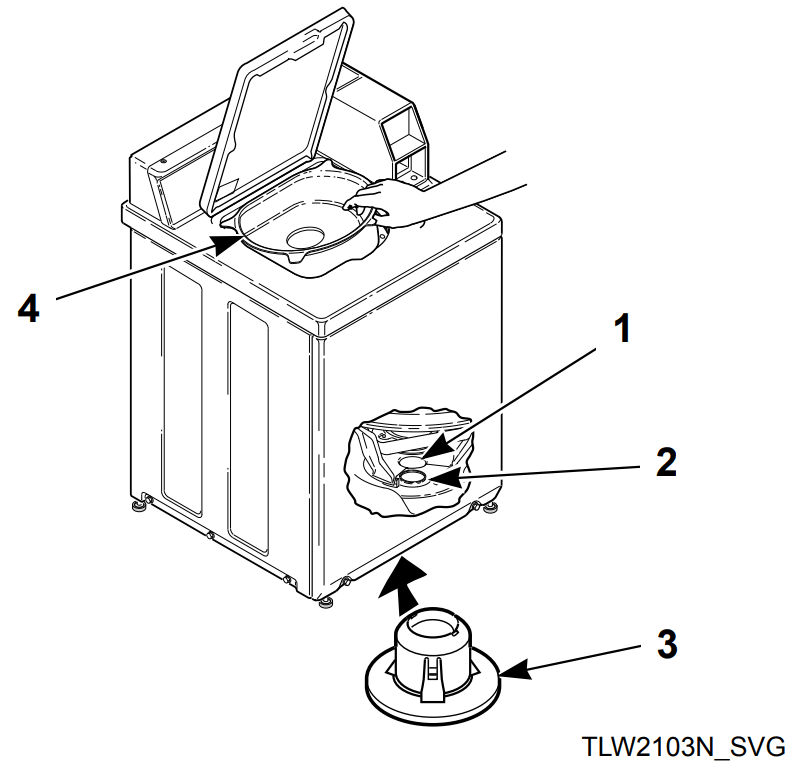
Reinstallation of Shipping Materials
You must install the shipping brace and shipping plug any time the washer is moved.
Shipping Brace
The shipping brace in the lid opening should be saved and reinstalled whenever the washer is moved. To reinstall the brace, open the washer lid and place the brace over the washer agitator, placing the back of the brace into the lid opening first.
Shipping Plug
The plastic shipping plug should be saved and reinstalled any time the washer is moved. The plug fits into two openings: The base opening and the shipping plug opening on the bottom of the movable pivot dome. The plug MUST be inserted into both openings to prevent damage to the washer. In order to accomplish this, the shipping plug opening must be directly lined up with the base opening.
The internal overload protector will stop the motor automatically in the event of an overload.
The overload protector will reset itself in two or three minutes and the motor will restart automatically
If the overload protector stops motor again, remove the washer from use and call the service person to correct the problem.
TROUBLESHOOTING
Washer Symptom
Possible Cause/Solution
Won’t Fill
• Make sure lid is closed.
• Make sure power cord is plugged all the way into the electrical outlet.
• Check the laundry room fuse or circuit breaker.
• Insert coin(s) or card. (metered models only)
• Check for proper operation of coin slide switch (coin slide models only).
• Push START switch to start the washer (nonmetered models only).
• Make sure that the controls are properly set.
• Make sure hot and cold water faucets are turned on.
• Make sure drain hose is not kinked or twisted.
• During the rinse portion of the cycle, the tub won’t fill with water. Instead, there is a spray rinse.
• Make sure that the last spin has been completed.
• Clean the screens in the water mixing valve and the filter screens located at the faucet end of the fill hoses. (Owner is responsible for service calls regarding cleaning of the screens.)
• Water is being siphoned from the washer during the cycle. Refer to the Installation instructions to make sure that the drain hose has been properly installed.
• The motor overload protector may have stopped the cycle. It will reset itself in two or three minutes and restart the washer automatically.
Won’t Start
• Make sure lid is closed.
• Make sure power cord is plugged all the way into the electrical outlet.
• Check the laundry room fuse or circuit breaker.
• Insert coin(s) or card. (metered models only)
• Check for proper operation of coin slide switch (coin slide models only).
• Push START switch to start the washer (nonmetered models only).
• Make sure that the controls are properly set.
• The motor overload protector may have stopped the cycle. It will reset itself in two or three minutes and restart the washer automatically.
Won’t Agitate
• Make sure lid is closed.
• Make sure power cord is plugged all the way into the electrical outlet.
• Check the laundry room fuse or circuit breaker.
• Insert coin(s) or card. (metered models only)
• Push START switch to start the washer (nonmetered models only).
• The motor overload protector may have stopped the cycle. It will reset itself in two or three minutes and restart the washer automatically.
• Broken drive belt. Call the service person.
• Have a qualified electrician check polarity and earth/ground. Refer to Electrical Requirements section.
Won’t Spin
• Make sure lid is closed.
• Make sure power cord is plugged all the way into the electrical outlet.
• Check the laundry room fuse or circuit breaker.
• Insert coin(s) or card. (metered models only)
• Push START switch to start the washer (nonmetered models only).
• The motor overload protector may have stopped the cycle. It will reset itself in two or three minutes and restart the washer automatically.
• Broken drive belt. Call the service person.
• Have a qualified electrician check polarity and earth/ground. Refer to Electrical Requirements section.
Stops/Pauses During Cycle
• Pauses are part of the washer’s normal operation. The washer will stop (pause) shortly before the wash and rinse spins.
• Check the laundry room fuse or circuit breaker.
• The motor overload protector may have stopped the cycle. It will reset itself in two or three minutes and restart the washer automatically.
Won’t Drain
• Make sure drain hose is not kinked or twisted.
• Make sure drain hose is not clogged.
• Make sure drain receptacle is not clogged.
• Refer to the Installation instructions to make sure that the drain hose has been properly installed.
Water Leaks
• Check that fill hoses are properly installed on the faucets and the washer’s water mixing valve.
• Check the condition of the fill hoses. Replace fill hoses every five years.
• Make sure drain receptacle is not clogged.
• Check laundry room plumbing.
• Laundry load may be oversudsing or overloaded. Use less detergent (or low-sudsing detergent) and proper load sizes.
Is Noisy
• Wash load may be unbalanced. Open lid and redistribute the load.
• Make sure washer is level. Uneven leveling can cause vibration.
• A newly installed washer may make a knocking sound if the machine has been in storage. The belt may have settled. Run washer through 4-5 cycles to loosen belt. Washer operation will not be affected.
Load is too Wet
• Wash load may be unbalanced. Open lid and redistribute the load.
• Load is too small. Add items to make full load.
Wrong Water Temperature
• Make sure that the controls are properly set.
• Check fill hoses. Make sure hot faucet hose is connected to hot mixing valve (indicated with “H” on the valve bracket) and cold faucet is connected to cold mixing valve (indicated with “C” on the valve bracket).
• Make sure laundry room water heater is adjusted properly.
This commercial washer does have a sensor that automatically locks the unit when it starts running for safety reason. That is a standard feature on top load washer.