User Manual
SETTING UP YOUR OVEN
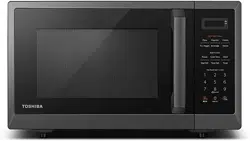
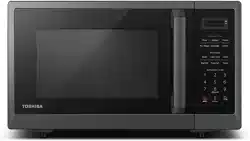
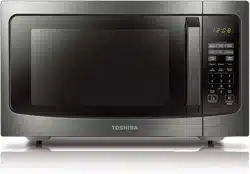
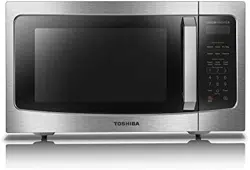
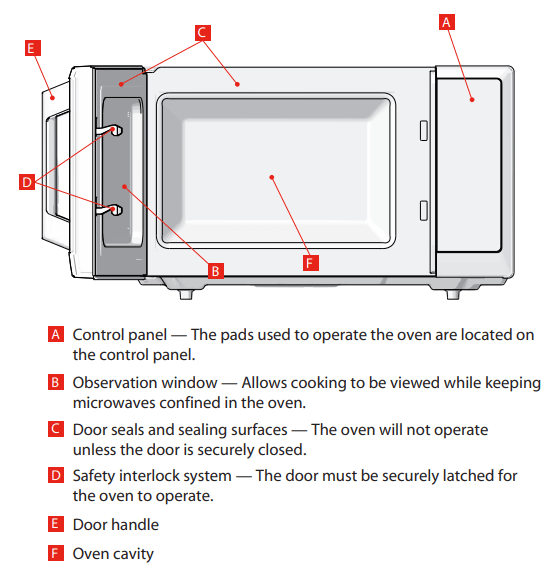
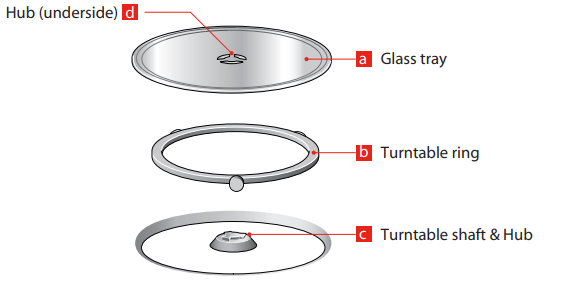
NAMES OF OVEN PARTS AND ACCESSORIES
Throughout this manual, features and appearance may vary from your model. Remove the oven and all materials from the carton and oven cavity. Your oven comes with the following accessories:
Glass tray 1
Turntable ring 1
Instruction Manual 1
TURNTABLE INSTALLATION
Cleaning the cooking compartment and putting the turntable in place. For new installations, make sure all packaging and shipping tape has been removed from the turntable shaft. Before using the appliance to prepare food for the first time, you will need to put the turntable in place correctly. You must clean the cooking compartment and accessories.
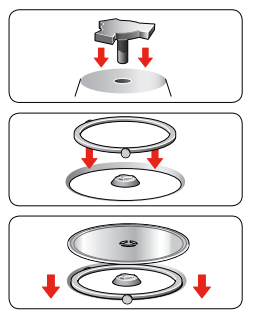
How to put the turntable in place
- Place the roller ring b into the recess in the cooking compartment.
- Place the glass tray a on the Turntable ring. Fit the raised, curved lines in the center of the glass tray bottom between the three spokes of the shaft. Make sure that the turntable a engages in the turntable shaft c in the centre of the cooking compartment floor. The rollers on the shaft should fit inside the turntable bottom ridge.
NOTE:
a. Never use the appliance without the turntable. Make sure that it is properly engaged. The turntable can turn clockwise or anti-clockwise.
b. Never place the glass tray upside down. The glass tray should never be restricted.
c. Both glass tray and turntable ring assembly must always be used during cooking.
d. All food and containers of food are always placed on the glass tray for cooking.
e. If glass tray or turntable ring assembly cracks or breaks, contact your nearest authorized service center.
COUNTERTOP INSTALLATION
Remove all packing material and accessories. Examine the oven for any damage such as dents or broken door. Do not install if oven is damaged.
Cabinet: Remove any protective film found on the microwave oven cabinet surface. Do not remove the light brown Mica cover that is attached to the oven cavity to protect the magnetron.
INSTALLATION
1. Select a level surface that provide enough open space for the intake and/or outlet vents.
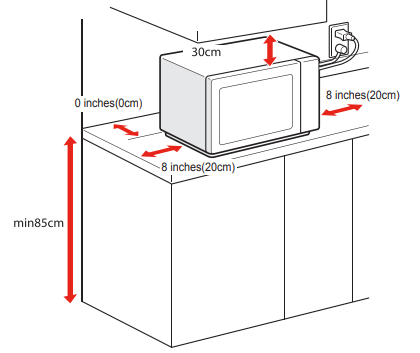
A minimum clearance of 8 inches(20cm) is required between the oven and any adjacent walls.
a. Leave a minimum clearance of 12 inches (30cm) above the oven.
b. Do not remove the legs from the bottom of the oven.
c. Blocking the intake and/or outlet openings can damage the oven.
d. Place the oven as far away from radios and TV as possible. Operation of microwave oven may cause interference to your radio or TV reception.
e. The minimum installation height is 85cm.
2. Plug your oven into a standard household outlet. Be sure the voltage and the frequency is the same as the voltage and the frequency on the rating label.
CONTROL PANEL AND FEATURES
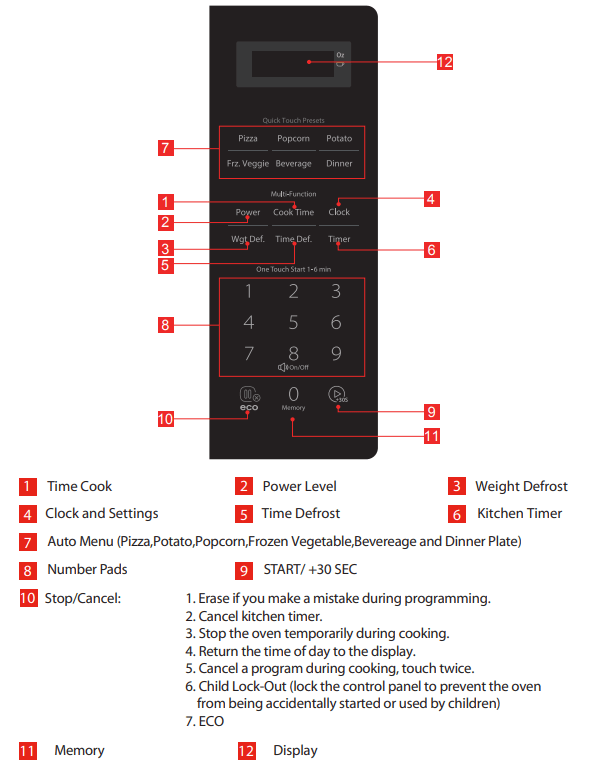
1.POWER LEVELS
Eleven power levels are available.
The power level is automatically set at PL10, but you can change it for more flexibility. Prior to or during cooking, touch Power and "PL10" will display. Then touch Power repeatedly until the number you wish appears in the display. Power levels can be adjusted by touching number pads.
If you wish to know power level in cooking state of microwave, simply touch Power, the current power level will be displayed for 3 seconds.

2.CLOCK SETTING
When the microwave oven is plugged into an outlet, "0:00" will display. Oven into standby mode.
- Touch Clock once, "00:00" will appear in the display.
- Touch the number pads to enter the current clock time. For example, if the time is now 10:12, enter the correct time of day by touching the numbers" 1, 0, 1, 2 " in sequence.
- Touch Clock to finish clock setting, " : " will flash and the numbers will appear as a clock time in the display.
3.KITCHEN TIMER
- Touch Timer once, "00:00" will appear in the display.
- Touch the number pads to enter the time amount. The maximum amount of time that can be entered is 99 minutes, 99 seconds.
- Touch
 to confirm setting, and the timer will start to count down.
- When the time amount elapses, the oven will beep 5 times.
- NOTE
- The Kitchen Timer setting is different from the Clock setting; it is simply a timer.
- During the Kitchen Timer function, no cooking function can be set into operation.
- Kitchen Timer amount cannot be increased by touching .
- Touching
 will cancel the Timer countdown.
4.MICROWAVE COOK
- Touch Cook Time , "00:00" will appear in the display.
- Touch number pads to enter the cooking time. The maximum cooking time is 99 minutes,99 seconds.
- Touch Power, PL10 will flash. Touch number pads 0 through 9 to select a different power level if desired. See the POWER LEVES table above.
- Touch to start cooking. The remaining cooking time will display.
Example : suppose you want to cook the food with 50% microwave power for 15 minutes.
a. Touch Cook Time , "00:00" will display.
b. Touch "1, 5, 0, 0" in order for 15:00 to appear in the display.
c. Touch Power , then touch "5" to select 50% microwave power.
d. Touch to start cooking. Buzzer sounds once. The remaining cooking time will display.
5.ONE TOUCH START
- Instant cooking at 100% power level and 1 to 6 minutes cooking time can be started by touching number pads 1 to 6. Touch to increase the cooking time by 30 seconds with each touch. Touch number pads 1 to 6 to increase the corresponding time. The maximum cooking time is 99 minutes, 98 seconds.
- provides a convenient way to extend cooking time by 30 seconds while the oven timer is counting down. It will add 30 seconds to the time shown each time the pad is touched. This pad may also be used as a quick start for 30 seconds of cooking. touch the oven will start immediately.
6.TIME DEFROST FUNCTION
The microwave oven is pre-programmed with a timer and power levels so that foods such as pork, beef and chicken can be easily defrosted.
- Touch Time Def. , "dEF2" will appear in the display.
- Touch the number pads to input the defrost time.
- The default microwave power is power level 3. If you want to change the power level, touch Power once, and PL3 will display; then touch the number pad within 3 seconds for the desired power level.
- Touch to start defrost cooking. And the remaining defrost time will display.
7.WEIGHT DEFROST FUNCTION
The microwave oven is pre-programmed with a timer and power levels so that foods such as pork, beef and chicken can be easily defrosted.
- Touch Wgt Def. once,"dEF1" will display.
- Touch number pads to input weight to be defrosted. Input the weight range between 4 to100 Oz.
- If the weight input is not between 4 to100 Oz, the input will be invalid. A beep will sound and the unit will not work until valid numbers are entered.
- Touchto start defrosting and the cooking time remaining will be displayed.
8.POPCORN
The AUTO MENU automatically calculates the correct cooking mode and cooking time of foods . Follow the example below for details on how to operate this function.
- Touch Popcorn pad repeatedly until the weight number you wish appears in the display, "1.75", "3.0", "3.5"OZ will display in order.
- Touch to cook. The remaining time will display. it will signal when cooking finish.
NOTE
The size of this microwave is ideal for popcorn bags below 85g.
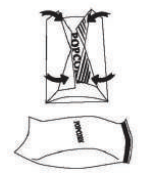
If you place a larger bag, we suggest you fold it and if the dish does not rotate properly when expanding, touch the  pad once and open the oven door and adjust the position of the bag to ensure even cooking.
9.POTATO
- Touch Potato repeatedly until the number you wish appears in the display "1", "2", will display in order.
Touch Once : 1 potato (approx. 8.0 oz)
Touch Twice: 2 potatoes ( approx. 16.0 oz)
Touch 3 Times: 3 potatoes ( approx. 24.0 oz)
2. Touch to cook. The remaining time will display. it will signal when cooking finish.
10.PIZZA
- Touch Pizza pad repeatedly until the weight number you wish appears in the display, "4.0", "8.0", "14.0" OZ will display in order.
- Touch to cook. The remaining time will display. it will signal when cooking finish.
11.FROZEN VEGETABLE
- Touch Frz. Veggie pad repeatedly until the weight number you wish appears in the display, "4.0", "8.0", "16.0" OZ will display in order.
- Touch to cook. The remaining time will display. it will signal when cooking finish.
12.BEVERAGE
- Touch Beverage repeatedly until the number you wish appears in the display will display in order.
Touch Once : 1 cup (approx. 120 ml)
Touch Twice: 2 cups ( approx. 240 ml)
Touch 3 Times: 3 cups ( approx. 360 ml)
2. Touch to cook. The remaining time will display. It will signal when cooking finish.
13.DINNER PLATE
- Touch Dinner pad repeatedly until the weight number you wish appears in the display, "9.0", "12.0", "18.0" OZ will display in order.
- Touch to cook. The remaining time will display. it will signal when cooking finish.
14.MEMORY FUNCTION
Add and save up to 3 of your own speed cook or microwave recipes, Once it's done, you can quickely recall your favorite so that your food cooks just the way you want it quickly!
- Touch "0/Memory" to program and choose up to three cooking procedures. Each procedure will be indicated by 1, 2 or 3 in the display.
- Touch "0/Memory" until your desired procedure number appears in the display.
Touch to begin it. A maximum of two cooking stages can be set for each procedure.
To program a procedure, follow the steps listed below. Example: Cook food at 80% Power Level for 3 minutes and 20 seconds; save as memory 2.
a. Touch "0/Memory" twice; screen displays 2.
b. Touch Cook Time , then touch "3" , "2" and "0" in order.
c. Touch Power once, then touch "8" for "PL 8" to display.
d. Touch to save the procedure. Oven beeps once. Or touch twice directly to save and start cooking.
e. To choose the procedure from the memory list, touch "0/Memory" twice. Screen will display "2". Touch to run procedure.
15.MUTE FUNCTION
It is default that the buzzer sounds is open. In standby mode, long touching on numeric pad "8" for 3 seconds, it sounds a long beep, turns off the sound. All the pads has no beep when they are touched, and the ending cooking sounds are off. When the sounds turn off, long touch on 8 for 3 seconds, it sounds a long beep and the sound turn on.
16.Multi-Stage Cooking
Up to two stages of cooking can be set. In multi-stage cooking, the first stage may be microwave and defrosting; if the defrosting program is set in the first stage, only microwave can be set in the second stage. If one of the multiple stages of cooking is defrosting, it is automatically performed in the first stage when cooking starts.
The buzzer sounds after each stage of cooking, and the next stage starts automatically.
EXAMPLE: 80% Power Level for 5 minutes followed by 60% Power Level for 10 minutes.
- Touch Cook Time, then touch "5" , "0" and "0" to set first stage cook time.
- Touch Power once, then touch "8" to choose 80% first stage cooking power.
- Touch Cook Time again, then touch "1", "0", "0" and "0" to set second stage cook time.
- Touch Power again, then touch "6" to choose 60% second stage cooking power.
- Touch to immediately start multi-stage cooking.
17.ENERGY SAVER MODE
- In standby mode, touch the "
 " once (less than 3 seconds to avoid starting the child lock function ) to enter the Energy Saver mode. (The screen turned off automatically when turned on)
- In child-locked mode, touch the " " once (less than 3 seconds) and release to enter the Energy Saver Mode.
- Above operation is the only way to start the Energy Saver mode.
- The Energy Saver mode works only if the door is closed.
- In screen off, you can touch any pad or open the oven door to turn on the screen, The first touch is to turn on the screen by default, and the second touch is to execution the cooking program itself.
18.LOCK FUNCTION
- To lock the microwave so that it cannot be operated by children or other unintended users, Touch pad for 3 seconds. You will hear a long beep. "
 " will display.
- To unlock, touch for 3 seconds, you will hear a long beep and " " will disappear.
19.INQUIRING FUNCTION
- When oven is cooking, touch Clock pad for the time of day to appear for three seconds in the display.
- When oven is cooking, touch Power pad for cooking power to appear for three seconds in the display.
20.COOKING END REMINDER FUNCTION
The oven will beep five times to alert the user that cooking time has ended.
21.OTHER SPECIFICATIONS
- must be touched to continue cooking if the door is opened during cooking.
- A single beep sounds to indicate that a pad is correctly touched; if pad is not correctly touched, no beep sounds.
- Cooling Fans: at the end of cooking, the automatic fan may continue to run for a short time.
- When the oven is on, light may be visible around the door or outer case.
- The turntable must always be in place when using the oven.
- The clear glass tray should always be in place when microwaving.
TROUBLESHOOTING
|
TROUBLE
|
Possible Cause
|
Possible Remedy
|
| Oven will not start |
- Electrical cord for oven is not plugged in.
- Door is open.
- Wrong operation is set
|
- Plug into the outlet.
- Close the door and try again.
- Check instructions
|
| Arcing or sparking |
- Materials to be avoided in microwave oven were used.
- The oven is operated when empty.
- Spilled food remains in the cavity.
|
- Use microwave-safe cookware only.
- Do not operate with oven empty.
- Clean cavity with wet towel.
|
| Unevenly cooked foods |
- Materials to be avoided in microwave oven were used.
- Food is not defrosted completely.
- Cooking time, power level is not suitable.
- Food is not turned or stirred.
|
- Use microwave-safe cookware only.
- Completely defrost food.
- Use correct cooking time, power level.
- Turn or stir food.
|
| Overcooked foods |
Cooking time, power level is not suitable. |
Use correct cooking time, power level. |
| Undercooked foods |
- Materials to be avoided in microwave oven were used.
- Food is not defrosted completely.
- Oven ventilation ports are restricted.
- Cooking time, power level is not suitable.
|
- Use microwave-safe cookware only.
- Completely defrost food.
- Check to see that oven ventilation ports are not restricted.
- Use correct cooking time, power level
|
| Improper defrosting |
- Materials to be avoided inmicrowave oven were used.
- Cooking time, power level is not suitable.
- Food is not turned or stirred.
|
- Use microwave-safe cookware only.
- Use correct cooking time, power level.
- Turn or stir food
|
| Sensor cooked foods not properly cooked |
- Cover or lid on food not vented.
- Door opened before sensor detected cooking time appears in display.
|
- Cover or lid over food must contain vent hole for escaping steam.
- Do not open door to stirorturn food before sensor-detected cooking time appears in display.
|