Loading ...
Loading ...
Loading ...
5
IMPORTANT: Due to specific hardware limitations within your camera it is important to note that these devices will
not be able to automatically pan/tilt or pivot in either the app or via the web UI on a computer. For this reason, it
is imperative to make sure to mount the cameras properly and position them as efficiently as you can to the areas
you wish to monitor. All positioning actions to the camera will have to be performed manually.
Installation Guide
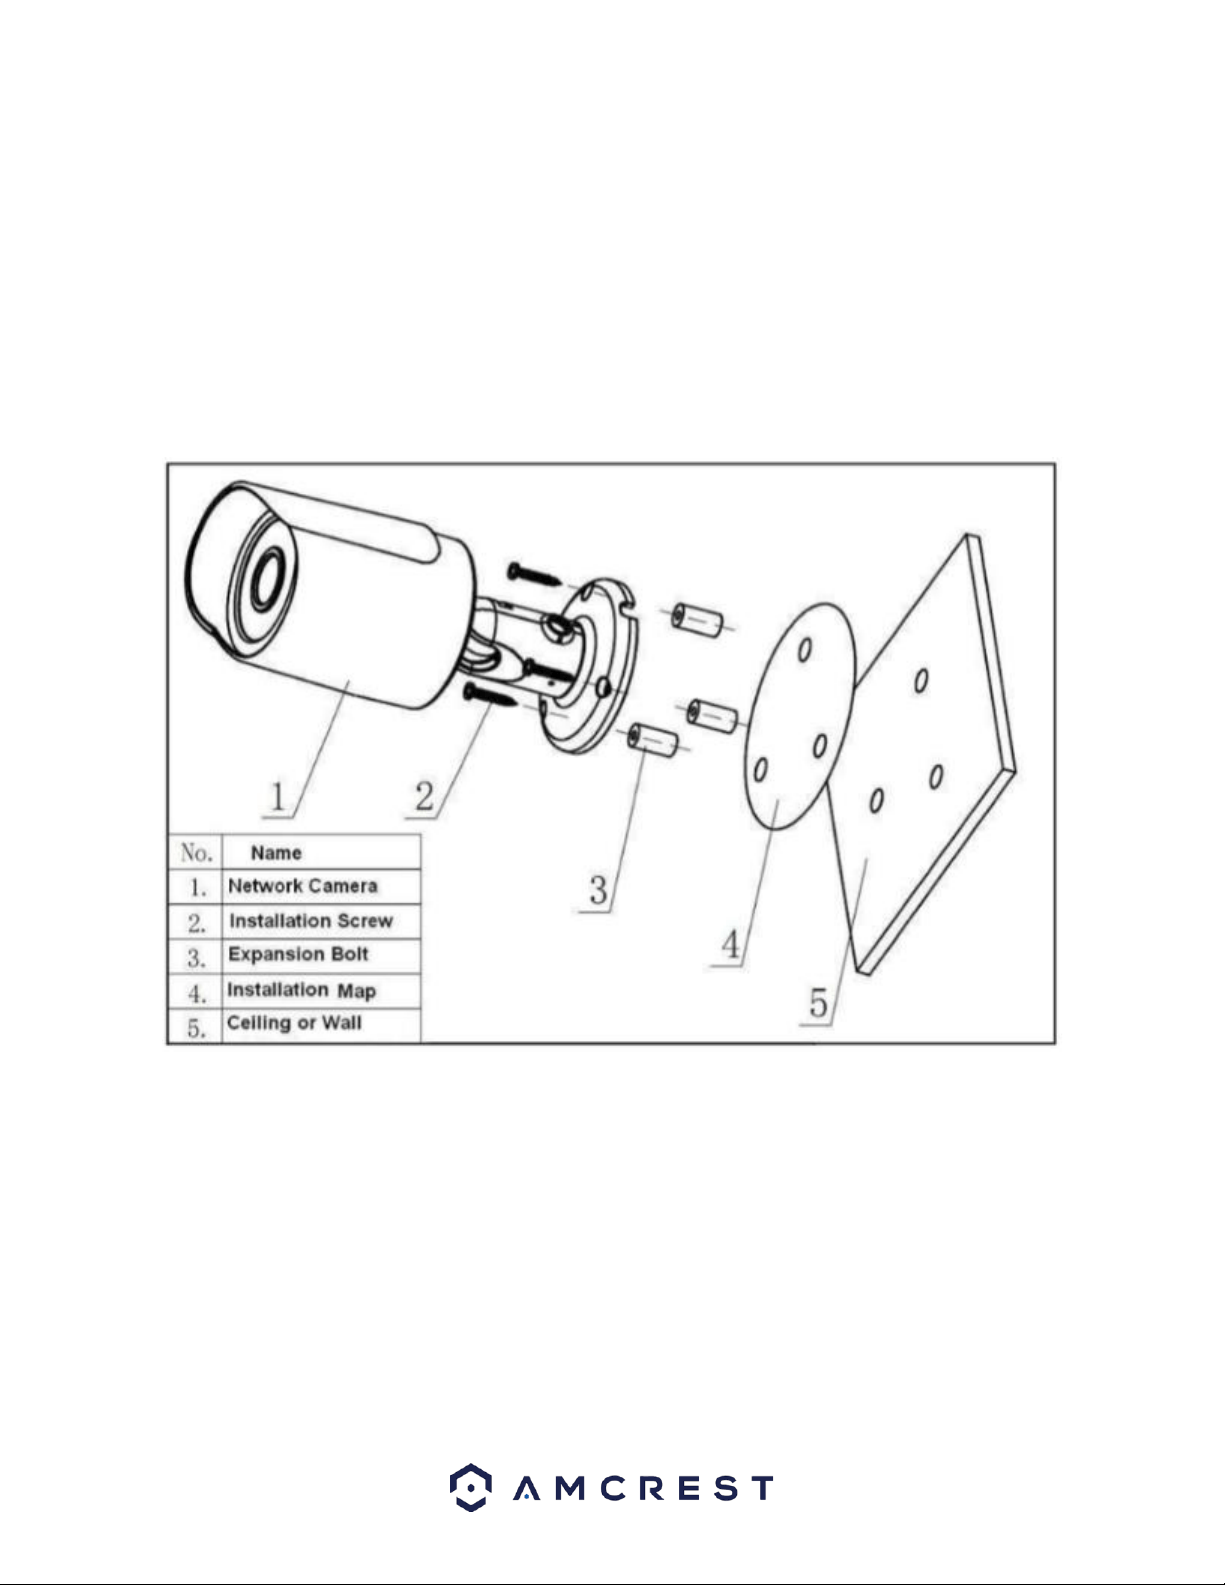
Follow the steps and use the diagram in this section to install the POE cameras.
Note: Prior to installation ensure that the installation environment can support at least 3 times the weight of the
camera.
Note: Due to specific hardware limitations within your camera it is important to note that these devices will not be
able to automatically pan/tilt or pivot in either the app or via the web UI on a computer.
1. Stick the installation sticker on the designated surface where the device will be installed (wall or ceiling).
2. Drill 3 holes through the holes on the installation sticker.
3. Open the accessories bag and take out the expansion bolt and insert it into the holes.
4. Open accessories bag and take out the screws. Tighten the 3 screws to fix the device on the installation surface
(wall or ceiling).
5. Loosen the sunshade screw to move it around to the desired position, then tighten the screw to lock it into
place.
6. Plug in the camera to power it, using either an Ethernet or power cable.
7. Using a Philip’s head screwdriver, (not included) loosen the adjusting screw near the base of the camera. This
allows the camera to be rotated, as well as pivoted within the ball joint.
Loading ...
Loading ...
Loading ...