Loading ...
Loading ...
Loading ...
Conversion instructions—Natural Gas to LP Gas
If your gas supply is LP gas, your water heater can be converted to burn LP gas as follows:
WARNING: This conversion kit must be installed by a
qualified installer or service technician in accordance with these
instructions. Installation must conform with local codes, or in
their absence, with the latest edition of the National Fuel Gas
Code, ANSI Z223.1. Failure to follow instructions could result
in serious injury or property damage. The qualified agency
performing this work assumes responsibility for this conversion.
CAUTION: The water heater is factory set to burn natural
gas, but can be converted to burn LP gas. Before placing the
water heater into operation, verify that the type of gas supplied
to your water heater and the type of gas your water heater is set
to burn are the same. If they are not, refer to these instructions.
NOTICE: The parts required to make this conversion are
supplied in a bag attached to the water heater. Should your
heater not have this bag attached to the water heater, a
replacement can be obtained. Simply contact the manufacturer at
the address below and request a replacement conversion kit.
Customer Service Department
2600 Gunter Park Drive, East
Montgomery, AL 36109-1413
Phone: 1-800-432-8373
Tools Required:
#20 Torx Wrench (Included)
#2 Phillips Screwdriver
3/4" Wrench
7/16" Wrench
3/8" Wrench
5/16" Wrench
Turn manual gas shut off valve to the OFF position to
shutoff gas to the thermostat.
Set the thermostat dial to the lowest setting by turning
the thermostat dial clockwise until it stops. DO NOT
FORCE.
Slightly depress the gas control knob and turn clockwise
to "OFF" position. Note: Knob cannot be turned from
"PILOT" position unless pushed down
slightly. DO NOT USE FORCE.
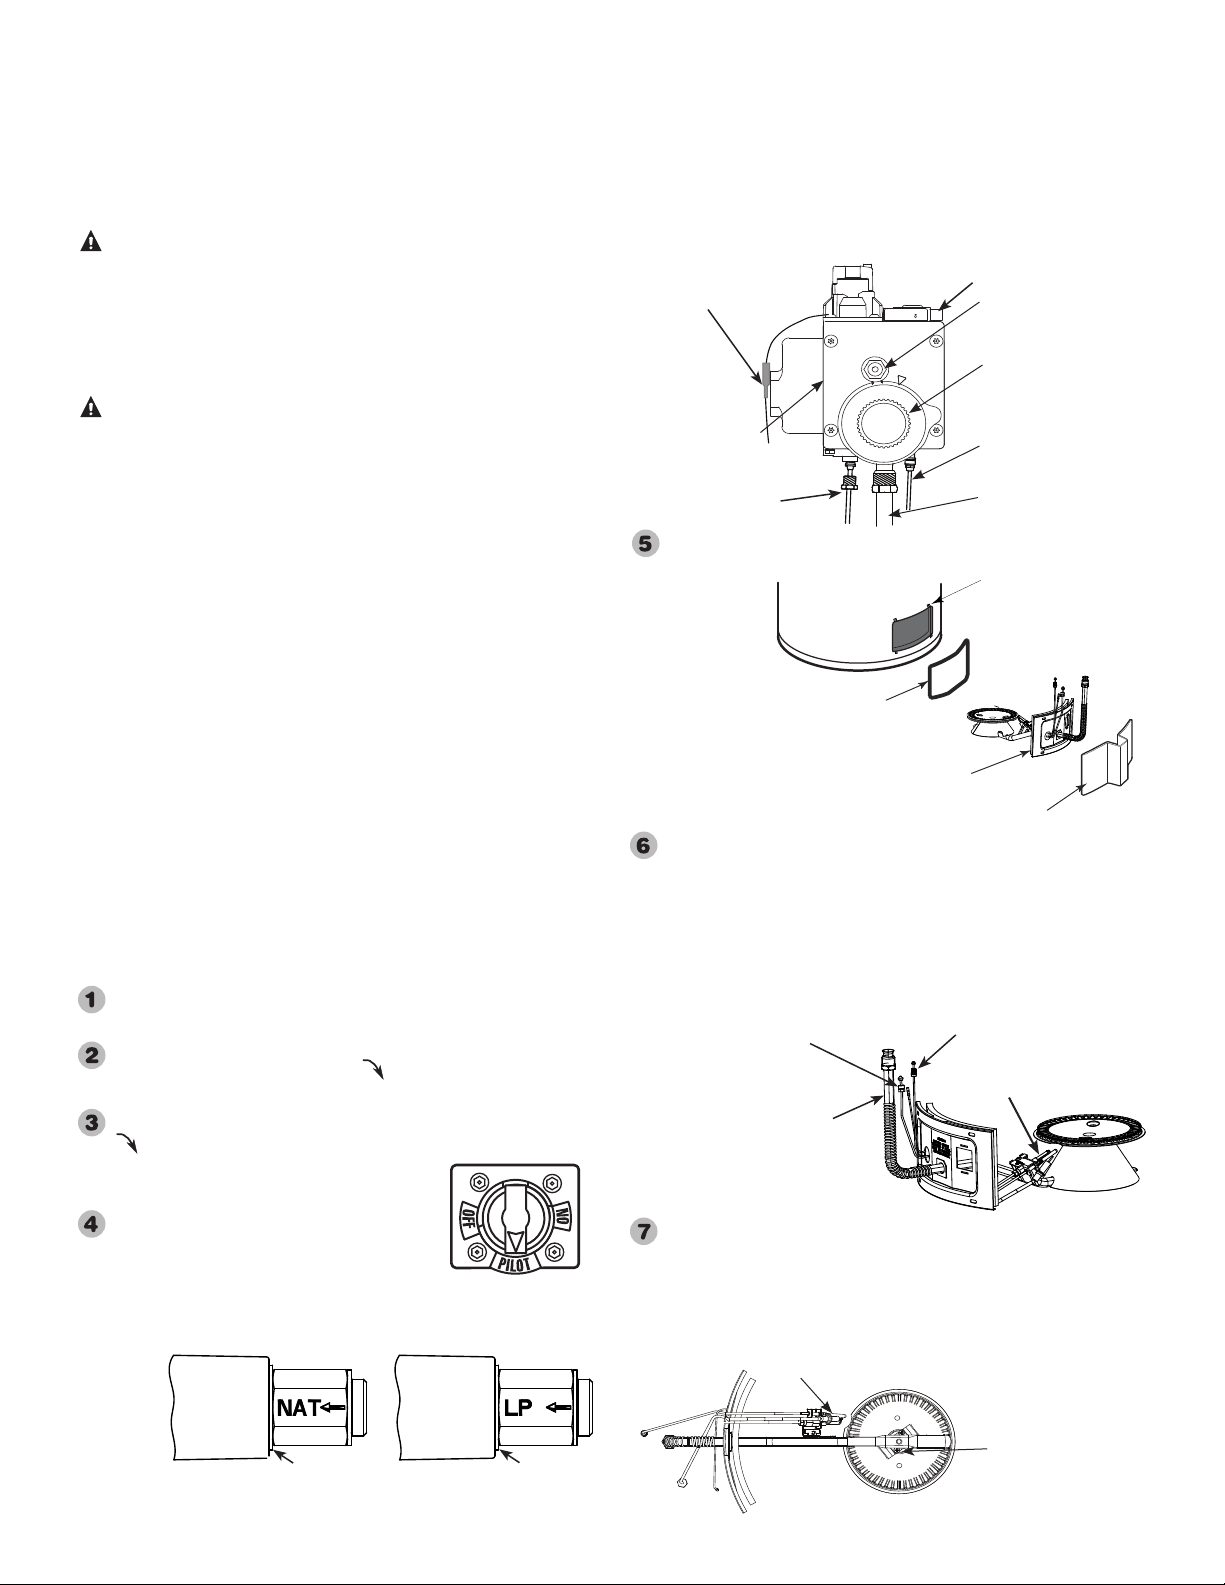
Change gas regulators setting by
removing cover from the gas selector
screw; then remove and reinstall the
selector screw with the red washer and
LP arrow mark pointing inward toward the heater. Tighten
to 4-8 in-lb. Replace cover.
LP Gas Position
Natural Gas Position
Gas Selector Screw Settings
Blue Washer
Red Washer
Remove outer jacket door.
Remove the four screws on the inner door using a
#20 TORX wrench supplied with the conversion
kit. Disconnect burner supply tube using the 3/4"
wrench, pilot tube using the 7/16" wrench, and
the thermocouple using the 3/8" wrench from the
thermostat Disconnect the piezo wire from piezo
ignitor striker connection. Remove the entire burner
assembly along with
the inner door
.
Remove the Philips head screw that holds the pilot
burner assembly in place. Remove the pilot burner
assembly from the burner bracket. Remove the two
#6 x 3/8" long Philips head screws from the burner
bracket and remove the burner from inner door
assembly to expose main burner orifice.
Natural Gas to Liquefied Petroleum (LP or Propane) Gas
Burner Supply
Tube
Pilot
Pilot Burner
Thermocouple
Supply Tube
Bottom View of Inner Door Assembly
Pilot
#6 x 3/8"
long screws
23
Inner Door
Assembly
Jacket Door
Inner Door
Gasket
Inner Door
Speed Clips
Gas Selector Screw
(Without cover.)
Thermostat Dial
Gas
Thermostat
Piezo Wire
Connection
Thermocouple
(Copper Tube)
Pilot Tube
(1/8" Aluminum
Tube)
Burner Supply
Tube
Piezo Igniter Striker
Front View of Gas Thermostat
Loading ...
Loading ...
Loading ...