Loading ...
Loading ...
Loading ...
Continued on Next Page
SB-GM-CAMCONV/10W1v2 INSTR_SKU# 011327
Page 5 • JL Audio, Inc., 2011
STEP 31
Using a grease pencil, trace the legs of the Stealthbox® onto
the floor panel. Remove the Carpeted Center Cover, the
enclosures, and the floor panel.
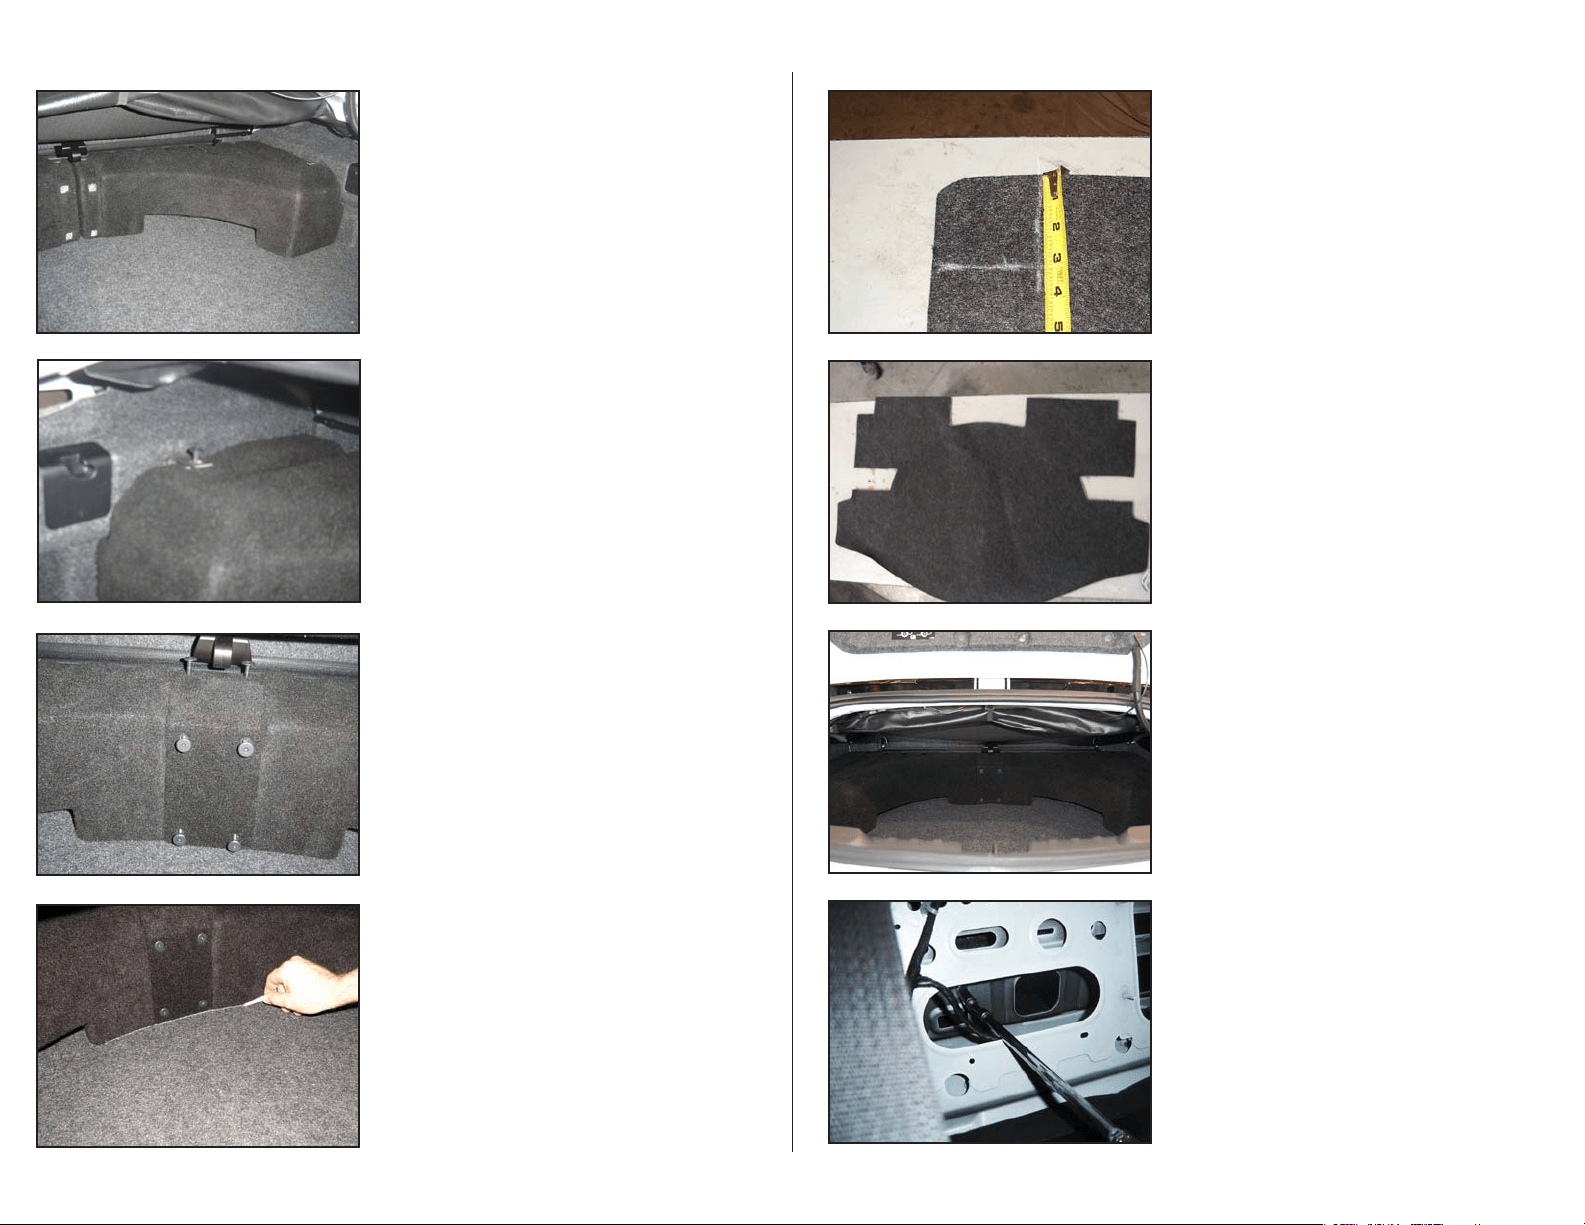
STEP 30
Align the Carpeted Center Cover between the two
enclosures as shown, and thread the six 1/4 - 20 x 1-1/2” Hex
Bolts into the threaded inserts in the enclosures.
STEP 34
Attach speaker cable to the enclosures, and reinstall the
Stealthbox®. Route the cable as necessary. Hand tighten the
eight 1/4 - 20 x 1-1/2” Hext Bolts, and reinstall the floor panel.
STEP 33
Carefully cut the floor panel along the lines. Pictured is the
floor panel after it has been cut.
STEP 28
Place the second enclosure in the trunk, and align the two
enclosures, as shown.
STEP 32
Mark a 3” x 3” square on the rear corners of the floor panel.
STEP 35
From inside the back seat area, locate the threaded insert on
the back of each enclosure. Place a 1/4” Lock Washer, and
a 1/4” Flat Washer on each 1/4 - 20 x 1-1/2” Bolt, and thread
an assembly into each of the threaded inserts, and firmly
tighten. Then firmly tighten the eight 1/4 - 20 x 1-1/2” Hex
Bolts installed in the previous step.
STEP 29
Thread a 1/4 - 20 x 1-1/2” Hex Bolt through each bracket
and into the threaded inserts in each enclosure to hold the
enclosures in place.
Loading ...