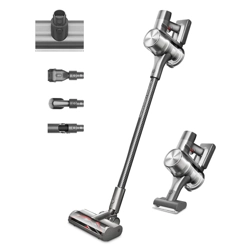
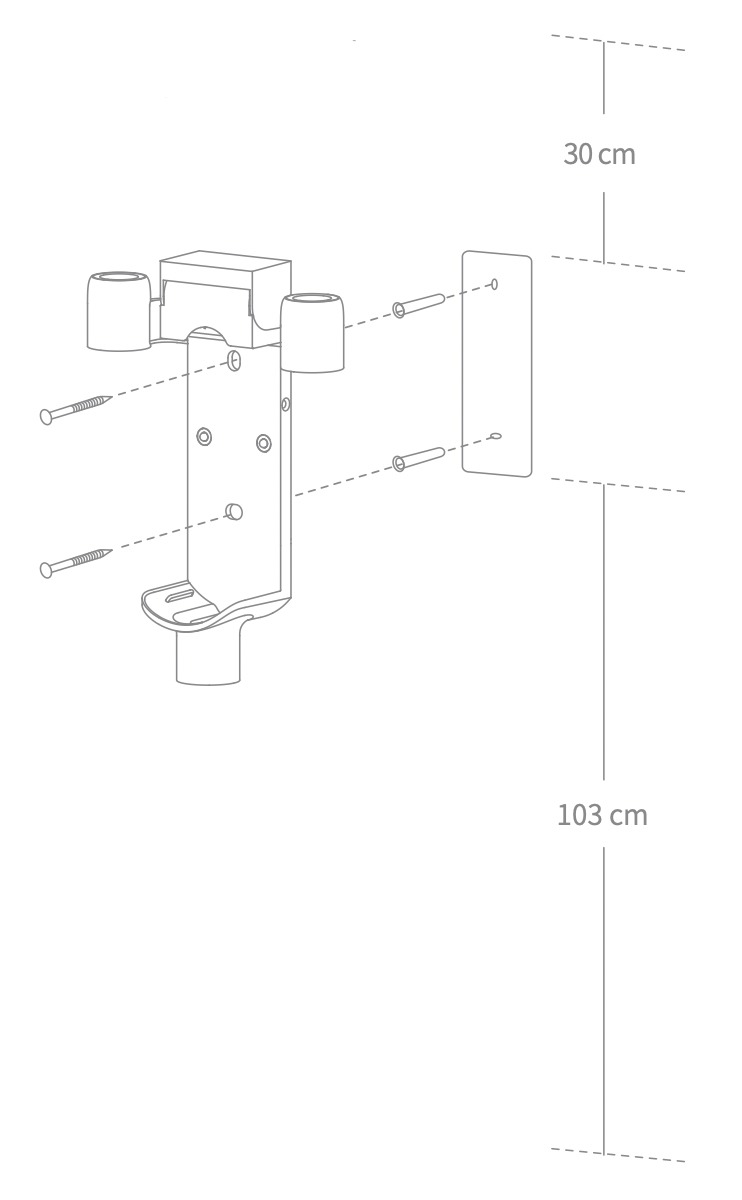
2-in-1 Charging & Storage Mount (Including screws ×2, wall plugs ×2, and mounting template sticker )
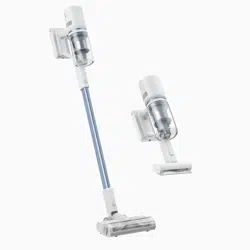
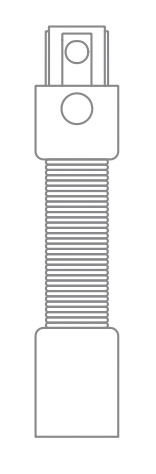
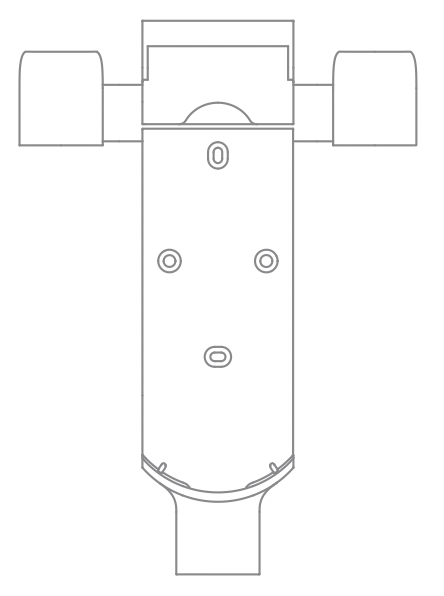
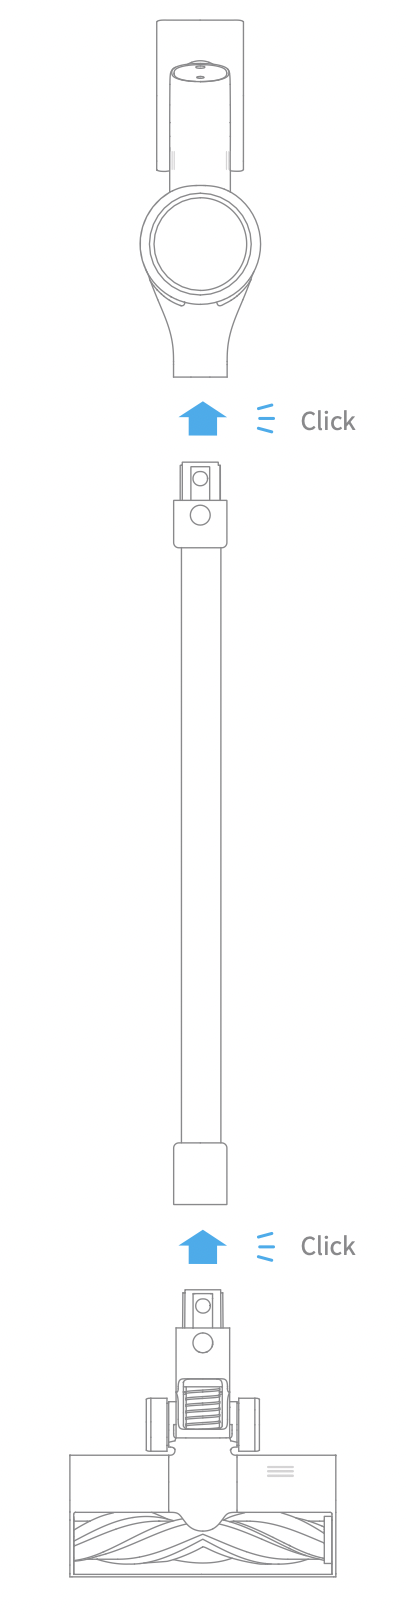
Smart Multi-Brush Bar
Note: The images in this manual are for illustrative purposes only. The actual product may differ.
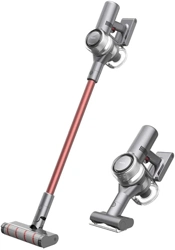
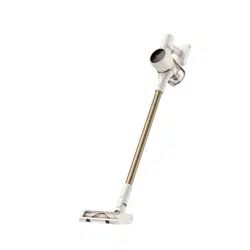
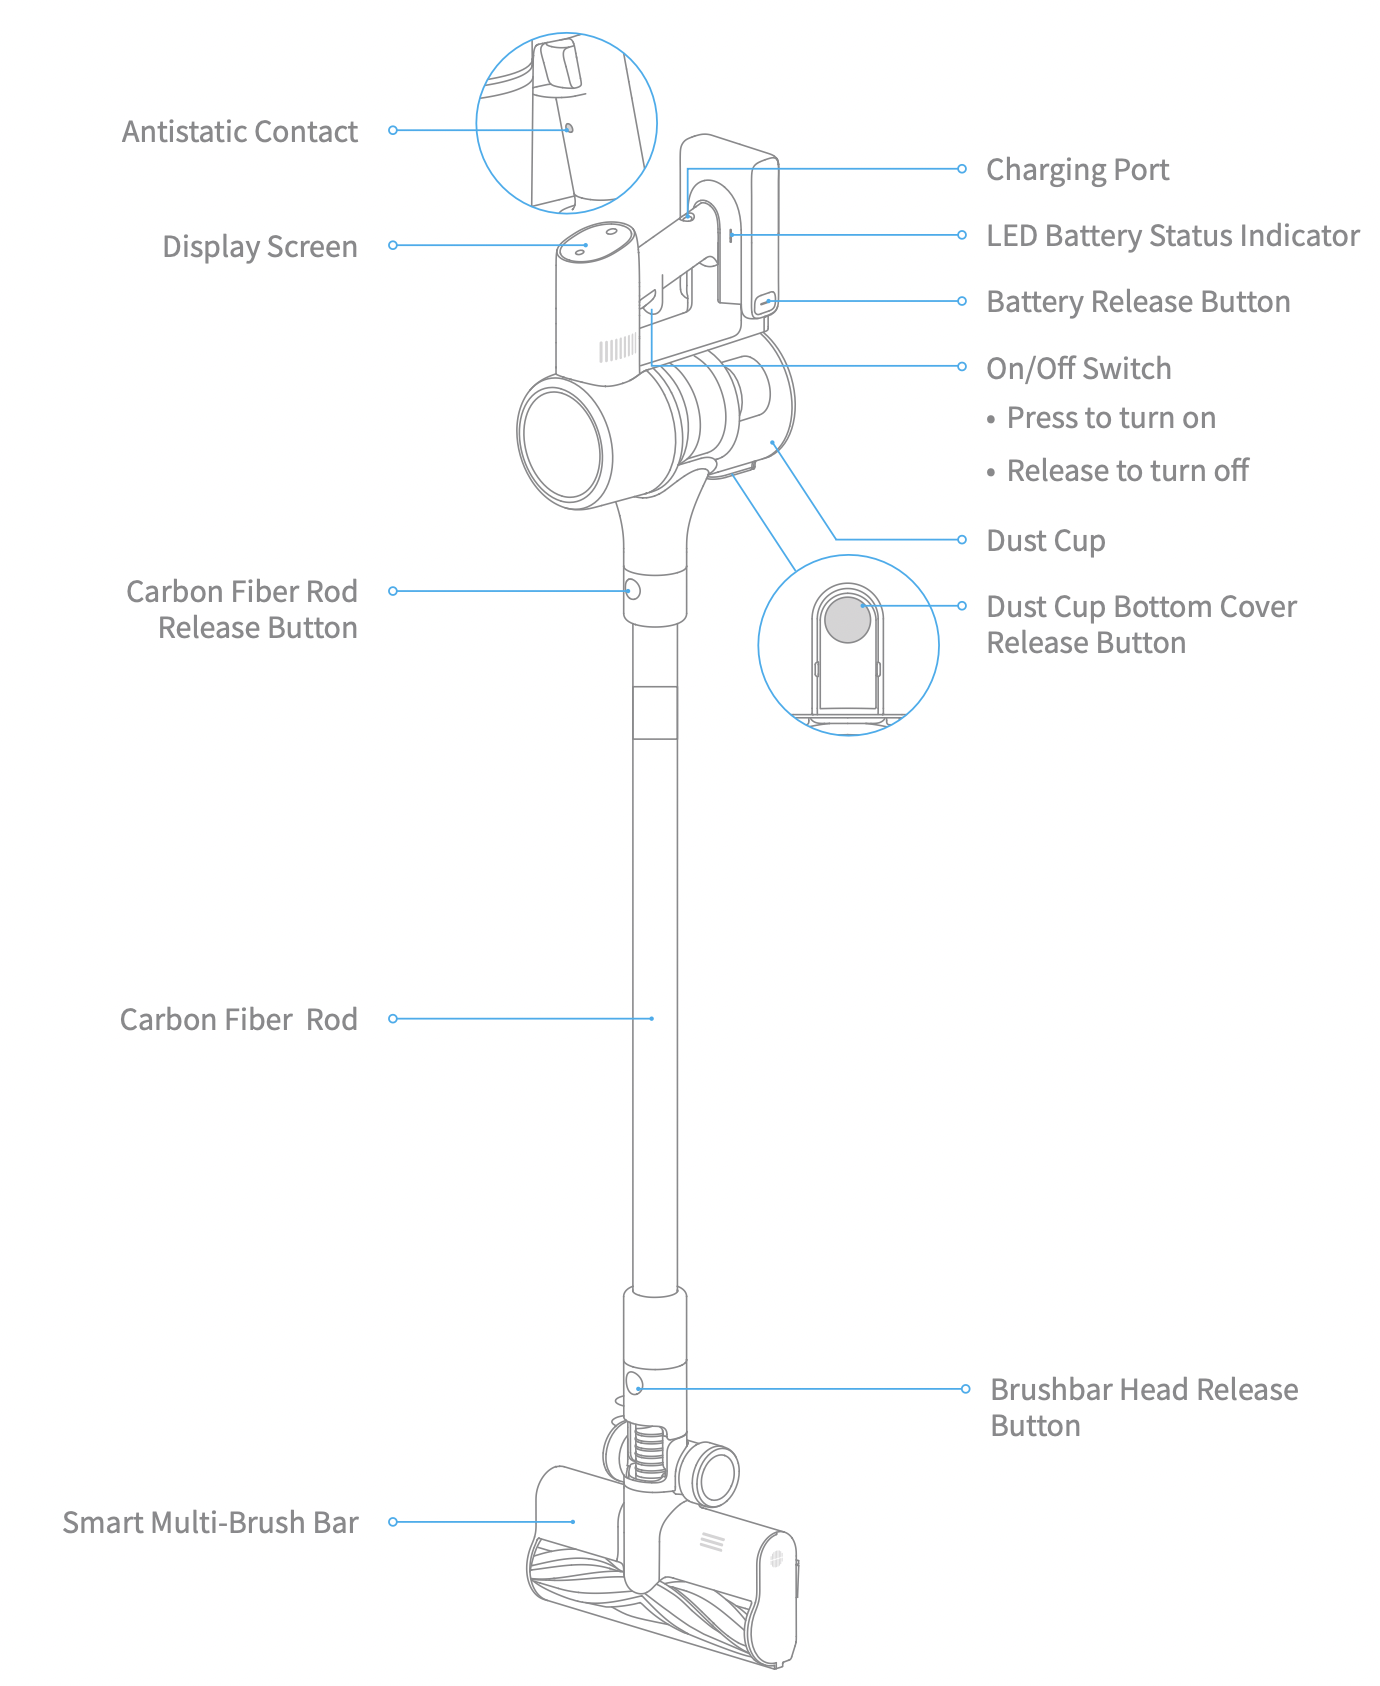
Component Names
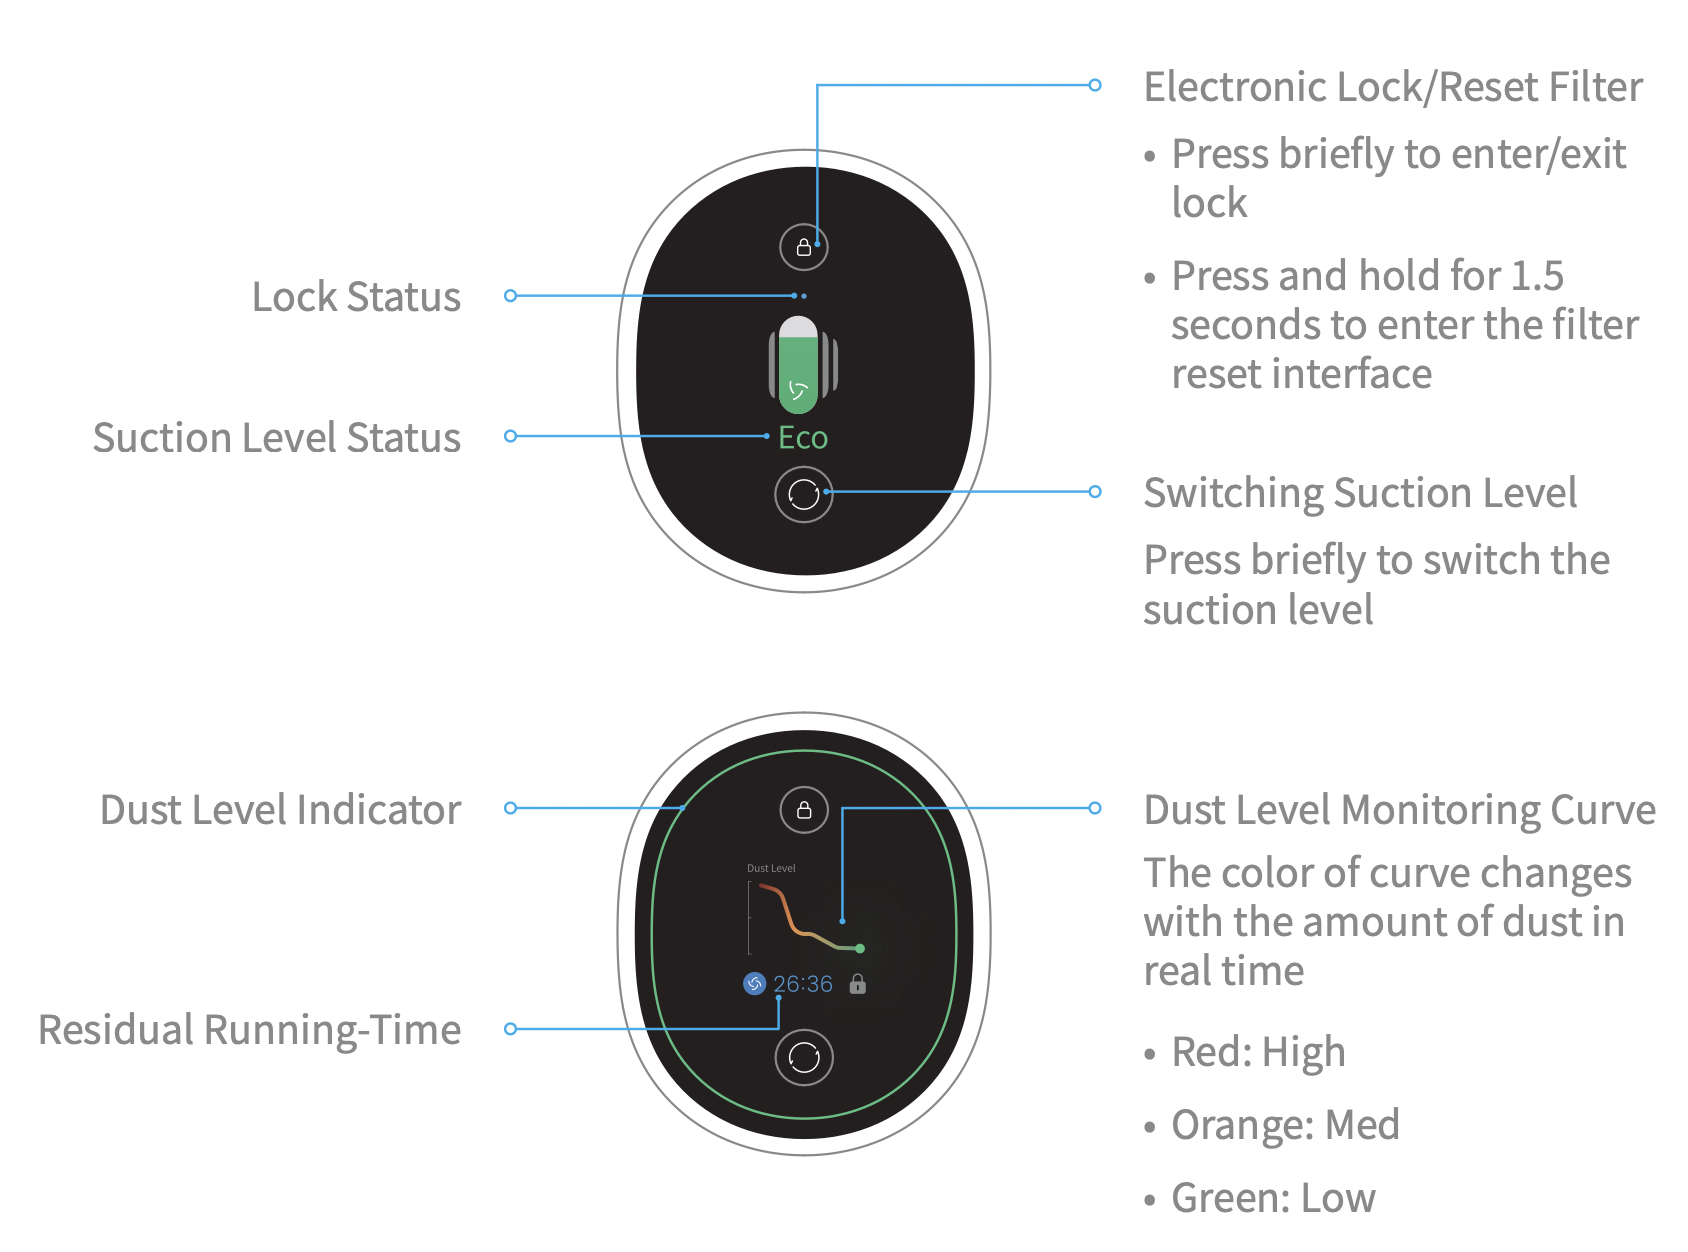
Introduction of Display Screen
Note:
The color of dust level indicator changes with the amount of inhaled dust.
Residual time is for reference only and it may be different from the actual time.
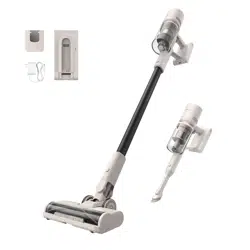
Installation
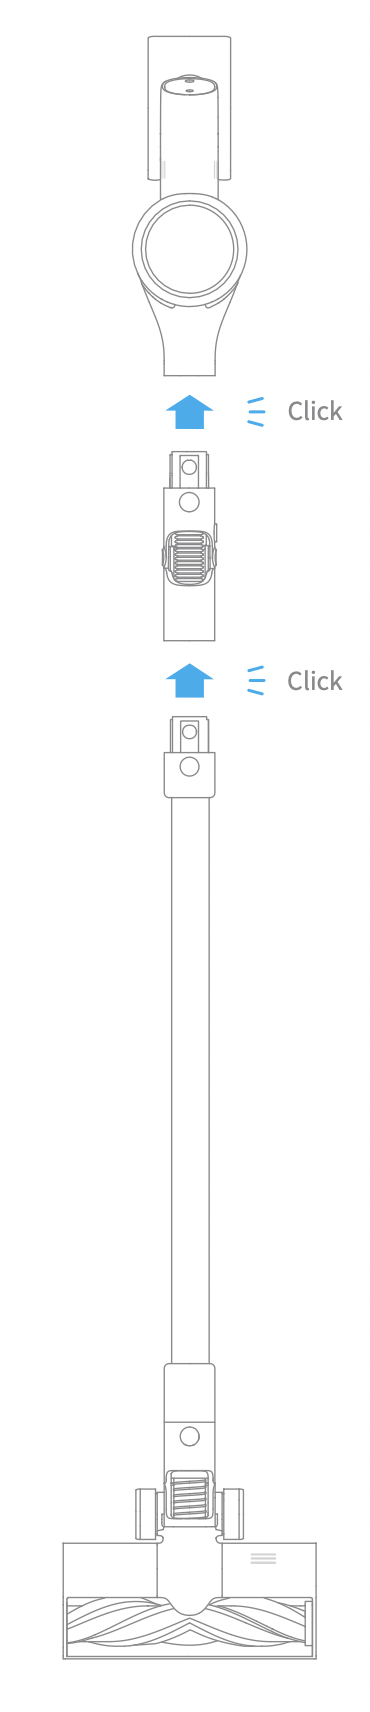
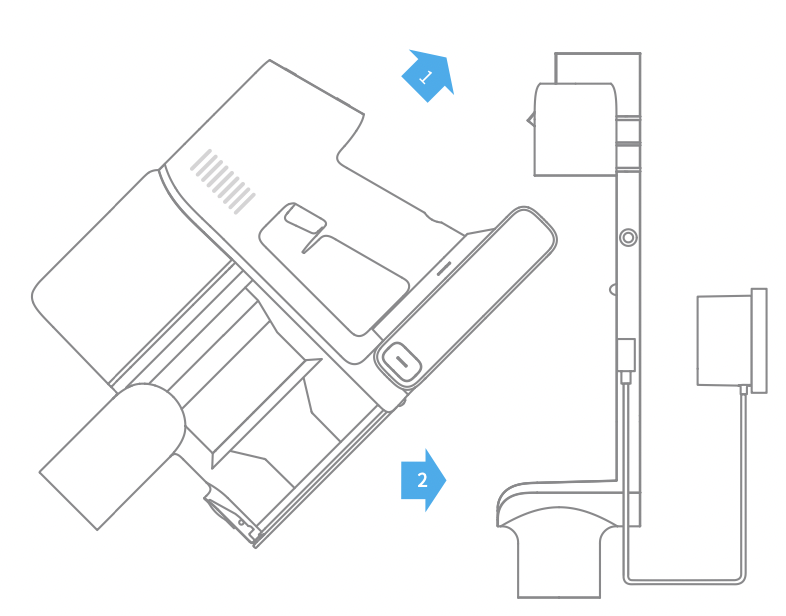
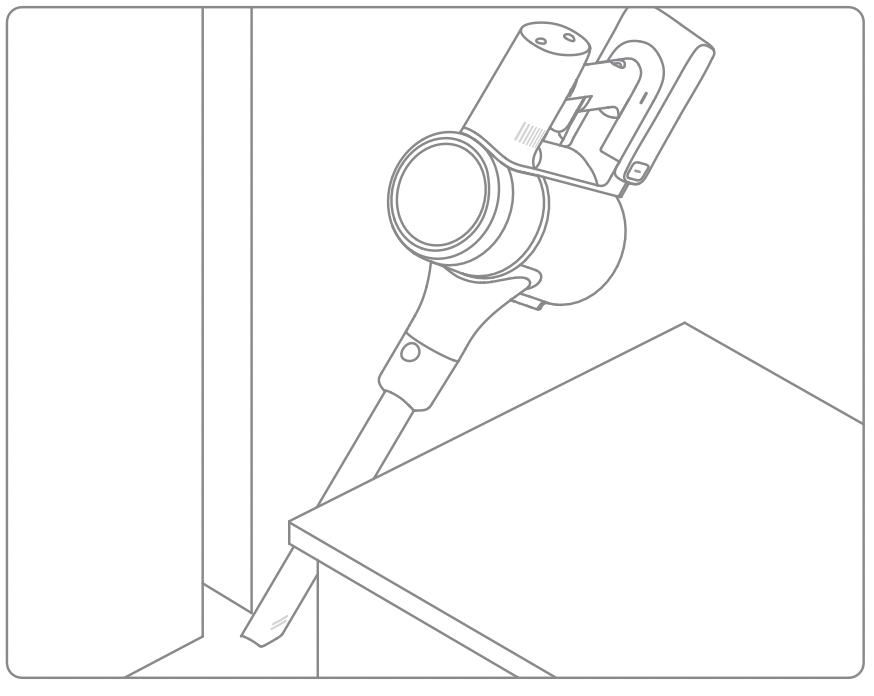
Vacuum Installation Diagram
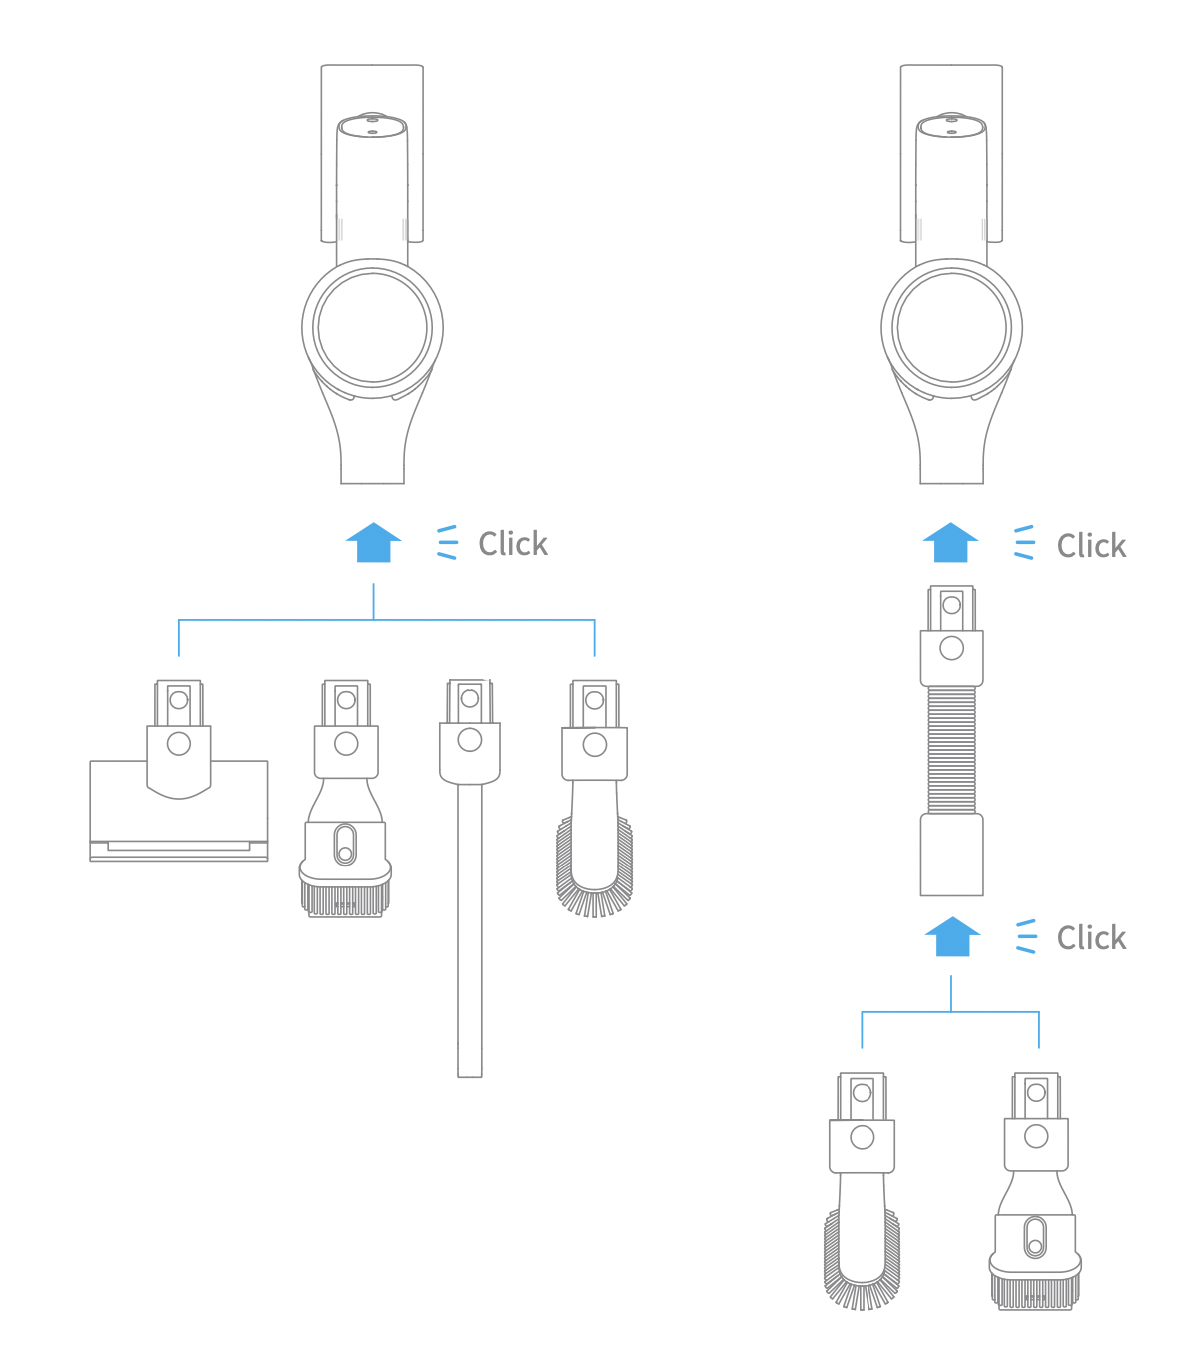
Accessories Installation Diagram
Accessories Installation Diagram
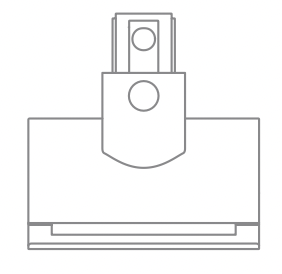
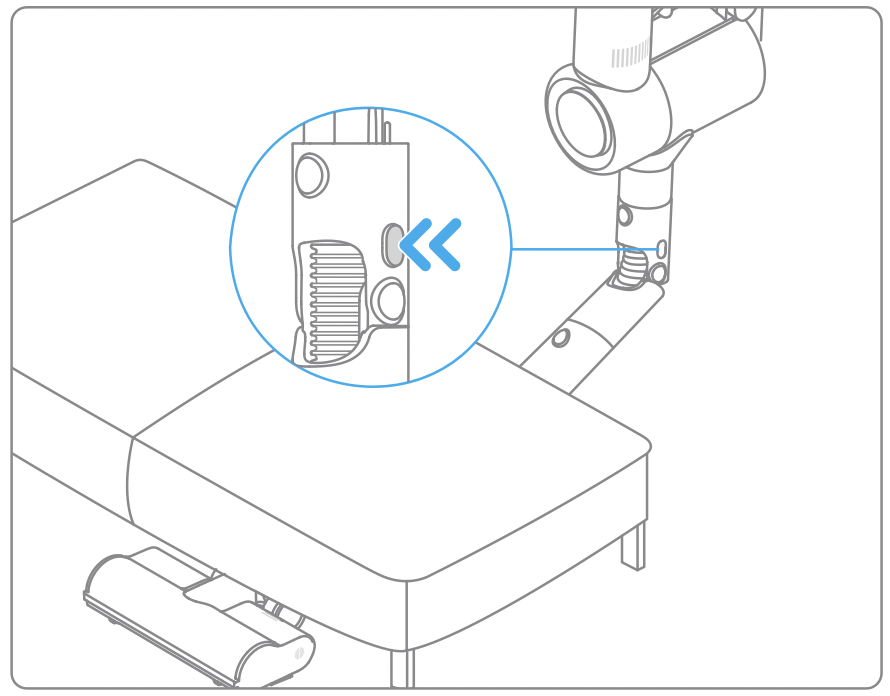
2-in-1 Charging & Storage Mount Installation Diagram
(The 2-in-1 charging & storage mount is an optional accessory. You can install it based on your needs.)
Note: The 2-in-1 charging & storage mount should be installed in a cool, dry place with an electrical outlet nearby. Prior to installing, ensure that there are no electrical wires or pipes in the space directly behind where the mount will be installed.
The bottom of the mounting template sticker should be level and at least 103cm from the ground. The top should have at least 30cm* of clearance above it.
Use a power drill with an 8mm drill bit to drill a hole into each marker on the mounting template sticker, then insert a wall plug into each hole.
Align the locating holes on the mount with the holes on the wall. Fasten it to the wall with the included screws.
*30cm: Leave enough space just in case you may need to purchase the replaceable battery in the future.
Charging
Fully charge the vacuum before using it for the first time.
Note:
A full charge will take approx. 4 hours.
Vacuuming in Turbo Mode for a prolonged period will cause the battery to heat up, which increases charging time. Allow the vacuum to cool down for 30 minutes before charging it.
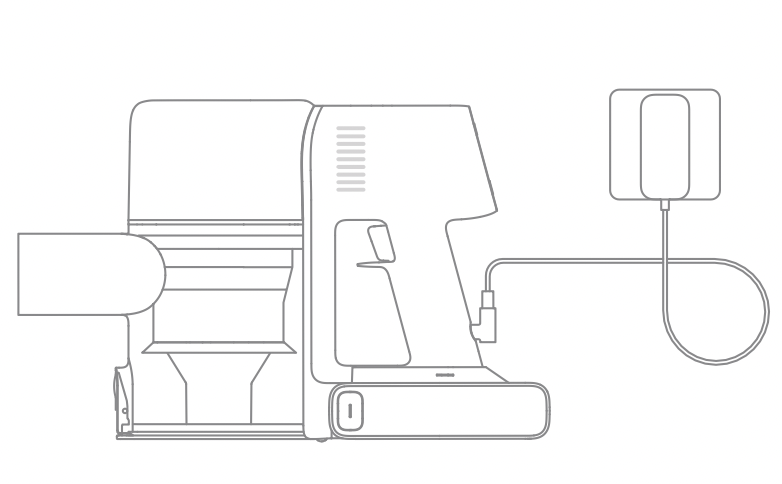
Charging Methods
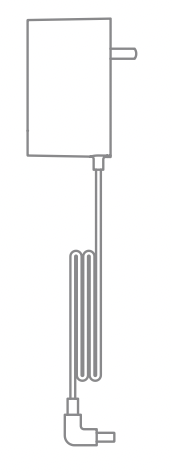
Charging the vacuum with the charger
Charging the vacuum on the charging mount
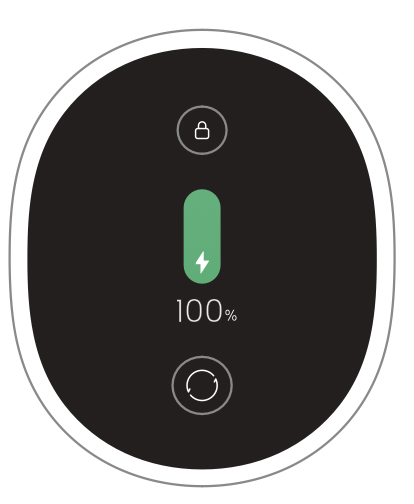
Battery Status Display
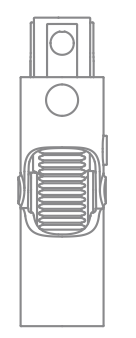
Display Screen
The number on the display screen represents the current battery level in a percentage during charging. When the number becomes 100, the battery is fully charged.
LED Battery Status Indicator
When charging, the indicators blink white. When the charging is completed, the indicators keep solid white.
Note: Once the vacuum is fully charged, the indicator will turn off after 5 minutes, and the vacuum will enter energy-saving mode.
How to Use
Setting Language
Press and hold the button for 3 seconds to enter the menu interface. Click the button to swtich to "Language". Press the button for 1 second to enter the language selection interface. Click to scroll through the language list, select a language, and then press and hold for 3 seconds to save your setting.
Cleaning Record
Press and hold the button for 3 seconds to enter the menu interface. Click the button to swtich to "Cleaning Record" and press the button for 1 second to enter the cleaning record interface. Then you will see the cleaning record of the last 7 days.
Note:
The display screen will return to the main page if there is no operation for more than 15 seconds.
To exit the menu interface, click the button to select "Exit".
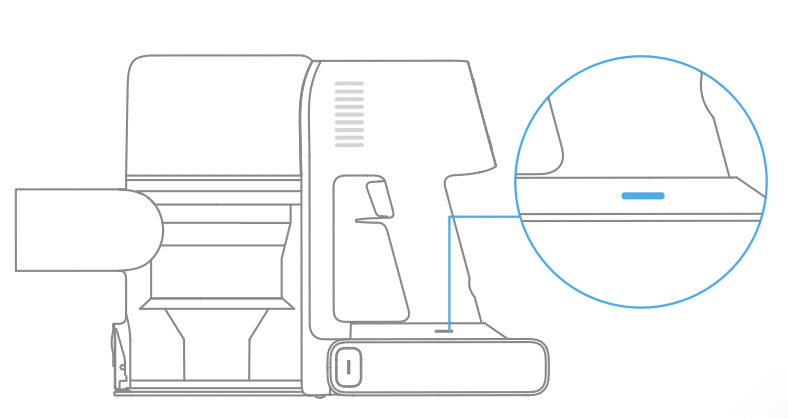
Switching Suction Level
Press the button to switch between four suction levels of auto, eco, med and turbo. The corresponding suction level will be highlighted on the display screen.
The color of dust level indicator changes with the amount of inhaled dust. When the smart multi-brush bar is attached, the vacuum will automatically switch the suction level between the floor/tile and the carpet.
Note: Stop the vacuum at any time while cleaning. It will continue to use the last selected suction level when starting again.
Working Methods
Select from two working methods for the vacuum, which can be selected based on your own needs.
When the vacuum is running, it will monitor the amout of inhaled dust within 1 second. The amount of dust will be displayed by the color of dust level monitoring curve on the screen in real time.
Method 1: Discontinuous Cleaning Mode
Press and hold the switch of the vacuum to enable this mode, and release it to stop immediately.
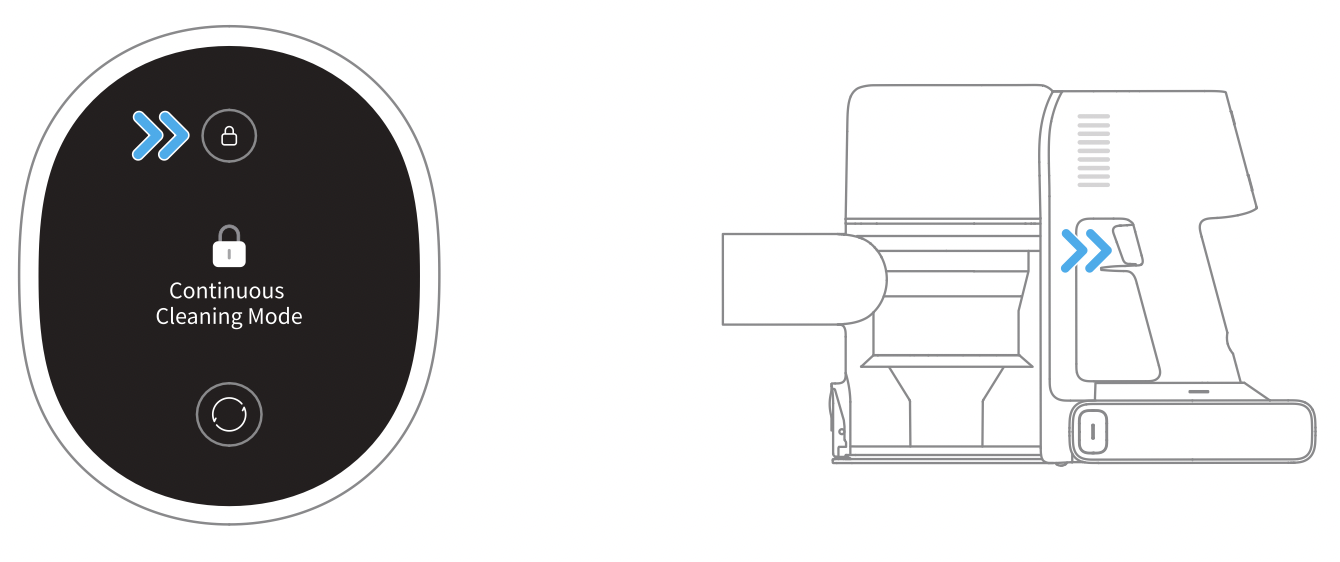
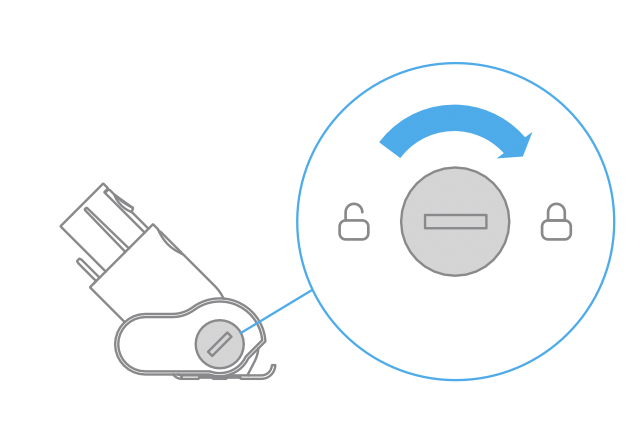
Click the electronic lock key to switch to Continuous Cleaning Mode, and then briefly press the on/off switch to keep the vacuum in Continuous Cleaning Mode.
Use the electronic lock to free your fingers from fatigue caused by holding the switch.
Note:
In this mode, briefly press the on/off switch to suspend the operation or start again and the working mode of the vacuum will not change.
Click the electronic lock again to quit Continuous Cleaning Mode.
Using Different Accessories
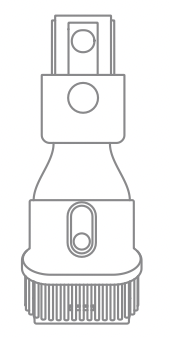
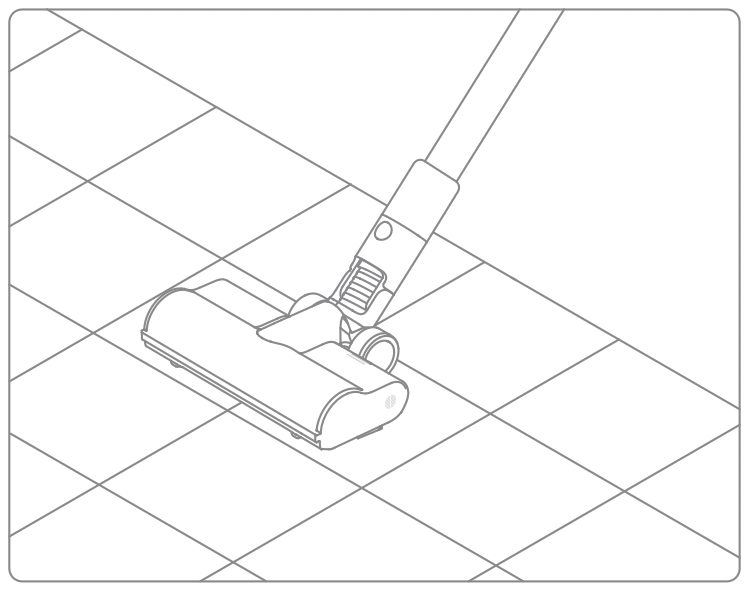
Smart Multi-Brush Bar
For cleaning floors such as marble, tile, and low pile carpet. When Auto Mode is activated, the vacuum will automatically adjust its suction level depending on the surface type.
Note: The smart multi-brush bar can be attached directly to the vacuum.
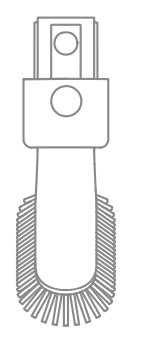
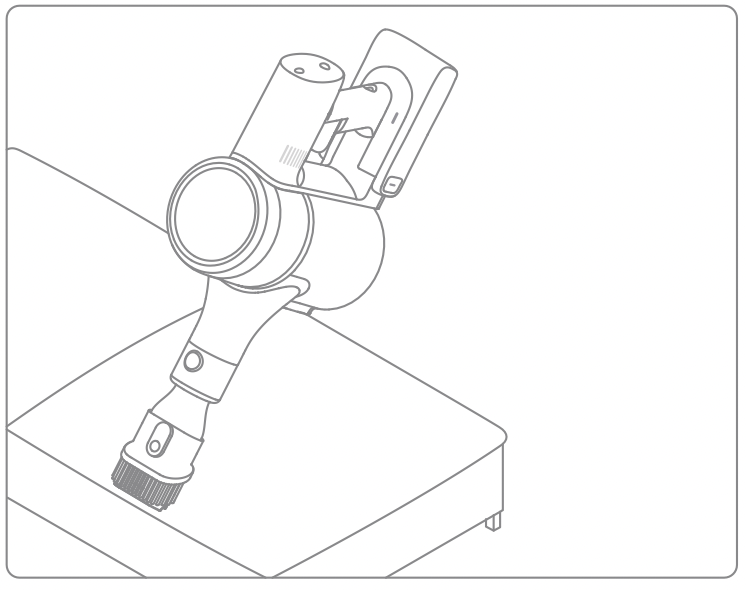
Mini Electric Brush
For vacuuming dirt, pet hair, and other stubborn debris from sofas, bedding, and other fabric surfaces.
Note: It is not recommended to vacuum on fragile surfaces, such as silk.
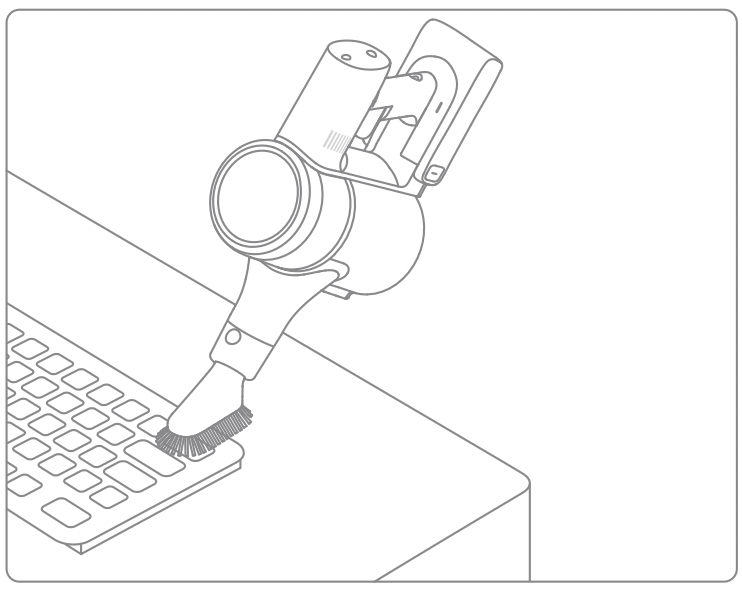
2-in-1 Brush Nozzle
For vacuuming dust from curtains, keyboards, ceilings, sofas, vehicle interiors, coffee tables, etc.
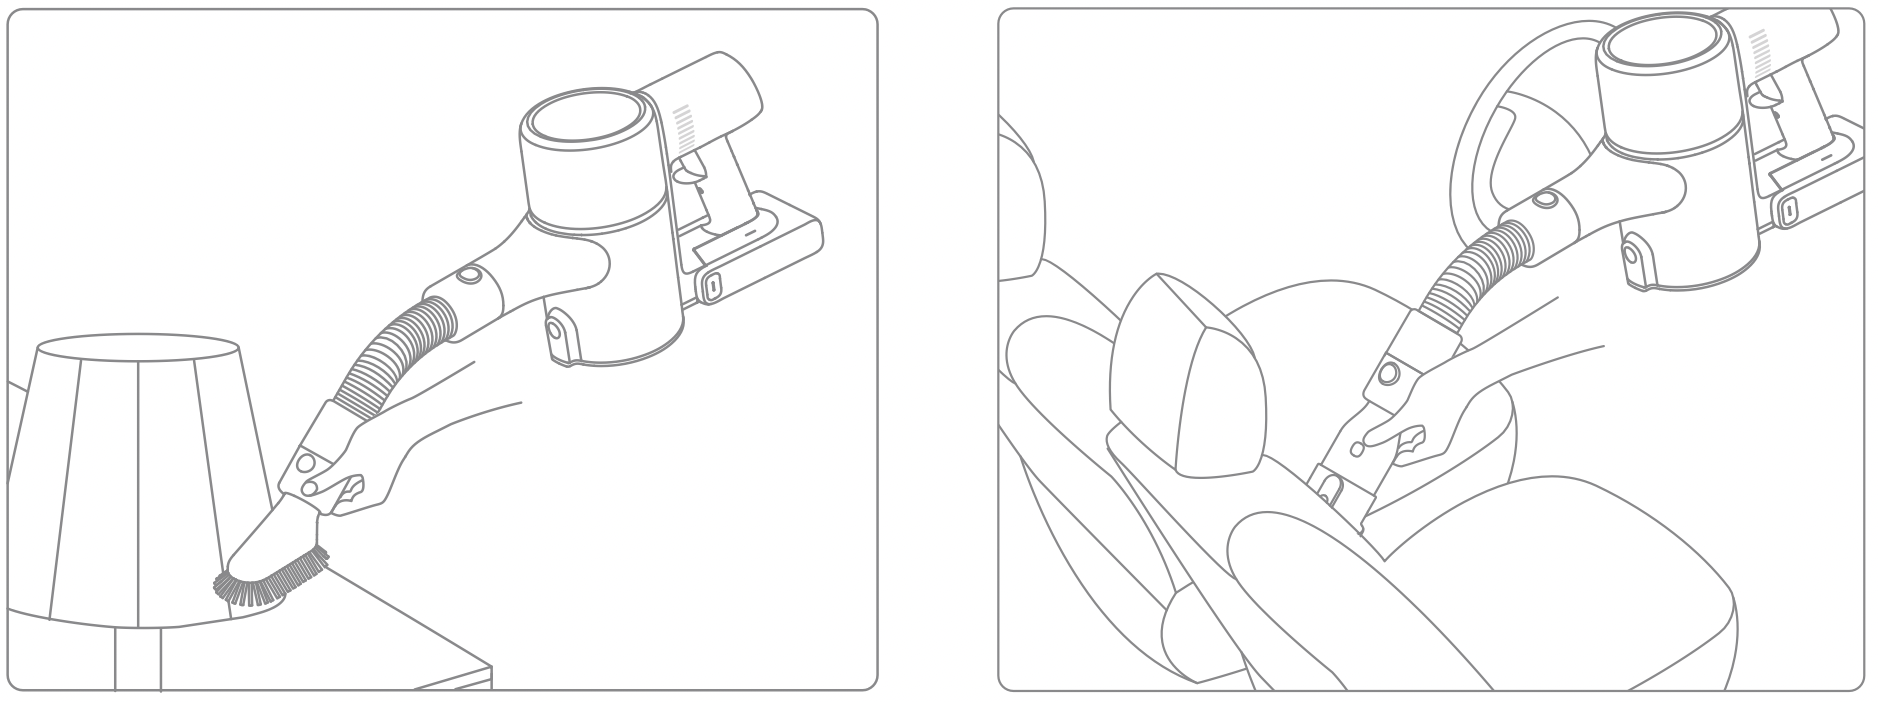
Soft Dusting Brush
Suitable for vacuuming on LCDs, keyboards, lampshades, curtains, shutters and other surfaces of fragile objects.
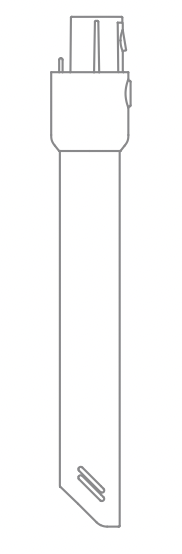
Extension Hose
It is suitable for vacuuming the corners that are not easily accessible such as drawers, cars interior, and in the bottom of sofa when used with soft dusting brush or 2-in-1 brush nozzle.
Flexible Adapter
Bending and extending the rod with one click can easily reach under low-lying furniture, such as bed and sofa.
LED Crevice Nozzle
The nozzle is equipped with a thin suction opening and LED light. It is suitable for vacuuming the debris in the narrow places.
Note:
If any rotating part becomes stuck, the vacuum may shut off automatically. Remove any trapped objects so the device can function normally.
When the battery becomes overheated, the vacuum will automatically shut off. Wait until the battery temperature returns to normal, then the vacuum will work normally.
Care & Maintenance
Tips:
Always use genuine parts to keep your warranty from becoming void.
If the filter or nozzle becomes clogged, the vacuum will stop working shortly after being turned on. To restore normal functions, clean the filter and/or nozzle.
If the vacuum is not be used for an extended period, fully charge it, unplug its charger, and store it in a cool, low-humidity environment away from direct sunlight. To avoid over-discharging the battery, recharge the vacuum at least once every three months.
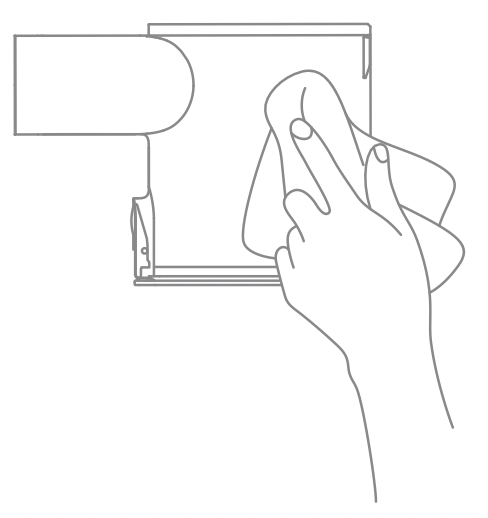
Cleaning the Vacuum
Wipe the vacuum with a soft dry cloth.
Cleaning the Dust Cup, Pre-Filter, and Cyclone Assembly
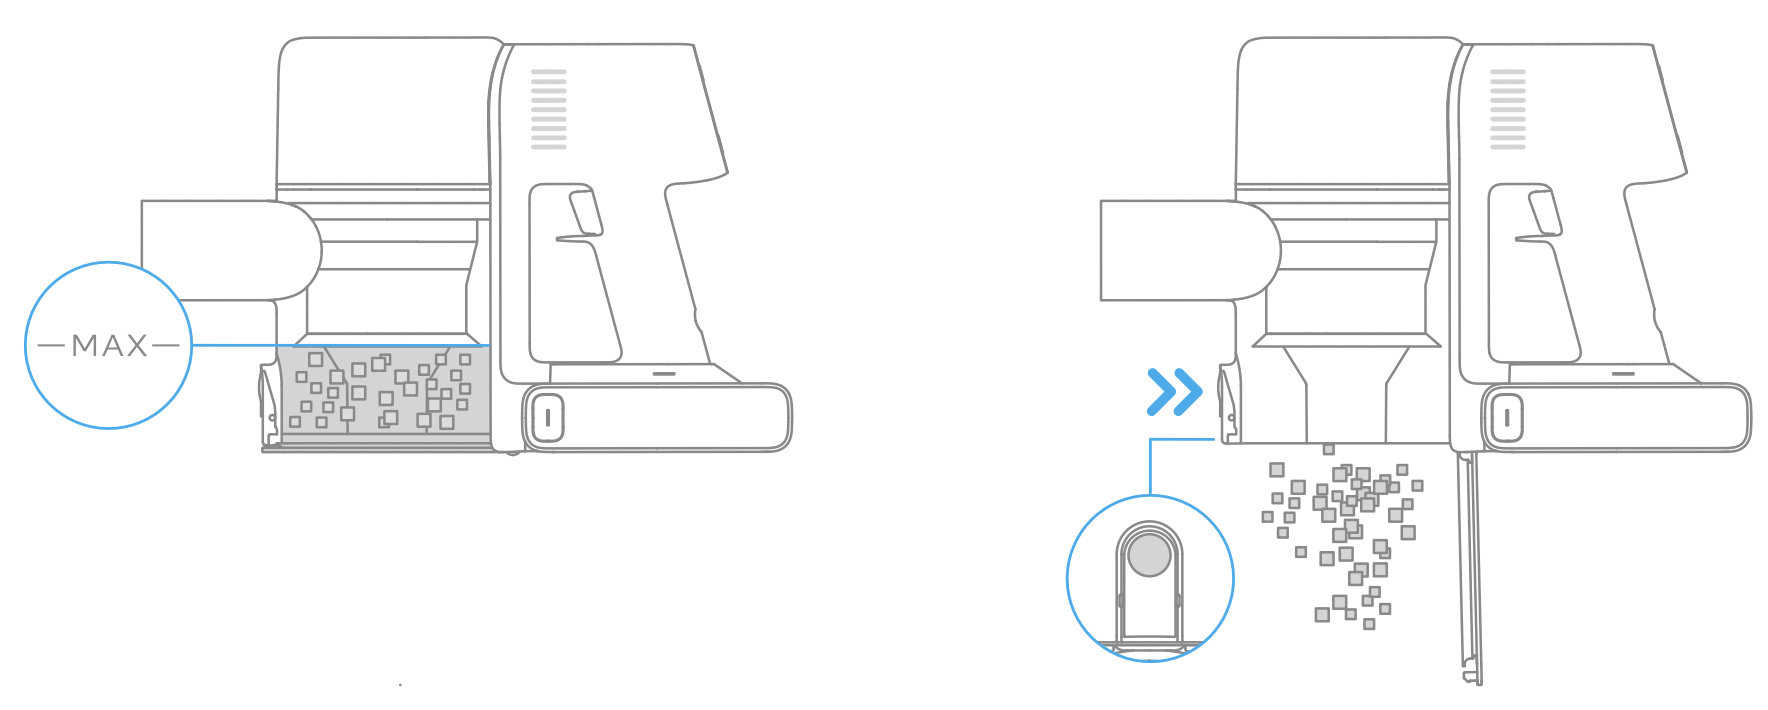
The vacuum's cleaning ability will be reduced if the dust cup is filled to the "MAX" mark. To regain performance, empty the dust cup in a timely manner. Before emptying the cup, make sure the vacuum is disconnected from the power, and do not press its power button.
Press the dust cup bottom cover release button, then empty the contents.
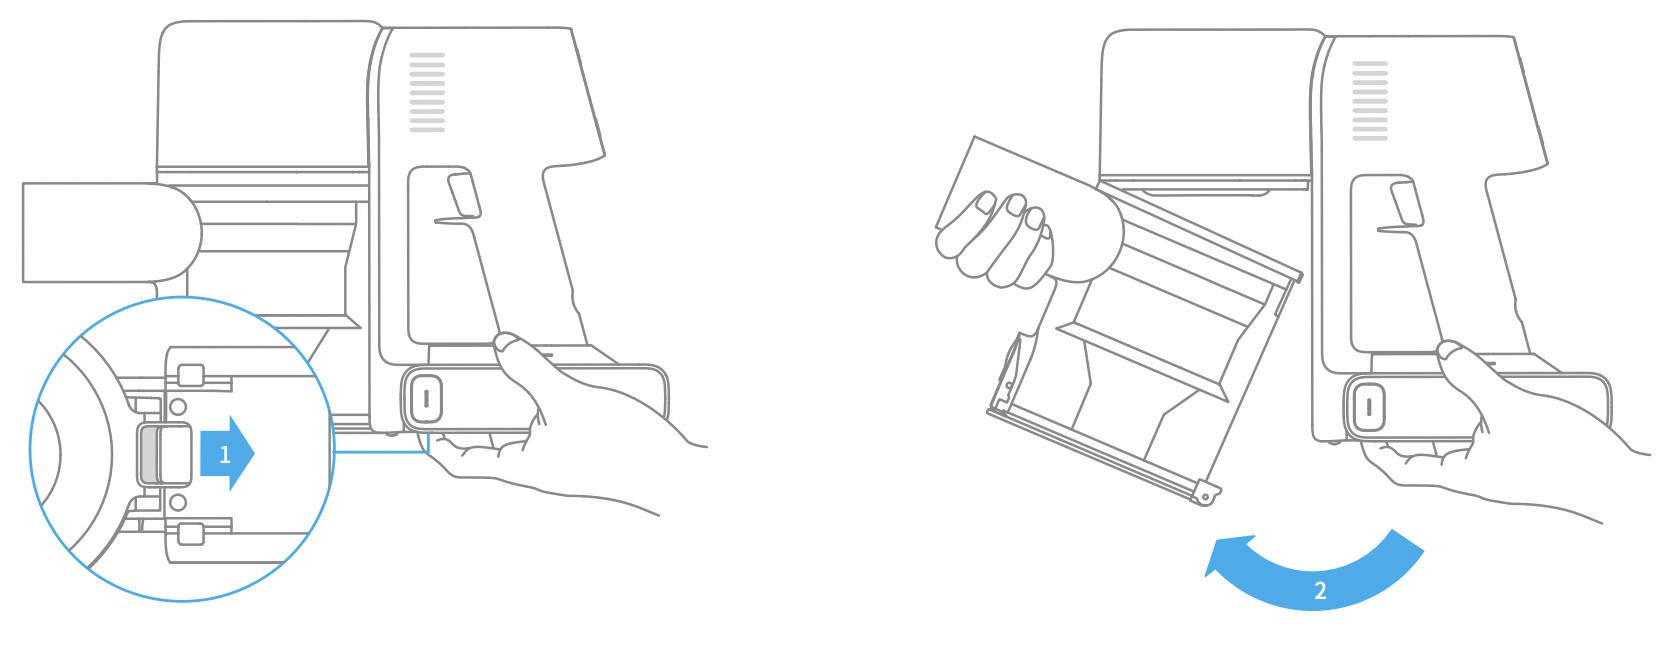
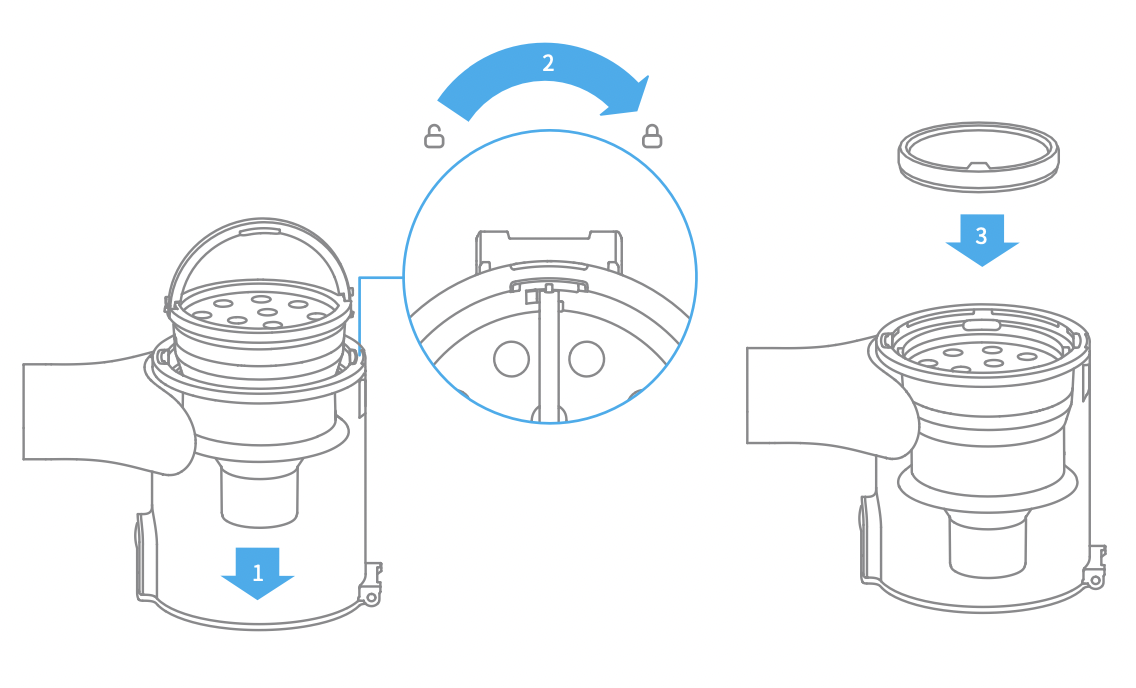
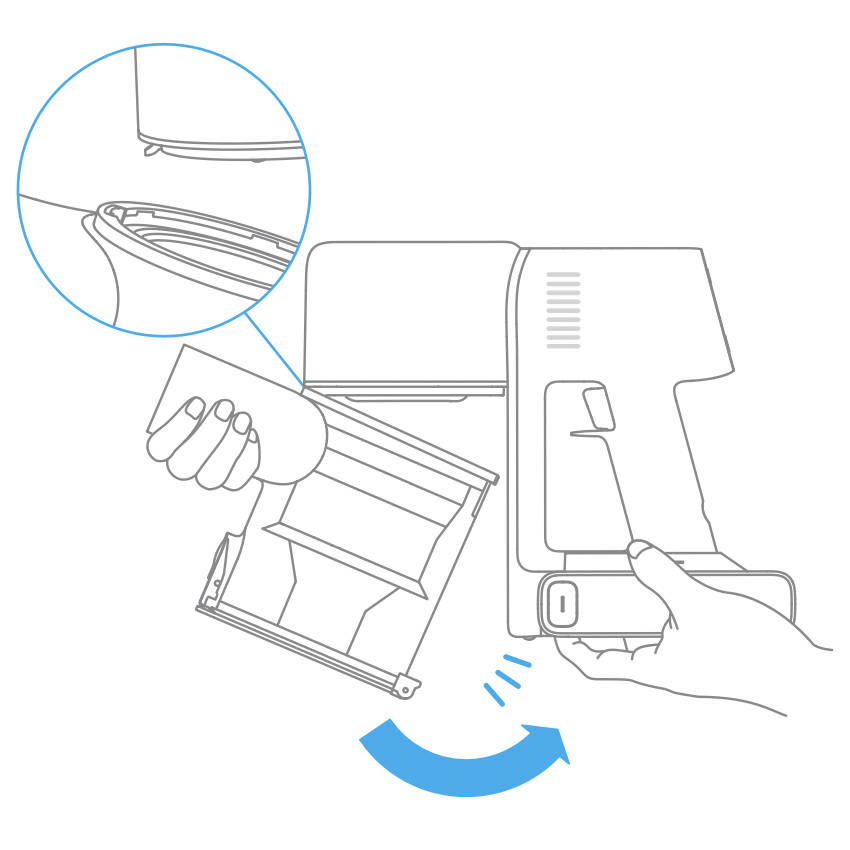
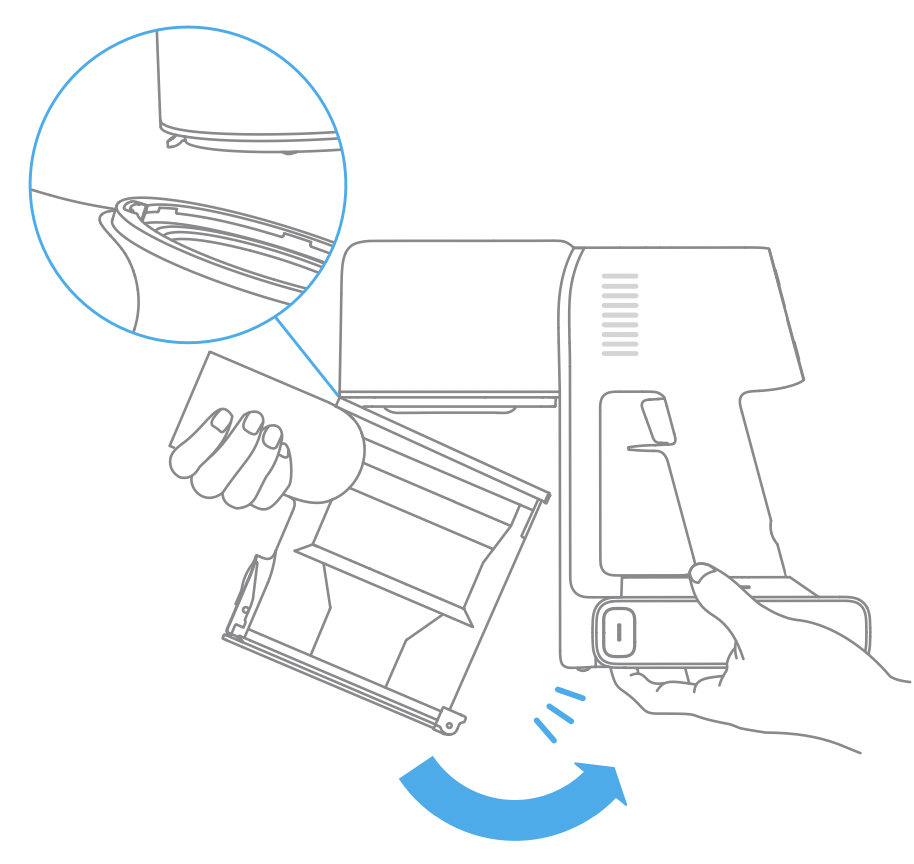
Push the dust cup release switch in the direction indicated by the arrow, then gently remove the dust cup from the vacuum.
Remove the pre-filter first, then lift the handle of the cyclone assembly and turn it counterclockwise until it stops, then pull to lift out the cyclone assembly.
Wipe the dust cup with a soft wet cloth. Pay attention to wring out the discloth before using. WARNING: To reduce the risk of electric shock, do not rinse the dust cup with water.
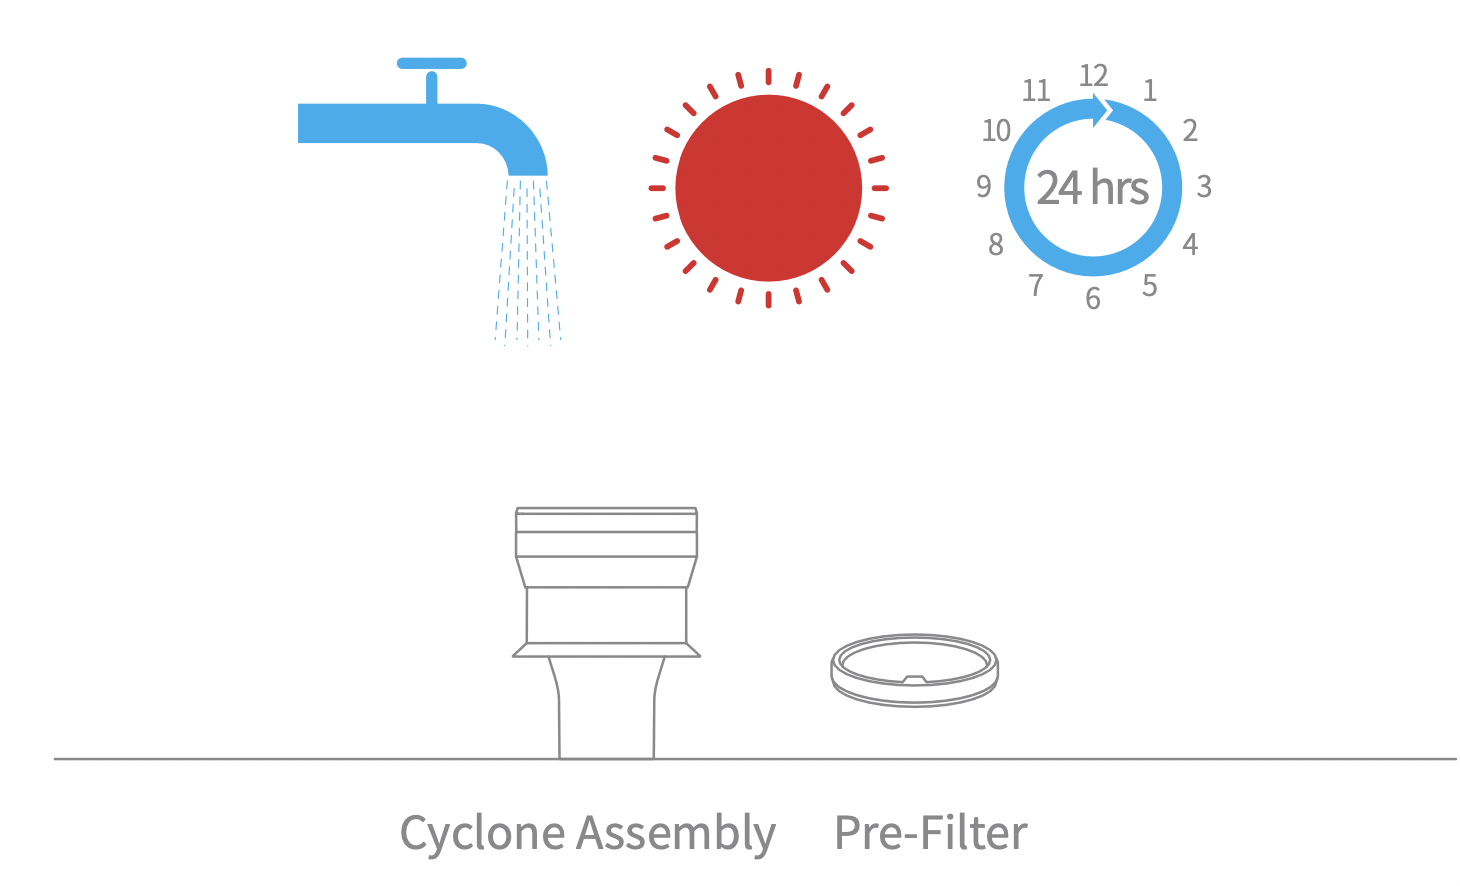
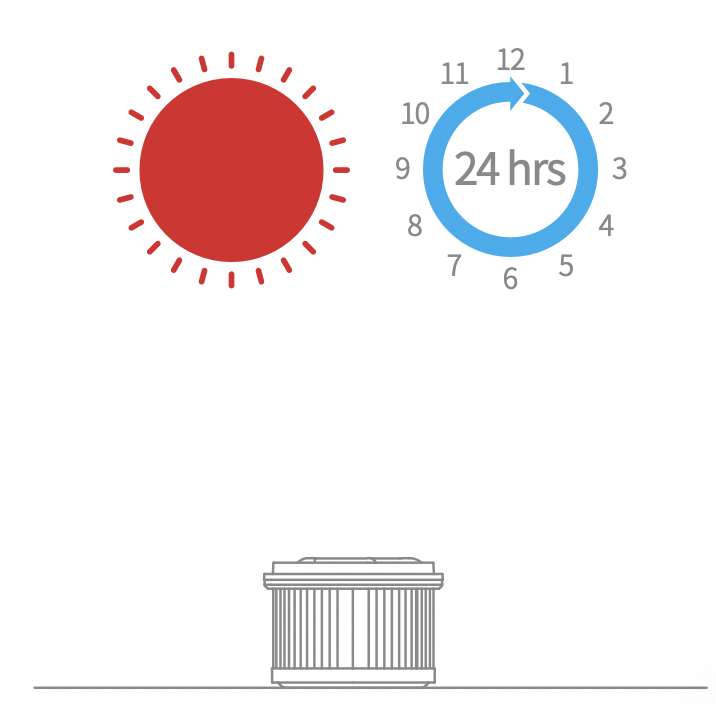
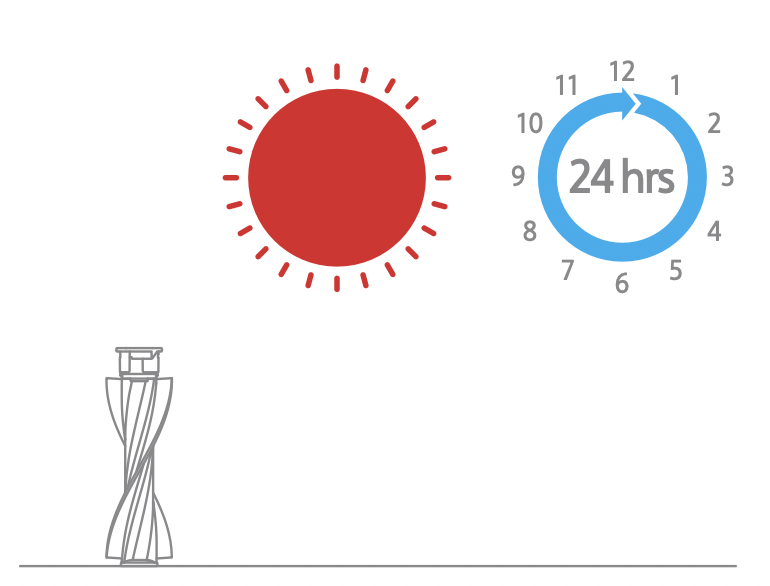
Rinse the cyclone assembly and pre-filter until they are clean. After washing, air dry for at least 24 hours .
Note: It is recommended to clean the pre-filter at least once every 3 months and the cyclone system at least once every 6 months.
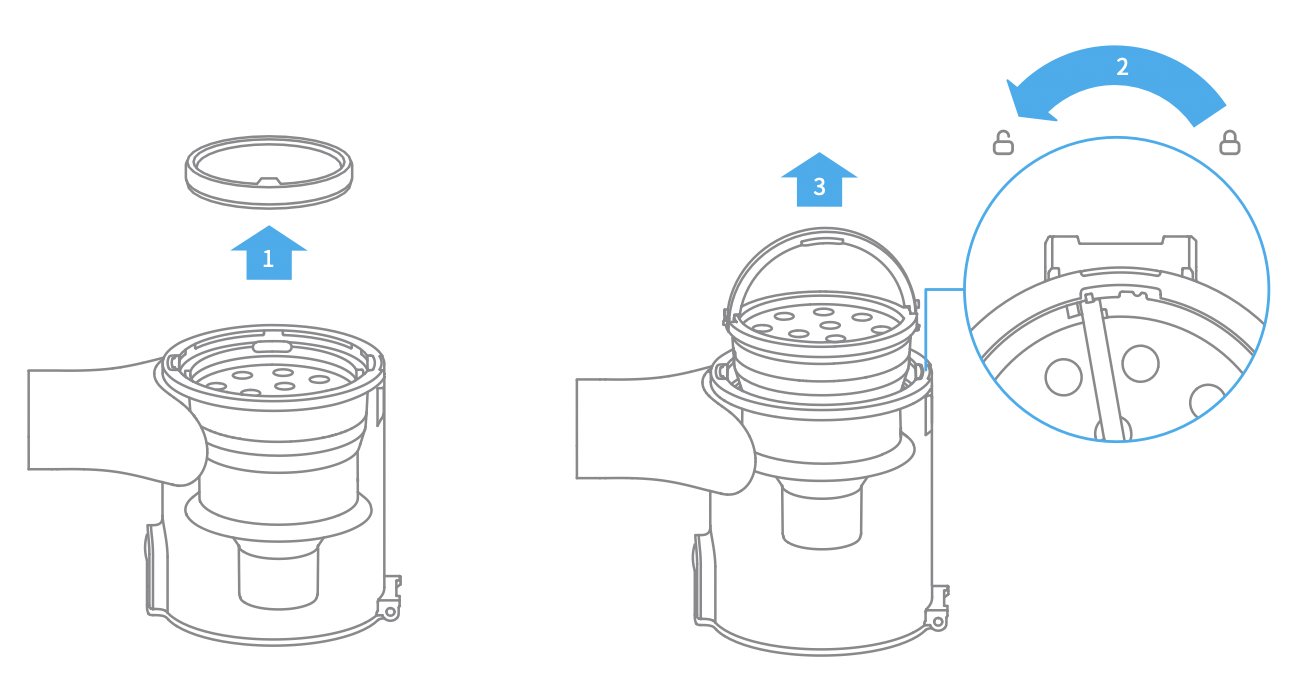
Installing the Dust Cup, Pre-Filter, and Cyclone Assembly
Insert the cyclone assembly vertically into the dust cup, and make sure that the handle of the cyclone assembly line up with the slot on the left side of the dust cup. Turn the handle clockwise until it locks, then flip the handle down.
Place the pre-filter with its front side facing up into the cyclone assembly.
Slightly tilt the dust cup so its slot aligns with the clip on the vacuum. Then gently push the dust cup until it clicks into place.
Cleaning the Filter
It is recommended to clean the filter once every 4 to 6 months.
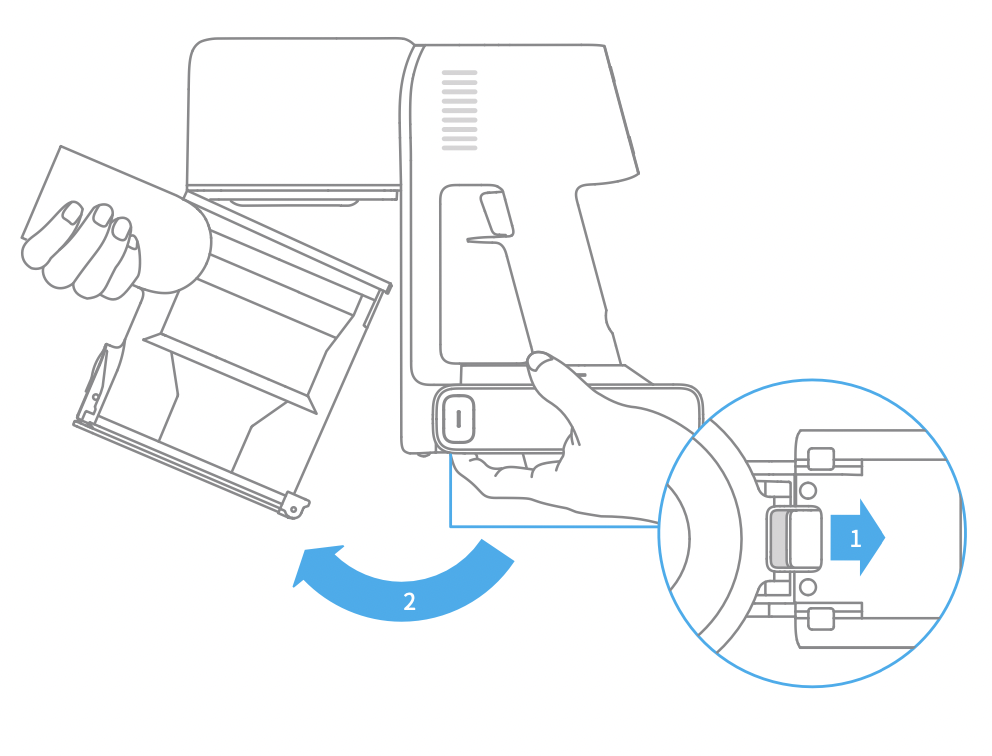
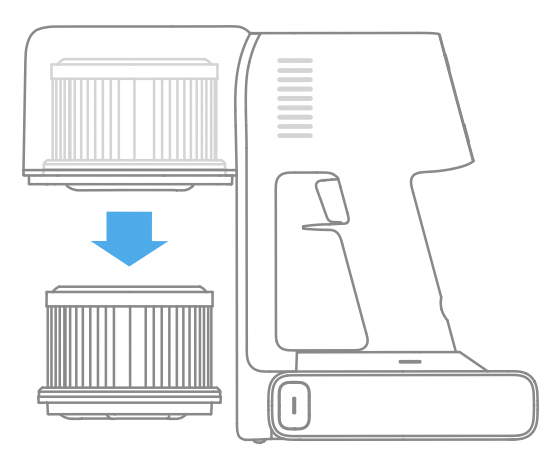
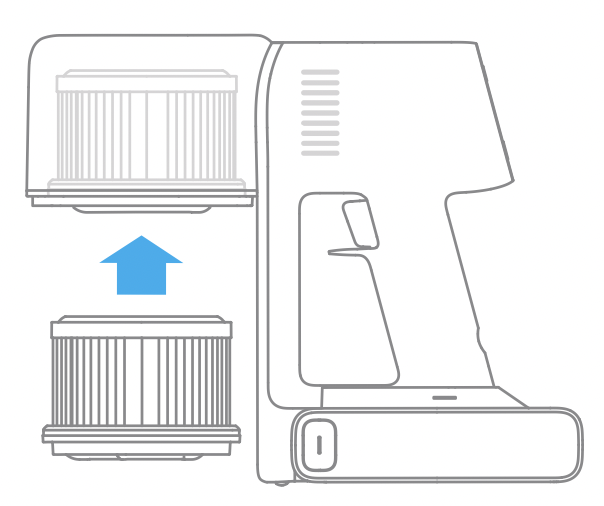
Remove the dust cup as shown in the figure.
Remove the filter from the vacuum by pulling it down in the direction shown in the figure.
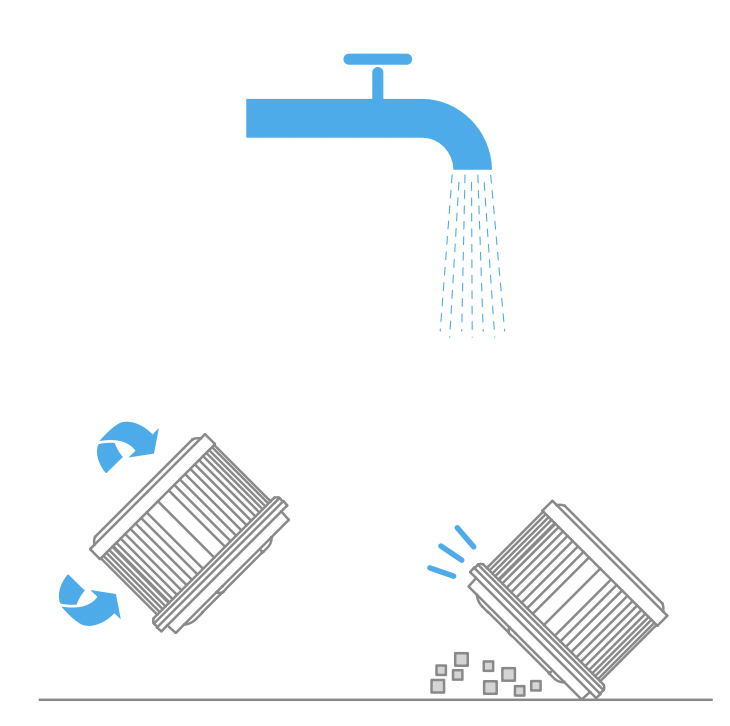
Clean the filter with clean water. Make sure you rotate the filter 360° to thoroughly and remove all dust caught in the filter. Lightly tap the filter several times to remove any excess dirt.
Allow the filter to air dry for 24 hours.
Note:
Only use clean water to wash the filter. Do not use detergent.
Do not attempt to clean the filter with a brush or finger.
Installing the Filter
Insert the filter into the vacuum and gently press down, as illustrated.
Reinstall the dust cup.
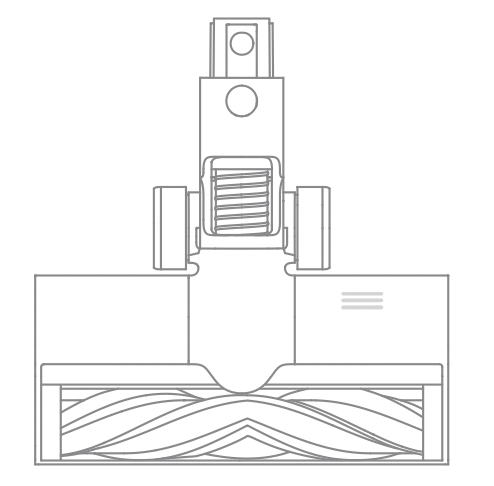
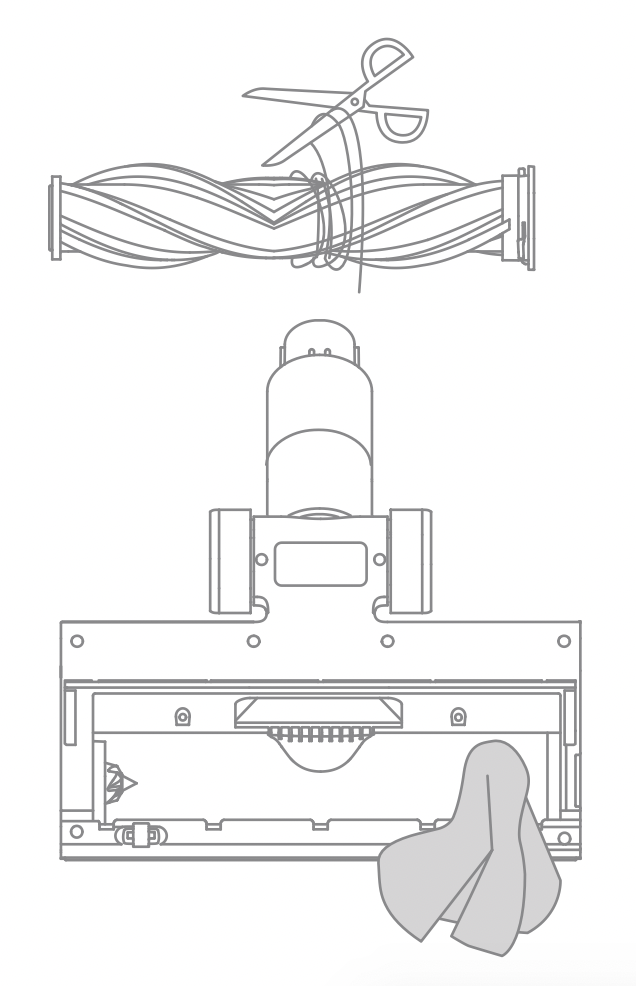
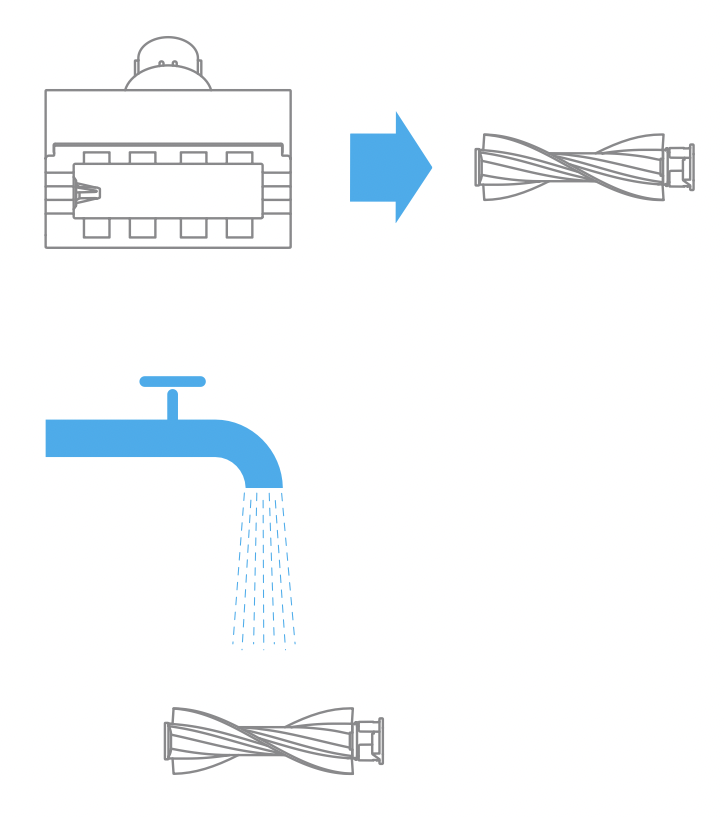
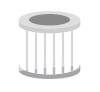
Cleaning the Smart Multi-Brush Bar
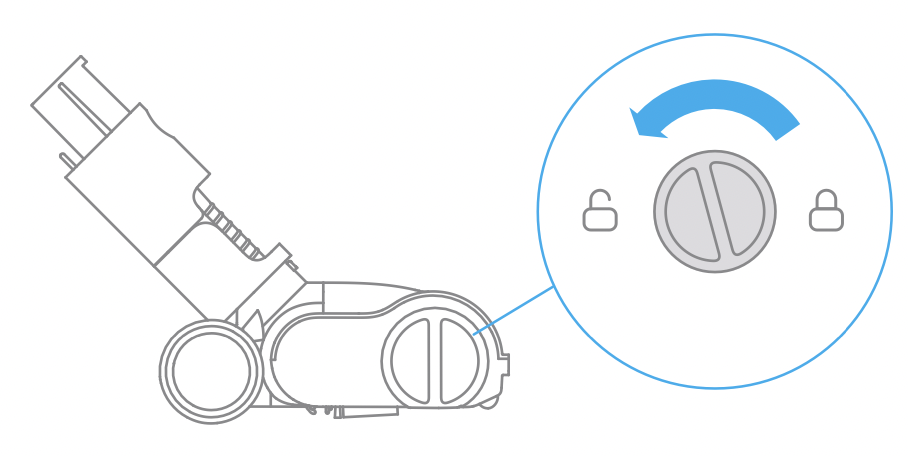
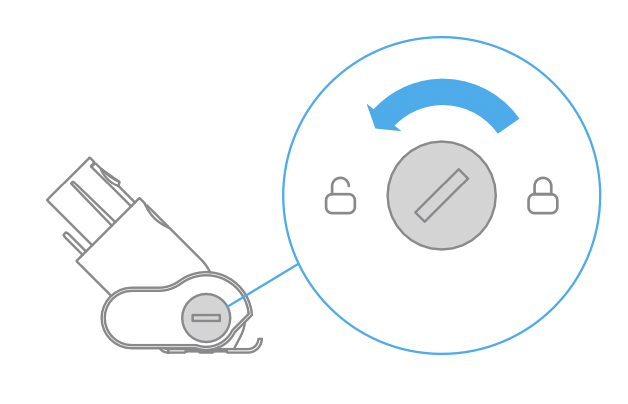
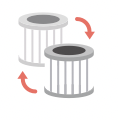
Turn the lock counterclockwise until it stops, then remove the roller brush from the smart multi-brush bar.
Use scissor to cut off the hairs and fibers that get stuck on the brush bar head. Wipe the dust from the notch and transparent cover with a dry cloth or paper towel. Thoroughly dry before use.
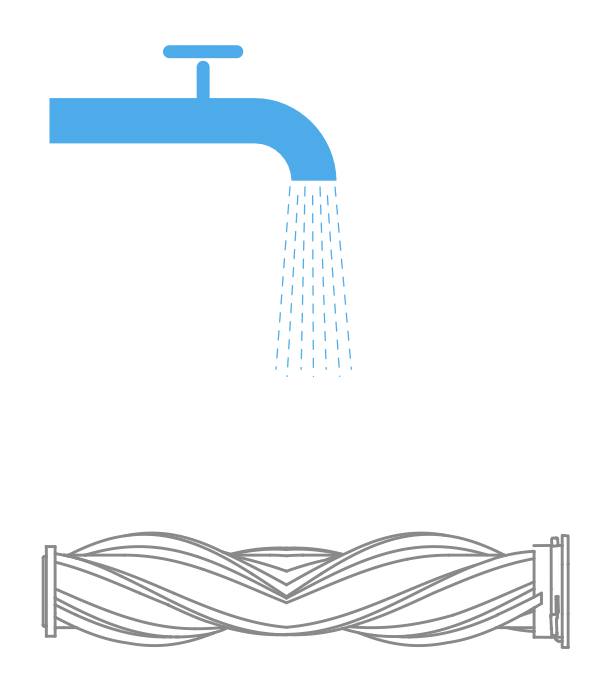
When it is dirty, rinse the roller brush with clean water until it is clean.
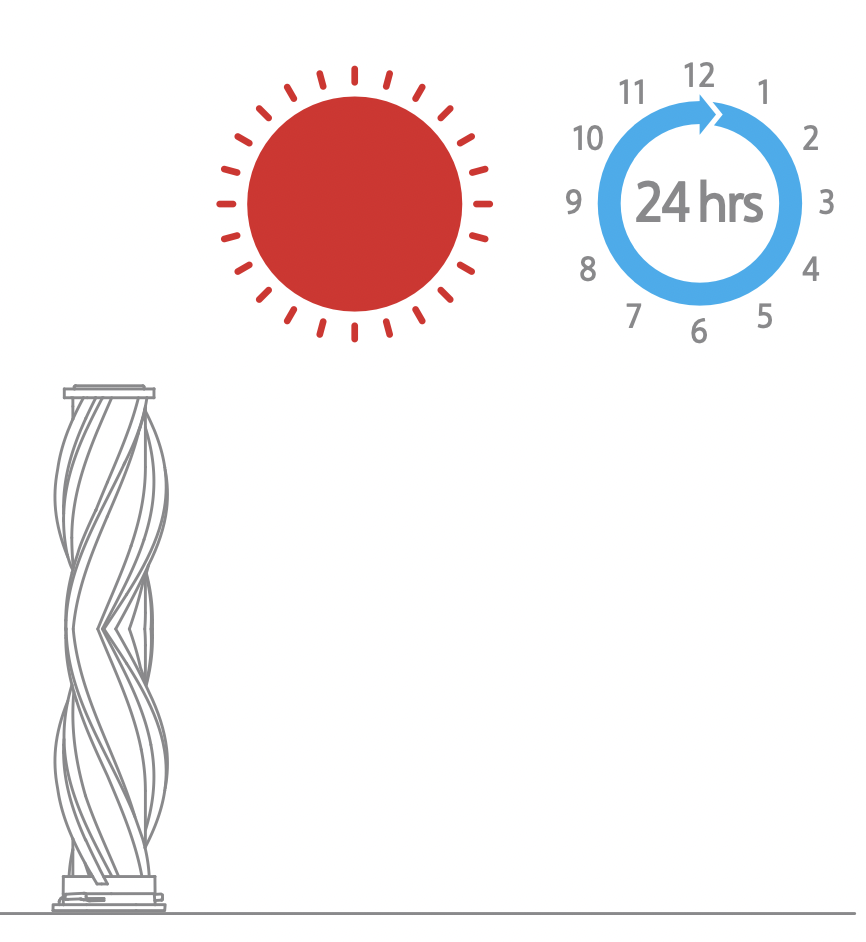
Stand the roller brush upright for at least 24 hours until it is fully dry.
Cleaning the Mini Electric Brush
Use a coin as illustrated to rotate the lock counterclockwise until you hear a click.
After unlocking the mini roller brush, remove it from the mini electric brush, then rinse and clean the brush head.
Stand the mini roller brush upright in a well-ventilated area for at least 24 hours until it is fully dry.
Once the mini roller brush is dry, reinstall it by following the disassembly steps in reverse.
Battery Pack
The vacuum contains a removable rechargeable lithium-ion battery pack which has a limited number of recharge cycles. After extended use, the battery pack may no longer hold a charge. If this happens, it means the battery pack has reached the end of its life cycle and needs to be replaced.
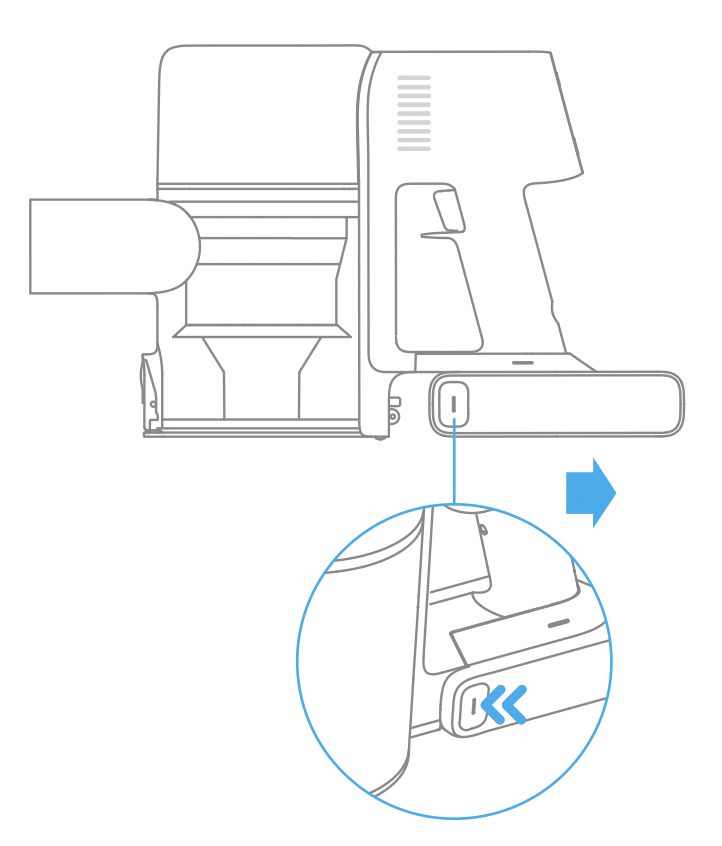
Press down the battery pack release button and slide the battery pack to the right, as illustrated, to remove it.
Install the new battery pack.
Troubleshooting
If the vacuum is not working properly, please refer to the table below.
Errors
Possible Causes
Solutions
Vacuum does not work.
Vacuum is out of battery or low on power.
Fully charge the vacuum, then continue to use it.
Overheat protection mode triggered by a blockage.
Clean the suction openings or air duct. Wait until the vacuum cools down, then reactivate it.
The suction opening or air duct is blocked.
Clear any blockage from suction opening or air duct.
Weak suction force.
Dust cup is full and/or filter assembly is clogged.
Empty the dust cup and clean the filter assembly.
Attachment is blocked.
Clear any blockage in the attachment.
Motor is making a strange noise.
Main suction opening or carbon fiber rod is blocked.
Clear any blockage in the main suction opening or extension rod.
The battery indicator does not light up when charging.
The charger does not plug into the vacuum well.
Check whether the charger is properly plugged into the vacuum.
The battery is fully charged and went into sleep mode.
The vacuum can be used normally.
If the problem persists after ruling out the above two possibilities.
Please contact the after- sales service department for maintenance.
The vacuum charges slowly.
Battery temperature is too low or too high.
Wait until the battery's temperature returns normal, then continue to use the vacuum.
If you need to pay attention to any abnormality during the use of the product, a prompt will be shown on the screen. You should follow the instructions on the screen to keep the performance normal.
Error Icon
Error Message
Solutions
Battery overheating
Please wait and continue to use after motor temperature is normal.
Roller brush stuck
Refer to the maintenance guide [Cleaning the Smart Multi-Brush Bar] section to clean the fiber material and hairs wrapped around the roller brush.
Air duct blocked
Check whether the dust cup, carbon fiber rod, and smart multi-brush bar are blocked.
Error
Please contact the after-sales department for maintenance.
Low battery
Recharge soon.
The battery runs out
Recharge soon.
Filter is expiring
Please replace the filter in time.
Filter uninstalled
Ensure that the filter and pre-filter are installed correctly.
Replace the filter
Refer to the maintenance manual [Cleaning Filter] section to remove the filter and replace it. After replacing the filter, press and hold the button for 1.5 seconds to enter the countdown to reset the filter, then hold the button for another 5 seconds until appears on the screen.

 for 3 seconds to enter the menu interface. Click
  the button to swtich to "Language". Press the button for 1 second to enter the language selection interface. Click to scroll through the language list, select a language, and then press
  and hold for 3 seconds to save your setting.
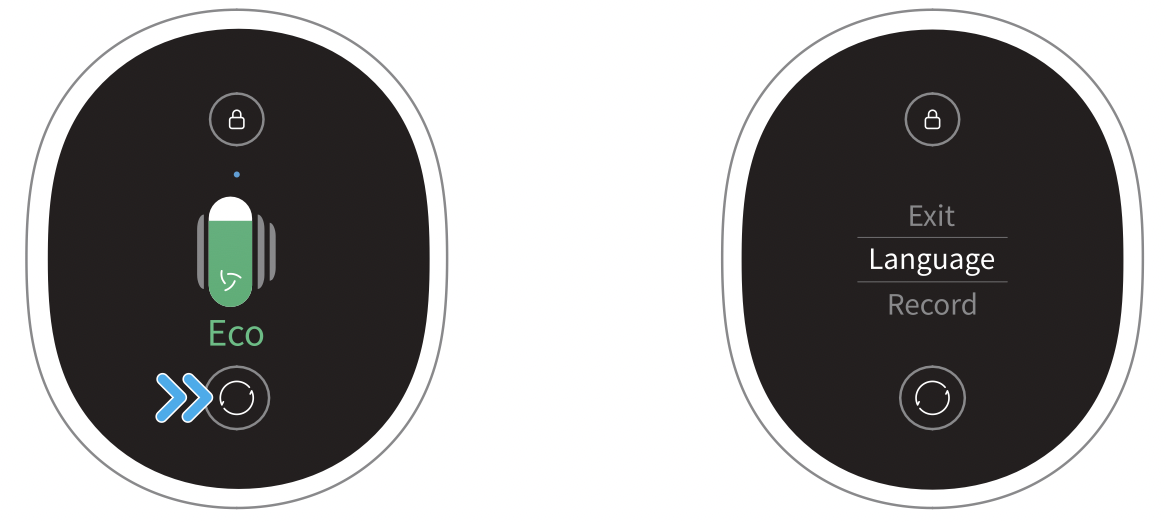
 for 3 seconds to enter the menu interface. Click the button
  to swtich to "Cleaning Record" and press the button
  for 1 second to enter the cleaning record interface. Then you will see the cleaning record of the last 7 days.
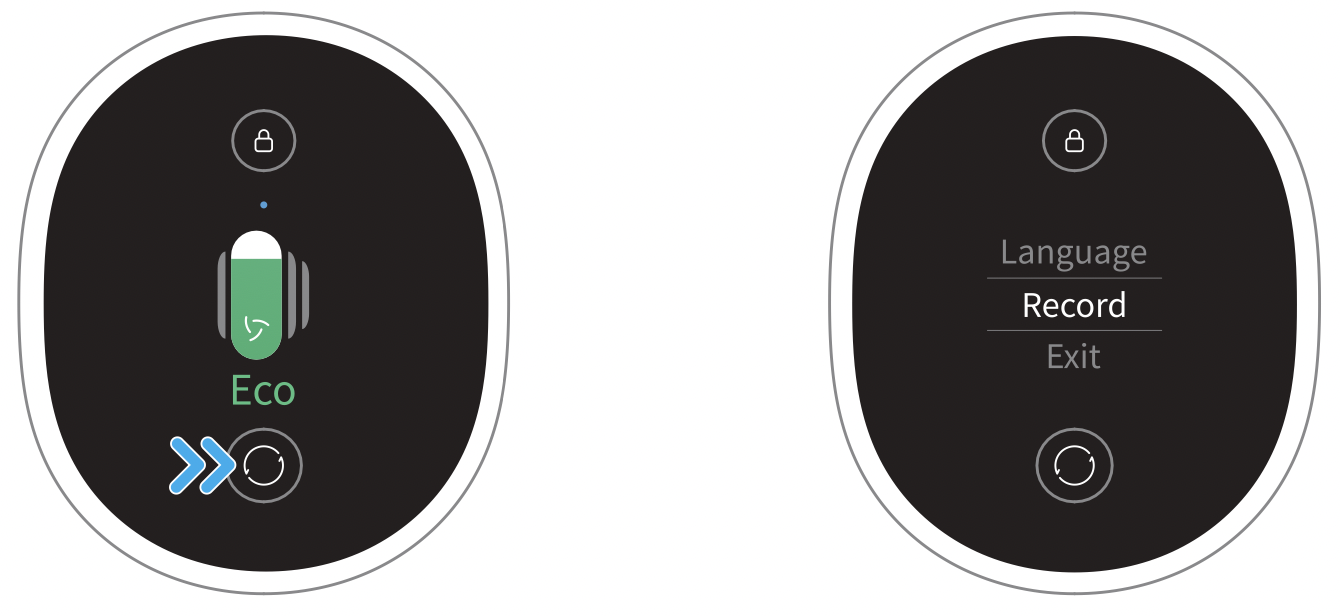
 to select "Exit".
 to switch between four suction levels of auto, eco, med and turbo. The corresponding suction level will be highlighted on the display screen.
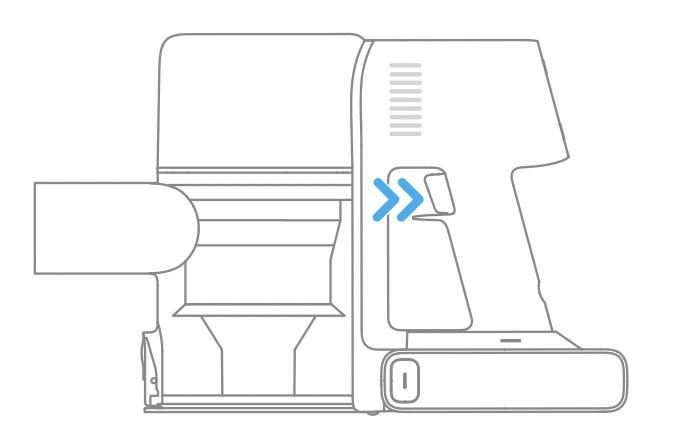


 for 1.5 seconds to enter the countdown to reset the filter, then hold the button for another 5 seconds until
  appears on the screen.