Loading ...
Loading ...
Loading ...
Before using for the first time en
15
--------
KBefore using for the first
time
Be f o r e us i ng for the fi rst time
Before you can use your new appliance, you must
make some settings. You must also clean the cooking
compartment and accessories.
Initial use
The time will appear on the display once the appliance
is connected to the power supply. Set the current time.
Setting the time
The time starts at "12:00".
1. Use the A or @ button to set the time.
2. Touch the v button to confirm.
The current time is shown in the display.
The oven's electric grill is ready for operation.
Notes
■ The clock must be programmed before you can
operate the electric grill.
■ The clock does not affect the operation of the oven
with the lower gas burner.
■ The clock does not interrupt the gas supply to the
lower gas burner. After the preparation, switch off
the selector to interrupt the gas supply.
Heating up the oven
To remove the new cooker smell, heat up the oven
when it is empty and closed. Ensure that no packaging
material has been left in the cooking compartment.
Keep the kitchen ventilated the whole time the oven is
on.
Setting the oven's lower gas burner
1. Open the top cover. The top cover must remain
open for as long as the appliance is in operation.
2. Turn on the main gas supply to the appliance. Insert
the plug into the socket. Open the oven door.
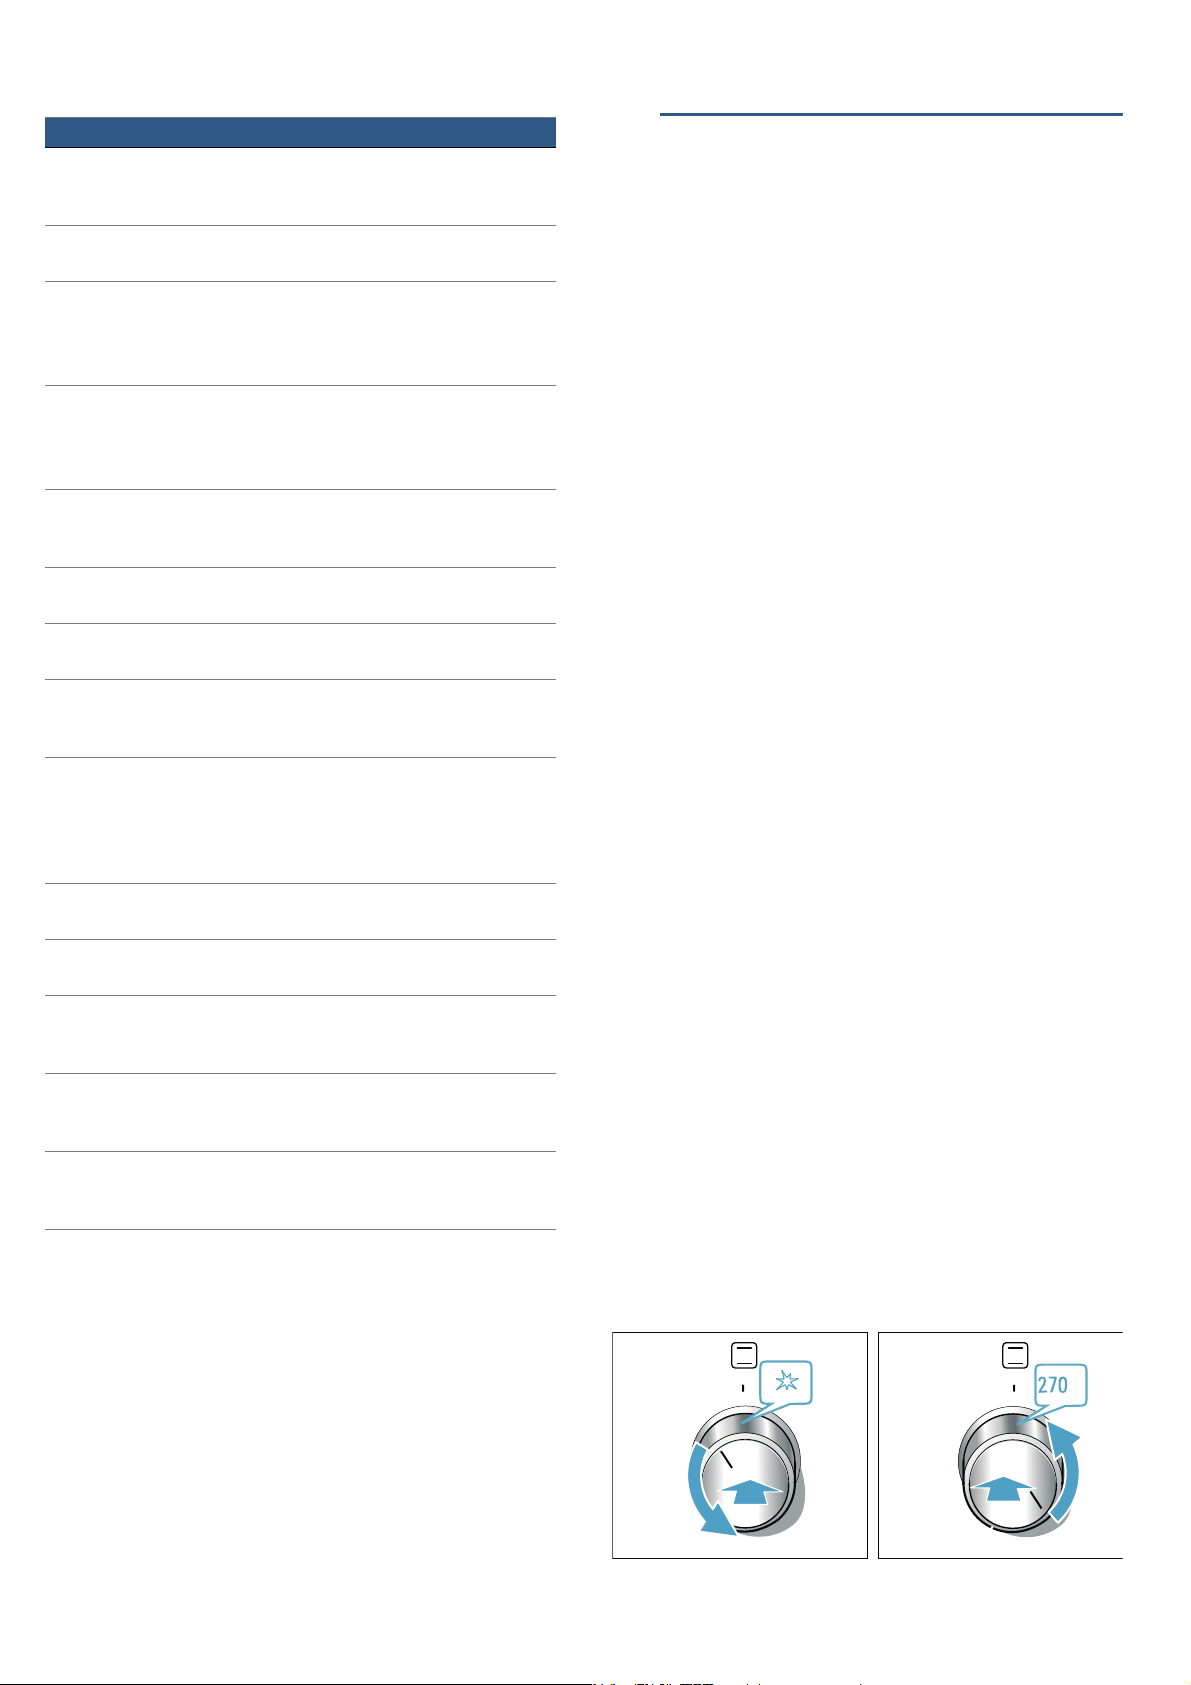
3. Push in the selector for the lower gas burner and
turn it anti-clockwise to the ignition position 8.
The gas that escapes from the lower oven gas
burner is ignited using the igniter.
4. Keep the selector for the lower gas burner pushed in
and turn it 270 °C.
Keep the selector for the lower gas burner pushed in
for 10 seconds so that the safety pilot starts up.
Optional accessories
Wire rack
For cookware, cake tins and ovenproof dishes, and for roasts and
grilled food.
Baking tray
For tray bakes and small baked items.
Universal pan
For moist cakes, baked items, frozen food and large roasts.
It can be used to catch dripping fat when you are grilling directly on
the wire rack.
Wire insert
For meat, poultry and fish.
For inserting into the universal pan to catch dripping fat and meat
juices.
Professional pan
For preparing large quantities of food. Also ideal for moussaka, for
example.
Lid for the professional pan
The lid turns the professional pan into a professional roasting dish.
Pizza tray
For pizzas and large round cakes.
Grill tray
Use for grilling in place of the wire rack or as a splatter guard. Use in
the universal pan only.
Baking stone
For home-made bread, bread rolls and pizzas that you wish to have a
crispy base.
The baking stone must be preheated to the recommended tempera-
ture.
Glass roasting dish
For stews and bakes.
Glass pan
For bakes, vegetable dishes and baked items.
Pull-out system, one level
Fitting pull-out rails at position 2 will allow you to pull accessories out
further without them tipping.
Pull-out system, two levels
Fitting pull-out rails at positions 2 and 3 will allow you to pull accesso-
ries out further without them tipping.
Pull-out system, three levels
Fitting pull-out rails at positions 1, 2 and 3 will allow you to pull acces-
sories out further without them tipping.
&
Loading ...
Loading ...
Loading ...