Loading ...
Loading ...
Loading ...
5
10
11
12
13
1
2
4
3
16
17
18
15
6
7
8
9
14
REFRIGERATOR INSTALLATION
18
1
2
3
4
Handle Type 2
Handle Type 1
5
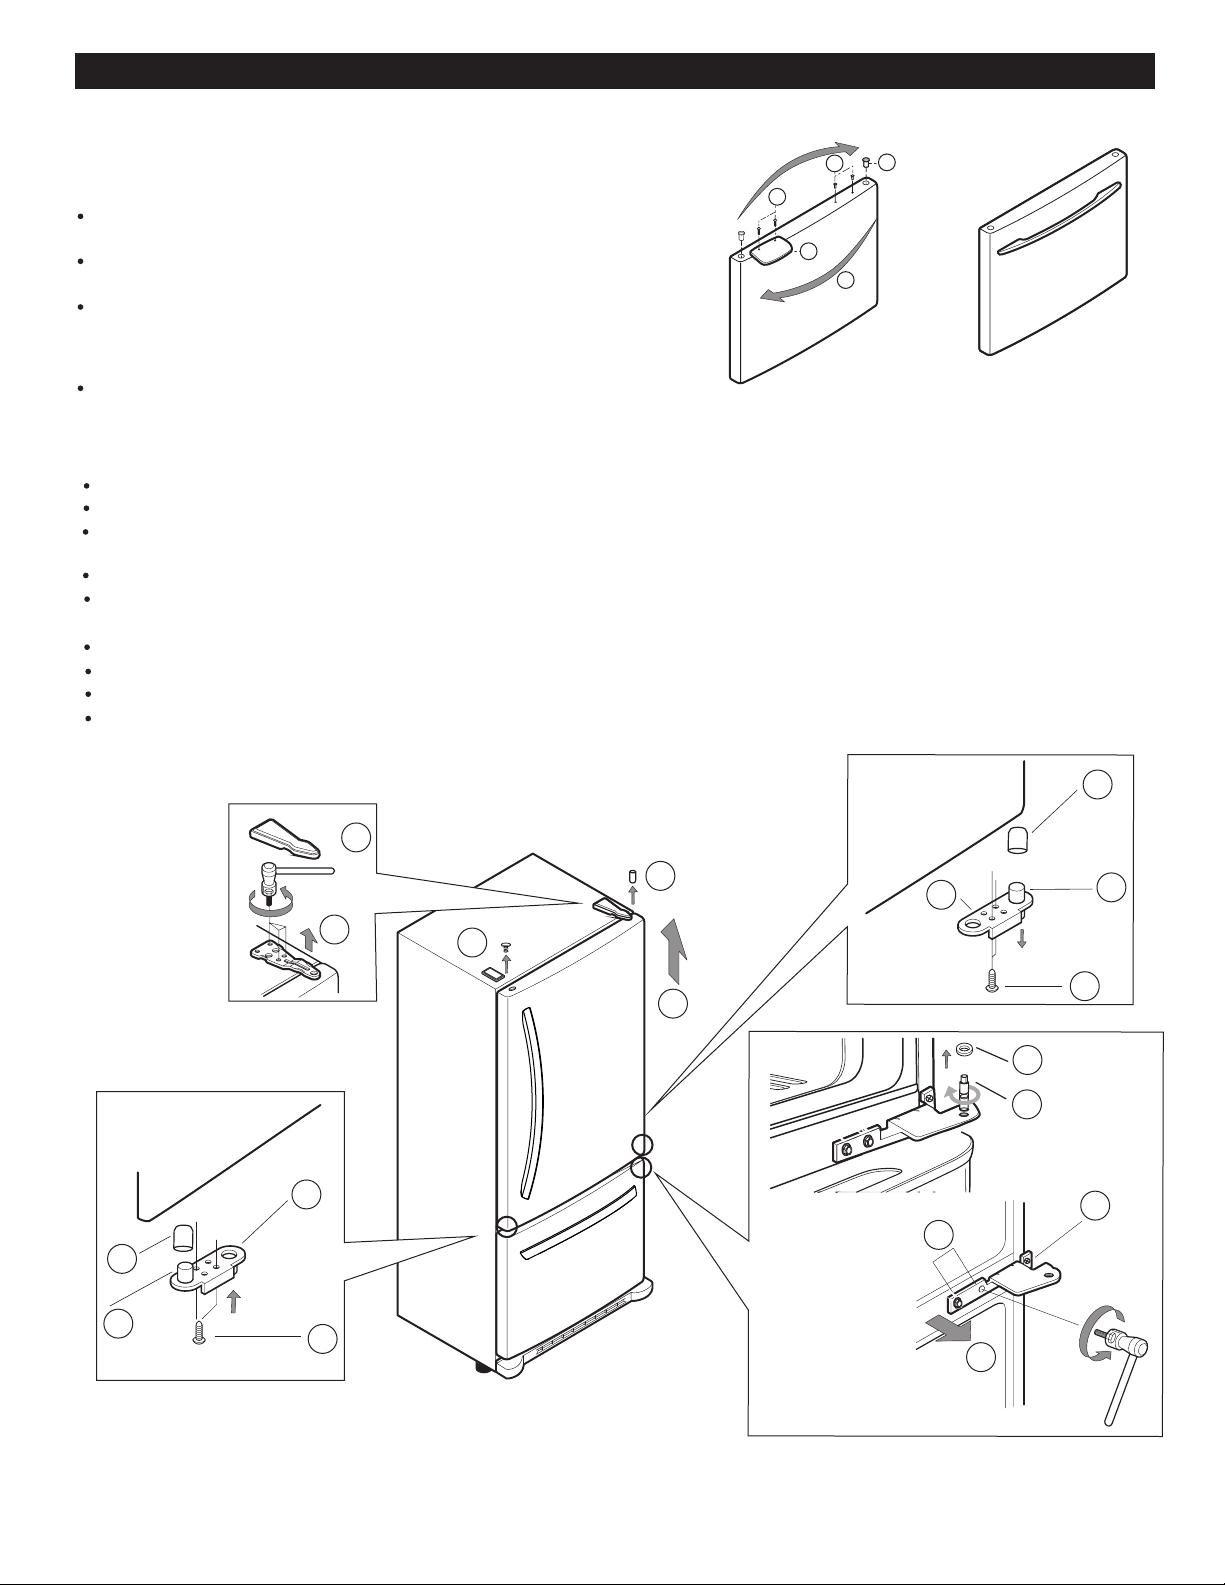
2. Removing and Installing The Freezer Handle
Remove the cap (1) and two screws (2) with a flat head
screwdriver.
Loosen the two screws (3), remove the handle (4) and
install all on the right side.
Attach the cap and the two screws (that were previously
removed) on the left side (5).
NOTE: Before beginning, check the handle type of your model.
Handle Type 1
Handle Type 2
It is not necessary to remove this type of handle.
3.
Removing the refrigerator Door
Gently remove the top hinge cover with a flat head screwdriver (1).
Using the 10mm open-end wrench, remove the 3 bolts and raise the top hinge and place aside (2).
Once the door has been taken off, remove the screws (6), the bolt (7) and the pivot (8) located below this and remove
Slightly raise the refrigerator door (5) and remove it.
the hinge (9).
Take off the washer (14).
Remove the 4 screws (16 and 17) and the hinge (18).
Install the hinge (10) on the opposite side of the door, replacing the screws (11), the bolt (12) and the pivot (13).
Remove the pivot (3) and the cap (4), place them in the oppsite side (the cap will be placed in the right side and the
pivot on the left side).
Using the ¼ inch hex socket wrench loosen the pin (15) and remove.
Loading ...
Loading ...
Loading ...