
R e a d a l l i n s t r u c t i o n s c a r e f u l l y b e f o r e u s i n g t h e o v e
n .
TINSEB388WRRZ _ Rev.2
Apr 19,
2017
O V E R T H E R A N G E
C O N V E C T I O N
M I C R O W A V E O V E N
O P E R A T I O N M A N U A L
MODELS
R-1874 / R-1875

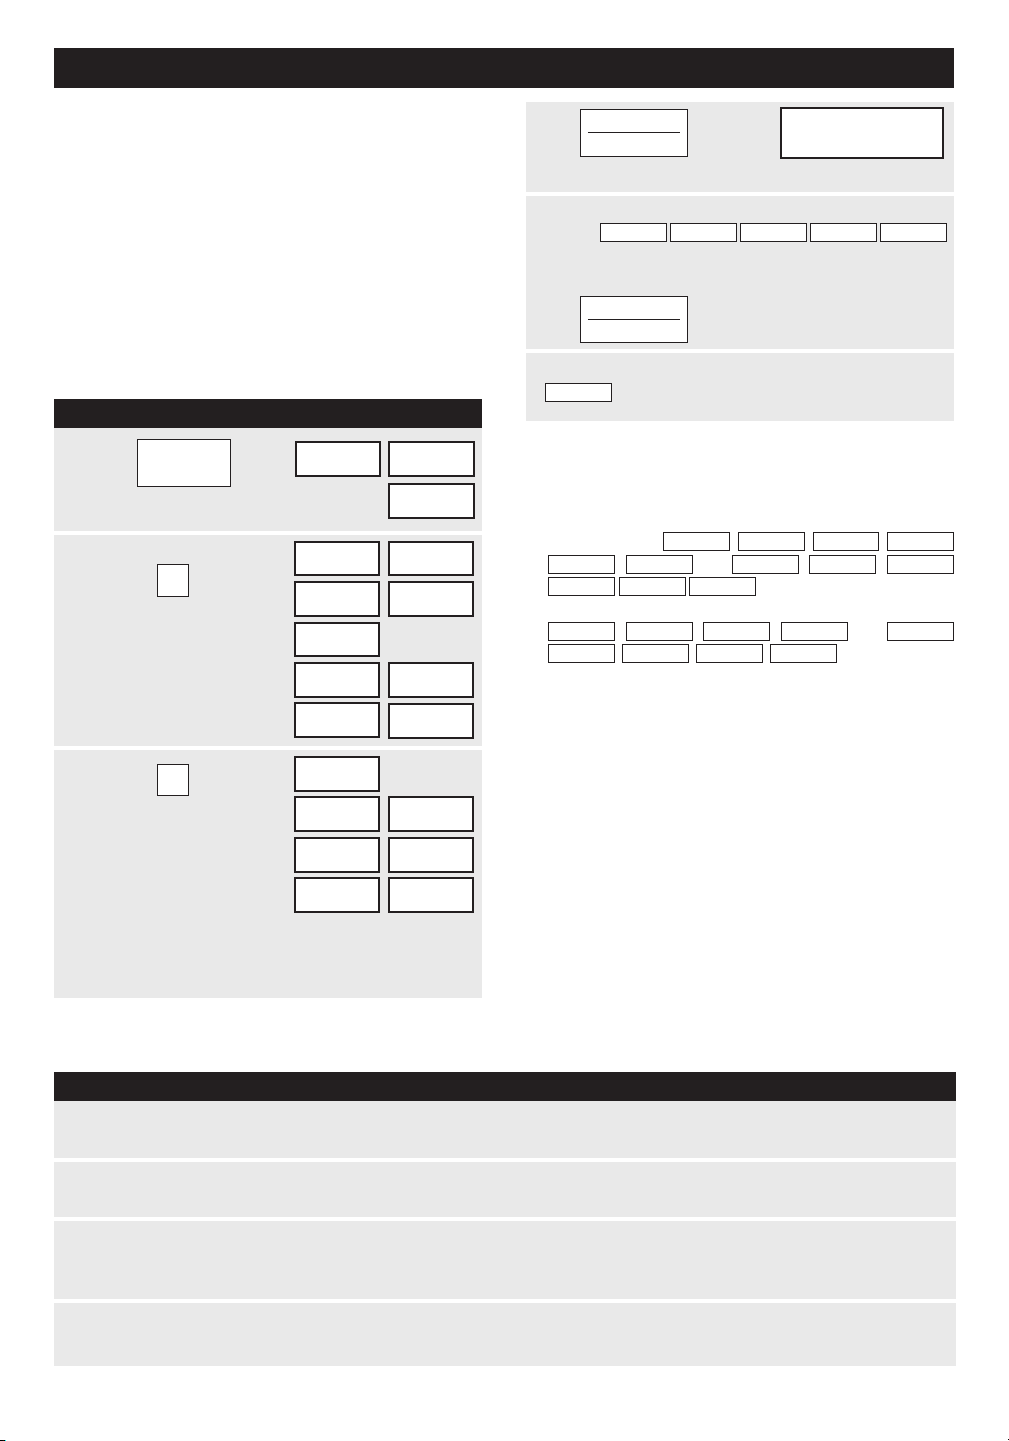
To aid in reporting this microwave oven in case of loss or theft, please record below the model number and serial
number located on the unit. We also suggest you record all the information listed and retain for future reference.
MODEL NUMBER _______________________ SERIAL NUMBER _____________
DATE OF PURCHASE ______________________
DEALER ___________________________ TELEPHONE ________________
SERVICER ___________________________ TELEPHONE ________________
PRECAUTIONS TO AVOID POSSIBLE
EXPOSURE TO EXCESSIVE
MICROWAVE ENERGY
(a) Do not attempt to operate this oven with the door open since open-door operation can result
in harmful exposure to microwave energy. It is important not to defeat or tamper with the
safety interlocks.
(b) Do not place any object between the oven front face and the door or allow soil or cleaner
residue to accumulate on sealing surfaces.
(c) Do not operate the oven if it is damaged. It is particularly important that the oven door close
properly and that there is no damage to the: (1) door (bent), (2) hinges and latches (broken
or loosened), (3) door seals and sealing surfaces.
(d) Theovenshouldnotbeadjustedorrepairedbyanyoneexceptproperlyqualiedservice
personnel.
TO PHONE:
DIAL 1-800-BE-SHARP ( 237-4277 ) for :
SERVICE (for your nearest Sharp Authorized Servicer)
PARTS (for your authorized parts distributor)
ADDITIONAL CUSTOMER INFORMATION
ACCESSORIES and COOKBOOK
TO WRITE:
Sharp Electronics Corporation
Customer Assistance Center
Sharp Plaza Blvd.
Memphis, Tennessee 38193
TO ACCESS INTERNET:
www.sharpusa.com
FOR CUSTOMER ASSISTANCE
Please provide the following information when you write or call: model number, serial number, date of purchase,
your complete mailing address (including zip code), your daytime telephone number (including area code) and
description of the problem.

C O N T E N T S
INTERACTIVE COOKING SYSTEM
The Interactive Cooking System offers step-by-step instructions in the display for using the oven,
from setting the clock to programming each feature. It also includes Custom Help for instructions
on using Child Lock, Audible Signal Elimination, Auto Start and Help. There is a choice of English,
Spanish or French and a choice of U.S. Customary Unit-pound or Metric-kilograms. Touch CUSTOM
HELP and follow the directions displayed or check page 25.
For Customer Assistance ..... Inside Front Cover
Precautions to Avoid Possible
Exposure to Excessive
Microwave Energy ............. Inside Front Cover
1
1
Consumer Limited Warranty......................
Product Information Card ..........................
Limited Warranty (valid only in Canada).....
2
Important Safety Instructions .................... 3
Unpacking Instructions .............................. 4
Accessories ................................................ 4
Grounding Instructions ............................. 4
Information You Need to Know ................. 5-7
About Your Oven ....................................... 5
About Food ................................................ 5
About Microwave Cooking ......................... 6
About Safety ............................................. 6
About Children and the Microwave ............ 7
About Utensils and Coverings ................... 7
Part Names .................................................. 8
Touch-Control Panel .................................. 9-10
Before Operating ....................................... 11
To Set the Clock ........................................ 11
Stop/Clear ................................................ 11
Manual Operation ....................................... 11-12
Turntable On/Off........................................ 11
Hood Light/Hood Fan ................................ 12
Time Cooking Microwave .......................... 12
Keep Warm .............................................. 12
Microwave Features .................................. 13-18
CompuDefrost .......................................... 13
CompuDefrost Chart ................................ 13
Manual Defrost .......................................... 14
Sensor Cooking ........................................ 14
Instant Sensors ......................................... 15
Instant Sensor Reheat .............................. 15
Instant Sensor Popcorn ............................. 15
Popcorn Chart ......................................... 15
Instant Sensor Chart ................................ 15
Sensor Cook ............................................. 16
Sensor Cook Chart ................................... 16
Sensor Cook Recipes................................ 17-18
Manual Convection/Automatic Mix
Operation ..................................................... 19-23
Convection Cooking .................................. 19
To Cook with Convection .......................... 19
To Preheat and Cook with Convection ...... 19
To Broil ...................................................... 19
To Slow Cook ............................................ 20
Automatic Mix Cooking .............................. 20
To Cook with Automatic Mix ...................... 20
To Preheat and Cook with Automatic Mix 20
Convection Automatic Mix Operation....... 21-23
CompuBroil................................................ 21
CompuBroil Chart ...................................... 21
CompuRoast ............................................. 22
CompuRoast Chart.................................... 22
CompuBake............................................... 23
CompuBake Chart ..................................... 23
Other Convenient Features ...................... 24-25
Multiple Sequence Cooking....................... 24
More/Less Time Adjustment ...................... 24
Kitchen Timer ............................................ 24
Minute Plus................................................ 24
Demonstration Mode ................................. 24
Help ........................................................... 24
Custom Help.............................................. 25
1. Child Lock .......................................... 25
2. Audible Signal Elimination ................. 25
3. Auto Start ........................................... 25
4. Language Selection ........................... 25
5. Weight/Temp Selection ...................... 25
Touch On................................................... 25
Cleaning and Care ...................................... 26-27
Service Call Check ..................................... 28
Specifications ............................................. 29
Auto-Touch Guide ...................................... 30

1
SHARP ELECTRONICS CORPORATION warrants to the first consumer purchaser that this Sharp brand
product (the “Product”), when shipped in its original container, will be free from defective workmanship and
materials, and agrees that it will, at its option, either repair the defect or replace the defective Product or
part thereof with a new or remanufactured equivalent at no charge to the purchaser for parts or labor for the
period(s) set forth below.
This warranty does not apply to any appearance items of the Product nor to the additional excluded item(s) set
forth below nor to any Product the exterior of which has been damaged or defaced, which has been subjected
to misuse, abnormal service or handling, or which has been altered or modified in design or construction.
In order to enforce the rights under this limited warranty, the purchaser should follow the steps set forth
below and provide proof of purchase to the servicer.
The limited warranty described herein is in addition to whatever implied warranties may be granted to
purchasers by law. ALL IMPLIED WARRANTIES INCLUDING THE WARRANTIES OF MERCHANTABILITY
AND FITNESS FOR USE ARE LIMITED TO THE PERIOD(S) FROM THE DATE OF PURCHASE SET
FORTH BELOW. Some states do not allow limitations on how long an implied warranty lasts, so the above
limitation may not apply to you.
Neither the sales personnel of the seller nor any other person is authorized to make any warranties other
than those described herein, or to extend the duration of any warranties beyond the time period described
above on behalf of Sharp.
The warranties described herein shall be the sole and exclusive warranties granted by Sharp and shall
be the sole and exclusive remedy available to the purchaser. Correction of defects, in the manner and for
the period of time described herein, shall constitute complete fulfillment of all liabilities and responsibilities
of Sharp to the purchaser with respect to the Product, and shall constitute full satisfaction of all claims, whether
based on contract, negligence, strict liability or otherwise. In no event shall Sharp be liable, or in any way
responsible, for any damages or defects in the Product which were caused by repairs or attempted repairs
performed by anyone other than an authorized servicer. Nor shall Sharp be liable or in any way responsible
for any incidental or consequential economic or property damage. Some states do not allow the exclusion
of incidental or consequential damages, so the above exclusion may not apply to you.
THIS WARRANTY GIVES YOU SPECIFIC LEGAL RIGHTS. YOU MAY ALSO HAVE OTHER RIGHTS
WHICH VARY FROM STATE TO STATE.
C O N S u m E r L I m I T E D W A r r A N T Y
R-1874 / R-1875 Home Use Carousel Microwave Oven. (Be sure to have
this information available when you need service for your Product.)
One (1) year parts and labor in-home service. The warranty period
continues for an additional six (6) years, for a total of seven (7) years,
with respect to the magnetron tube in the Product for parts only. Labor
and the servicer trip charge are not provided free of charge for this
additional period.
Non-functional accessories, turntable and light bulbs.
From a Sharp Authorized Servicer located In the United States. Be sure
to have Proof of Purchase available. For in-home service, the servicer
will come to the unit’s location. If it is necessary to remove the unit for
repair, the servicer will reinstall the unit at no extra charge, provided
it was installed according to Sharp’s Installation Instructions. To find
the location of the nearest Sharp Authorized Servicer, call Sharp toll
free at 1-800-BE-SHARP (1-800-237-4277).
Additional Item(s) Excluded from
Warranty Coverage (if any):
Where to Obtain Service:
Your Product Model Number
& Description:
Warranty Period for
this Product:
TO OBTAIN SUPPLY, ACCESSORY OR PRODUCT INFORMATION, CALL 1-800-BE-SHARP OR VISIT www.sharp-usa.com.
SAVE THE PROOF OF PURCHASE AS IT IS NEEDED SHOULD YOUR OVEN EVER REQUIRE WARRANTY SERVICE.
The Product information card should be completed within ten days of purchase and returned. We will keep it on file
and help you access the information in case of loss, damage or theft. This will also enable us to contact you in the
unlikely event that any adjustments or modifications are ever required for your oven.
P r O D u C T I N F O r m AT I O N C A r D

2
Revision: 03/21/2016
LIMITED WARRANTY
Consumer Electronics Products
Congratulations on your purchase!
Sharp Electronics of Canada Ltd. (“Sharp”) warrants to the first purchaser for this Sharp brand product (“Product”), when shipped in its original container
and sold or distributed in Canada by Sharp or by an authorized Sharp dealer, and Product was not sold “as is” or “sales final” that the Product will during
the applicable warranty period, be free from defects in material and workmanship, and will within the applicable warranty period, either repair the defective
Product or provide the first purchaser a replacement of the defective Product.
Conditions: This limited warranty shall not apply to:
(a) Any defects caused or repairs required as a result of abusive operation, negligence, accident, improper installation or inappropriate use as outlined
in the owner’s manual or other applicable Product documentation.
(b) Any defects caused or repairs required as a result of any Product that has been tampered with, modified, adjusted or repaired by any person other
than Sharp, a Sharp authorized service centre or a Sharp authorized servicing dealer.
(c) Any defects caused or repairs required as a result of the use of the Product with items not specified or approved by Sharp, including but not limited
to chemical cleaning agents.
(d) Any replacement of accessories required through normal use of the Product, including but not limited to, remote controls, AC adapters, batteries,
temperature probe, trays, filters, belts, ribbons, cables and paper.
(e) Any cosmetic damage to the Product surface or exterior that has been defaced or caused by normal wear and tear.
(f) Any defects caused or repairs required as a result of damage caused by any external or environmental conditions, including but not limited to,
transmission line/power line voltage or liquid spillage or acts of God.
(g) If the serial number or model number affixed to Product has been removed, defaced, changed, altered or tampered with.
(h) This limited warranty will not apply if the Product has been used or is being used in a commercial setting or application; this warranty is meant solely
for the non-commercial, household use of the Product by consumers in their home or residence.
(i) Any installation, delivery, setup and/or programming charges
(j) The removal and reinstallation of Over-The-Range Microwave, Microwave Drawer or Steam Oven if it is installed in an inaccessible location or
requiring removal of cupboards, handles or other cosmetic parts, or is not installed in accordance with installation instructions included with Product.
How to get service: Warranty service may be obtained upon delivery of the Product, together with proof of purchase (including date of purchase) and a
copy of this limited warranty statement, to an authorized Sharp service centre or an authorized Sharp servicing dealer. In home warranty service will be
carried out to locations accessible by on-road service vehicle and within 50 km of an authorized Sharp service centre on any Over-The-Range Microwave
Oven, Microwave Drawer Oven or Steam Oven. The servicer may if necessary take the unit for repair at the servicer's facility. No other person (including
any Sharp dealer or service centre) is authorized to extend, enlarge or transfer this warranty on behalf of Sharp.
The purchaser will be responsible for any
and all removal, reinstallation, transportation and insurance costs incurred with exception for Over-The-Range Microwave Oven, Microwave Drawer Oven
or Steam Oven whereby Sharp will be responsible for the removal and reinstallation.
The express warranties in this limited warranty are, except for consumer purchasers domiciled in Quebec, in lieu of and, except to the extent prohibited
by applicable law, Sharp disclaims all other warranties and conditions, express or implied, whether arising by law, statute, by course of dealing or usage
of trade, including, without limitation, implied warranties or conditions of merchantability and/or quality, fitness for a particular use or purpose, and/or non-
infringement. Limitations (not applicable to consumer purchasers domiciled in Quebec to the extent prohibited under Quebec law): (a) Sharp shall not be
liable for any incidental, special, consequential, economic, exemplary or indirect damages of any kind or nature (including lost profits or damages for loss
of time or loss of use or loss of data) arising from or in any connection with the use or performance of a Product or a failure of a Product, even if Sharp is
aware of or has been advised of the possibility of such damages; (b) the remedies described in this limited warranty constitute complete fulfillment of all
obligations and responsibilities of Sharp to the purchaser with respect to the Product and shall constitute full satisfaction of all claims, whether based on
contract, negligence, strict liability or otherwise. Some provinces may not allow the exclusion or limitation of certain damages, or limits on the duration or
voiding of implied warranties or conditions; in such provinces, the exclusions and limits herein may not apply. This limited warranty is, except for consumer
purchasers domiciled in Quebec, governed by the laws of the Province in Canada in which the purchaser has purchased the Product. For consumer
purchasers domiciled in Quebec this limited warranty is governed by the laws of Quebec.
WARRANTY PERIODS (calculated from the date of original purchase): Parts & Labour (exceptions noted)
Microwave Oven 1 year (magnetron - 4 additional years)
Steam Oven 1 year
Small Kitchen Appliances 1 year
Air Purifiers 1 year
To obtain the name and address of the nearest Authorized Sharp Service Centre or Dealer, or for more information on this Limited Warranty, Sharp
Extended Warranty Offers, Sharp Canada Products or Accessory Sales, please contact Sharp:
By writing to Sharp Electronics Of Canada Ltd. at 335 Britannia Road East Mississauga
, Ontario L4Z 1W9
Calling: at 905-568-7140
Visiting our Web site: www.sharp.ca
THIS LIMITED WARRANTY IS VALID ONLY IN CANADA

3
I m P O r TA N T S A F E T Y I N S T r u C T I O N S
SAVE THESE INSTRUCTIONS
When using electrical appliances basic safety precautions should be followed, including the following:
WARNING -
To reduce the risk of burns, electric shock, fire, injury to persons or exposure to excessive microwave
energy:
SAVE THESE INSTRUCTIONS
1. READ ALL INSTRUCTIONS BEFORE USING
THE APPLIANCE.
2. Read and follow the specific “PRECAUTIONS TO
AVOID POSSIBLE EXPOSURE TO EXCESSIVE
MICROWAVE ENERGY” on inside front cover.
3. This appliance must be grounded. Connect only
to properly grounded outlet. See “GROUNDING
INSTRUCTIONS” on page 4 and INSTALLATION
INSTRUCTIONS.
4. Install or locate this appliance only in accordance
with the provided installation instructions.
5. Some products such as whole eggs and sealed
containers—for example, closed glass jars—are
able to explode and should not be heated in this
oven.
6. Use this appliance only for its intended use as
described in this manual. Do not use corrosive
chemicals or vapors in this appliance. This type of
oven is specifically designed to heat, cook or dry
food. It is not designed for industrial or laboratory
use.
7. As with any appliance, close supervision is
necessary when used by children.
8. Do not operate this appliance if it has a damaged
cord or plug, if it is not working properly or if it has
been damaged or dropped.
9. This appliance should be serviced only by
qualified service personnel. Contact nearest Sharp
Authorized Servicer for examination, repair or
adjustment.
10. Do not cover or block any openings on the
appliance.
11. Do not store or use this appliance outdoors. Do
not use this product near water—for example,
near a kitchen sink, in a wet basement, near a
swimming pool, or similar locations.
12. Do not immerse cord or plug in water.
13. Keep cord away from heated surfaces.
14. Do not let cord hang over edge of table or
counter.
15.
See door surface cleaning instructions on page 26.
16. To reduce the risk of fire in the oven cavity:
a. Do not overcook food. Carefully attend
to appliance when paper, plastic or other
combustible materials are placed inside the
oven to facilitate cooking.
b. Remove wire twist-ties from paper or plastic
bags before placing bag in oven.
c. If materials inside the oven ignite, keep oven
door closed, turn oven off and disconnect
the power cord or shut off power at the fuse
or circuit breaker panel.
d. Do not use the cavity for storage purposes.
Do not leave paper products, cooking utensils
or food in the cavity when not in use.
17. Liquids, such as water, coffee or tea are able to
be overheated beyond the boiling point without
appearing to be boiling. Visible bubbling or boiling
when the container is removed from the microwave
oven is not always present. THIS COULD RESULT
IN VERY HOT LIQUIDS SUDDENLY BOILING
OVER WHEN A SPOON OR OTHER UTENSIL
IS INSERTED INTO THE LIQUID.
To reduce the risk of injury to persons:
a. Do not overheat the liquid.
b. Stir the liquid both before and halfway through
heating it.
c. Do not use straight-sided containers with narrow
necks. Use a wide-mouthed container.
d. After heating, allow the container to stand in
the microwave oven at least for 20 seconds
before removing the container.
e. Use extreme care when inserting a spoon or
other utensil into the container.
18. Clean ventilation openings and grease filters
frequently—Grease should not be allowed to
accumulate on ventilation openings, louver or
grease filters.
19. Use care when cleaning the louver and the
grease filters. Corrosive cleaning agents, such as
lye-based oven cleaners, may damage the louver
and the grease filters.
20.
When flaming food under the hood, turn the fan on.
21. This appliance is suitable for use above both gas
and electric cooking equipment 36" wide or less.
Two optional accessories are available for this oven.
To purchase contact: Sharp Electronics Corporation
Customer Assistance Center
Sharp Plaza Blvd
Memphis, Tennessee 38193
Phone: 1-800-BE-SHARP (237-4277)
G R O U N D I N G INS T R U C T I ONS
This appliance must be grounded. This oven is equipped with a cord having a grounding wire with a grounding plug.
It must be plugged into a wall receptacle that is properly installed and grounded in accordance with the National
Electrical Code and local codes and ordinances. In the event of an electrical short circuit, grounding reduces risk
of electric shock by providing an escape wire for the electric current.
WARNING – Improper use of the grounding plug can result in a risk of electric shock.
Electrical Requirements
Check Installation Instructions for proper location for the power supply.
The electrical requirements are a 120 volt 60 Hz, AC only, 15 amp. or more protected
electrical supply. It is recommended that a separate circuit serving only the oven be
provided.
The oven is equipped with a 3-prong grounding plug. It must be plugged into a
wall receptacle that is properly installed and grounded. DO NOT UNDER ANY
CIRCUMSTANCES CUT OR REMOVE THE GROUNDING PIN FROM THE PLUG.
Notes: 1. If you have any questions about the grounding or electrical instructions,
3-Prong Plug
Grounding Pin
3-Prong Receptacle
Ground Receptacle Box
consult a qualified electrician or service person.
2. Neither Sharp nor the dealer can accept any liability for damage to the oven or personal injury resulting
from failure to observe the correct electrical connection procedures.
Radio or TV Interference
Should there be any interference caused by the microwave oven to your radio or TV, check that the microwave
oven is on a different electrical circuit, relocate the radio or TV as far away from the oven as feasible or check
position and signal of receiving antenna.
4
1. Charcoal Filter (RK-220). This is required when hood exhaust is recirculated. See Charcoal Filter on page 26.
To order filter replacement, if dealer does not stock this item, it can be ordered by calling 1-800-BE-SHARP
(237-4277)
2. Filler Panel Kit. (Model 1875 only) For use when the oven is installed in a 36-inch or 42-inch wide opening. The
metal filler panels come in 3-inch wide pairs. One set is needed for a 36-inch opening and 2 sets for a 42-inch
opening. White and black are available.
UNP ACKING I N S T R U C T I O N S
Unpacking and Examining Your Oven
Carefully remove oven from carton. SAVE THE CARTON AS IT MAY MAKE
INSTALLATION EASIER.
Remove:
Latches
Hinges
Oven Cavity
Door seals and sealing surfaces
Check the oven for any damage, such as misaligned or bent door, damaged
door seals and sealing surfaces, broken or loose door hinges and latches and dents inside the cavity or on the door.
If there is any damage, do not operate the oven and contact your dealer or SHARP AUTHORIZED SERVICER.
See Installation Instructions for more details.
O P T I O N A L AC CESSO RIE S
1. all packing materials from inside the oven cavity; however, DO NOT
REMOVE THE WAVEGUIDE COVER, which is located on the ceiling in
the oven cavity. Check to see that there are Installation Instructions, Wall
Template and Top Template. Read enclosures and SAVE the Operation
Manual.
2. the feature sticker from the outside of the door, if there is one.

5
Condensation is a normal part of microwave cooking.
Roomhumidityandthemoistureinfoodwillinuence
the amount of moisture that condenses in the oven.
Generally, covered foods will not cause as much
condensation as uncovered ones. Ventilation openings
must not be blocked.
The oven is for food preparation only. It should not be
used to dry clothes or newspapers.
Your oven is rated 850 watts by using the IEC Test
Procedure. In using recipes or package directions,
check food a minute or two before the minimum time
and add time accordingly.
ABOUT YOUR OVEN
This Operation Manual is valuable: read it carefully
and always save it for reference.
NEVER use the oven without the turntable and
support nor turn the turntable over so that a large dish
could be placed in the oven. The turntable will turn
both clockwise and counterclockwise. See page 11 for
complete instructions.
ALWAYS have food in the oven when it is on to absorb
the microwave energy.
When using the oven at power levels below 100%, you
may hear the magnetron cycling on and off.
The fan will automatically start when heat rises from
range surface units or burners and when convection,
high mix, low mix or the broil settings are used.
ABOUT FOOD
FOOD DO DON'T
Eggs, sausages,
nuts, seeds, fruits
& vegetables
• Puncture egg yolks before cooking to
prevent “explosion”.
• Pierce skins of potatoes, apples, squash,
hot dogs and sausages so that steam
escapes.
• Cook eggs in shells.
• Reheat whole eggs.
• Dry nuts or seeds in shells.
Popcorn • Use specially bagged popcorn for the
microwave oven.
• Listen while popping corn for the popping
to slow to 1 or 2 seconds or use special
Sensor Popcorn pad.
• Pop popcorn in regular brown bags
or glass bowls.
• Exceed maximum time on popcorn
package.
Baby food • Transfer baby food to small dish and heat
carefully, stirring often. Check temperature
before serving.
• Put nipples on bottles after heating and
shake thoroughly. “Wrist” test before
feeding.
• Heat disposable bottles.
• Heat bottles with nipples on.
• Heat baby food in original jars.
General • Cutbakedgoodswithllingafterheating
to release steam and avoid burns.
• Stir liquids briskly before and after heating
to avoid “eruption”.
• Use deep bowl, when cooking liquids or
cereals, to prevent boilovers.
• Heat or cook in closed glass jars or
air tight containers.
• Can in the microwave as harmful
bacteria may not be destroyed.
• Deep fat fry.
• Dry wood, gourds, herbs or wet
papers.
INFORMATION YOU NEED TO KNOW

6
ABOUT MICROWAVE COOKING
• Arrange food carefully. Place thickest areas towards
outside of dish.
• Watch cooking time. Cook for the shortest amount
of time indicated and add more as needed. Food
severely overcooked can smoke or ignite.
•
Cover foods while cooking. Check recipe or
cookbook for suggestions: paper towels, wax paper,
microwave plastic wrap or a lid. Covers prevent
spattering and help foods to cook evenly.
• Shield with small flat pieces of aluminum foil any
thin areas of meat or poultry to prevent overcooking
before dense, thick areas are cooked thoroughly.
• Stir foods from outside to center of dish once or twice
during cooking, if possible.
• Turn foods over once during microwaving to
speed cooking of such foods as chicken and
hamburgers. Large items like roasts must be turned
over at least once.
I N F O r m A T I O N Y O u N E E D T O K N O W
• Rearrange foods such as meatballs halfway
through cooking both from top to bottom and from
the center of the dish to the outside.
•
Add standing time. Remove food from oven and
stir, if possible. Cover for standing time which allows
the food to finish cooking without overcooking.
• Check for doneness. Look for signs indicating that
cooking temperatures have been reached.
Doneness signs include:
- Food steams throughout, not just at edge.
- Center bottom of dish is very hot to the touch.
- Poultry thigh joints move easily.
- Meat and poultry show no pinkness.
- Fish is opaque and flakes easily with a fork.
• Check foods to see that they are cooked to the United
States Department of Agriculture’s recommended
temperatures.
To test for doneness, insert a meat thermometer in a
thick or dense area away from fat or bone.
NEVER leave
the thermometer in the food during cooking, unless it is
approved for microwave oven use.
•
ALWAYS use potholders to prevent burns when
handling utensils that are in contact with hot food.
Enough heat from the food can transfer through
utensils to cause skin burns.
• Avoid steam burns by directing steam away from
the face and hands. Slowly lift the farthest edge of
a dish’s covering and carefully open popcorn and
oven cooking bags away from the face.
• Stay near the oven while it’s in use and check cooking
progress frequently so that there is no chance of
overcooking food.
• NEVER use the cavity for storing cookbooks or
other items.
• Select, store and handle food carefully to preserve
its high quality and minimize the spread of foodborne
bacteria.
• Keep waveguide cover clean. Food residue can cause
arcing and/or fires.
• Use care when removing items from the oven so
that the utensil, your clothes or accessories do not
touch the safety door latches.
ABOUT SAFETY
... for fresh pork, ground meat,
boneless white poultry, fish,
seafood, egg dishes and frozen
prepared food.
... for leftover, ready-to-reheat
refrigerated, and deli and carry-
out “fresh” food.
... white meat of poultry.
... dark meat of poultry.
160°F
T E m P F O O D
165°F
170°F
180°F
Children should be taught all safety precautions: use
potholders, remove coverings carefully, pay special
attention to packages that crisp food because they
may be extra hot.
Don’t assume that because a child has mastered one
cooking skill he/she can cook everything.
Children need to learn that the microwave oven is not
a toy. See page 25 for Child Lock feature.
ABOUT CHILDREN AND THE MICROWAVE
Children below the age of 7 should use the microwave
oven with a supervising person very near to them.
Between the ages of 7 and 12, the supervising person
should be in the same room.
The child must be able to reach the oven comfortably;
if not, he/she should stand on a sturdy stool.
At no time should anyone be allowed to lean or swing
on the oven door.

7
I N F O r m A T I O N Y O u N E E D T O K N O W
ABOUT UTENSILS AND COVERINGS
It is not necessary to buy all new cookware. Many pieces already in your kitchen can be used successfully in your
new microwave convection oven. The chart below will help you decide what utensils and coverings should be used
in each mode.
DISH CHECK. If you wish to check if a dish is safe for microwaving, place the empty dish in the oven and microwave
on HIGH for 30 seconds. If the dish becomes very hot, DO NOT use it for microwaving.
aCCESSOriES There are many microwave accessories available for purchase. Evaluate carefully before you
purchase so that they meet your needs. A microwave-safe thermometer will assist you in determining correct
doneness and assure you that foods have been cooked to safe temperatures. Sharp is not responsible for any
damage to the oven when accessories are used.
Utensils and
Coverings
MiCrowave only
ConveCtion Broil,
slow Cook
HigH Mix/roast
low Mix/Bake
Yes Small flat pieces of aluminum foil placed
smoothly on food can be used to shield areas from
cooking or defrosting too quickly. Keep foil at least
1 inch from wall of oven.
Yes Can be used if 3/4 filled with food. Keep 1 inch
away from walls and do not cover with lid.
Yes Do not exceed recommended preheating time.
Follow manufacturer’s directions.
Yes
Excellent.
Yes Excellent
No
Yes
No
No
No
Yes Good for large meats or foods that need
tenderizing. DO NOT use metal twist ties.
Yes For reheating.
Yes To cover for reheating and cooking. Do not
use recycled paper towels which may contain
metal filings.
Yes
Yes Use for reheating and defrosting. Follow ma-
nufacturer’s directions.
Yes
Yes Use brands specially marked for microwave
use. DO NOT allow plastic wrap to touch food. Vent
so steam can escape.
Yes Check manufacturer’s recommendation for
being microwave-safe.
Yes For reheating
Yes Good covering for cooking and reheating.
Yes May be used for short periods of time. Do
not use with high fat or high sugar content foods.
Could char.
Yes
For shielding.
Yes Broil - No cover.
No
Yes Excellent.
Yes Excellent
No
Yes Broil - No cover.
Yes Broil - No cover.
Yes
No
Yes Broil - No
No
No
Yes For temperatures
up to 400
o
F. Do not
use for broiling.
No
Yes Are heat resistant
up to 425
o
F. Do not
use for broiling.
No
Yes
No
No
No
Aluminum Foil
Aluminum
containers
Browning dish
Glass ceramic (Pyroce-
ram
®
)
Glass, heat-resistant
Glass, non-heat-resistant
Lids, glass
Lids, metal
Metal cookware
Metal, misc: dishes with
metalic trim, etc. Metal
twist-ties.
Oven cooking bags
Paper plates
Paper towels
Paper, ovenable
Microwave-safe plastic
containers
Plastic, Thermoset
®
Plastic wrap
Pottery, stoneware,
porcelain
Styrofoam
Wax paper
Wicker, wood, straw
Yes For shielding.
Yes Can be used if 3/4
filled with food. Keep 1
inch away from walls and
do not cover with foil.
No
Yes Excellent.
Yes Excellent
No
Yes
No
Yes Do not use metal
coverings.
No
Yes Do not use metal
coverings.
No
No
Yes For temperatures up
to 400
o
F.
No
Yes
No
Yes Must be microwave-
safe and ovenable.
No
No
No
8
P A r T N A m E S
BOTTOM VIEW
(Rear of Microwave)
1. Oven door with see-through window.
2. Door hinges.
3. Waveguide cover
DO NOT REMOVE.
4. Turntable motor shaft.
5. Oven light.
It will light when oven is operating or door is open.
6. Safety door latches.
The oven will not operate unless the door is securely
closed.
7. One touch DOOR OPEN button.
Push to open door.
8. FAN HI / LO button.
Push for high/low/off.
9. LIGHT button.
Push for on/off.
13
14
17
18
3
2
1
4
6
5
6
7
8 9
10
11
15
16
12
FRONT VIEW
10. Auto-Touch control panel.
11. Time display: Digital display,
99 minutes 99 seconds.
12. Ventilation openings.
13. Light cover.
14. Grease filters.
15. Removable ceramic turntable.
The turntable will rotate clockwise or
counterclockwise. Only remove for cleaning.
16. Removable turntable support.
Place the turntable support on the floor of the oven
cavity and the turntable on the turntable support.
17. Removable low rack for broiling and meat and
poultry roasting.
18. Removable high rack for two level baking.
19. Rating Label
(Front of Microwave)
19
9
MODEL R-1874
T O u C h C O N T r O L P A N E L
INTERACTIVE DISPLAY
Words will light in the display to indicate
features and cooking instructions.
Number next to the control panel illustration indicates page on which
there are feature descriptions and usage information.
12 12
11 11
15
24
15
13
19
19
20
20
19
20
14 - 16
21
22
23
11
25
24
12
24
10
T O u C h C O N T r O L P A N E L
INTERACTIVE DISPLAY
Words will light in the display to indicate
features and cooking instructions.
Number next to the control panel illustration indicates page on which
there are feature descriptions and usage information.
MODEL R-1875
25
21
22
23
111211
24
11
19
20
20
20
19
19
15
13
15
24
14-16
24
12
B EFORE OPE R A T I N G
• Before operating your new microwave oven make
sure you read and understand this operation
manual completely.
Before the oven can be used, follow these proce-
dures:
3
CLOCK
12:30000
TURNTABLE ON
•
Touch CLOCK pad.
1. Plug in the oven. Close the door. The oven display
This is a 12 hour clock. If you attempt to enter an
incorrect clock time,
ERROR
will appear in the display.
Touch the STOP/CLEAR pad and re-enter the time.
will show
WELCOME PRESS CLEAR AND PRESS
CLOCK
.
2. Touch the STOP/CLEAR pad.
:
will appear.
3. Touch CLOCK and follow directions to set.
TO SET THE CLOCK
P R OCEDU R E D I SPLA Y
NOTE:
Your oven can be programmed with the door
open except for START/TOUCH ON, MINUTE PLUS,
SENSOR REHEAT and POPCORN.
STOP/CLEAR
Touch the STOP/CLEAR pad to:
1
CLOCK
TURNTABLE ON
Touch CLOCK pad.
TIME
TURNTABLE ON
2
1 2 3 0
BLE ON
12:30000
Enter the correct time of
TURNTA
day by touching the numbers in sequence.
MAN UAL M I C ROW A V E O P ERA TION
TURNTABLE ON/OFF
For most cooking, the turntable should be on; however
the turntable can be turned off so that it does not rotate
when extra large dishes, such as the popular 13" x 9"
x 2" glass utility casserole, are used. The casserole
should be placed on the turntable so that it is level.
NOTE:
The door can be opened for checking food and the
turntable will stay in the off position. After checking,
close door and touch START/TOUCH ON.
The turntable will stay off for one minute after door is
opened when time-of-day appears in the display. It
is possible to reprogram the oven during that minute
without touching the TURNTABLE ON/OFF pad. The
display always indicates whether the turntable is off
or on.
THE TURNTABLE SHOULD ALWAYS BE ON WHEN
USING THE SPECIAL FEATURES. On/Off function
can be used with manual cooking modes and Sensor
Reheat. Turntable off condition will automatically
change to on condition when you select auto cooking
except Sensor Reheat and CompuBake.
When cooking large quantities of food which cannot be
stirred, it is best to use a lower power level such as 40
or 50%. You may speed cooking of large amounts by
programming 5 to 10 minutes on 100% power (HIGH)
followed by the desired time on lower power. See page
24 for how to program multiple sequences. You may
wish to reverse a large casserole once during cooking;
simply open door, reposition casserole, close door and
touch START/TOUCH ON.
PROCE DUR E D I SPLAY
1
TURNTABLE
EnTER
ON / OFF
TURNTABLE ON OFF
Touch TURNTABLE ON/OFF pad and note
TURNTABLE OFF in the display.
2
4 5 0 0
45.00000
Enter cooking time.
TURNTABLE ON OFF
3
POWER
LEVEL
4
P-40000
TURNTABLE ON OFF
Enter power level.
4
START
TOUCH ON
45.00000
TURNTABLE ON OFF COOK
Touch START/TOUCH ON pad.
11
• If the electrical power supply to your microwave
oven should be interrupted, the display will inter-
mittently show
WELCOME
PRESS
CLEAR
AND
PRESS
CLOCK
after the power is reinstated. If this
occurs during cooking, the program will be erased.
The time of day will also be erased. Simply touch
STOP/CLEAR pad and reset the clock for the correct
time of day.
• Suppose you want to enter the correct time of day
12:30 (A.M. or P.M.).
1. Erase if you make a mistake during programming.
2. Cancel kitchen timer.
3. Stop the oven temporarily during cooking.
4. Return the time of day to the display.
5. Cancel a program during cooking, touch twice.
•
Suppose you want to cook lasagna in a 13" x 9" x
2" casserole for 45 minutes on 40% power.
ENTER
MANUAL MICROW A VE OPERA TION
HOOD LIGHT/ HOOD FAN
Your oven is equipped with a Hood Light and a Hood
Fan which can be used whether the door is open or
closed.
To turn the Hood Light on, touch the LIGHT pad once.
To turn the Hood Light off, touch the LIGHT pad again.
To turn the Hood Fan on, touch the FAN HI/LO pad
once for high speed. To turn the Hood Fan to low speed,
touch pad twice and touch the pad three times to turn
the fan off.
When fan is manually turned on, "H" will be
shown on the display. When the fan is turned off, "H"
will disappear from display.
TIME COOKING-
MICROWAVE
Your oven can be programmed for 99 minutes
99 seconds (99.99). Always enter the seconds after
the minutes, even if they are both zeros.
TO SET POWER LEVEL
There are eleven preset power levels.
Using lower power levels increases the cooking time
which is recommended for foods such as cheese, milk
and long slow cooking of meats. Consult cookbook or
recipes for specific recommendations.
TOUCH POWER APPROXIMATE COMMON WORDS
LEVEL PAD ONCE PERCENTAGE FOR
THEN TOUCH OF POWER POWER LEVELS
POWER LEVEL 100% High
9 90%
8 80%
7 70% Medium High
6 60%
5 50% Medium
4 40%
PROCEDURE DISPLAY
3 30% Med Low/Defrost
1
5 0 0
5.00000
2 20%
TURNTABLE ON
Enter cooking time.
1 10% Low
0 0%
START
2
5.00000
TOUCH ON
TURNTABLE ON OFF COOK
Touch START/TOUCH ON pad.
KEEP WARM
KEEP WARM can only be programmed with manual
cooking or as a separate program.
PROCEDURE DISPLAY
1
5 0 0
5.00000
TURNTABLE ON
Enter defrosting time.
2
POWER
LEVEL
3
P-30000
PROCEDURE
TURNTABLE ON
Touch POWER LEVEL pad.
Enter power level.
1
4 0 0
Touch the desired cook time for
1 baked potato. (Ex: 4 minutes.)
KEEP
START
45.00000
2
WARM
Touch KEEP WARM pad.
3
TOUCH ON
TURNTABLE ON OFF COOK
Touch START/TOUCH ON pad.
3
START
TOUCH ON
Touch START/TOUCH ON pad.
At the end of cook time, KEEP WARM is displayed
warming food until end of 30 minutes.
To use KEEP WARM as a separate program, touch
KEEP WARM pad within 1 minute after cooking,
closing the door or touching the STOP/CLEAR pad.
12
• Suppose you want to cook for 5 minutes at 100%
• Suppose you want to defrost for 5 minutes at 30%
with the turntable on.
• Suppose you want to cook a baked potato for
4 minutes at 100% power and you want to keep it
warm after cooking for 30 minutes.

13
P r O C E D u r E D I S P L A Y
1
2
3
m I C r O W A v E F E AT u r E S
CompuDefrost automatically defrosts ground meat,
steaks, chicken pieces.
• Suppose you want to defrost a 2.0 pound steak.
COMPU DEFROST
4
After the 1st stage, open the door. Turn
steak over and shield any warm portions.
Close the door.
After the 2nd stage, open the door. Shield any
warm portions. Close the door.
5
6
After defrost cycle ends, cover and let stand as
indicated in chart below.
Touch
START/TOUCH ON pad.
Touch
START/TOUCH ON pad.
42.50000
TURNTABLE ON OFF COOK LBS OZ KG HELP
MIX COV
DEFROST
SENSOR
44.35000
TURNTABLE ON OFF COOK LBS OZ KG HELP
MIX COV
DEFROST
SENSOR
NOTE:
1. The weight can be entered in increments of 0.1 lb.
If you attempt to enter more or less than the allowed
amount
or
will appear in the display.
2. CompuDefrost can be programmed with More/Less
Time Adjustment. See page 24.
3. To defrost other foods or foods above or below the
weights allowed on CompuDefrost Chart, use time
and 30% power. See Manual Defrost on page 14.
ERROR WEIGHT TOO SMALL TOO
LARGE
NOTE:
Check foods when oven signals. After final stage, small sections may still be icy. Let stand to continue
thawing. Do not defrost until all ice crystals are thawed.
Shielding prevents cooking from occurring before the center of the food is defrosted. Use small smooth
strips of aluminum foil to cover edges and thinner sections of the food.
COMPU DEFROST CHART
Ground
Meat
once
twice
Remove any thawed pieces after each stage. Let stand,
covered, for 5 to 10 minutes.
After each stage of defrost cycle, rearrange and if there
are warm or thawed portions, shield with small flat pieces
of aluminum foil. Remove any meat or fish that is nearly
defrosted. Let stand, covered, for 10 to 20 minutes.
After each stage of defrost cycle, if there are warm or
thawed portions, rearrange or remove. Let stand, covered,
for 10 to 20 minutes.
3 times
T O u C h
C O m P u D E F r O S T
P A D *
F O O D
F O r
A m O u N T
P r O C E D u r E
Chicken
Pieces
0.5 - 3.0 lb
(0.2 - 1.4 kg)
0.5 - 4.0 lb
(0.2 - 1.8 kg)
0.5 - 3.0 lb
(0.2 - 1.4 kg)
Steaks
(chops, fish)
* Number of touches AFTER initial touch to access
COMPU DEFROST.
Touch COMPU DEFROST
pad once. Then touch COMPU
DEFROST pad two more times to select steak.
Enter weight by touching
the number pads. (Ex. 2.0 lb)
Touch START/TOUCH ON pad.
42.00000
TURNTABLE ON OFF COOK LBS OZ KG HELP
STEAK
2 0
x 3
EnTER WEIGHT
MIX COV
DEFROST
SENSOR
46.50000
TURNTABLE ON OFF COOK LBS OZ KG HELP
MIX COV
DEFROST
SENSOR
The oven will stop and directions will be displayed.
Follow the indicated message.
COMPU
DEFROST
START
TOUCH ON
START
TOUCH ON
START
TOUCH ON

14
m I C r O W A v E F E A T u r E S
Using Sensor Settings:
MANUAL DEFROST
If the food that you wish to defrost is not listed on the
CompuDefrost Chart or is above or below the limits in
the “Amount” column on the chart, you need to defrost
manually.
You can defrost any frozen food, either raw or previously
cooked, by using power level 3. Follow the exact 3-step
procedure found under To Set Power Level on page
12. Estimate defrosting time and press 3 for 30% when
you select the power level.
For either raw or previously cooked frozen food, the rule
of thumb is approximately 5 minutes per pound. For
example, defrost 5 minutes for 2-3 cups of casserole
or 1 pound of frozen spaghetti sauce.
Always stop the oven periodically to remove or
separate the portions that are defrosted. If food is not
defrosted at the end of the estimated defrosting time,
program the oven in 1 minute increments on power
level 3 until totally defrosted.
When using plastic containers from the freezer, defrost
only long enough to remove from the plastic in order to
place food in a microwave-safe dish.
SENSOR COOKING
Sharp’s Sensor is a semi-conductor device that detects
the vapor (moisture and humidity) emitted from the food
as it heats. The Sensor adjusts the cooking times and
power level for various foods and quantities. It takes
the guesswork out of microwave cooking.
1. Room temperature should not exceed 95˚F.
2. Be sure the exterior of the cooking container
and the interior of the oven are dry. Wipe off any
moisture with a dry cloth or paper towel.
3. Sensor cooking can only be entered within 1 minute
after cooking, opening and closing the door or
touching the STOP/CLEAR pad.
4. During the first part of sensor cooking,
, ,
, ,
, ,
, , or
will appear on display. Do not open oven door or
touch STOP/CLEAR during this part of the cooking
cycle. The measurement of vapor will be interrupted.
SEnSOR
REHEAT POPCORn REGULAR SEnSOR BAKEd
POTATO fROzEn vEG SOfT
fRESH vEG
fRESH
fROzEn
BACOn fISH
If this occurs, will appear and sensor
cooking will be interrupted. To continue cooking,
touch the STOP/CLEAR pad and select cooking
time and power. When sensor detects the vapor
emitted from the food, remainder of cooking time
will appear. Door may be opened when remaining
cooking time appears on display. At this time, you
may stir or season food, as desired.
5. Check food for doneness after cooking with sensor
settings. If additional time is needed, continue to
cook with variable power and time.
6. If the sensor does not detect vapor, will
appear and the oven will shut off.
7. At the end of any cycle, open oven door or touch
STOP/CLEAR pad. The time of day will reappear
on the display.
8. Any sensor setting can be programmed with More
or Less Time Adjustment. See page 24.
Selecting Foods:
1. The sensor works with foods at normal storage
temperature. For example, foods for reheating
would be at refrigerator temperature and potatoes
for baking would be room temperature.
2. More or less food than the quantity listed in the charts
should be cooked by time and variable power.
Covering Foods:
Some foods work best when covered. Use the cover
recommended in the Sensor Cooking chart for these
foods.
1. Casserole lid.
2. Plastic wrap: Use plastic wrap recommended for
microwave cooking. Cover dish loosely; allow
approximately 1/2 inch to remain uncovered to allow
steam to escape. Plastic wrap should not touch
food.
3. Paper towel: Use paper towels to absorb excess
fat and moisture when cooking bacon and potatoes.
Line the turntable when baking potatoes.
4. Wax paper: Cover dish completely; fold excess wrap
under dish to secure. If dish is wider than paper,
overlap two pieces at least one inch to cover.
ERROR
ERROR
HARdvEG
EnTREE HOT dOGS

15
P r O C E D u r E
P r O C E D u r E
F O O D
A m O u N T
P r O C E D u r E
After cooking,
End
will be displayed.
SEnSOR
POPCORn
REGULAR
will be displayed
repeatedly.
m I C r O W A v E F E A T u r E S
INSTANT SENSORS
Your oven has Instant Sensor Popcorn and Instant
Sensor Reheat. To use any of the Instant Sensors,
simply touch the chosen pad. The oven will start
automatically. Any sensor setting can be programmed
with More/Less Time Adjustment. See page 24.
INSTANT SENSOR REHEAT
Turntable on:
You can reheat many foods by touching just one pad.
You don’t need to calculate reheating time or power
level. To reheat food with turntable on, simply touch
the SENSOR REHEAT pad.
Turntable off:
You may reheat using a 11"x8"x2" or 13"x9"x2" casserole
with the turntable off. First touch TURNTABLE ON/OFF
and note indicator. Then touch SENSOR REHEAT.
The display will indicate turntable off and oven will
start automatically. After cooking,
LET
STAnd
COvER
will be displayed.
INSTANT SENSOR POPCORN
• Suppose you want to pop a 3.5 oz bag of popcorn.
will be displayed repeatedly.
When sensor detects the vapor emitted from the
food, remainder of cooking time will appear.
After cooking,
will be
displayed.
Touch SENSOR REHEAT
pad. (Note :
Sensor Reheat can be programmed
with turntable on or off).
Touch POPCORN pad once.
(Ex: Touch POPCORN once for
regular size bag.)
This sensor setting works well with most brands of
microwave popcorn. You may wish to try several and
choose your favorite. Pop only one bag at a time. Unfold
the bag and place in oven according to directions.
T O u C h
P O P C O r N P A D
POPCORN CHART
F O r A m O u N T
3.0 and 3.5 oz bag (Regular size)
twice 1.5 and 1.75 oz bag (Snack size)
once
INSTANT SENSOR CHART
Leftovers such
as rice, potatoes,
vegetables
casserole
Soups
Canned entrees
and vegetables
4 - 32 oz Place in dish or casserole slightly larger than amount to be reheated.
Flatten, if possible. Cover with lid, plastic wrap or wax paper. Use covers
such as plastic wrap or lids with larger quantities of more dense foods
such as stews.
After reheating, stir well, if possible. Foods should be very hot. If not,
continue to heat with variable power and time. After stirring, recover and
allow to stand 2 to 3 minutes.
Use less Time Adjustment by touching POWER LEVEL pad twice for
small quantities of canned vegetables.
1 - 4 cups
4 - 16 oz
Dinner Plate
1 plate
3-6 oz of
meat plus
vegetables
and/or potato/
rice
Use this pad to reheat precooked foods from the refrigerator. Place
meaty portions and bulky vegetables to outside of plate. Cut large items
like baked potatoes in smaller pieces. Flatten foods such as mashed
potatoes and other dense foods. Cover with wax paper or plastic wrap.
ONE PLATE ONLY. After cooking, check that food is very hot throughout
and that the bottom center of the plate is very hot. If not, continue heating
using time and power level. Allow to stand, covered, 2 to 3 minutes.
Popcorn Only 1
package at
a time
Use only popcorn packaged for microwave oven use. Try several brands
to decide which you like best. Do not try to pop unpoped kernels. More/
Less Time Adjustment can be used to provide adjustment needed for
older popcorn or individual tastes.
SEnSOR REHEAT
STAnd COvERLET
SENSOR
REHEAT
POPCORN

16
m I C r O W A v E F E A T u r E S
• Suppose you want to cook a baked potato.
SENSOR COOK
P r O C E D u r E D I S P L A Y
1
2
SENSOR COOK CHART
F O O D
A m O u N T
P r O C E D u r E
3
Touch SENSOR COOK
pad.
SELECT
nUMBER
fOOd
BAKEd
PRESS
POTATO
START
1
Select desired sensor
setting. Touch 1 to
cook baked potatoes.
Touch START/TOUCH ON pad.
When sensor detects
the vapor emitted from
the food, the remainder
of cooking time will
appear.
Open oven door or touch STOP/CLEAR pad. The time
of day will appear in the display.
LET
COvER
STAnd
1. Baked potatoes 1 - 6 medium
2. Frozen
vegetables
1 - 6 cups
3. Fresh vegetables - soft
Broccoli
Brussels sprouts
Cabbage
Cauliflower (flowerets)
Cauliflower (whole)
Spinach
Zucchini
Baked apples
0.25 - 2.0 lb
0.25 - 2.0 lb
0.25 - 2.0 lb
0.25 - 2.0 lb
1 medium
0.25 - 1.0 lb
0.25 - 2.0 lb
2 - 4 medium
4. Fresh vegetables - hard
Carrots, sliced
Corn on the cob
Green beans
Winter squash: diced
halves
0.25 - 1.5 lb
2 - 4 pcs
0.25 - 1.5 lb
0.25 - 1.5 lb
1 - 2
5. Frozen entrees 6 - 17 oz
6. Hot dogs 1 - 4 servings
7. Bacon 2 - 6 slices
8. Fish, seafood 0.25 - 2.0 lb
Pierce. Place on paper-towel-lined turntable. After cooking, remove
from oven, wrap in aluminum foil and let stand 5 to 10 minutes.
Cover with lid or plastic wrap. After cooking, stir and let stand
3 minutes, covered.
Wash and place in casserole. Add no water if vegetables have just
been washed. Cover with lid for tender vegetables. Use plastic
wrap for tender-crisp vegetables. Stir before standing, if possible.
After cooking, let stand, covered, 2 to 5 minutes.
Place in casserole. Add 1-4 tbsp water. Cover with lid for tender
vegetables. Use plastic wrap cover for tender-crisp vegetables.
Stir before standing, if possible. After cooking, let stand, covered,
2 to 5 minutes.
Use for frozen convenience food. It will give satisfactory results
for most brands. You may wish to try several and choose your
favorite. Remove package from outer wrapping and follow package
directions for covering. After cooking, Iet stand, covered, for 1 to
3 minutes.
Place hot dog in bun and wrap in paper towel or paper napkin.
Place bacon on paper plate, lined with paper towel. Bacon should
not extend over the rim of plate. Cover with paper towel.
Arrange in ring around shallow glass dish (roll fillet with edges
underneath). Cover with vented plastic wrap. After cooking, let
stand, covered, 3 minutes.
SENSOR
COOK

17
m I C r O W A v E F E A T u r E S
SENSOR COOK RECIPES
Cranberry Fluff
Makes 6 to 8 servings
2 cups fresh cranberries 1/2 pint whipping cream, whipped or
1 cup water 1 carton (8 ounces) non-dairy whipped topping
3/4 cup sugar
1 carton (3 ounces) orange flavored gelatin
1
Combine cranberries, water and sugar in a 2-quart casserole. Cover with wax paper. Microwave using SENSOR
COOK for Fresh Vegetables-soft. Drain cranberries and reserve liquid.
2
Add enough hot water to reserved liquid to make 2 cups. Stir the gelatin into hot liquid until it dissolves. Cover
with wax paper. Microwave using SENSOR REHEAT.
3
Add berries and cool. Refrigerate until thickened. Fold whipped cream into cooled cranberry mixture. Spoon into
serving dishes and garnish with extra whipped cream. Refrigerate until ready to serve.
Curry Vegetable Chowder
Makes 4 servings
6 slices bacon 3/4 teaspoon salt
1 can (10 3/4 ounces) chicken broth 1/2 teaspoon curry powder
3 medium potatoes, finely diced (about 2 cup) 1/8 teaspoon pepper
2 carrots, shredded (about 1 cup) 1 can (12 ounces) evaporated milk
1 small onion, chopped (about 1/2 cup) 2 tablespoons chopped fresh parsley
1
Layer 2 paper towels on a microwave-safe plate. Arrange bacon on the towels. Cover with another paper towel.
Microwave using SENSOR COOK for Bacon. Crumble and reserve bacon.
2
Combine chicken broth, vegetables and seasonings in 4-quart casserole. Cover with vented plastic wrap.
Microwave using SENSOR COOK for Baked potatoes. Vegetables should be tender.
3
Stir in evaporated milk. Re-cover with vented plastic wrap. Microwave using SENSOR REHEAT Less. Stir in
parsley. Let stand, covered, 5 minutes.
4
Top each serving with crumbled bacon.
Glazed Apple Slices
Makes 6 to 8 servings
1/4 cup brown sugar 3/4 cup orange juice
3 tablespoons margarine or butter 1 tablespoon cornstarch
2 tablespoons apricot preserves 4 baking apples (about 1 1/2 pounds), peeled and
1/2 teaspoon ground nutmeg sliced into 8 pieces each
1/4 teaspoon salt 3 tablespoons chopped green pistachios
1/2 cup sugar
1
Combine brown sugar, margarine and apricot preserves in a small bowl. Microwave at HIGH (100%) until
margarine melts and preserves soften, 45 seconds to 1 minute. Stir in nutmeg, salt, sugar, orange juice and
cornstarch. Microwave at HIGH (100%) until thickened, 4 to 6 minutes, stirring several times.
2
Arrange apple slices in a large microwave serving dish. Spread hot sauce over apples. Cover well with
vented plastic wrap. Microwave using SENSOR COOK for Fresh vegetables-soft. Allow to cool 5 minutes
before serving.
3
Sprinkle with pistachios. Serve alone or over vanilla ice cream or sponge cake.

18
m I C r O W A v E F E A T u r E S
SENSOR COOK RECIPES (CONTINuED)
Mexican Seasoned Potatoes
Makes 6 to 8 servings
4 medium baking potatoes (8 ounces each) 1/2 teaspoon oregano leaves
1/4 cup olive oil 1/4 teaspoon ground cumin
1 tablespoon instant minced onion 1/2 teaspoon salt
1/2 teaspoon chili powder
1
Cut each potato lengthwise into 4 equal wedges. Place potato wedges into 10-inch square casserole. Toss
potatoes with oil to coat well.
2
In small bowl, combine remaining ingredients. Sprinkle over potatoes.
3
Cover potatoes with wax paper. Microwave using SENSOR COOK for Baked potatoes setting. Rearrange
potatoes when time appears on display. Let stand, covered, 5 minutes.
Spiced Carrots
Makes 6 to 8 servings
3 cups sliced carrots, 1/4 inch thick 2 teaspoons vinegar
1/2 cup chopped green pepper, 1-inch cubes 1 teaspoon soy sauce
1/4 cup linely chopped onion 1/2 teaspoon salt
3 tablespoons water 1/2 teaspoon prepared mustard
1 can (7 3/4 ounces) semi-condensed tomato soup 1/8 teaspoon pepper
1/2 cup sugar
1
In a 1 1/2-quart casserole, combine carrots, green pepper, onion and water. Cover with lid. Microwave using
SENSOR COOK for Fresh vegetables-hard. Carrots should be tender-crisp. Drain.
2
Stir in remaining ingredients. Cover and microwave using SENSOR REHEAT.
Savory Flounder Fillets
Makes 4 servings
3/4 cup of corn flake crumbs
3 tablespoons chopped parsley
2 teaspoons grated lemon peel
1
On waxed paper, combine corn flake crumbs, parsley, lemon peel and paprika. Dip fillets in beaten egg, then
coat with crumb mixture.
2
Place fish in a covered, microwave-safe, baking dish. Microwave using SENSOR COOK for Fish, seafood.
3
Serve with tartar or cocktail sauce or melted cheese.
Creole Corn
Makes 6 servings
2 teaspoons oil
1/2 cup chopped celery
1/2 cup chopped green pepper
16 ounce can tomatoes
4 ounce can mushroom stem and pieces, drained
1
In 2-quart casserole, combine oil, celery, green pepper, tomatoes, mushrooms, sugar, onion powder, garlic
powder, salt and pepper.
2
Microwave using SENSOR REHEAT. Set aside.
3
In covered, 1-quart casserole, microwave corn using SENSOR COOK for Frozen vegetables. Drain.
4
Combine corn and vegetable-seasoning mixture. Stir and serve immediately.
1/2 teaspoon paprika
1 pound flounder fillets
1 egg, slightly beaten
1 teaspoon brown sugar
1/2 teaspoon onion powder
1/4 teaspoon garlic powder
salt and pepper to taste
1 package (16 ounces) frozen corn

19
P r O C E D u r E D I S P L A Y
1
2
3
4
2
3
4
P r O C E D u r E D I S P L A Y
1
2
3
Touch START/TOUCH ON pad.
START
TOUCH ON
m A N u A L C O N v E C T I O N / A u T O m AT I C m I x O P E r AT I O N
This section of the Operation Manual gives you
specific cooking instructions and procedures. Please
consult your Sharp Carousel Convection Microwave
Cookbook for helpful hints for convection and
combination cooking.
The oven should not be used without the turntable
in place, and it should never be restricted so that it
cannot rotate. You may remove the turntable when
preheating the oven and when preparing food to be
cooked directly on the turntable.
CONVECTION COOKING
During convection heating, hot air is circulated
throughout the oven cavity to brown and crisp foods
quickly and evenly. This oven can be programmed for
ten different convection cooking temperatures for up to
99 minutes, 99 seconds.
TO COOK WITH CONVECTION
• Suppose you want to cook at 350˚F for 20
minutes.
TO PREHEAT AND COOK
WITH CONVECTION
Your oven can be programmed to combine preheating
and convection cooking operations. You can preheat at
the same temperature as the convection temperature
or change it to a higher or lower temperature.
• Suppose you want to preheat until 350˚F and then
cook 25 minutes at 375˚F convection.
NOTE:
To preheat and cook with the same temperature, enter
same temperature in steps 2 and 3.
When the oven reaches the programmed
temperature, it will automatically hold at the preheat
temperature for 30 minutes and then the display will
change to time of day. Whenever STOP/CLEAR
pad is touched during this 30 minute period, PRESS
CONVEC or PRESS MIX will be displayed and
cooking mode and time can be entered.
TO BROIL
In the BROIL setting, preheating is automatic. Just
enter the actual broiling time and wait for preheat to
be over before adding food. (Preset 450˚F). Oven
temperature cannot be changed.
• Suppose you want to broil a ham steak for 15
minutes.
Touch BROIL pad.
Touch number pads
to enter cooking time.
(Ex: 1500)
450f
COOKInG
EnTER
TIME
PREHEAT
SELECT
TEMP
350f
EnTER
COOKInG
TIME
20.00
Touch CONVEC pad.
Touch number
pad for desired
temperature.
(Ex: Pad 6 for
350˚F.)
Enter cooking time.
(Ex: 2000 min.)
Touch START/TOUCH ON pad.
START
TOUCH ON
P r O C E D u r E D I S P L A Y
1
5
START
TOUCH ON
Touch PREHEAT pad.
TEMP
SELECT
PREHEAT
Touch number pad for
desired temperature.
(Ex: Pad 6
for 350˚F.)
350f
START
PRESS
Enter number pads
for cooking time.
(Ex: 2500)
25.00
Touch START/TOUCH ON pad.
PRESS
OR
COnvEC
Touch CONVEC
then touch number
pad for temp.
(Ex: 7 for 375˚F)
SELECT
375f
TEMP
EnTER
COOKInG
TIME
PREHEAT
CONVEC
PREHEAT
BROIL
20
P r O C E D u r E D I S P L A Y
1
2
O v E N
T E m P E r A T u r E
m I C r O W Av E
P O W E r
P r O C E D u r E D I S P L A Y
1
2
P r O C E D u r E D I S P L A Y
m A N u A L C O N v E C T I O N / A u T O m A T I C m I x O P E r A T I O N
TO PREHEAT AND COOK WITH
AUTOMATIC MIX
Your oven can be programmed to combine pre-
heating and Automatic Mix cooking operations. You
can preheat at the same temperature as the preset
combination temperature or change it to a different
temperature.
• Suppose you want to preheat until 350˚F and then
cook 25 minutes on 325˚F Low Mix bake.
TO SLOW COOK
Slow Cook is a preset at 300˚F. Slow Cook is
programmed for 4 hours. Oven temperature can be
changed to temperature below 300˚F. Simply touch
the SLOW COOK pad and touch the desired numbered
pad with temperature below 300˚F.
AUTOMATIC MIX
COOKING
This oven has two pre-programmed settings that
make it easy to cook with both convection heat and
microwave automatically.
TO COOK WITH AUTOMATIC MIX
• Suppose you want to bake a cake at low mix for
20 minutes.
2
4
350f
START
PRESS
5
Touch START/TOUCH ON pad.
PRESS
OR
COnvEC
3
Touch PREHEAT pad.
1
SELECT
TEMP
PREHEAT
Touch LOW MIX/BAKE
pad.
325f
COOKInG
TIME
EnTER
Touch number pads to
select time.
0052
25.00
PRESS
START
Touch number
pad for desired
temperature
(Ex: Pad 6
for 350˚F.)
PREHEAT
With the exception of those foods that cook best by
convection heating alone, most foods are well suited
to mix cooking using either LOW MIX/BAKE or HIGH
MIX/ROAST.
The marriage of these two cooking methods produces
juicy meats, moist and tender cakes and fine textured
breads, all with just the right amount of browning
and crispness.
The temperature can be changed; however, the
microwave power cannot.
The oven temperature can be changed from 100˚F
to 450˚F. To change the temperature, first touch
HIGH MIX or LOW MIX, then touch the same pad
again. When the display says
, touch
desired temperature pad. Ex: HIGH MIX, HIGH MIX, pad
7 and START/TOUCH ON. The mix temperature will
change automatically.
SELECT TEMP
At the end of the baking time, 1 long tone will sound
and
will be displayed.
HIGH MIX 325˚F 30%
LOW MIX 325˚F 10%
Touch LOW MIX/BAKE
pad.
Touch number pads to
select time.
0002
20.00
PRESS
START
325f
COOKInG
TIME
EnTER
At the end of the baking time, 1 long tone will sound
and
will be displayed.
End
START
TOUCH ON
End
Touch SLOW COOK pad.
300f
PRESS
START
Touch START/TOUCH ON pad.
The oven begins counting and
continues to 4 hours.
4HOURS
START
TOUCH ON
SLOW
COOK
PREHEAT
LOW MIX
BAKE
LOW MIX
BAKE
21
P r O C E D u r E D I S P L A Y
C O N v E C T I O N A u T O m A T I C m I x F E A T u r E S
This section of the operation manual offers instructions
for preparing 12 popular foods using CompuBroil,
CompuRoast and CompuBake.
After selecting the desired feature, follow the directions
indicated in the display.
For helpful hints, simply touch CUSTOM HELP anytime
HELP is lighted in the display.
COMPU BROIL
CompuBroil automatically broils hamburgers, chicken
pieces, steaks and fish steaks.
• Suppose you want to broil 2 hamburgers.
Touch COMPU BROIL pad.
1
Touch number pad.
(Ex: for hamburgers,
touch 1.)
2
nUMBER
SELECT fOOd
1
HAM- BURGERS
USE LOW
RACK
nUMBER
HOW MAnY
PRESS
Touch number pad
to enter quantity.
(Ex: 2.) Follow
information in display
for cooking information.
3
2
2
nOfOOd InOvEn
fOR MEdIUM
PRESS START
For well done or rare burgers, touch POWER LEVEL
pad to select More for well done or Less for rare. See
More/ Less Time Adjustment on page 24.
4
5
After broil cycle ends, 1 long tone will sound and
will be displayed.
PPREHEAT
TURNTABLE ON OFF COOK LBS OZ KG HELP
MIX COV
DEFROST
SENSOR
NOTE:
1. CompuBroil can be programmed with More/Less
Time Adjustment. See page 24.
2. If you attempt to enter more or less than the al-
lowed weight
or
will appear in the display.
If you enter more or less than the allowed number
or
will appear in
the display.
3. To broil other foods or foods above or below the
weight or number allowed on the chart below,
follow instructions in the Sharp Carousel Convection
Microwave Cookbook. See Broiling Chart.
Touch START/TOUCH ON pad.
After broil preheat cycle ends, 4 long tones will
sound.
will be displayed repeatedly. Open the door and
place hamburgers into oven. Close the door.
End
PREHEAT PLACEOvER
ERROR WEIGHT TOO LARGE
Touch START/TOUCH ON pad.
InOvEn
fOOd
PRESS
CLEAR ERROR WEIGHT TOO
SMALL PRESS CLEAR
PRESS CLEARERROR
0QTY
PRESS CLEARTOO MAnY
ERROR
START
TOUCH ON
START
TOUCH ON
COMPU BROIL CHART
S E T T I N G / F O O D A m O u N T P r O C E D u r E
1. Hamburgers 1 - 8 pieces
1/4 lb each
2. Chicken
pieces
0.5 - 3.0 lb
3. Steaks 0.5 - 2.0 lb
4. Fish steaks 0.5 - 2.0 lb
Use this setting to broil hamburger patties. Place on low rack.
Arrange pieces on low rack. After cooking, let stand, 3-5 minutes. Dark meat
should be 180
o
F, and white meat should be 170˚F.
Use this setting to broil steaks from 3/4" to 1" thick. Individual boneless
steaks broil evenly. Place steak on low rack. For well done, touch POWER
LEVEL once; for rare, touch POWER LEVEL twice.
Use this setting to broil fish steak which is 3/4" to 1" thick. Place on low
rack.
COMPU
BROIL
22
P r O C E D u r E D I S P L A Y
COMPU ROAST
CompuRoast automatically roasts chicken, turkey,
turkey breast or pork.
• Suppose you want to roast a 2.5 pound chicken.
Touch COMPU ROAST pad.
1
Touch number pad.
(Ex: for chicken
touch 1.)
2
3
Touch number pad to
enter weight. (Ex: 2.5)
nUMBER
SELECT fOOd
Touch START/TOUCH ON pad.
4
After COMPU ROAST cycle end, a long tone will
sound.
will be displayed.
1
CHICKEn USE
LOW RACK
EnTER WEIGHT
2 5
2.5
PRESS START
COMPU ROAST CHART
S E T T I N G F O O D A m O u N T P r O C E D u r E
1. Chicken 2.5 - 7.0 lb
(1.2 - 3.1 kg)
After the cycle ends, cover with foil and let stand for 5-10 minutes.
Internal temperature of white meat should be 170
o
F and of dark
meat, 180
o
F.
r A C K
Low
2. Turkey
(Unstuffed)
6.5 - 9.0 lb
(3.0 - 4.0 kg)
Season, as desired. Place on low rack. After the cycle ends, cover
with foil and let stand 10 minutes. Internal temperature of white
meat should be 170
o
F and of dark meat, 180
o
F.
Low
3. Turkey breast 3.0 - 6.0 lb
(1.4 - 2.7 kg)
Season, as desired. Place on low rack. After the cycle ends, cover
foil and let stand 10 minutes. Internal temperature of white meat
should be 170
o
F.
Low
4. Pork 2.0 - 3.5 lb
(0.9 - 1.5 kg)
Boneless pork loin is recommended because it cooks evenly.
Place on low rack. After cooking, remove from oven, cover with
foil and allow to stand 5-10 minutes. Internal temperature should
be 160
o
F.
Low
LET
NOTE:
1. CompuRoast can be programmed with More/Less
Time Adjustment. See page 24.
2. If you attempt to enter more or less than the allowed
weight,
or
CLEAR
will appear in the display.
3. To roast other food or foods above or below the
weights allowed on the chart below, check the
Sharp Carousel Convection Microwave Cookbook’s
Combination Roasting Chart.
ERROR WEIGHT TOO LARGE
PRESS
CLEAR ERROR WEIGHT TOO
SMALL
PRESS
START
TOUCH ON
fORCOvEREdSTAnd
5-10MIn
C O N v E C T I O N A u T O m A T I C m I x F E A T u r E S
COMPU
ROAST
23
P r O C E D u r E D I S P L A Y
C O N v E C T I O N A u T O m A T I C m I x F E A T u r E S
COMPU BAKE
CompuBake automatically bakes cakes, brownies,
muffins and French fries.
• Suppose you want to bake a 13" x 9" x 2" cake.
Touch COMPU BAKE pad.
Note: Turntable function is
automatically turned OFF.
1
Touch number pad.
(Ex: for cake, touch 1.)
2
3
nUMBER
SELECT fOOd
Touch START/TOUCH ON pad.
4
After COMPU BAKE cycle ends, 1 long tone will
sound, and
End
will be displayed.
1
CAKE
USE 13X9X2
InCH METAL
S E T T I N G F O O D
1. Cake
r A C K
Low
2. Brownies Low
3. Muffins Low
4. French fries Low
NOTE:
1. CompuBake can be programmed with More/Less
Time Adjustment. See page 24.
2. To bake other food, see the Sharp Carousel
Convection Microwave Cookbook’s Baking
Section.
PAn On
LOW RACK
nOfOOd InOvEn
PRESS START
Touch START/TOUCH ON pad.
After CompuBake preheat cycle ends, 4 tones will
sound. The display will indicate
PREHEAT
OvER
PLACE
fOOd
InOvEn
. Open door. Place the
cake pan inside. Close door and touch START/
TOUCH ON.
COMPU BAKE CHART
4PREHEAT
TURNTABLE ON OFF COOK LBS OZ KG HELP
MIX COV
DEFROST
SENSOR
P A N S I z E / Q T Y
START
TOUCH ON
START
TOUCH ON
P r O C E D u r E
Ideal for packaged cake mix or your own recipe for 13”x9”x2”
pan. Prepare according to package or recipe directions and
place in a greased and floured 13”x9”x2” baking pan. After
the preheat is over, place pan in oven centered on low rack.
Cool before frosting and serving.
Ideal for packaged brownie mix or your own recipe for 13" x
9" x 2" pan. Prepare according to package or recipe directions
and place in a greased and floured 13" x 9" x 2" baking pan.
After the preheat is over, place pan in oven centered on low
rack. Cool before cutting into serving pieces.
Ideal for packaged muffin mix or your own recipe for 12
medium size muffins. Prepare according to package or recipe
directions and place in one 12-cup muffin pan. After the
preheat is over, place pan in oven centered on low rack.
Use frozen prepared French fries.
No preheat is required for the French fries baking procedure.
Place French fries on cookie sheet on low rack.
For shoestring potatoes, touch POWER LEVEL pad twice to
enter less time before touching START/TOUCH ON pad.
13" x 9" x 2"
13" x 9" x 2"
12 cup
Muffin pan
3 to 24 oz
Cookie sheet
to hold
C O N v E C T I O N A u T O m A T I C m I x F E A T u r E S
COMPU
BAKE
OTHER CO N VENI ENT F E A T U R E S
MULTIPLE SEQUENCE
COOKING
The oven can be programmed for up to 4 automatic
cooking sequences for the microwave mode and 3
automatic cooking sequences for convection mode,
switching from one setting to another automatically.
Sometimes cooking directions tell you to start on one
power level and then change to a different power level.
Your oven can do this automatically.
KITCHEN TIMER
P R O C E DUR E
1
KITCHEN
Touch KITCHEN TIMER pad.
TIMER
2
300
Enter time.
3
START
TOUCH ON
Touch START/TOUCH ON pad.
PROCED U R E
1
POWER
Touch POWER LEVEL
pad once.
MINUTE PLUS
Minute Plus allows you to cook for a minute at 100%
by simply touching the MINUTE PLUS pad. You can
also extend cooking time in multiples of 1 minute by
repeatedly touching the
MINUTE PLUS pad during
manual cooking using microwave, convection, mix
or broil.
LEVEL
2
9
Touch POWER LEVEL
number. (Ex: 90%)
3
5 0 0
Enter cooking time.
(Ex: 5 minutes.)
4
POWER
Touch POWER LEVEL
•
Suppose you want to heat a cup of soup for one
LEVEL
pad again.
minute.
5
Touch POWER LEVEL
number. (Ex: 50%)
P R O C E DUR E
5
MINUTE
Enter cooking time.
(Ex: 30 minutes.)
PLUS
Touch MINUTE PLUS pad.
6
3000
NOTE:
7
START
Touch START/TOUCH ON
TOUCH ON
pad.
NOTE:
will
HIGH
DEMONSTRATION MODE
To demonstrate, touch CLOCK, 0 and START/TOUCH
ON and hold for three seconds.
DEMO
ON
necessary to touch the POWER LEVEL pad.
3. If you wish to know power level, simply touch the
POWER LEVEL pad. As long as your finger is touch-
ing the POWER LEVEL pad, the power level will be
displayed.
DURING DEMO NO OVEN POWER and
DEMO
w
will appear in the display. Cooking operations and
special features can now be demonstrated with no
power in the oven. For example, touch MINUTE
PLUS, and the display will show
1.00 and count
down quickly to 0and the
END .
To cancel, touch CLOCK, the number 0 and STOP/
CLEAR.
HELP
Each setting of CompuDefrost, CompuBroil,
CompuRoast, CompuBake and Sensor Cook has a
cooking hint. If you wish to check, touch
CUSTOM HELP
whenever HELP is lighted in the Interactive Display.
MORE OR LESS TIME
ADJUSTMENT
More : Should you discover that you like any of
the COMPU DEFROST, COMPU ROAST, COMPU
BAKE, COMPU BROIL, SENSOR COOK or INSTANT
SENSOR settings slightly more done, touch the
POWER LEVEL pad once after touching your choice
of pads.
Less : Should you discover that you like any of
the COMPU DEFROST, COMPU ROAST, COMPU
BAKE, COMPU BROIL, SENSOR COOK or INSTANT
SENSOR settings slightly less done, touch the POWE R
LEVEL pad twice after touching your choice of pads.
24
• Suppose you want to time a 3 minute long distance
phone call.
•
Suppose you want to cook roast beef for 5 minutes
at 90% and then continue to cook for 30 minutes at
50%
.
1. Touch MINUTE PLUS pad within 1 minute after
cooking, closing the door, touching the STOP/
CLEAR pad or during cooking. Minute Plus cannot be
used to start the oven if any program is on display.
2. Minute Plus cannot be used with Special Features.
1. If POWER LEVEL pad is touched twice,
be displayed.
2. If 100% is selected as the final sequence, it is not

25
1
2
3
4
5
6
CUSTOM HELP
Custom Help provides 5 features which make using
your oven easy because specific instructions are
provided in the Interactive Display.
1. CHiLD LOCK
The Child Lock prevents unwanted oven operation
such as by small children.
note: Child Lock is not
applicable to Hood Fan and Hood Light buttons.
The oven can be set so that the control panel is
deactivated or locked. To set, touch CUSTOM HELP,
the number 1 and START/TOUCH ON pad. Should a
pad be touched,
will appear in the display.
To cancel, touch CUSTOM HELP, the number 1 and
STOP/CLEAR.
2. aUDiBLE SignaL ELiMinaTiOn
If you wish to have the oven operate with no audible
signal, touch CUSTOM HELP, the number 2 and
STOP/CLEAR.
To cancel and restore the audible signal, touch CUSTOM
HELP, the number 2 and START/TOUCH ON.
3. aUTO STarT
If you wish to program your oven to begin cooking
automatically at a designated time of day, follow this
procedure:
•
Suppose you want to start cooking a stew for
20 minutes on 50% at 4:30. Before setting, check
to make sure the clock is set correctly.
P r O C E D u r E
NOTE:
1. Auto Start can be used for manual cooking,
CompuBroil/Roast/Bake, if clock is set.
2. If the oven door is opened after programming Auto
Start, it is necessary to touch the START/TOUCH ON
pad for the time of day to appear in the readout so
that the oven will automatically begin programmed
cooking at the chosen Auto Start time.
O T h E r C O N v E N I E N T F E A T u r E S
LANGuAGENumbEr 4
DISPLAY
Once English
Twice Spanish
3 times French
Touch On allows you to cook at 100% power by
touching the
START/TOUCH ON continuously. Touch
On is ideal for melting cheese, bringing milk to just below
boiling etc. The maximum cooking time is 3 minutes.
• Suppose you want to melt cheese on a piece of
toast.
TOUCH ON
NOTE:
1. Note time it takes for frequently used foods and
program that time in the future.
2. Touch TOUCH ON pad within 1 minute after cooking,
opening and closing the door or touching the
STOP/
CLEAR pad.
3. TOUCH ON can only be used 3 times in a row. If
more times are needed, open and close door or touch
STOP/CLEAR.
P r O C E D u r E
1
When the cheese is melted to desired degree,
remove finger from
START/ TOUCH ON pad.
Oven stops immediately.
2
Continuously touch START/
TOUCH ON pad. The cooking
time will begin counting up.
3. Be sure to choose foods that can be left in the oven
safely until the Auto Start time. Baked potatoes are
often a good choice.
4. LangUagE SELECTiOn
The oven comes set for English language. To change,
touch CUSTOM HELP and the number 4. Continue to
touch the number 4 until your choice is selected from
the table below. Then touch START/TOUCH ON pad.
LOCK
CLOCK
3
034
0002
START
TOUCH ON
EnGLISH
ESPAnOL
fR
5. WEigHT/TEMP SELECTiOn
The oven comes set for U.S. Customary Unit-pounds.
To change, touch CUSTOM HELP and the number
5. Continue to touch the number 5 until your choice
is selected from the table below. Then, touch START/
TOUCH ON pad.
Touch the number.
Touch
CUSTOM
HELP pad.
Enter the start time.
Touch
CLOCK pad.
Enter cooking program.
Touch
START/
TOUCH ON pad.
STANDArD OF WEIGhT
AND TEmPErATurE
NumbEr 5 DISPLAY
Once Pound/Fahrenheit
Twice Kilogram/Celsius
START
TOUCH ON
LBf
KGC
CUSTOM
HELP
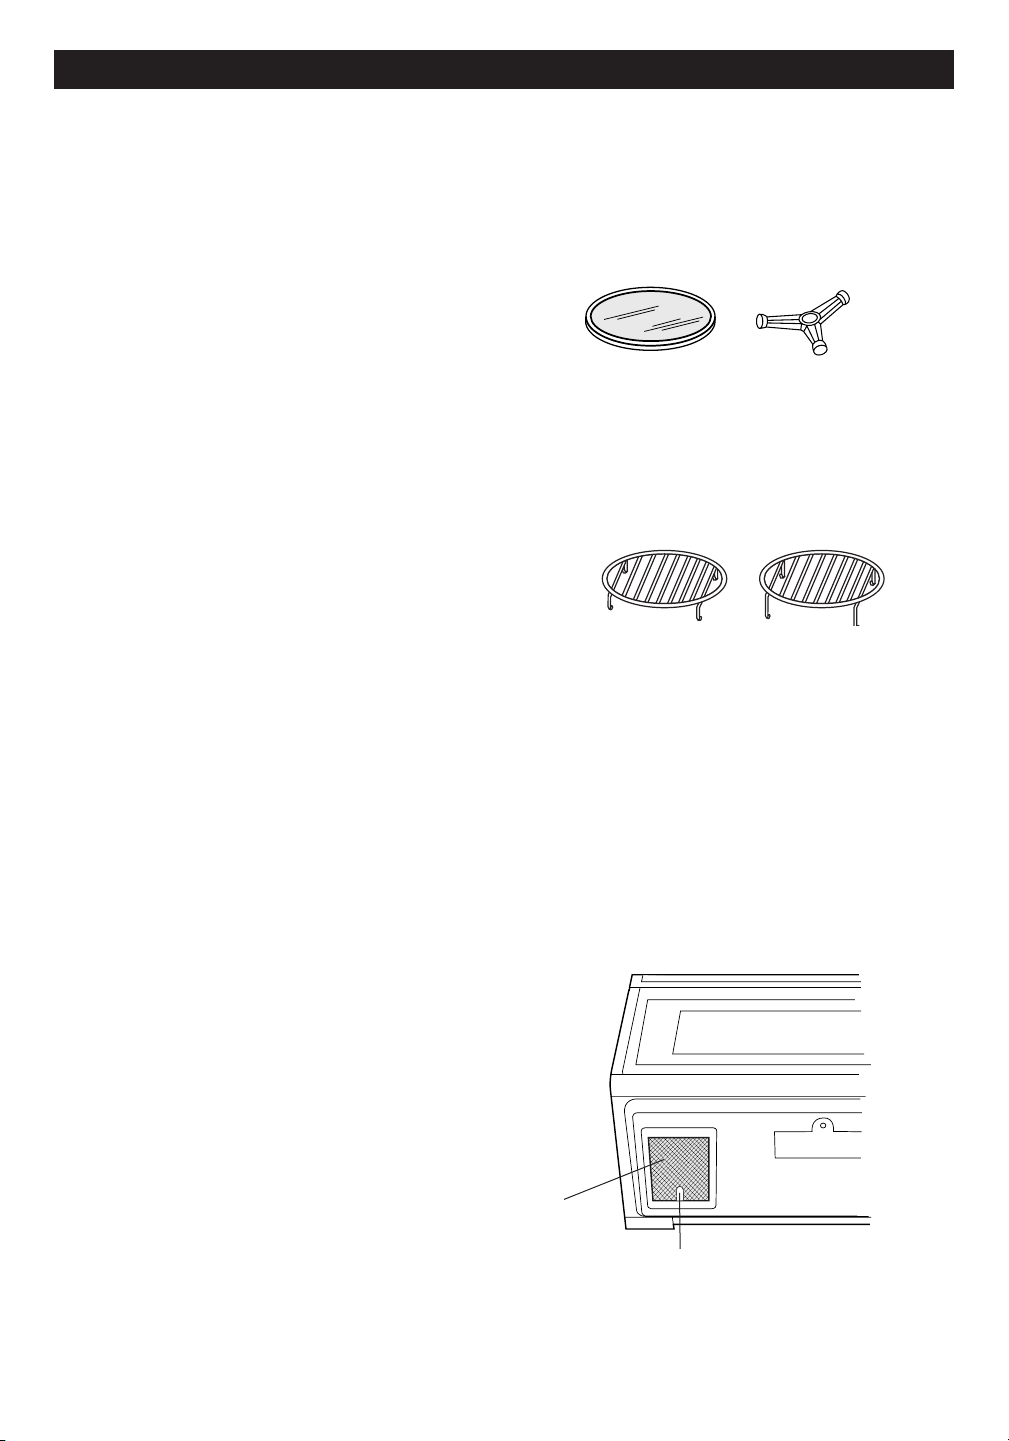
26
C L E A N I N G A N D C A r E
EXTERIOR
The outside surface is precoated metal and plastic.
Clean the outside with mild soap and water; rinse and
dry with a soft cloth. Do not use any type of household
or abrasive cleaner.
DOOR
Wipe the window on both sides with a damp cloth to
remove any spills or spatters. Metal parts will be easier
to maintain if wiped frequently with a damp cloth. Avoid
the use of harsh abrasives.
TOUCH CONTROL PANEL
Care should be taken in cleaning the touch control
panel. If the control panel becomes soiled, open the
oven door to inactivate the control panel before clean-
ing. Wipe the panel with a cloth dampened slightly with
water only. Dry with a soft cloth. Do not scrub or use
any sort of chemical cleaners. Avoid the use of excess
water. Close door and touch STOP/CLEAR.
INTERIOR- AFTER MICROWAVE
COOKING
The oven walls, ceiling and floor are stainless steel.
Cleaning after microwave cooking is easy because no
heat is generated to the interior surfaces; therefore,
there is no baking and setting of spills or spattering. To
clean the interior surfaces, wipe with a soft cloth and
warm water. DO NOT USE ABRASIVE OR HARSH
CLEANERS OR SCOURING PADS. For heavier soil,
use mild soap; rinse thoroughly with hot water.
INTERIOR- AFTER CONVECTION,
MIX OR BROIL COOKING
Spatters may occur because of moisture and grease.
Wash immediately after use with hot, soapy water.
Rinse and polish dry. Harder to remove spatters may
occur if oven is not thoroughly cleaned or if there is long
time/high temperature cooking. If so, you may wish to
purchase an oven cleaner pad with liquid cleaner within
it-not a soap filled steel pad-for use on stainless or
porcelain surfaces. Follow manufacturer’s directions
carefully and be especially cautious not to get any of the
liquid cleaner in the perforations on the wall or ceiling or
any door surfaces. Rinse thoroughly and polish dry.
WAVEGUIDE COVER
The waveguide cover is located on the ceiling in the
oven cavity. It is made from mica so requires special
care. Keep the waveguide cover clean to assure good
oven performance. Carefully wipe with a damp cloth any
food spatters from the surface of the cover immediately
after they occur. Built-up splashes may overheat and
cause smoke or possibly catch fire.
DO NOT REMOVE
THE WAVEGUIDE COVER.
ODOR REMOVAL
Occasionally, a cooking odor may remain in the oven.
To remove, combine 1 cup water, grated peel and juice
of 1 lemon and several whole cloves in a 2-cup glass
measuring cup. Boil for several minutes using 100%
power. Allow to set in oven until cool. Wipe interior
with a soft cloth.
TURNTABLE/TURNTABLE
SUPPORT
The ceramic turntable and turntable support can be
removed for easy cleaning. Wash them in mild, sudsy
water; for stubborn stains use a mild cleanser and
scouring sponge as described above. They are also
dishwasher-safe using top rack.
OVEN RACKS
The high and low baking racks can be removed for easy
cleaning and stored away from the microwave oven
when racks are not needed. After each use, wash them
in mild, sudsy water. For any stubborn stains, use a mild
kitchen cleanser and scouring sponge as described
above. They are dishwasher-proof.
GREASE FILTERS
Filters should be cleaned at least once a month. Never
operate the fan or oven without the filters in place.
1. Pull the tab toward the front of the oven, down slightly
and remove the filter. Repeat for the other filter.
2. Soak the filters in a sink or dish pan filled with hot
water and detergent. DO NOT use ammonia or
other alkali; they will react with the filter material and
darken it.
3. Agitate and scrub with a brush to remove embedded
dirt.
4. Rinse thoroughly and shake dry.
5. Replace by fitting the filter back into the opening.
Tab
Grease
filter
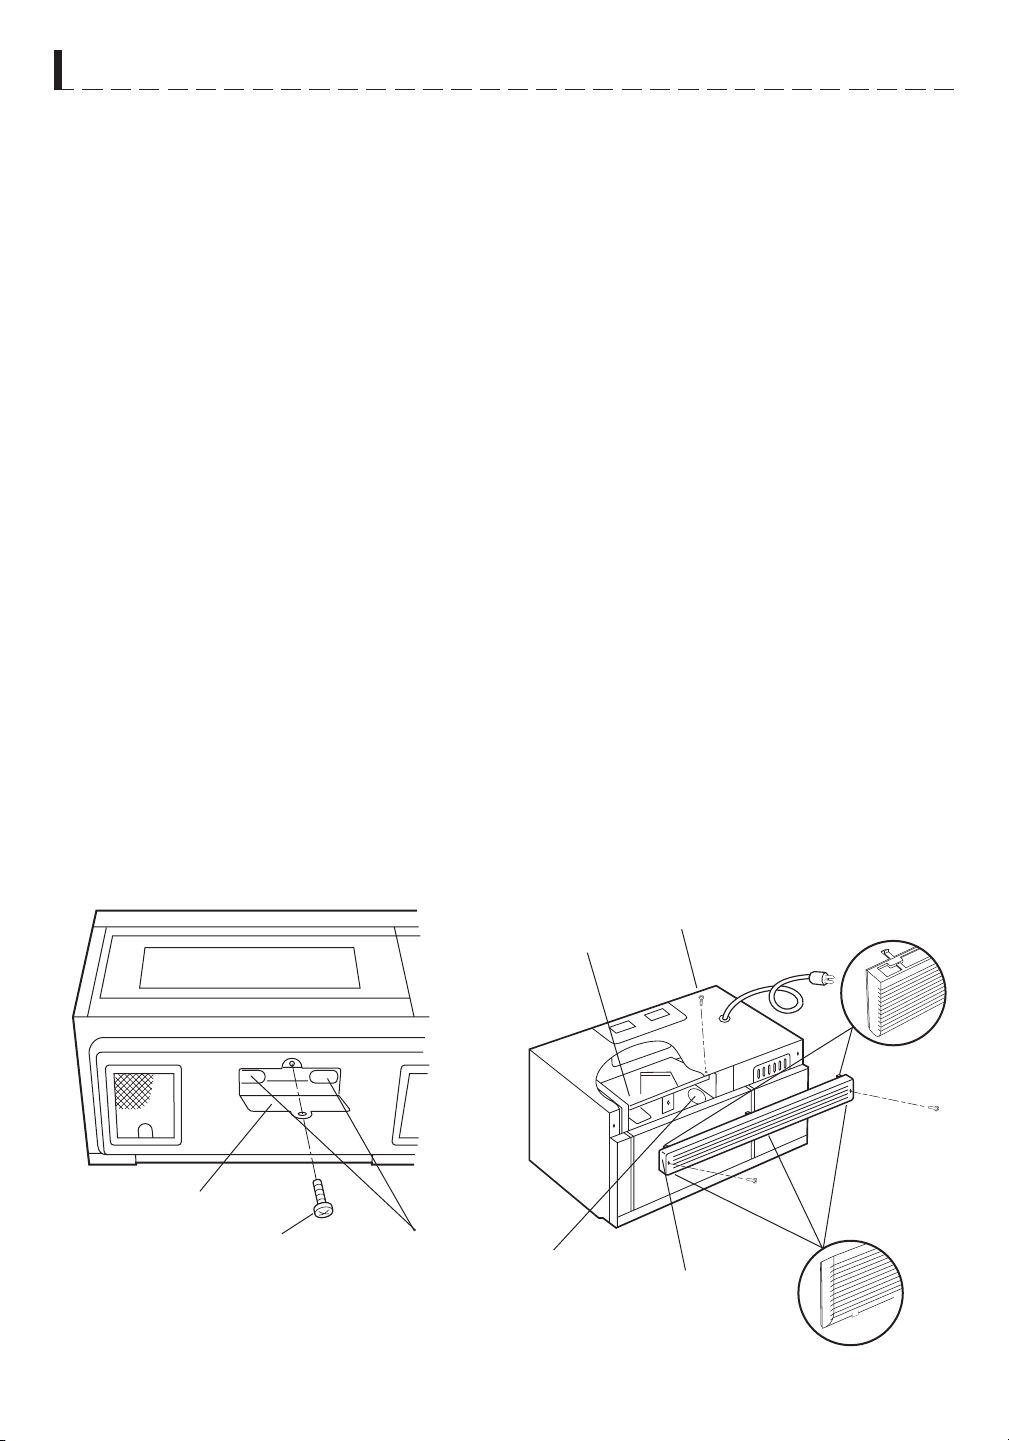
CLEA NING A N D CARE
FAN
The fan will automatically start when heat rises from
range surface units or burners and when convec
tion, high
mix, low mix or the broil settings are used. This protects
the microwave oven from excessive temperature rise.
The fan will stay on until the temperature decreases. It
cannot be turned off manually during this time.
For other uses, select either high or low speed.
PRECAUTIONS FOR PROPER USE:
CHARCOAL FILTER
Charcoal Filter, Sharp Part Number RK-220 is used for
No-vented, recirculated installation. The filter should be
changed every 6 to 12 months depending on use.
OVEN LIGHT
Remove the louver per instructions 1-4 above and
charcoal filter, if used.
LIGHT
CAUTION: Light cover may become very hot. Do not
touch glass when light is on. Do not use light for long
time use such as a night light.
Screw
Top tab
Charcoal filter
Screw
Screw
Light cover
Oven light
Louver
Screw
Light bulbs
Bottom tab
27
1. Disconnect power to the oven at the circuit breaker
panel or by unplugging.
2. Remove 3 screws that secure louver.
3. Remove louver by inserting flat edge screwdriver
over each tab depressing the tab down and moving
louver away from unit.
4. Pull the louver away from the oven.
5. Slide Charcoal Filter into position on support tabs.
6. Push louver back into place and gently snap tabs into
place by hand (engaging both the bottom and top
tabs) and replace the 3 screws to secure louver.
1. DO NOT leave range unattended while using high
temperatures. Automatic fan may start and provide
excessive air to the surface units. This may cause
spattering or boilover.
2. Avoid burning food.
3. Keep grease filters clean.
1. To replace light bulbs, first disconnect power to the
oven at the circuit breaker panel or by unplugging.
2. To release cover remove the screw on the light cover.
(See illustration.)
3. Replace bulbs only with equivalent watt bulbs
available from a Sharp Authorized Servicer or parts
distributor. Bulbs are also available at most hardware
stores or lighting centers. DO NOT USE A BULB
LARGER THAN 30 WATTS.
4. Close light cover and secure with screw removed in
step 2.
5. Slide the light cover forward and lift up.
6. Remove old light bulb and replace only with
an equivalent watt bulb available from a Sharp
Authorized Servicer or parts distributor. Bulbs are
also available at most hardware stores or lighting
centers. DO NOT USE A BULB LARGER THAN 30
WATTS.
7. Replace the oven light cover and charcoal filter,
if used; push louver back in place (engaging both
the bottom and top tabs) and replace the louver
mounting screws.

28
S E r v I C E C A L L C h E C K
Please check the following before calling for service:
1. Place one cup of water in a glass measuring cup in the oven and close the door securely.
Operate the oven for two minutes at HIGH 100%.
YES _____ NO _____
YES _____ NO _____
YES _____ NO _____
YES _____ NO _____
YES _____ NO _____
CONVEC
450˚F
5 0 0
START
TOUCH ON
YES _____ NO _____
YES _____ NO _____B. After the oven shuts off, is the inside of the oven hot?
If “NO” is the answer to any of the above questions, please check electrical outlet, fuse and/or circuit breaker.
If either or both are not functioning properly, CONTACT YOUR NEAREST SHARP AUTHORIZED SERVICER.
A microwave oven should never be serviced by a “do-it-yourself” repair person.
NOTE:
If time appearing in the display is counting down very rapidly, check Demonstration Mode on page 24
and cancel.
A. Does the light come on in the oven?
B. Does the cooling fan work?
(Put your hand over the top ventilation openings.)
C. Does the turntable rotate when the TURNTABLE ON/OFF
pad is touched and TURNTABLE ON is in the display?
(It is normal for the turntable to turn in either direction when
TURNTABLE ON is in the display.)
D. Is the water in the oven warm?
E. Does "H" appear on the display when fan is manually turned on?
2. Remove the water from the oven and program:
A. Do CONV and COOK light?

AC Line Voltage:
UL Rating
CSA Rating
AC Power Required:
UL Rating
CSA Rating
Output Power Microwave:*
850 W
Convection Heater:
1400 W
Frequency:
2450 MHz
Outside Dimensions:
29 15/16" (W) x 16 11/32" (H) x 15 9/32" (D)
Cavity Dimensions:
17 1/8" (W) x 81/16" (H) x 13 13/16" (D)
Oven Capacity:**
1.1 cu. ft.
Cooking Uniformity:
Turntable, diameter 13" & Stirrer Fan
Weight:
Approx. 71 lbs
In compliance with standards set by:
FCC – Federal Communications Commission Authorized.
DHHS – Complies with Department of Health and Human Services (DHHS) rule, CFR, Title 21, Chapter I,
Subchapter J.
– This symbol on the nameplate means the product is listed by Underwriters Laboratories, Inc.
S P E CIFIC A T IONS
★
The International Electrotechnical Commission’s standardized method for measuring output wattage. This test
method is widely recognized.
Internal capacity is calculated by measuring maximum width, depth and height. Actual capacity for holding
food is less.
★★
29
R-1874 / R-1875
- Single phase 120V, 60Hz, AC only
- Single phase 116V, 60Hz, AC only
- 1600 W 13.2 amps.
- 1500 W 13.0 amps.
A U T O - T O U C H
GUID E
For more complete information and safety precautions, refer to the inside instructions.
SET CLOCK
If
WELCOME PRESS
MANUAL OPERATION
High Power Cooking
CLEAR AND PRESS
1 3 0
CLOCK
is in the display, first touch STOP/CLEAR.
START
CLOCK
TOUCH ON
1 2 3 0
POWER
2. After Step 1 above, touch POWER
LEVEL pad.
Select power level (Ex: 5 for 50%)
and touch START/TOUCH ON pad.
LEVEL
5
CLOCK
3.
START
TOUCH ON
INSTANT SENSOR POPCORN
Touch POPCORN pad. Touch once for regular
size and twice for snack size. See page 15.
POPCORN
MINUTE PLUS
Touch MINUTE PLUS for one munute at
100% power or to add additional minutes.
MINUTE
PLUS
INSTANT SENSOR REHEAT
Touch SENSOR REHEAT once. The oven will
start automatically. SENSOR REHEAT can be
programmed with turntable on or off.
See Instant Sensor Chart on page 15.
TOUCH ON
Continuously touch START/TOUCH ON
for 100% power cooking. Remove finger
and oven will stop instantly.
START
SENSOR
REHEAT
TOUCH ON
SENSOR COOK
SENSOR
COMPU DEFROST
COMPU
COOK
DEFROST
1
2 0
START
(Ex: and 0.)
3. Touch START/TOUCH ON pad.
START
TOUCH ON
TOUCH ON
During defrosting, oven will stop.
Check food. See CompuDefrost Chart on page 13.
TO PREHEAT
AND COOK WITH
CONVECTION
SELECT
PREHEAT
TEMP
COMPU ROAST
or CompuBake or CompuBroil
COMPU
350f
PRESS
ROAST
START
OR
1
(Ex: Touch 1 for chicken.)
PRESS
COnvEC
2 5
SELECT
TEMP
START
325f
See CompuRoast, Bake and Broil Charts
on pages 21, 22 and 23.
TOUCH ON
temperature.
(Ex: 5 for 325
o
F.)
EnTER
COOKInG
TO COOK WITH AUTOMATIC MIX
TIME
Touch LOW MIX/BAKE pad,
enter desired cooking time
and touch START/TOUCH ON
pad. Follow information on the
display.
325f
EnTER
20.00
PRESS
COOKInG
TIME
START
PRESS
START
PREHEAT
When the oven reaches the programmed temp., it will
automatically hold at the preheat temperature for 30 minutes
and then the display will change to the time of day. Whenever
STOP/CLEAR is touched during this 30 minute period, PRESS
CONVEC or PRESS MIX will be displayed and cooking mode
and time can be entered.
For more information on convection cooking, see pages 19
and 20.
Your oven can be programmed to combine preheating
and automatic mix cooking operations. See page 19 for
information.
SHARP ELECTRONICS CORPORATION
100 Paragon Drive, Suite #100 • Montvale, NJ 07645
Carousel
®
is a registered trademark of Sharp Corporation.
30
1. Enter cooking time by touching numbers
pads. (Ex: 1 min. 30 sec.)
2. Touch START/TOUCH ON pad.
Variable Power Cooking
1. Touch CLOCK pad.
2. Enter correct time of day by touching
numbers in sequence. (Ex: 12:30)
3. Touch CLOCK pad again.
1. Touch SENSOR COOK pad.
2. Select desired SENSOR COOK
setting. (Ex: 1)
3. Touch START/TOUCH ON pad.
See Sensor Cook Chart, page 16.
1. Touch COMPU DEFROST pad
(Ex: three times for a steak).
2. Enter weight by touching number pad.
1. Touch PREHEAT pad.
2. Touch number pad for desired
temperature.
(Ex: touch pad 6 for 350
o
F.)
3. Touch CONVEC pad.
4. Touch number pad for desired
1. Touch desired COMPU pad.
2. Select desired Compu setting.
3. Touch number pad for weight or quantity.
4. Touch START/TOUCH ON pad.
5. Enter cooking time by touching
number pads.
(Ex: .)
6. Touch START/TOUCH ON pad.

MODÈLES
R-1874 / R-1875
F O U R M I C R O - O N D E S
M A N U E L D ’ U T I L I S A T I O N
À C O N V E C T I O N E N
S U R P L O M B D E C U I S I N I È R E

A I D E À L A C L I E N T È L E
(a) Ne pas essayer de faire fonctionner ce four lorsque que la porte est ouverte, car le fonctionnement
avec la porte ouverte pourrait entraîner une exposition dangereuse aux micro-ondes. Il est important
que le système de fermeture de sûreté ne soit pas désamorcé ou modifié.
(b) Ne placer aucun objet entre le cadre et la porte du four et ne pas laisser de saleté ou de traces de
produits de nettoyage s’accumuler sur les surfaces d’étanchéité.
(c) Ne pas utiliser le four s’il est endommagé. Il est particulièrement important que la porte ferme
correctement et que les éléments suivants ne présentent pas de défectuosités : (1) porte (gauchie),
(2) charnières et verrous (brisés ou desserrés), (3) joints et surfaces d’étanchéité de la porte.
(d) Le four ne doit être réglé ou réparé que par du personnel d’entretien qualifié.
Pour obtenir le nom et l’adresse du réparateur ou du centre de service autorisé Sharp le plus proche, veuillez
appeler au (905) 568-7140 ou contacter :
SHARP ELECTRONICS OF CANADA LTD
335 Britannia Road East
Mississauga, Ontario
L4Z 1W9
Veuillez indiquer les renseignements suivants quand vous nous écrivez ou que vous nous appelez : numéro de
modèle, numéro de série, date d’achat, votre adresse postale complète (y compris le code postal), le numéro de
téléphone où l’on peut vous joindre pendant la journée (avec indicatif régional) et la description du problème.
AccèS
À
l’INTERNET :
www.sharp.ca
Pour vous permettre d’avoir sous la main tous les renseignements voulus en cas de perte ou de vol de ce four
à micro-ondes, nous vous conseillons de noter le numéro de modèle et le numéro de série de l’unité. Nous vous
suggérons aussi de prendre note de tous les renseignements indiqués pour référence future.
NUMÉRO DE MODÈLE _____________________ NUMÉRO DE SÉRIE ____________
DATE D’ACHAT ________________________
DÉTAILLANT _________________________ N° DE TÉLÉPHONE ____________
RÉPARATEUR _________________________ N° DE TÉLÉPHONE ____________
PRÉCAUTIONS POUR ÉVITER
LE RISQUE D’UNE EXPOSITION
AUX MICRO-ONDES

T ABL E DES M A T IÈRE S
Précautions pour éviter .... Intérieur de la couverture
Manuelle Convection/Combinaison
le risque d’une exposition
excessive à l’énergie micro-onde
Automatique ................................................ 19-23
Cuisson par convection ............................. 19
Assistance à la clientèle..... Intérieur de la couverture
Cuire par convection ................................. 19
Table des matières
.......................................... 1
Préchauffage et cuisson par convection ... 19
Garantie utilisateur limitée ............................. 2
Grillade ...................................................... 19
Carte d’information produit ............................ 2
Cuisson lente............................................. 20
Précautions importantes ................................ 3
Cuisson automatique combinée ................ 20
Instructions de déballage ............................... 4
Cuisson combinée .....................................
Préchauffage et cuisson automatique
20
Accessoires .....................................................
Instructions de mise à la terre .......................
combinée 20
Renseignements concernant : .......................
5-7
Opération par Convection Automatique... 21-23
À propos du four .............................................
Grillade CompuBroil .................................. 21
À propos des aliments ....................................
Tableau CompuBroil.................................. 21
À propos de la cuisson aux micro-ondes .......
Rôtissage CompuRoast ............................ 22
À propos de la sécurité ..................................
Tableau CompuRoast ............................... 22
À propos des enfants et du four á
Four CompuBake ...................................... 23
micro-ondes.................................................
Tableau CompuBake................................. 23
Ustensiles et couvercles. ................................
Autres Particularités Commodes ............. 24-25
Nomenclature des pièces ............................... 8
Cuisson par séquences multiples .............. 24
Panneau tactile de contrôle à touches .......... 9-10
Ajustement de plus ou moins de temps .... 24
Avant la mise en service ................................ 11
Minuterie de cuisine .................................. 24
Réglage de l’horloge ...................................... 11
Minute de Plus........................................... 24
Arrêter/Annuler .............................................. 11
Mode de démonstration............................. 24
Opération manuelle ......................................... 11-12
Aide ........................................................... 24
Marche/Arrêt du plateau tournant................... 11
Aide personnalisée .................................... 25
Lampe/Ventilateur de hotte ............................ 12
1. Verrouillage de Sécurité .................... 25
Cuisson-temps micro-ondes ........................... 12
2. Supression du signal sonore ............. 25
Tenue au chaud ............................................ 12
3. Démarrage automatique .................... 25
Fonctions spéciales ....................................... 13-17
4. Sélection de langue ........................... 25
Décongélation CompuDefrost ....................... 13
5. Sélection de poids/température ......... 25
Tableau CompuDefrost ................................. 13
Cuisson-touche ......................................... 25
Décongélation manuelle ................................. 14
Nettoyage et entretien ................................ 26-27
Cuisson par capteur ...................................... 14
Appel de Service ......................................... 28
Capteurs instantanés ..................................... 15
Fiche Technique ......................................... 29
Capteur instantanée popcorn ........................ 15
Guide des Auto-Touch ............................... 30
Tableau popcorn ........................................... 15
Tableau de capteur instantané ....................... 15
Cuisson par capteur ..................................... 15
Tableau de cuisson par capteur .................... 16
Recettes de cuisson par capteur ................... 17-18
SYSTÈME DE CUISINE INTERACTIVE
Le Système de cuisine interactive affiche des instructions pas-à-pas pour chaque étape d’utilisation du four,
depuis le réglage de la minuterie jusqu’à la programmation de chaque fonction. Le système comprend égale-
ment une aide personnalisée donnant les modes d’emploi du verrouillage de sécurité, suppression de signal
sonore, démarrage automatique et aide. Le système est disponible en anglais, espagnol ou français, et propose
un choix entre les systèmes de poids et mesures U.S. Customary Unit-pound ou décimal/métrique. Appuyer
sur CUSTOM HELP et suivre les directions affichées, ou consulter la page 25.
1
4
4
5
5
6
6
6
7

GARANTIE LIMITÉE
Produits électroniques de grande consommation
Merci d’avoir choisi la marque Sharp!
Sharp Électronique du Canada Ltée (« Sharp ») garantit à l'acheteur initial de ce Produit de marque Sharp (le « Produit ») que, s’il est emballé dans son
contenant original et s’il est vendu ou distribué au Canada par Sharp ou par un détaillant agréé Sharp, et s’il n’a pas été vendu « tel quel » ou s’il ne s’agissait
pas d’une « vente ferme », ledit Produit est exempt de défaut de fabrication et de vice de matériau pour la période de garantie stipulée et s'engage auprès de
l’acheteur initial, durant ladite période de garantie applicable, à réparer la défectuosité ou à remplacer le Produit défectueux.
Conditions : La présente garantie limitée ne s’applique pas :
Pour obtenir le service après-vente : La réparation sous garantie se fera à la condition que le Produit Sharp soit livré accompagné de la preuve d’achat
(sur laquelle est indiquée la date d’achat) et d’une copie de la présente garantie limitée, à un centre agréé de service après-vente Sharp ou chez un
détaillant agréé de service après-vente Sharp. Pour les fours à micro-ondes à hotte intégrée, les tiroirs à micro-ondes Microwave Drawer, ou les fours à
vapeur, la réparation sur place sous garantie sera effe
ctuée aux endroits accessibles par véhicule routier et situés à moins de 50 km d’un centre agréé de
service Sharp. Le technicien peut, au besoin, ramener l’appareil à son atelier pour en faire la réparation. Aucun autre agent (y compris les détaillants et les
centres de service après-vente Sharp) n'est autorisé à prolonger la durée de la garantie, à proposer des garanties additionnelles ou à transférer cette
garantie au nom de Sharp.
L’acheteur est redevable de tous les frais de démontage, de réinstallation, de transport et d’assuran
ce de l’appareil, à l’exception
des fours à micro-ondes à hotte intégrée, du tiroir à micro-ondes Microwave Drawer, ou du four à vapeur, auquel cas Sharp est responsable du démontage
et de la réinstallation.
Les garanties expresses de la présente garantie limitée constituent, sauf pour les consommateurs-acheteurs domiciliés au Québec, et à l’exception des cas
où la loi en vigueur l’interdit, la garantie entière du Produit. Sharp décline toute autre garantie et condition, explicite ou implicite, découlant de la loi, d’un
règlement, de la conduite habituelle ou de l’usage du commerce, y compris, mais sans en être limité, les garanties ou les conditions implicites de qualité
marchande et d’adaptabilité à une utilisation ou à une fin particulière, et/ou de non-violation. Limitations (non applicables aux consommateurs-acheteurs
domiciliés au Québec, dans la mesure où la loi en vigueur au Québec l’interdit) : a) Sharp ne se tiendra en aucun cas responsable des dommages accessoires,
spéciaux, consécutifs, économiques, exemplaires ou indirects de quelque type ou nature que ce soit (y compris la perte de profits ou les dommages par suite
de la perte de temps, d’utilisation ou de données) relatifs à l’utilisation ou au rendement d’un Produit ou à la défectuosité d’un Produit, même si Sharp est
informé ou a été avisé de la possibilité de tels dommages; b) les recours mentionnés dans la présente garantie limitée constituent l’exécution intégrale de
toutes les obligations et responsabilités de Sharp envers l’acheteur à l’égard du Produit et constitueront la satisfaction entière de toutes les réclamations,
qu’elles relèvent d’un contrat, de négligence, de responsabilité stricte ou autre. Dans certaines provinces, il est interdit d’exclure ou de limiter l’application de
certains dommages ou de certaines limites sur la durée ou l’annulation de certaines garanties ou conditions implicite. Par conséquent, dans ces provinces, les
exclusions et les limites indiquées aux présentes peuvent ne pas s’appliquer. La présente garantie limitée est, sauf pour les consommateurs-acheteurs
domiciliés au Québec, régie par les lois de la province canadienne dans laquelle l’acheteur a acquis le Produit. Pour les consommateurs-acheteurs domiciliés
au Québec, la présente garantie limitée est régie par les lois du Québec.
PÉRIODES DE GARANTIE (calculées à partir de la date de l’achat original) : Pièces et main-d’œuvre (exceptions relevées)
Four à micro-ondes
Four à vapeur
Petits électroménagers de cuisine
Purificateur d’air
1 an (magnétron – 4 ans supplémentaires)
1 an
1 an
1 an
Pour savoir les coordonnées du détaillant agréé de service après-vente ou du centre agréé de service après-vente Sharp près de chez vous, ou pour obtenir
davantage de renseignements sur la présente garantie limitée, sur les offres de garantie prolongée de Sharp ou sur les ventes de produits ou d’accessoires
Sharp, veuillez communiquer avec Sharp :
CETTE GARANTIE LIMITÉE EST VALABLE UNIQUEMENT AU CANADA.
Révision : 2016-03-22
2
(a) Aux dommages occasionnés ou aux réparations requises sur les appareils qui ont fait l’objet d’un emploi abusif, de négligence, d’un accident, d’une
installation inadéquate ou d’une utilisation non appropriée, tel qu’il est mentionné dans le manuel du propriétaire ou dans toute autre documentation
applicable sur le Produit;
(b) Aux dommages occasionnés ou aux réparations requises sur les produits Sharp trafiqués, modifiés, réglés ou réparés par une entité autre que Sharp,
un centre agréé de service après-vente Sharp ou un détaillant agréé de service après-vente Sharp;
(c) Aux dommages occasionnés ou aux réparations requises à la suite de l’utilisation du Produit avec des articles non désignés ou approuvés par Sharp, y
compris, mais sans en être limité aux des agents de nettoyage chimiques;
(d) Au remplacement des accessoires devenu nécessaire dans le contexte d’une utilisation normale du Produit, y compris, mais sans en être limité aux
télécommandes, adaptateurs c.a., piles, sonde de température, plateaux, filtres, courroies, rubans, câbles ou papier;
(e) Aux défauts cosmétiques à la surface ou au boîtier extérieur du Produit, et qui sont attribuables à une dégradation volontaire ou à une détérioration une
sure résultant d’un usage normal;
(f) Aux défectuosités occasionnées ou aux réparations requises à la suite de dommages occasionnés par des conditions extérieures et relatives à
l'environnement, y compris, mais sans en être limité à surtension de la ligne électrique ou de transmission, liquide répandu ou force majeure;
(g) Si le numéro de série ou de modèle indiqué sur le Produit a été enlevé, dégradé, modifié, altéré ou varié;
(h) La présente garantie limitée ne s’applique pas si le Produit a été utilisé ou est utilisé dans un environnement commercial ou aux fins commerciales,
puisque la présente garantie s’applique uniquement aux produits non commerciaux et utilisés dans un contexte ménager ou personnel, par des
consommateurs dans leur résidence;
(i) Aux frais d’installation, de livraison, de configuration et/ou de programmation.
(j) Au démontage et à la réinstallation des fours à micro-ondes à hotte intégrée, du tiroir à micro-ondes Microwave Drawer, ou du four à vapeur si l’appareil
est installé dans un endroit inaccessible, si des armoires, des poignées ou d’autres pièces d’appoint doivent être enlevées pour l’accès au Produit, ou si
l’appareil n’est pas installé conformément aux directives d’installation du Produit.
Par écrit : Sharp Électronique du Canada Ltée, 335, rue Britannia Est, Mississauga (Ontario) L4Z 1W9
Par téléphone : 905 568-7140
Sur Internet : www.sharp.ca

3
I M P O R TA N T E S C O N S I G N E S D E S É C U R I T É
Certaines précautions de sécurité devraient toujours être prises lorsqu’on se sert d’appareils électriques :
AVERTISSEMENT — Pour réduire les risques de brûlures, de chocs électriques, de feu, de blessures
ou d’exposition aux micro-ondes :
1. LIRE TOUTES LES INSTRUCTIONS AVANT DE SE
SERVIR DE L’APPAREIL.
2. Lire et suivre les PRÉCAUTIONS POUR ÉVITER LE
RISQUE D’UNE EXPOSITION AUX MICRO-ONDES
à l’intérieur de la couverture avant.
3. Cet appareil doit être mis à la terre. Brancher
seulement à une prise à trois broches. Se reporter
aux «INSTRUCTIONS DE MISE À LA TERRE»
à la
page 4 et INSTRUCTIONS d’INSTALLATION.
4. Installer ou placer l’appareil conformément aux
instructions d’installation fournies.
5. Certains produits comme des oeufs entiers et des
contenants scellés – par exemple des bocaux en verre
fermés – peuvent s’exploser et ne devraient pas être
utilisés dans ce four.
6. N’utiliser cet appareil qu’aux fins décrites dans ce
manuel. Ne pas utiliser de produits corrosifs dans
le four à micro-ondes. Ce four a été conçu pour la
cuisson et le réchauffage des aliments, non pour un
usage industriel ou des travaux en laboratoire.
7. Comme pour tout appareil, exercer une surveillance
étroite quand des enfants l’utilisent.
8. Ne pas faire fonctionner l’appareil si le cordon ou la
fiche sont endommagés, si l’appareil ne fonctionne
pas bien ou s’il a été endommagé ou est tombé.
9. Cet appareil ne doit être réparé que par du personnel
de service autorisé. Communiquer avec le service
de réparations autorisé Sharp le plus proche pour un
examen, une réparation ou un réglage.
10. Ne couvrir ou bloquer aucune ouverture de
l’appareil.
11. Ne pas laisser ni utiliser cet appareil à l’extérieur. Ne
pas utiliser ce produit auprès de l’eau – comme par
exemple près d’un évier de cuisine, dans un sous-sol
humide, près d’une piscine ou dans d’autres endroits
semblables.
12. Ne pas immerger le cordon ou la fiche dans l’eau.
13. Garder le cordon loin des surfaces chauffées.
14. Ne pas laisser pendre le cordon de la table ou du
comptoir.
15. Voir les instructions pour le nettoyage de la surface
de la porte à la page 26.
16. Pour réduire les risques de feu à l’intérieur du four :
a. Ne trop cuisez pas la nourriture. Occupez-vous
soigneusement l’appareil quand le papier, le
plastique ou d’autres matériaux combustibles
sont placés à l’intérieur du four pour faciliter la
cuisine.
b. Retirer les attaches de métal des sacs de papier ou
de plastique avant de mettre les sacs au four.
c. Si les matériaux à l’intérieur du four prennentc. Si les matériaux à l’intérieur du four prennent
feu, garder la porte du four fermée, arrêter
le four et débrancher la fiche ou couper
l’électricité au panneau d’entrée.
d. Ne pas utiliser la cavité comme espace ded. Ne pas utiliser la cavité comme espace de
rangement. Ne laisser ni papier, ni ustensiles, ni
aliments dans la cavité lorsque l’appareil n’est pas
utilisé.
17. Des liquides tels que l’eau, le café ou le thé peuvent
chauffer au-delà du point d’ébullition sans qu’aucun
bouillonnement n’apparaisse. Ainsi, quand le contenant
est retiré du four, il peut ne pas y avoir d’ébullition ou
de bouillonnement apparents. IL PEUT EN RÉSULTER
UN DÉBORDEMENT DES LIQUIDES TRÈS CHAUDS
LORSQU’UNE CUILLER OU UN AUTRE USTENSILE
EST INSÉRÉ DANS LE LIQUIDE.
Pour réduire le risque de blessures personnelles:
a. Ne pas trop chauffer le liquide.
b. Remuer le liquide et avant de le chauffer et à mi-
cuisson.
c. Ne pas utiliser de contenants à bords droits et à
goulot mince. Utiliser un bocal à large goulot.
d. Après le chauffage, laisser reposer le contenant
dans le four à micro-ondes pour au moins 20
secondes avant de le retirer.
e. Lors d’insérer une cuiller ou un autre ustensile
dans le contenant, le faire très soigneusement.
18. Nettoyes les ouvertures de ventilation et les filtres
fréquemment -- il ne faut paslaisser de la graisse
s’accumuler sur les ouvertures de ventilation, la hotte
ou les filtres à graisse.
19. Faites très attention quand vous nettoyez l’évent à
lame et les filtres à graisse. Les agents de nettoyage
corrosifs, tels que les nettoyants pour fours à la soude,
peuvent endommager l’évent à lame et les filtres à
graisse.
20. Si vous flambez des plats sous la hotte, mettez le
ventilateur en marche.
21. Cet appareil convient pour un emploi audessus
d’équipement de cuisson au gaz ou à l’électricité d’une
largeur de 90 cm ou moins.
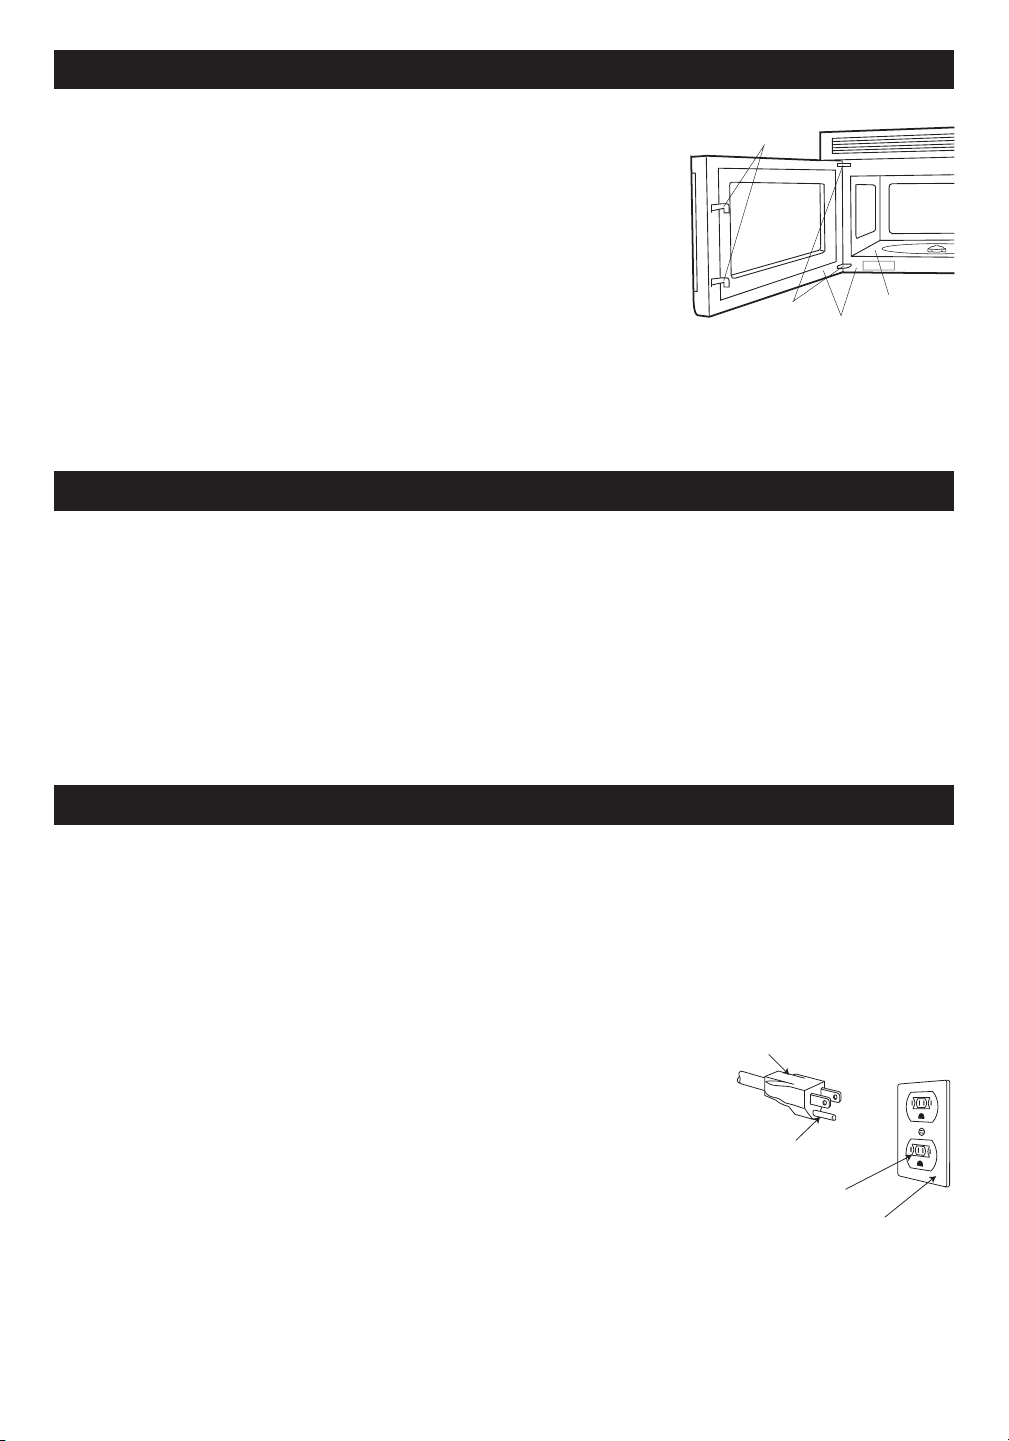
4
I N S T R U C T I O N S D E D É B A L L A G E
I N S T R U C T I O N S D E M I S E À L A T E R R E
A C C E S S O I R E S
Déballez et inspectez votre four
Enlevez soigneusement le four du carton. GARDEZ LE CARTON CAR IL PEUT
FACILITER L’INSTALLATION.
Enlevez :
1. tous matériaux d’emballage de l’intérieur du four, mais NE PAS RETIRER
LE COUVERCLE DU GUIDE D’ONDES situé au plafond de l’intérieur du
four. Vérifiez la présence des Instructions d’installation, du gabarit mural,
du gabarit supérieur. Prière de lire les pièces jointes et de CONSERVER le
Manuel de l’opérateur.
2.
l’autocollant avec caractéristiques collé à l’intérieur de la porte s’il y en a un.
Vérifiez que le four n’a aucun dommage, comme une porte mal alignée ou pliée,
un joint ou des surfaces d’étanchéité de porte endommagés, des charnières ou des mécanismes de verrouillage
cassés ou lâches et des coups à l’intérieur de la cavité ou sur la porte. En cas de dommages quelconques, ne
faites pas fonctionner le four et contactez votre détaillant ou un réparateur autorisé SHARP.
Voir les instructions d’installation pour plus de détails.
Deux accessoires sont disponibles pour ce four.
1. Filtre à charbon (RK-220). Le filtre emballé avec le four est requis lorsque l’échappement de la hotte est recirculé.
Voir Filtre à charbon à la page 27. Pour l’achat d’un Filtre à charbon de rechange, consultez votre négociant ou
appelez le 1-800-BE-SHARP (237-4277). Ayez une carte de crédit sous la main.
2. Ensemble de panneaux de calage. À utiliser lorsque le four est installé dans une ouverture de 36 po ou 42 po
de largeur. Les panneaux de calage métalliques sont fournis en paires de 3 po de largeur.
Pour les achats, contactez :
Cet appareil doit être mis à la terre. Ce four est équipé d’un cordon d’alimentation avec fil de terre, et d’une fiche
de mise à la terre. Il faut le brancher dans une prise murale qui a été installée correctement et mise à la terre selon
le Code national de lè lectricité et les codes et décrets locaux. En cas de court-circuit électrique, la mise à la terre
réduit les risques de secousse électrique en permettant au courant de s’échapper par le fil de terre.
ATTENTION — Un usage impropre de la fiche de terre peut provoquer une secousse électrique.
Installation électrique
Vérifiez les instructions d’installation pour l’emplacement correct de l’alimentation électrique.
Les demandes en électricité sont de 120 volts à 60 Hz, courant alternatif seulement,
15 A ou plus sous alimentation protégée. Il est recommandé d’alimenter le four par
un circuit séparé.
Le four est équipé d’une fiche de terre à trois broches. Il faut la brancher dans une
prise murale correctement installée et mise à la terre. IL NE FAUT EN AUCUN CAS
ENLEVER LA BROCHE DE MISE À LA TERRE DE LA FICHE.
Remarques :
1. Si vous avez des questions à propos de l’installation électrique ou de la mise à
la terre, consultez un électricien de métier ou un réparateur qualifié.
2. Ni Sharp ni le détaillant ne peuvent accepter aucune responsabilité pour des
dommages au four,ou des blessures personnelles résultant du non-respect des
procédures correctes de connexion électrique.
Brouillage radio ou T.V.
Si votre four à micro-ondes provoque un brouillage radio ou T.V., vérifiez que le four à micro-ondes est bien sur un
circuit électrique séparé, éloignez la radio ou la télévision le plus possible du four et vérifiez la position et le signal
de l’antenne de réception.
Fiche à 3 broches
Broche de mise
à la terre
Prise de courant
pour 3 broches
Broîte et prise mises à la terre
Verrouillages de
sécurité de porte
Charnières
Joints de porte et surfaces
d’étanchéité
Cavité du Four
Sharp Electronics Corporation
Customer Assistance Center
Sharp Plaza Blvd.
Memphis, Tennessee 38193

5
R E N S E I G N E M E N T S U T I L E S
Ce mode d’emploi est précieux; le lire attentivement et
le conserver pour s’y reporter, au besoin.
Un bon livre de cuisine aux micro-ondes est très utile.
Il présente les principes, les techniques, des conseils
et des recettes de cuisine aux micro-ondes.
Ne JAMAIS se servir du four sans le plateau tournant
et le support. Ne pas installer le plateau tournant à
l’envers pour faire entrer dans le four un plat de grandes
dimensions. Le plateau tourne dans les deux sens.
S’assurer à ce qu’il y ait TOUJOURS des aliments dans
le four lorsqu’il est allumé, de sorte qu’ils absorbent
l’énergie produite.
Quand on utilise le four à des niveaux de puissance
inférieurs à 100 %, on peut entendre la mise en marche
et l’arrêt du magnétron. Il est normal que l’extérieur du
four soit chaud au toucher pendant la cuisson ou le
réchauffement.
La condensation est un phénomène normal pendant la
cuisson au four à micro-ondes. L’humidité ambiante et
la teneur en eau des aliments déterminent le degré de
condensation à l’intérieur du four.
En règle générale, les aliments couverts produisent
moins de condensation que les aliments cuits à
découvert. Veiller à ce que les évents à l ’arrière du
four soient toujours dégagés.
Ce four est conçu seulement pour la préparation des
aliments. Il ne doit pas être utilisé pour sécher des
vêtements ou des journaux.
La puissance de ce four est de 850 watts calculée par
la méthode d’essai CEI. Vérifier la cuisson des aliments
une minute ou deux avant la fin de la période minimum
de cuisson indiquée sur les recettes et les emballages
et, s’il y a lieu, augmenter le temps de cuisson.
Œufs, saucisses
noix, graines,
fruits et légumes
PRéPARATIoN dE dIVERS AlIMENTS
• Percer les jaunes pour éviter qu’ils n’éclatent
pendant la cuisson.
• Piquer la pelure des pommes de terre,
des pommes, des courges ainsi que les
saucisses afin de permettre à la vapeur de
s’échapper.
• Utiliser seulement du maïs soufflé pour
micro-ondes.
• Attendre que seuls quelques grains isolés
éclatent toutes les 1 ou 2 secondes, ou
appuyer sur la appuyez sur POPCORN.
• Transférer la nourriture dans de petits
plats et faire réchauffer doucement, en
remuant souvent. Vérifier la température
des aliments avant de servir.
• Mettre la tétine sur le biberon après l’avoir
réchauffé et bien brassé celui-ci ce dernier
faire le «test du poignet» avant de donner
le biberon à bébé.
• Après avoir réchauffé des aliments
contenant une garniture, les couper afin
de laisser s’échapper la vapeur et d’éviter
des brûlures.
• Bien mélanger les liquides avant et
après la cuisson pour que la chaleur soit
uniforme.
• Faire cuire les aliments liquides et les
céréales dans un bol profond afin d’éviter
qu’ils ne débordent.
• Cuire les œufs dans leur coquille.
• Réchauffer des œufs entiers.
• Faire sécher les noix ou les graines
dans leur écaille.
À FAIRE
À NE PAS FAIRE
AlIMENT
• Faire éclater des grains de maïs dans
des sacs de papier brun ou dans un bol
de verre.
• Dépasser le temps indiqué sur
l’emballage.
• Faire chauffer les aliments commerciaux
pour bébés dans leurs pots.
• Faire chauffer des biberons jetables.
• Faire chauffer les biberons avec la
tétine.
• Réchauffer ou faire cuire des aliments
dans des contenants hermétiques ou
fermés en verre.
• Préparer des conserves au four à micro-
ondes, car des bactéries dangereuses
pourraient ne pas être tuées.
• Utiliser le four à micro-ondes pour faire
de la friture.
• Faire sécher du bois, des courges, des
herbes ou du papier.
Maïs soufflé
Aliments pour
bébés
Généralités
lE FouR À MIcRo-oNdES

6
À PRoPoS dE lA cuISSoN AuX MIcRo-oNdES
R E N S E I G N E M E N T S U T I L E S
À PRoPoS dE lA SécuRITé
• Disposez les aliments avec soin. Placez ce qui est
le plus épais vers l’extérieur du plat.
• Surveillez le temps de cuisson. Cuisez les aliments
le temps le plus court indiqué, et augmentez le temps
si nécessaire. La nourriture qui cuit trop longtemps
peut fumer ou prendre feu.
• Recouvrez les aliments pendant la cuisson. Suivez les
conseils de la recette ou du livre de cuisine : essuie-
tout, papier ciré, film plastique spécial micro-ondes
ou un couvercle. Couvrir les aliments empêche les
éclaboussures et leur permet de cuire de manière
uniforme.
• Protégez les morceaux de viande ou de volaille très
minces par des petits écrans en papier d’aluminium
pour éviter qu’ils ne cuisent trop vite et permettre
aux morceaux plus épais de cuire complètement.
• Si possible, mélangez les aliments de l’extérieur
du plat vers le centre une ou deux fois pendant la
cuisson.
• Retournez les aliments une fois accélérera la cuisson
du poulet ou des hamburgers. Il faut retourner les
grandes pièces comme les rôtis au moins une fois.
• Déplacez les aliments comme les boulettes de viande
à moitié de la cuisson, de l’extérieur du plat vers
l’intérieur, et du bas vers le haut.
• Augmentez le temps de repos. Enlevez les aliments du
four et si possible, mélangez-les. Couvrez les aliments
pendant un temps de repos qui permet à la cuisson de
finir.
• Vérifiez si les aliments sont cuits. Vérifiez les signes
qui indiquent que les aliments sont cuits à point. Ces
signes incluent :
- La vapeur s’élève de tous les des aliments, pas
seulement des bords.
- La partie centrale et inférieure du plat est très
chaude au toucher.
- Les articulations de la volaille bougent
facilement.
- La viande et le poulet ne sont plus roses.
- Le poisson est opaque et les morceaux se
détachent facilement.
Pour vérifier que les aliments sont cuits à point, insérez
un thermomètre dans un endroit épais, à l’écart de la
graisse et des os. Ne laissez JAMAIS le thermomètre
dans les aliments qui cuisent, sauf s’il est approuvé
pour emploi aux micro-ondes.
• Employez TOUJOURS des gants isolants pour éviter
des brûlures quand vous employez des ustensiles
qui entrent en contact avec les aliments chauds. La
chaleur transférée des aliments aux ustensiles peut
provoquer des brûlures.
• Évitez les brûlures dues à la vapeur en dirigeant la
vapeur loin de vous. Soulevez doucement ce qui
recouvre le plat en commençant par le bord le plus
éloigné de vous et ouvrez lentement les sacs de maïs
soufflé ou de cuisson en les tenant loin du visage.
• Restez près du four quand il fonctionne et vérifiez
fréquemment la cuisson pour éviter une cuisson trop
longue.
• N’employez JAMAIS la cavité pour entreposer des
livres de cuisine ou autres objets.
• Choisissez, entreposez et manipulez la nourriture
de manière à préserver sa qualité et minimiser la
propagation des bactéries alimentaires.
• Gardez le couvercle du guide d’ondes propre. Les
résidus de nourriture peuvent causer des étincelles
ou un incendie.
• Faites attention quand vous enlevez les aliments du
four que les ustensiles, les vêtements ou accessoires
ne touchent pas les mécanismes de sécurité de la
porte.
• Vérifiez que les aliments sont cuits conformément aux
températures recommandées par le United States
Department of Agriculture (Ministère de l’agriculture
des États-Unis).
T E M P A L I M E N T S
... pour le porc, la viande hachée,
le blanc de poulet sans os, le
poisson, les fruits de mer, les
oeufs frais et les aliments préparés
surgelés.
... pour les restes de table, les aliments
réfrigérés prêts-à-réchauffer, et
les aliments frais d’un traiteur ou
équivalent.
... les blancs de volaille.
... la viande brune de volaille.
71°C (160°F)
74°C (165°F)
77°C (170°F)
82°C (180°F)
À PRoPoS dES ENFANTS ET du FouR À MIcRo-oNdES
de sécurité aux enfants : employer des gants isolants,
enlever les couvercles avec précaution, faire très
attention aux contenants d’aliments croustillants qui
peuvent devenir très chauds.
Ne pas présumer qu’un enfant qui connaît bien une
fonction de l’appareil les connaît toutes.
Les enfants doivent savoir qu’un four à micro-ondes
n’est pas un jouet. Voir la page 25 pour obtenir des
renseignements sur le verrouillage de sécurité.
Les enfants de moins de 7 ans devraient utiliser le four
à micro-ondes sous la surveillance étroite d’un adulte.
Les enfants de 7 à 12 ans devraient utiliser l’appareil
sous la surveillance d’un adulte se trouvant dans la
même pièce qu’eux.
L’enfant doit être capable d’atteindre facilement le
four; sinon, le faire monter sur un tabouret robuste et
stable.
Il ne faut jamais s’appuyer ou s’accrocher à la porte
du four à micro-ondes. Il faut enseigner les mesures

7
R E N S E I G N E M E N T S U T I L E S
uSTENSIlES ET couVERclES
Il n’est pas nécessaire d’acheter une nouvelle batterie de cuisine. Beaucoup de vos récipients peuvent très bien
servir à la cuisson dans votre nouveau four micro-ondes à convection. Le tableau ci-dessous vous aidera à choisir
les ustensiles et couvercles convenant le mieux à chaque mode de cuisson.
USTENSILES ET
COUVERCLES
MICRO-ONDES SEULEMENT
GRILLADE PAR CONV.,
CUISSON LENTE
MODE COMBINÉ HAUTE
TEMP./RÔTIR MODE
COMBINÉ BASSE TEMP./
CUISSON AU FOUR
VÉRIFICATION DE RÉCIPIENTS Pour vérifier qu’un récipient est bon pour micro-ondes, placez-le vide dans le four et réglez sur HIGH
pendant 30 secondes. Si le plat chauffe à l’extrême, NE PAS l’utiliser pour la cuisson micro-ondes.
ACCESSOIRES : De nombreux accessoires micro-ondes sont proposés sur le marché. Considérez vos achats pour qu’ils correspondent
à vos besoins. Un thermomètre adapté aux micro-ondes vous aidera à déterminer le degré voulu de cuisson aux micro-ondes seulement
et garantira que les aliments ont été cuits aux températures de sécurité recommandées. Sharp n’est pas responsable de dommages
causés au four par l’introduction d’accessoires.
Oui Des petites feuilles d’aluminium lisses peuvent être
placées sur une préparation pour protéger ses surfaces
contre une cuisson ou une décongélation trop rapide.
Maintenir les feuilles à au moins un pouce d’écart des
parois du four.
Oui À condition de ne remplir qu’aux 3/4. Maintenir à
un pouce d’écart des parois du four et ne pas recouvrir
de feuille d’aluminium.
Oui Ne pas dépasser la durée de préchauffage recom-
mandée. Suivre le mode d’emploi du fabricant.
Oui
Excellent.
Oui Excellent
Non
Oui
Non
Non
Non
Oui Conviennent aux grosses pièces de viande ou aux
préparations à attendrir. NE PAS utiliser de ligatures
métalliques.
Oui Pour réchauffer.
Oui Comme couvercles au réchauffage et à la cuisson.
Ne pas employer de produits recyclés pouvant contenir
des fibres métalliques.
Oui
Oui Pour réchauffer et décongeler. Suivre le mode
d’emploi du fabricant.
Oui
Oui Choisir des marques spécialement indiquées pour
micro-ondes. NE PAS placer le film en contact avec les
aliments. Percer pour laisser s’échapper la vapeur.
Oui Voir les recommandations du fabricant pour usage
micro-ondes.
Oui Pour réchauffer
Oui Recommandé comme couvercle à la cuisson et
au réchauffage.
Oui Convient aux cuissons très courtes. Ne pas em-
ployer avec des plats reès gras ou très sucrés. Risque
de se calciner.
Oui
Comme protection.
Oui Griller sans couver-
cle.
Non
Oui Excellent
Oui Excellent
Non
Oui Griller sans cou-
vercle
Oui Griller sans cou-
vercle
Oui
Non
Oui Grillades, non
Non
Non
Oui Pour températures
jusqu’à 400
o
F. Ne pas
employer pour griller.
Non
Oui Résiste à la chaleur
jusqu’à 425
o
F. Ne pas
employer pour griller.
Non
Oui
Non
Non
Non
Feuille d’aluminium
Récipients en aluminium
Plat à gratin
Vitrocéramique (Pyroce-
ram
®
)
Verre calorifuge
Verre non-calorifuge
Couvercles en verre
Couvercles en métal
Casseroles en métal
Métaux assortis : plats à
rebords métalliques, etc.
Ligatures métalliques
Poches de cuisson au four
Assiettes en carton
Serviettes en papier
Papier allant au four
Récipients en plastique
bons pour micro-ondes
Plastique, Thermoset
®
Film plastique
Céramiques, grès, porce-
laine
Polystyrène
Papier ciré
Osier, bois, paille
Oui
Comme protection.
Oui À condition de ne
remplir qu’aux 3/4. Main-
tenir à un pouce d’écart
des parois du four et ne
pas recouvrir de feuille
d’aluminium.
Non
Oui Excellent.
Oui Excellent
Non
Oui
Non
Oui Ne pas employer de
couvercles métalliques
Non
Oui NE PAS utiliser de
ligatures métalliques.
Non
Non
Oui Pour températures
jusqu’à 400
o
F.
Non
Oui
Non
Oui Doivent être bons pour
micro-ondes et cuisson
au four.
Non
Non
Non
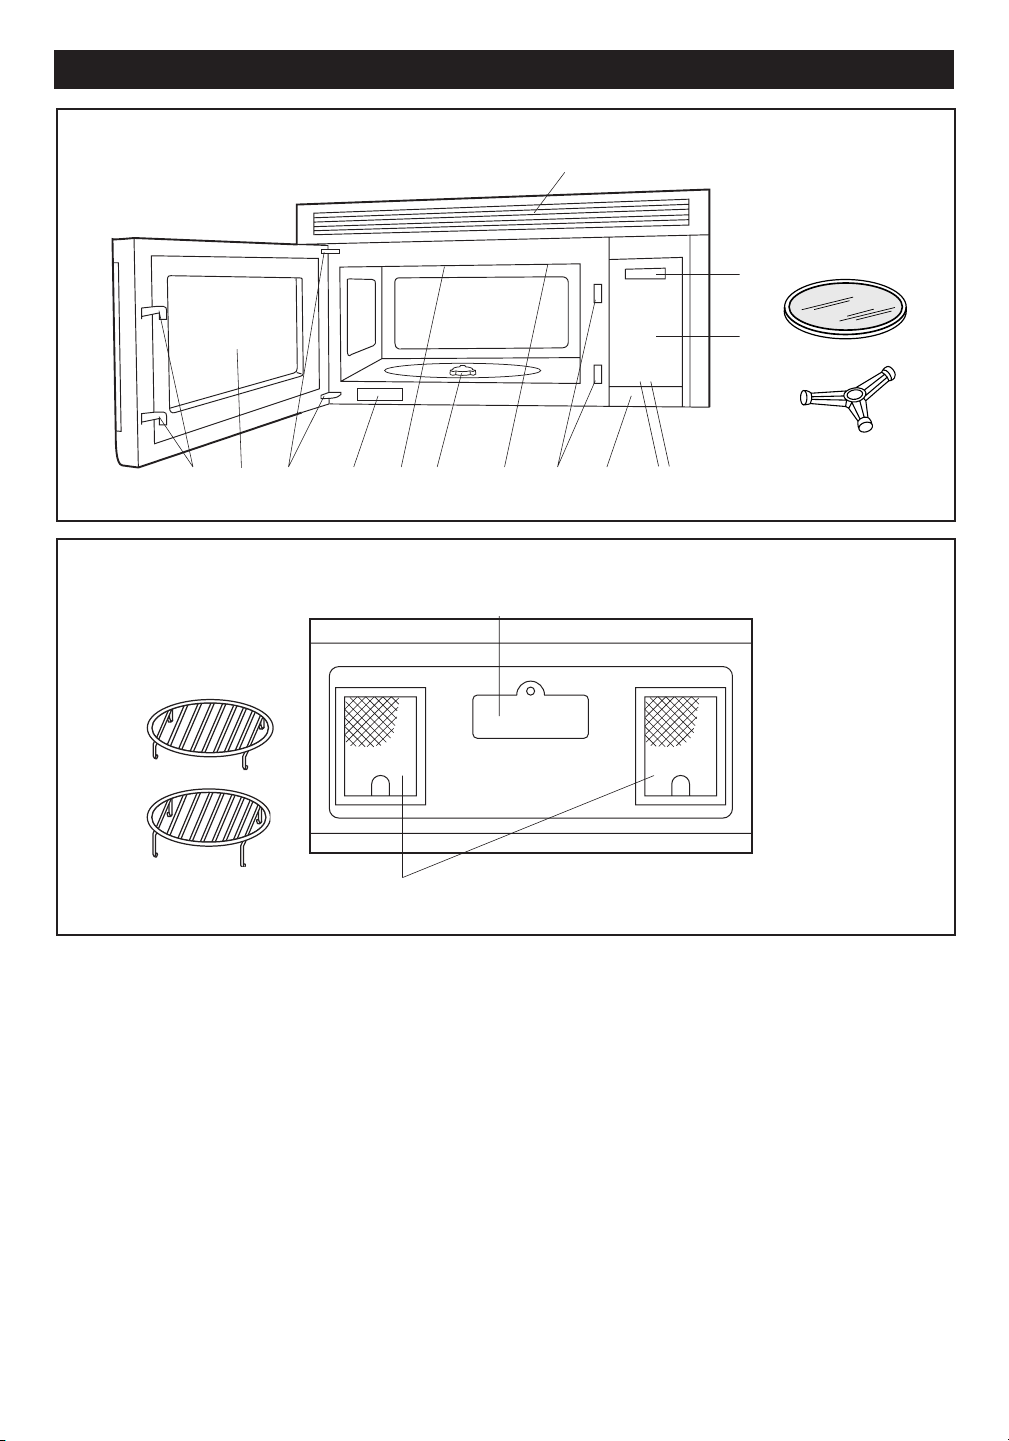
8
3
2
1
4
6
5
6
7
8
9
10
11
15
16
12
N O M E N C L A T U R E D E S P I È C E S
VUE DU DESSOUS
(Face arrière du four micro-ondes)
(Face avant du four micro-ondes)
13
14
17
18
VUE DU AVANT
1. Porte à hublot
2. Charnières
3. Couvercle du guide d’ondes - NE PAS ENLEVER
4. Arbre moteur du plateau tournant
5. Ampoule du four.
S’allume lorsque le four est en marche ou que la
porte est ouverte.
6. Loquets de sécurité. Le four ne fonctionne pas si la
porte n’est pas correctement fermée.
7. Bouton d’une touche DOOR OPEN. Pousser une
fois pour ouvrir la porte.
8. Bouton FAN HI/LO. Pousser pour activer le
ventilateur en position rapide, lente ou arrêt.
9. Bouton LIGHT. Pousser en positions de marche/arrêt
pour allumer l’ampoule.
10. Panneau tactile de commande
AUTO-TOUCH.
11. Affichage de minuterie : affichage numérique,
99 minutes, 99 secondes.
12. Ouvertures de ventilation.
13. Couvercle de l’éclairage.
14. Filtres à graisses.
15. Plateau tournant en céramique, amovible.
Le plateau tourne dans ou contre le sens des aiguilles
d’une montre. Ne retirer que pour nettoyer.
16. Support du plateau tournant.
Placer le support au fond du four et le plateau
tournant sur le support.
17. Grille inférieure, amovible, pour griller ou rôtir des
viandes et volailles au four.
18. Grille supérieure, amovible, pour cuisson
superposée.
19. Étiquette des caractéristiques
19
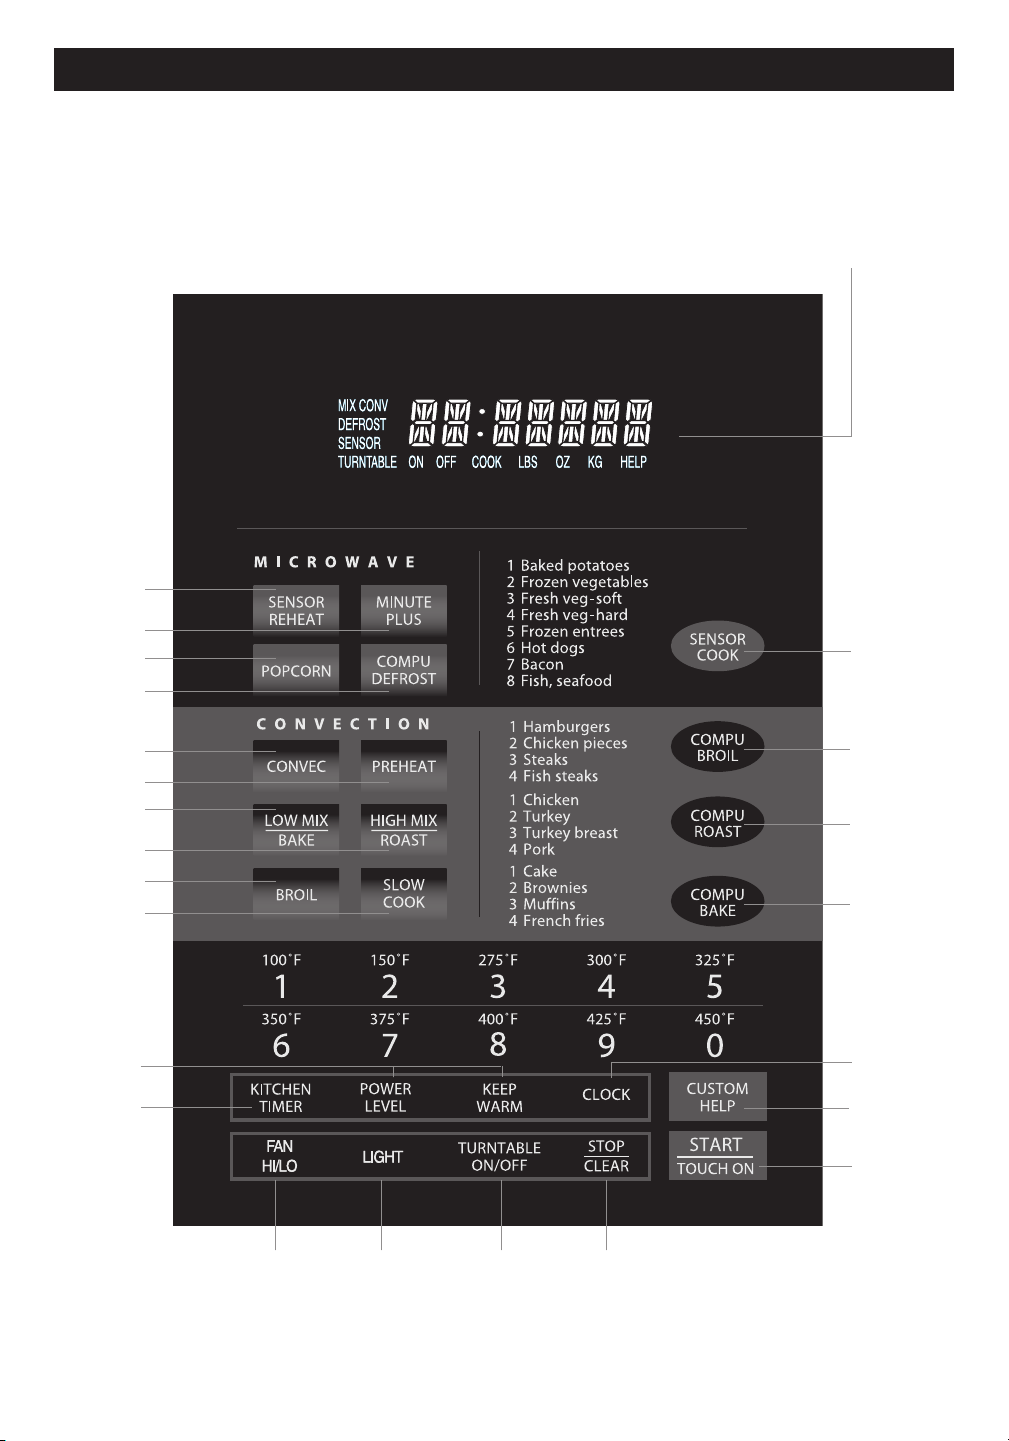
9
MODÈLE R-1874
P A N N E A U D E C O N T R Ô L E À T O U C H E S
Le chiffre à côté de l’illustration du panneau de contrôle indique la page où vous pouvez
trouver une description et des renseignements sur son utilisation.
Affichage du panneau de contrôle
Des mots apparaîtront dans l’affichage
pour indiquer les caractéristiques et les
instructions de cuisson.
12 12
11 11
15
24
15
13
19
19
20
20
19
20
14 - 16
21
22
23
11
25
24
12
24
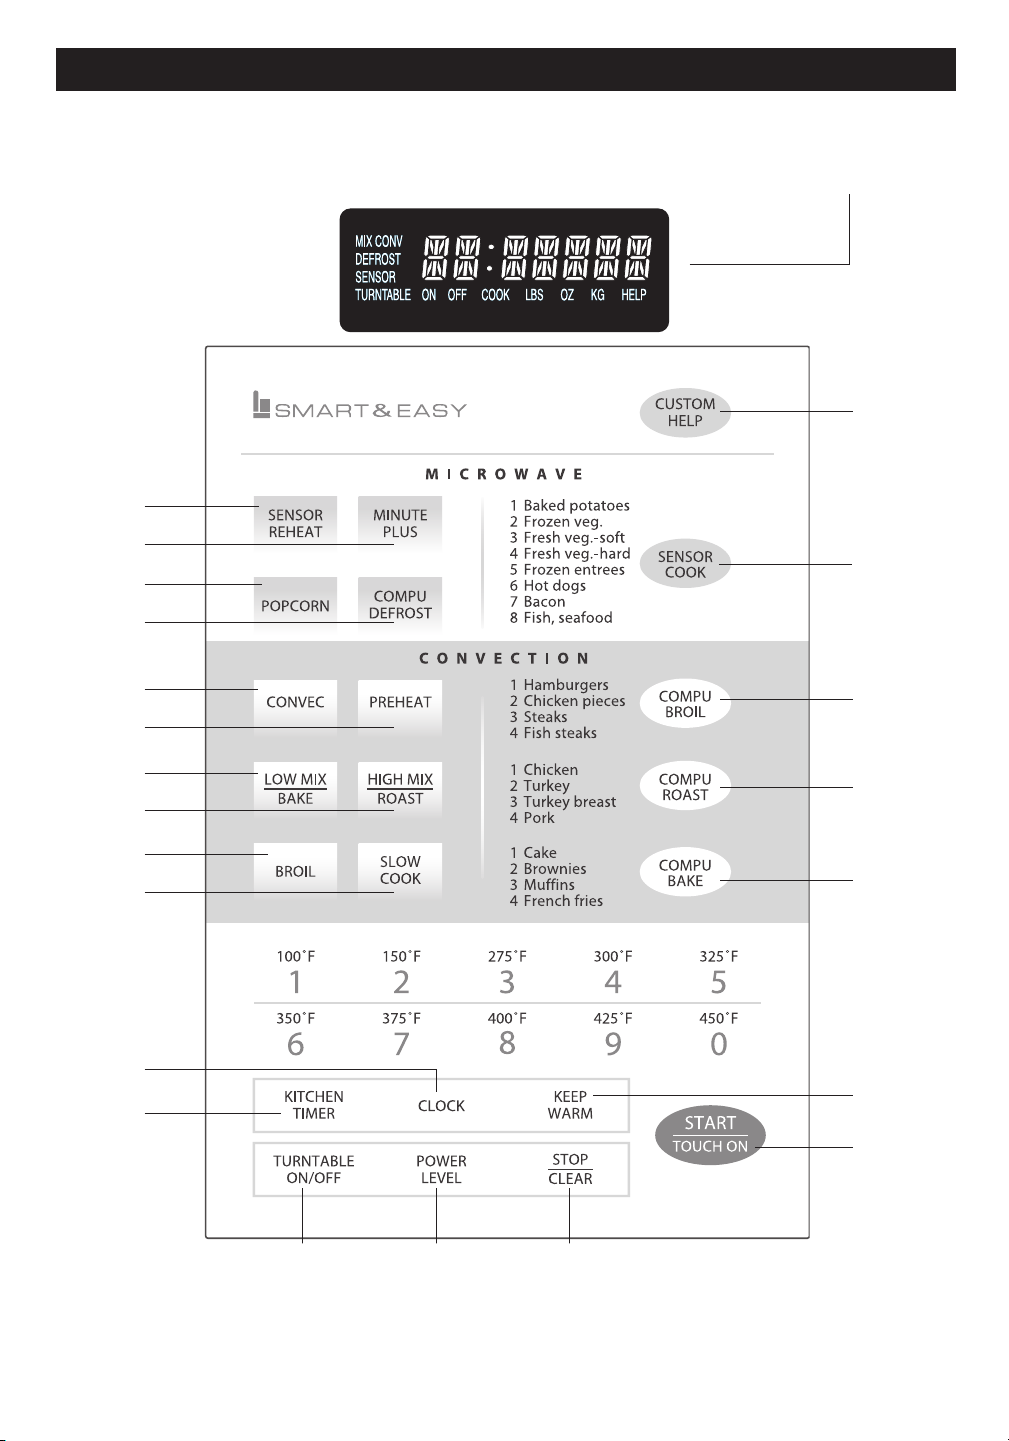
10
MODÈLE R-1875
P A N N E A U D E C O N T R Ô L E À T O U C H E S
Affichage du panneau de contrôle
Des mots apparaîtront dans l’affichage
pour indiquer les caractéristiques et les
instructions de cuisson.
Le chiffre à côté de l’illustration du panneau de contrôle indique la page où vous pouvez
trouver une description et des renseignements sur son utilisation.
25
21
22
23
12
111211
24
11
19
20
20
20
19
19
15
13
15
24
14-16
24

A V A NT L A MISE EN S E R V ICE
• Lisez entièrement ce manuel d’opération et assurez-
vous de l’avoir bien compris avant d’employer votre
nouveau four micro-ondes.
Suivez les procédures ci-dessous avant de pouvoir
mettre le four en usage.
3
CLOCK
12:30000
TURNTABLE ON
•
Appuyez sur CLOCK.
1. Branchez le four. Fermez la porte. L’affichage du
L’horloge s’affiche sur douze heures. A l’entrée d’une
heure incorrecte, l’affichage d’erreur
ERROR
apparaît.
Appuyez sur STOP/CLEAR puis répétez l’entrée
horaire.
four sera
WELCOME PRESS CLEAR AND PRESS
CLOCK
..
.
2. Appuyez sur STOP/CLEAR pour afficher
:
.
3. Appuyez sur CLOCK et suivez les directives de
réglage.
RÉGLAGE DE L’HORLOGE
REMARQUE :
Le four peut se programmer avec
la porte ouverte, à l’exception des fonctions START/
TOUCH ON, MINUTE PLUS, SENSOR REHEAT et
POPCORN.
ARRÊTER/ANNULER
Appuyez sur STOP/CLEAR pour :
M ARCHE À SUI VRE AFFI CHA G E
1
CLOCK
ENTRER
TURNTABLE ON
Appuyez sur CLOCK.
HEURE
TURNTABLE ON
2
1 2 3 0
BLE ON
12:30000
Entrez l’heure exacte en
TURNTA
touchant sur les chiffres dans l’ordre voulu.
O P É R A T ION MANU ELLE
MARCHE/ARRÊT DU PLATEAU TOURNANT
Le plateau tournant est activé pour la plupart des prépa-
rations ; il peut cependant être désactivé lorsqu’il reçoit
de grands plats tels que le plat en verre fréquemment
utilisé de 13 po x 9 po x 2 po. Placez cet ustensile bien
à plat sur le plateau tournant.
REMARQUE :
Ouvrez la porte pour surveiller la cuisson : le plateau
tournant restera en arrêt. Après avoir examiné la
préparation, refermez la porte et appuyez sur START/
TOUCH ON.
Le plateau tournant reste en arrêt pendant une minute
après l’ouverture de la porte lorsque l’heure s’affiche.
Le four peut être reprogrammé pendant cette minute
sans appuyez sur TURNTABLE ON/OFF. L’affichage
indique toujours si le plateau tournant est en marche
ou en arrêt.
LE PLATEAU TOURNANT DOIT TOUJOURS ÊTRE EN
POSITION DE MARCHE LORSQUE LES FONCTIONS
SPÉCIALES SONT ACTIVÉES. La fonction Marche/Ar-
rêt peut s’utiliser en modes de cuisson manuelle et avec
réchauffage par capteur. Le plateau tournant passe
automatiquement à l’état de marche lorsque vous choi-
sissez le mode de cuisson automatique, à l’exception.
Pour la cuisson de grandes quantités ne pouvant être
remuées, un niveau de 40 ou 50 % de puissance est
conseillé. La cuisson peut alors être accélérée en pro-
grammant 5 ou 10 minutes à un niveau de 100 % (HIGH)
suivi du temps voulu à puissance inférieure. Voir la page
24 pour la programmation de séquences multiples. Si
vous souhaitez changer une fois la position d’un grand
récipient à mi-cuisson, ouvrez la porte, ajustez la posi-
tion, refermez et appuyez sur START/TOUCH ON.
M ARCH E À SUIVR E AFFI CHA G E
1
TURNTABLE
ENTER
ON / OFF
TURNTABLE ON OFF
Appuyez sur TURNTABLE ON/OFF et notez
TURNTABLE OFF à l’affichage.
2
4 5 0 0
45.00000
Entrez la durée de cuisson.
TURNTABLE ON OFF
3
POWER
LEVEL
4
P-40000
TURNTABLE ON OFF
Entrez le niveau de puissance.
4
START
TOUCH ON
45.00000
TURNTABLE ON OFF COOK
Appuyez sur START/TOUCH ON.
11
• En cas de coupure de courant, le four clignote
WELCOME
PRESS CLEAR AND PRESS
CLOCK
une fois que le courant est rétabli. Si la coupure se
produit en cours de cuisson, la programmation est
effacée, ainsi que l’heure. Appuyez sur simplement
STOP/CLEAR puis remettez l’horloge à l’heure.
• Pour entrer l’heure exacte de 12:30 (matin ou soir).
1. Effacer une erreur de programmation.
2. Annuler la minuterie de cuisine.
3.
Arrêter le four momentanément en cours de cuisson.
4. Rétablir l’heure à l’affichage.
5. Annuler un programme en cours de cuisson (appuyez
sur deux fois).
• Pour cuire une lasagne dans un plat de 13 po x 9 po
x 2 po pendant 45 minutes à 40 % de puissance :

12
5.00000
TURNTABLE ON
START
TOUCH ON
O P É R A T I O N M A N U E L L E
RéGlAGE du NIVEAu dE
PuISSANcE
Onze niveaux de puissance ont été préréglés.
Les niveaux inférieurs de puissance augmentent la
durée de cuisson, ce qui est recommandé pour des
aliments tels que le fromage, le lait et les viandes
demandant une longue cuisson au ralenti. Consultez
le livre de cuisine ou les recettes pour y trouver des
conseils particuliers.
lAMPE/VENTIlATEuR dE
HoTTE
Le
four comporte une lampe et un ventilateur de hotte
qui fonctionnent que la porte soit ouverte ou fermée.
Pour activer la lampe, touchez une fois sur LIGHT. Pour
l’éteindre, appuyez sur LIGHT à nouveau.
Pour activer le ventilateur, appuyez sur FAN HI/LO
une fois pour la plus haute vitesse, deux fois pour
une vitesse plus lente ou trois fois pour l’arrêter.
Lorsque ventilateur est mis manuellement sur, "H"
sera affiché sur l'écran. Lorsque le ventilateur est
éteint, "H" disparaît de l'affichage.
cuISSoN-TEMPS
MIcRo-oNdES
Le four dispose de 99 minutes, 99 secondes de
temps de programmation (99.99). Entrez toujours les
secondes après les minutes, même s’il ne s’agit que
de zéros.
• Pour une cuisson de 5 minutes à 100% de puis-
sance
M A R C H E À S U I V R E A F F I C H A G E
1
2
Appuyez sur START/TOUCH ON.
Entrez la durée de cuisson.
POURCENTAGE
APPROXIMATIF
DE PUISSANCE
TERMES COURANTS DE
NIVEAUX DE
PUISSANCE
TOUCHE UNE FOIS SUR
POWER LEVEL PUIS
TOUCHE
5 0 0
5.00000
TURNTABLE ON OFF COOK
MAINTEIN Au cHAud
KEEP WARM se programme uniquement en opération
manuelle ou en tant que programme séparé.
• Pour faire rôtir une pomme de terre pendant 4
minutes à 100 % de puissance et la tenir au chaud
pendant 30 minutes après la cuisson :
• Pour décongeler pendant 5 minutes â 30% avec le
plateau tournant en marche :
Pour
employer KEEP WARM comme programme
séparé, appuyez sur KEEP WARM pendant la
première minute après le début de cuisson, l’ouverture
ou fermeture de la porte, ou une appuyez sur STOP/
CLEAR.
M A R C H E À S U I V R E
1
2
START
TOUCH ON
KEEP
WARM
4 0 0
3
A la fin du temps de cuisson, KEEP WARM s’affiche
pour indiquer que la préparation reste au chaud
pendant les 30 minutes.
P-30000
TURNTABLE ON
45.00000
TURNTABLE ON OFF COOK
5.00000
TURNTABLE ON
M A R C H E À S U I V R E A F F I C H A G E
1
2
3
Appuyez sur la durée de cuisson
voulue pour une pomme de terre
rôtie. (Par exemple : 4 minutes)
Appuyez sur KEEP WARM.
Appuyez sur START/TOUCH ON.
Entrez la durée de décongélation.
Appuyez sur POWER LEVEL. Entrez le
niveau de puissance.
Appuyez sur START/TOUCH ON.
START
TOUCH ON
5 0 0
3
POWER
LEVEL
POWER LEVEL
100% High (élevé)
9
90%
8
80%
7
70% Medium High
6
60% (mi-élevé)
5
50% Medium (moyen)
4
40%
3
30% Med. Low/Defrost
2
20%
(mi-faible/décongélation)
1
10% Low (faible)
0
0%

13
M A R C H E À S U I V R E A F F I C H A G E
1
2
3
M I C R O - O N D E S P A R T I C U L A R I T É S
décoNGélATIoN coMPu
dEFRoST
4
Après la deuxième étape, ouvrez la porte.
Protégez toute partie chauffée. Refermez la
porte.
5
6
À la fin du cycle de décongélation, couvrez et
laissez reposer comme indiqué dans le tableau
ci-dessous.
Appuyez sur
START/TOUCH ON pad.
Appuyez sur
START/TOUCH ON.
42.50000
TURNTABLE ON OFF COOK LBS OZ KG HELP
MIX COV
DEFROST
SENSOR
44.35000
TURNTABLE ON OFF COOK LBS OZ KG HELP
MIX COV
DEFROST
SENSOR
TABlEAu coMPu dEFRoST
Viande hachée
Une fois
Deux fois
Trois fois
A P P U y E z S U R
C O M P U
D E F R O S T *
A L I M E N T
QUANTITÉ
M A R C H E À S U I V R E
Poulet dé-
coupé
0,5 à 3.0 livres
(0,3 à 1,3 kg)
0,5 à 3,0 livres
(0,3 à 1,3 kg)
Bifteck
(côtelettes)
(poisson)
* Nombre de touches APRÈS la touche initiale pour accéder à COMPU DEFROST.
Après la première étape, ouvrez la porte du
four. Retournez le bifteck et protégez toute
partie chauffée. Refermez la porte.
REMARQuE :
1. Le poids peut être entré en incréments de 0,1 livre.
Si vous tentez d’entrer plus ou moins que la quantité
permise,
ERREUR
POIDS
TROP
PETIT
ou
TROP
ELEVE
apparaissent à l’affichage.
2. CompuDefrost peut se programmer avec un
ajustement de plus ou moins de temps. Voir la
page 24.
3. Pour décongeler d’autres aliments ou des quantités
supérieures ou inférieures aux poids permis dans
le tableau CompuDefrost, programmez les durées
à 30 % de puissance. Voir Décongélation manuelle
à la page 14.
Enlevez les morceaux décongelés après chaque étape.
Laissez reposer à couvert pour 5 à 10 minutes.
Après chaque étape de cycle de décongélation,
réarrangez et protégez avec des petits morceaux lisses
de feuille d’aluminium. Enlevez toute viande ou poisson
presque décongelé. Laissez reposer couvert pour 10 à
20 minutes.
Après chaque étape de cycle de décongélation, réarran-
gez ou enlevez toutes pièces chaudes ou décongelées.
Laissez reposer couvert pour 10 à 20 minutes.
0,5 à 4,0 livres
(0,3 à 1,8 kg)
REMARQuE :
Vérifiez les aliments dès que le four émet un signal. Après l’étape finale, quelques petites parties restent quelquefois
glacées. Laissez reposer pour terminer la décongélation. Ne pas décongeler avant que tous les cristaux de glace se soient
dégivrés.
Couvrez ou protégez afin d’empêcher toute cuisson avant la décongélation au coeur de l’aliment. Appliquez des bandelettes
lisses de feuille d’aluminium pour recouvrir les bords et les sections minces de l’aliment.
42.00000
TURNTABLE ON OFF COOK LBS OZ KG HELP
BIFTECK
2 0
x 3
ENTERE POIDS
MIX COV
DEFROST
SENSOR
46.50000
TURNTABLE ON OFF COOK LBS OZ KG HELP
MIX COV
DEFROST
SENSOR
COMPU
DEFROST
START
TOUCH ON
START
TOUCH ON
START
TOUCH ON
Appuyez sur une fois sur COMPU
DEFROST. Appuyez sur ensuite deux fois de plus
sur COMPU DEFROST pour la sélection STEAK.
Entrez le poids sur les
touches numériques (Par exemple : 2.0 livres)
Appuyez sur START/TOUCH ON.
Le four s’arrête et les instructions apparaissent.
Exécutez selon le message affiché.
CompuDefrost décongèle automatiquement la viande
hachée, les biftecks et le poulet découpé.
• Pour décongeler un bifteck de 2 livres :

14
M I C R O - O N D E S P A R T I C U L A R I T É S
Réglages de capteur :
cuISSoN PAR cAPTEuE
Le capteur de Sharp est un dispositif semi-conducteur
qui détecte les vapeurs (condensats et humidité)
émises par les aliments en cours de cuisson. Le capteur
ajuste les temps de cuisson et le niveau de puissance
convenant aux divers aliments et quantités afin que la
cuisine micro-ondes ne se fasse pas à l’aveuglette.
1. La température ambiante ne doit pas dépasser
95˚F.
2. Assurez-vous que l’extérieur du plat de cuisson
et l’intérieur du four sont secs. Essuyez toute
humidité avec un linge ou une serviette en papier
bien secs.
3. Les réglages de cuisson par capteur ne peuvent se
programmer que pendant la première minute après
le début de cuisson, l’ouverture ou fermeture de la
porte, ou une appuyez sur STOP/CLEAR.
4. Pendant la première partie du cycle de cuisson par
capteur,
RECHAUF
AU
CAPTEUR
,
ORDIN
MAIS
SOUFFLE
DU
CAPTURE
,
POMME
DE
TERRE
AU FOUR
,
LEGUMES
CONGELE
,
LEGUMES
FRAIS
MOUS
,
LEGUMES
FRAIS
DURS
,
ENTREE CONGELE CHIENS CHAUDS
BACON
POISSON
apparaissent à l’affichage. Ne
pas ouvrir la porte du four ni toucher STOP/CLEAR
au cours de cette étape du cycle sous risque
d’interrompre les mesures d’émission de vapeur.
En cas de telle interruption, la cuisson par capteur
s’interrompt avec l’affichage de
ERREUR
. Pour
reprendre la cuisson, appuyez sur STOP/CLEAR
et sélectionnez le temps de cuisson ainsi que le
niveau. Lorsque le capteur détecte les vapeurs
émises par les aliments, le temps de cuisson
encore nécessaire apparaît l’affichage. Les aliments
peuvent maintenant être remués ou assaisonnés à
volonté.
5. Vérifiez si les plats préparés par capteur sont cuits.
Si la cuisson n’a pas suffi, continuez sous puissance
et durée variables.
6. Si le capteur ne détecte pas de vapeurs,
s’affiche et le four se met en arrêt.
7. À la conclusion de tout cycle, ouvrez la porte ou
appuyez sur STOP/CLEAR. L’heure actuelle revient
à l’affichage.
8. Tout réglage de capteur peut se programmer avec
ajustement de plus ou moins de temps. Voir la
page 24.
Sélection d’aliments :
1. Le capteur fonctionne avec les aliments à température
normale de conservation. Par exemple, les plats à
réchauffer seront à la température du réfrigérateur,
et les pommes de terre à rôtir seraient à température
ambiante.
2. Les quantités supérieures ou inférieures aux valeurs
citées dans les tableaux se cuisent sous durées et
niveaux de puissance variables.
Couvercles d’aliments :
Certaines préparations réussissent mieux sous
couvercle. Utilisez le mode de couverture recommandé
dans les tableaux citant ces aliments.
1. Couvercle de cocotte
2. Film plastique : utilisez les produits recommandés
pour la cuisine micro-ondes. Couvrez légèrement, en
laissant environ 1/2 po à découvert pour permettre
aux vapeurs de s’échapper. Le film plastique ne doit
pas être en contact avec les aliments.
3. Serviettes en papier : utilisez pour absorber
l’excédent de graisse et d’humidité du bacon et des
pommes de terre. Recouvrez le plateau tournant
pour faire rôtir les pommes de terre.
4. Papier ciré : recouvrez le récipient complètement ;
repliez le papier sous le plat de cuisson pour le
maintenir en place. Si le papier est plus étroit que
le récipient, utilisez deux couches se chevauchant
d’au moins 1 po.
Si les aliments à décongeler ne figurent pas au tableau
CompuDefrost, ou s’ils pèsent plus ou moins que les
quantités limites du tableau, la décongélation doit se
faire manuellement.
Tout aliment surgelé, cuit ou cru, peut être décongelé
au niveau 3 de puissance. Suivez exactement les trois
étapes de procédure de la section Cuisson-temps à la
page 11. Estimez la durée de décongélation et appuyez
sur le 3 pour un niveau de 30 % de puissance.
La règle générale est de 5 minutes par livre pour les
aliments crus ou déjà cuits. Par exemple, décongelez
pendant 5 minutes pour une quantité de 2 à 3 tasses
de plat préparé ou pour une livre de sauce congelée
pour spaghettis.
Arrêtez toujours le four à intervalles pour enlever ou sé-
parer les parties déjà décongelées. Si la décongélation
n’est pas terminée à la fin de la durée prévue, program-
mez le four en incréments d’une minute au niveau de
puissance 3 jusqu’à décongélation totale.
Les récipients en plastique sortant du congélateur se
dégivrent juste assez pour en transférer le contenu dans
un plat bon pour micro-ondes.
décoNGélATIoN
MANuEllE

15
M A R C H E À S U I V R E
M A R C H E À S U I V R E
A L I M E N T
Q U A N T I T É
M A R C H E À S U I V R E
Plateau tournant en arrêt : Vous pouvez réchauffer
un plat dans une cocotte de 11 po x 8 po x 2 po
ou 13 po x 9 po x 2 po avec le plateau tournant en
arrêt. Touche d’abord TURNTABLE ON/OFF et
notez l’indication affichée. Touche ensuite SENSOR
REHEAT. L’affichage indique que le plateau tournant
est en arrêt, et le four démarre automatiquement.
LAISSER
REPOSER
COUVERT
apparaît à l’affichage après
la cuisson.
s’affiche après la cuisson.
s’affiche à plusieurs reprises.
ORDIN MAIS SOUFFLE
FIN
M I C R O - O N D E S P A R T I C U L A R I T É S
PoPcoRN PAR cAPTEuR
INSTANTANé
• Pour préparer un sac de 3,5 onces de popcorn :
Appuyez sur POPCORN une
fois. (Par exemple : Appuyez sur
POPCORN une fois pour un sac de
capacité ordinaire.)
A P P U y E z S U R
P O P C O R N Q U A N T I T É
TABlEAu PoPcoRN
Q U A N T I T É
Sac de 3,0 et 3,5 onces
(Capacité ordinaire)
Deux fois
Sac de 1,5 et 1,75 onces
(Capacité snack)
Une fois
TABlEAu dES cAPTEuRS INSTANTANéS
4 à 32 onces
1 à 4 tasses
4 à 16 onces
3 à 6 onces
de viande
plus légumes
et/ou pom-
mes de
terre/riz˚
Popcorn Un deul sac
à la fois
Le four comporte des capteurs instantanés pour
popcorn et réchauffage. Pour s’en servir, il suffit de
toucher leurs commandes afin que le four démarre
automatiquement. Tout réglage de capteur peut se
programmer avec des ajustement de plus ou moins de
temps. Voir la page 24.
cAPTEuRS INSTANTANéS
RécHAuFFAGE PAR
cAPTEuR INSTANTANé
Plateau tournant en marche : De nombreux plats peu-
vent se réchauffer en touchant une seule commande,
sans avoir à recalculer la durée ou la puissance néces-
saire. Pour réchauffer lorsque le plateau tournant est en
marche, touche simplement SENSOR REHEAT.
s’affiche à plusieurs
reprises. Lorsque le capteur perçoit les vapeurs
émises par les aliments, le temps restant de cuisson
s’affiche.
apparaît à l’affichage
après la cuisson.
Appuyez sur SENSOR REHEAT.
(Remarque : la commande est
programmable avec le plateau
tournant en marche ou en arrêt).
RECHAUF AU
REPOSER COUVERTLAISSER
CAPTEUR
AU CAPTEUR
Ce réglage de capteur convient à la plupart des marques
de popcorn à cuire aux micro-ondes. Faites quelques
essais pour choisir votre marque préférée. Préparez
un seul sac à la fois. Dépliez le sac et préparez selon
le mode d’emploi fourni.
Placez dans un récipient ou cocotte légèrement plus grand que la quantité
à réchauffer. Aplatissez le contenu si possible. Couvrez d’un couvercle, film
plastique ou papier ciré. Couvrez de film plastique ou couvercle pour les
quantités importantes ou les aliments à consistance épaisse tels que les
ragoûts.
Remuez si possible le plat réchauffé, qui doit être très chaud. Sinon, continuez
à réchauffer à puissance et durée variables. Une fois remué, couvrez le plat
et laissez reposer 2 ou 3 minutes.
Ajustez pour moins de temps en touchant POWER LEVEL deux fois pour
de petites quantités de légumes en conserves.
Utilisez cette touche pour réchauffer des plats déjà cuits sortis du réfrigérateur.
Placez les portions de viande et les gros morceaux de légumes à l’écart
du centre de l’assiette. Découpez les gros morceaux tels que les pommes
de terre. Aplatissez les aliments tels que la purée et autres préparations
à consistance épaisse. Couvrez de papier ciré ou de film plastique. UNE
ASSIETTE SEULEMENT. Après la cuisson, vérifiez que les préparations sont
très chaudes de part en part et que le dessous du centre de l’assiette est
très chaud. Sinon, continuez à réchauffer par durée et niveau de puissance.
Laissez reposer recouvert pendant 2 ou 3 minutes.
N’utilisez que du popcorn conditionné pour cuisson micro-ondes. Faites
quelques essais pour choisir votre marque préférée. N’essayez pas de
faire éclater les grains restés entiers. Ajustez par plus ou moins de temps
si nécessaire, pour accommoder les grains plus mûrs ou les préférences
de chacun.
Restes de riz,
pommes de terre,
légumes, plats
préparés ou autres
Soupes
Assiette assortie
1 assiette
Plats principaux et
légumes en conserves
SENSOR
REHEAT
POPCORN

16
M I C R O - O N D E S P A R T I C U L A R I T É S
• Pour faire rôtir une pomme de terre :
cuISSoN PAR cAPTEuR
M A R C H E À S U I V R E A F F I C H A G E
1
2
TABlEAu dE cuISSoN PAR cAPTEuR
A L I M E N T
Q U A N T I T É
M A R C H E À S U I V R E
3
Appuyez sur SENSOR
COOK.
CHOISIR
ALIMENT
NUMERO
POMME
TERRE
DE
AU FOUR
Choisissez le réglage de
capteur voulu. Appuyez
sur 1 pour cuire des
pommes de terre.
1
Appuyez sur START/
TOUCH ON . Lorsque
le caapteur perçoit
les vapeurs émises
par l’aliment, le temps
de cuisson restant
s’affiche.
Ouvrez la porte et appuyez sur STOP/CLEAR. L’heure
actuelle apparaît à l’affichage.
LAISSER
COUVERT
REPOSER
1. Pommes de terre
rôties
1 à 6
moyennes
2. Légumes
surgelés
1 à 6 tasses
3. Légumes frais, tendres
Brocoli
Choux de Bruxelles
Chou
Chou-fleur (en bouquets)
Chou-fleur (entier)
Épinards
Zucchini
Pommes cuites
0,25 à 2,0 livres
0,25 à 2,0 livres
0,25 à 2,0 livres
0,25 à 2,0 livres
1 moyen
0,25 à 1,0 livres
0,25 à 2,0 livres
2 à 4 moyen
4. Légumes frais, croquants
Carottes en tranches
Maïs en épi
Haricots verts
Courges, en dés
Coupées en moitié
0,25 à 1,5 livres
2 à 4 pièces
0,25 à 1,5 livres
0,25 à 1,5 livres
1 à 2
5. Plats principaux
surgelés
6 à 17 onces
6. Hot dogs 1 à 4 portions
7. Bacon 2 à 6 tranches
8. Poisson, fruits de mer 0,25 à 2,0 livres
PRESSER START
Percez. Placez sur le plateau tournant recouvert de serviette en
papier. Après la cuisson, retirez du four, enveloppez de feuille
d’aluminium et laissez reposer 5 à 10 minutes.
Mettez sous couvercle ou film plastique. Après la cuisson, remuez
et laissez reposer recouvert pendant 3 minutes.
Lavez et placez dans un récipient. Ne pas ajouter d’eau si les
légumes viennent d’être lavés. Posez un couvercle pour des
légumes tendres, ou du film plastique pour une cuisson plus
croquante. Remuez si possible avant de laissez reposer. Après
la cuisson, laissez reposer recouvert de 2 à 5 minutes.
Placez dans une casserole. Ajoutez 1 à 4 cuillères à soupe d’eau.
Posez un couvercle sur les légumes à cuisson tendre, ou du film
plastique pour une cuisson plus croquante. Remuez si possible
avant de laissez reposer. Après cuisson, laissez reposer recouvert
de 2 à 5 minutes.
Utilisez pour les légumes surgelés prêts à servir. Les résultats
seront bons dans la plupart des cas. Faites quelques essais pour
trouver votre marque préférée. Défaites l’emballage extérieur et
suivez les indications concernant les couvercles. Après la cuisson,
laissez reposer recouvert de 1 à 3 minutes.
Placez la saucisse dans son petit pain et enveloppez d’une
serviette en papier.
Placez le bacon sur une assiette en carton recouverte d’une
serviette en papier. Le bacon ne doit pas dépasser hors de
l’assiette. Couvrez d’une serviette en papier.
Disposez en rond sur un plat en verre peu profond (enroulez
les filets afin qu’ils reposent sur leurs bords repliés). Recouvrez
de film plastique. Après la cuisson, laissez reposer recouverts
pendant 3 minutes.
SENSOR
COOK

17
M I C R O - O N D E S P A R T I C U L A R I T É S
REcETTES dE cuISSoN coMMANdéE PAR cAPTEuR
2 tasses de canneberges fraîches 500 ml
1 tasse d’eau 250 ml
3/4 tasse de sucre 175 ml
1 boîte (3 onces) de gélatine à l’orange 90 g
1
Mélanger les canneberges, l’eau et le sucre dans un bol de 2 pintes/2l. Couvrir de papier ciré. Cuire au four en
utilisant le réglage SENSOR REHEAT Moins. Égoutter les canneberges et conserver le jus.
2
Ajouter suffisamment d’eau pour obtenir 2 tasses/500 ml. Dissoudre complètement la gélatine dans ce jus chauffé.
Couvrir de papier ciré. Cuire au four en utilisant le réglage SENSOR REHEAT Moins.
3
Ajouter les canneberges et laisser refroidir. Placer au réfrigérateur jusqu’à l’obtention d’un produit consistant.
Napper alors les cannegerges de crème fouettée. Verser dans les bois à desserts avec une cuiller et garnir de
crème fouettée. Conserver au réfrigérateur jusqu’au moment de servir.
1/2 chopine de crème à fouetter, fouettée ou 250 ml
1 boîte (8 onces) de gamiture non laitière 230 g
à dessert
1/4 tasse de cassonade 50 ml
3 c. à soupe de margarine ou de beurre 50 ml
2 c. à soupe de confiture d’abricots 30 ml
1/2 c. à thé de muscade moulue 2 ml
1/4 c. à thé de sel 1 ml
1/2 tasse de sucre 125 ml
1
Mélanger la cassonade, la margarine et la confiture d’abricots dans un petit bol. Faire cuire au four en utilisant
le réglage HIGH (100%) pendant 45 secondes à 1 minute, le temps nécessaire pour fondre la margarine et
ramollir la confiture. Ajouter la muscade, le sel, le sucre, le jus d’orange et la fécule de maïs. Cuire au four de 4
à 6 minutes en utilisant le réglage HIGH (100%) jusqu’à épaississement, en remuant plusieurs fois.
2
Disposer les tranches de pommes dans un grand plat de service allant au four à micro-ondes. Napper les pommes
de la préparation chaude. Bien couvrir d’une pellicule plastique percée de trous. Cuire au four en utilisant le
réglage FRESH VEGETABLES : Tendres. Laisser refroidir 5 minutes avant de servir.
3
Parsemer de pistaches. Servir seul ou accompagné de crème glacée à la vanille ou d’un gâteau éponge.
3/4 tasse de jus d’orange 175 ml
1 c. à soupe de fécule de maïs 15 ml
4 pommes à cuire au four 700 g
(environ 0,7 kg (1,5 lb) pelées et
couplées en 8 morceaux chacune
3 c. à soupe de pistaches vertes, hachées 50 ml
Mousse aux canneberges
Pour 6 à 8 personnes
Tranches de pommes glacees
Pour 6 à 8 personnes
Soupe aux légumes et au car
Pour 4 personnes
6 tranches bacon
1 boîte (10 3/4 onces) buillon de poulet 350 ml
3 pommes de terre moyennes, coupées en 250 ml
dés (à peu prè 2 tasses)
2 carottes râpées (à peu près 1 tasse) 250 ml
1 petit oignon, coupé (à peu près 1/2 tasse) 125 ml
1
Mettre 2 servíettes en papier sur un récipient allant au four aux micro-ondes. Arranger le bacon sur les serviettes.
Le recouvrir d’une troisiènne serviette. Faire cuire au four aux micro-ondes en utilisant SENSOR COOK pour
bacon. Casser le bacon cuit en morceaux et le mettre de côté.
2
Combiner le bouillon de poulet, les légumes et les assaîsonnements dans une casserole de 4 litres allant au
four aux micro-ondes. Le recouvrir de pellicule en plastíque fentée. Passer aufour aux micro-ondes en utilisant
SENSOR COOK pour pommes de terre. Les légumes devromt être tendres.
3
Ajouter le lait évaporé. Recouvrir encore de pellicule en plastíque fentée. Faíre cuire au four aux micro-ondes
en utilisant SENSOR REHEAT (réchauffer moins). Ajouter le persil. Laisser reposer, recouvert, pendant 5
minutes.
4
Mettre des morceaux de bacon sur chaque portion.
3/4 c. à thé sel 5 ml
1/2 c. à thé carí en poudre 500 ml
1/8 c. à thé poívre 1 ml
1 boîte (12 onces) laít évaporé 375 ml
2 c. à table persíl fraís coupé 30 g

18
M I C R O - O N D E S P A R T I C U L A R I T É S
REcETTES dE cuISSoN coMMANdéE PAR cAPTEuR (SUITE)
Pommes de terre assaisonnées
Pour 6 à 8 personnes
4 pommes de terre moyennes à cuire au four 4
(230 g / 8 onces chacune)
1/4 d’huile d’olive 50 ml
1 c. à soupe d’oignon haché instantané 15 ml
1/2 c. à thé de poudre de chili 2 ml
1
Couper chaque pomme de terre dans le sens de la longueur en quatre quartiers égaux. Placer les morceaux
dans un plat carré de 25 cm/10 po. Les mélanger avec l’huile dans l’huile pour bien les enrober.
2
Dans un petit bol, mélanger les autres ingrédients. Saupoudrer sur les pommes de terre.
3
Couvrir les pommes de terre de papier ciré. Faire cuire au four au réglage BAKED POTATOES. Réarranger les
pommes de terre lorsque l’affichage indique la durée de cuisson. Laisser reposer à couvert 5 minutes.
1/2 c. à thé de feuille d’origan 2 ml
1/4 c. à thé de cumin moulu 1 ml
1/2 c. à thé de sel 2 ml
Carottes assaisonnées
Pour 6 à 8 personnes
3 tasses de carottes tranchées, 750 ml 1/2 tasse de sucre 125 ml
0,5 cm (1/4 po) d’épaisseur 2 c. à thé de vinaigre 10 ml
1/2 tasse de poivron vert, coupé en carrés, 125 ml 1 c. à thé de sauce soja 15 ml
2,5 cm (1 po) 1/2 c. à thé de sel 2 ml
1/4 tasse d’oignon, émincé 50 ml 1/2 c. à thé de moutarde préparée 2 ml
3 c. à soupe d’eau 50 ml 1/8 c. à thé de poivre 1 ml
1 boîte 220 g (7 3/4 oz) de soupe aux 220 g
tomates semi-condensée
1
Dans un bol de 1 1/2 pinte, mélanger les carottes, le poivron vert, I’oignon et I’eau. Recouvrir. Cuire au four en
utilisant le réglage Fresh vegetables : Hard. Les carottes devraient être tendres et croustillantes. Égoutter.
2
Mélanger le reste des ingrédients. Couvrir et cuire en utilisant le réglage Sensor reheat.
Filets de plie savoureux
Pour 6 personnes
3/4 tasse de flocons de maïs 175 ml
3 c. à soupe de persil, haché 50 ml
2 c. à thé d’écorce de citron, râpée 10 ml
1
Sur du papier ciré, mélanger les flocons de maïs, le persil, l’écorce de citron et le paprika. Tremper les filets dans
l’oeuf battu, puis les enrober du mélange de flocons.
2
Placer le poisson dans un plat couvert allant au four à micro-ondes. Cuire en utilisant le réglage
FISH/SEAFOOD.
3
Servir avec de la sauce tartare ou à coctail ou du fromage fondu.
1/2 c. à thé de paprika 2 ml
1 livre de filets de plie 500 g
1 oeuf, légèrement battu 1
Maïs créole
Pour 6 personnes
2 cuillères à thé d’huile 10 ml
1/2 tasse de céleri haché 125 ml
1/2 tasse de poivron vert haché 125 ml
16 onces de tomates en conserve 450 ml
4 onces de champignons en conserve 110 g
pieds et morceaux, égouttés
1
Dans une casserole de 2 piintes/2l, mélanger l’huile, le céleri, les poivrons, les tomates, les champignons, le
sucre, la poudre d’oignon, la poudre d’ail ainsi que le sel et le poivre.
2
Mettre au micro-ondes en utilisant le réglage SENSOR REHEAT. Mettre de côté.
3
Placer le maïs dans une casserole recouverte de 1 pinte/1l et mettre au micro-ondes au réglage FROZEN
VEGETABLES. Égoutter.
4
Mélanger le maïs et l’assisonnement de légumes. Remuer et servir immédiatement.
1 cuillère à thé de sucre brun 5 ml
1/2 cuillère à thé de poudre d’oignon 2 ml
1/4 cuillère à thé de poudre d’ail, sel et poivre 1 ml
1 paquet (16 onces) de maïs surgelé 450 g

19
REMARQuE :
Pour préchauffer et cuire à la
même température, entrez la même valeur aux étapes
2 et 3.
M A R C H E À S U I V R E A F F I C H A G E
1
2
3
4
2
3
4
M A R C H E À S U I V R E A F F I C H A G E
1
2
3
Appuyez sur START/
TOUCH ON.
START
TOUCH ON
C U I S S O N P A R C O N V E C T I O N / C O M B I N A I S O N A U T O M AT I Q U E
Cette section du Manuel d’opérations présente des in-
structions et procédures de cuisson spécifiques. Prière
de consulter le livre de cuisine, Sharp Carousel Con-
vection Microwave Cookbook, pour des conseils utiles
concernant la cuisson par convection ou combinée.
Le four ne doit pas être utilisé sans que le plateau
tournant soit installé et la rotation ne doit jamais être
entravée. Le plateau tournant peut être retiré pour
préchauffer le four et pour préparer des aliments à cuire
directement sur le plateau.
Le chauffage par convection fait circuler l’air chaud dans
tout l’espace du four pour que les aliments deviennent
rapidement dorés et croustillants de part en part. Ce
four peut se programmer à dix températures différentes
de cuisson par convection pour un maximum de 99
minutes, 99 secondes.
cuIRE PAR coNVEcTIoN
• Pour une cuisson de 20 minutes à 350
o
F :
PRécHAuFFAGE ET cuISSoN
PAR coNVEcTIoN
Le four peut se programmer pour combiner les fonctions
de préchauffage et de cuisson par convection. La
convection peut être réglée à la même température
que le préchauffage ou à une température plus ou
moins élevée.
• Pour un préchauffage à 350
o
F suivi d’une cuisson
de 25 minutes à 375
o
F par convection :
Lorsque le four atteint la température programmée,
il retient automatiquement la température de
préchauffage pendant 30 minutes. L’affichage
revient ensuite à l’heure actuelle. Lorsque STOP/
CLEAR est touché pendant cet intervalle de temps,
PRESS CONVEC ou PRESS MIX apparaissent à
l’affichage et le mode de cuisson ainsi que sa durée
peuvent être entrés.
GRIllAdE
Le préchauffage est automatique au réglage de
grillade. Entrez simplement la durée voulue de grillade
et attendez la fin du préchauffage pour introduire les
aliments. (Préréglage à 450
o
F). La température du four
ne peut pas être modifiée.
• Pour faire griller une tranche de jambon pendant 15
minutes :
Appuyez sur BROIL.
Appuyez sur les chiffres
pour entrer la durée de
cuisson. (Par exemple :
1500)
450F
DUREE
ENTRER
CUISSON
PRE-
CHOISIR
TEMPE-
350F
ENTRER
DUREE
CUISSON
20.00
Appuyez sur CONVEC.
Appuyez sur les
chiffres pour obtenir la
température voulue.
(Par exemple : Appuyez
sur 6 pour une
température de 350˚ F)
Entrez la durée de
cuisson. (Par exemple :
2000 minutes)
Appuyez sur START/
TOUCH ON.
START
TOUCH ON
M A R C H E À S U I V R E A F F I C H A G E
1
5
START
TOUCH ON
RATURE
CHAUF-
FAGE
cuISSoN PAR
coNVEcTIoN
PRE
CHAUF-
FAGE
Appuyez sur
PREHEAT pad.
RATURE
CHOISIR
TEMPE-
Appuyez sur les
chiffres pour obtenir
la température
voulue. (Par exemple
: touche 6 pour une
température de 350˚F.)
350F
START
PRESSER
Entrez la durée de
cuisson. (Par exemple :
2500minutes)
25.00
Appuyez sur START/
TOUCH ON.
PRESSER
OU
CONVEC
Appuyez sur CONVEC
puis les touches
chiffrées pour obtenir
la température. (Par
exemple : 7 pour
375˚F)
CHOISIR
RATURE
TEMPE-
375F
ENTRER
DUREE
CONVEC
PREHEAT
BROIL
CUISSON

20
À l’exception d’aliments donnant de meilleurs résultats
par convection seule, la plupart des plats se prêtent
très bien à la cuisson combinée au moyen de LOW
MIX/BAKE ou de HIGH MIX/ROAST.
La combinaison de ces deux modes de cuisson produit
des viandes juteuses, des gâteaux moelleux et des
pains de consistance très fine, avec des résultats
toujours croustillants et dorés à point.
Les températures peuvent se modifier mais non pas la
puissance micro-ondes.
La température du four peut se régler de 100˚ F à
450˚ F. Pour la modifier, touchez d’abord HIGH MIX ou
LOW MIX; touchez ensuite la même commande une
deuxième fois. À l’affichage,
touchez les chiffres voulus pour la température. Par
exemple : HIGH MIX, HIGH MIX, touche 7 puis
START/TOUCH ON. La température combinée se
modifie alors automatiquement.
CHOISIR TEMPE-
RATURE
M A R C H E À S U I V R E A F F I C H A G E
1
2
T E M P É R A T U R E
D U F O U R
P U I S S A N C E
M I C R O - O N D E S
M A R C H E À S U I V R E A F F I C H A G E
1
2
M A R C H E À S U I V R E A F F I C H A G E
C U I S S O N P A R C O N V E C T I O N / C O M B I N A I S O N A U T O M AT I Q U E
PRécHAuFFAGE ET cuISSoN
AuToMATIQuE coMBINéE
Le four peut se programmer à la fois pour le préchauffage
et les étapes de cuisson automatique combinée. Le
préchauffage peut s’exécuter à la température préréglée
combinée ou être changé à une autre température.
• Pour un préchauffage à 350˚ F suivi d’une cuisson
au four de 25 minutes à 325˚ F réglée sur une
combinaison à niveau faible :
cuISSoN lENTE
La cuisson lente est préréglée à 300
o
F et programmée
pour 4 heures de cuisson. Cette température peut
être réduite à moins de 300
o
F. Touchez simplement
SLOW COOK puis les touches chiffrées pour obtenir
une température inférieure à 300
o
F.
cuISSoN AuToMATIQuE
coMBINéE
Ce four possède deux réglages préprogrammés
facilitant une cuisson automatique par convection et
micro-ondes combinées.
cuISSoN coMBINéE
• Pour cuire un gâteau en combinaison à niveau faible
pendant 20 minutes :
2
4
350F
START
PRESSER
5
Appuyez sur START/
TOUCH ON.
PRESSER
OU
CONVEC
3
Appuyez sur PREHEAT.
1
CHOISIR
RATURE
TEMPE-
Appuyez sur LOW MIX/
BAKE.
325F
DUREE
CUISSON
ENTRER
Appuyez sur les chiffres
pour sélectionner la durée.
0052
25.00
PRESSER
START
Appuyez sur les
chiffres pour obtenir
la température voulue
(Par 6 pour une
température de 350˚F.)
PRE-
À la fin du cycle de cuisson, une tonalité prolongée
se fait entendre et l’affichage
apparaît.
HIGH MIX 325˚F 30%
LOW MIX 325˚F 10%
Appuyez sur LOW
MIX/BAKE.
Appuyez sur les chiffres
pour sélectionner la durée.
0002
20.00
PRESSER
START
325F
DUREE
CUISSON
ENTRER
À la fin de la cuisson, une tonalité prolongée se fait
entendre et l’affichage apparaît.
START
TOUCH ON
FIN
FIN
CHAUF-
FAGE
Appuyez sur SLOW COOK.
300F
PRESSER
START
Appuyez sur START/TOUCH ON.
Le four commence le minutage et
continue pendant 4 heures.
4HEURES
START
TOUCH ON
SLOW
COOK
PREHEAT
LOW MIX
BAKE
LOW MIX
BAKE
21
M A R C H E À S U I V R E A F F I C H A G E
REMARQuE :
C O N V E C T I O N A U T O M A T I Q U E C O M B I N É E F O N C T I O N S
Cette section du manuel d’opérations explique la
préparation de 12 plats populaires utilisant les fonctions
de grillade CompuBroil, de rôtissage CompuRoast et
de four CompuBake.
Après avoir sélectionné la fonction voulue, suivez les
indications de l’affichage.
Pour des conseils pratiques, touchez simplement
CUSTOM HELP lorsque le message d’aide HELP
s’allume en affichage.
coMPu BRoIl
CompuBroil fait griller automatiquement les hamburgers,
le poulet en morceaux, les biftecks et les tranches de
poisson.
• Pour faire griller deux hamburgers :
Appuyez sur COMPU
1
Appuyez sur les
chiffres. (Par exemple
: pour les hamburgers,
touche 1.)
2
ALIMENT
CHOISIR
NUMERO
1
HAM BURGERS
UTILIS GRILLE
BAS
NUMERO
QUEL
NOMBRE
CHOISIR
Appuyez sur les chiffres
pour entrer la quan-
tité. Par exemple : 2.)
Suivez les indications
de cuisson indiquées à
l’affichage.
3
2
2
AUCUN
ALIMENT
DANS
FOUR
POUR
CUISSON
4
5
À la fin du cycle de grillade, une longue tonalité se
fait entendre et
FIN
apparaît à l’affichage.
1. CompuBroil peut se programmer avec un ajustement
de plus ou moins de temps. Voir la page 24.
2. Si vous tentez d’entrer plus ou moins que les lim-
ites de poids établies,
ou
s’affichent. Si
vous entrez plus ou moins que les limites de chif-
fres établies,
ou
s’affichent.
3. Pour faire griller d’autres aliments ou des aliments
de poids ou de chiffres inférieurs ou supérieurs aux
valeurs établies dans le tableau ci-dessous, suivez
les instructions du livre de cuisine Sharp Carousel
Convection Microwave Cookbook. Voir le tableau
Broiling.
Appuyez sur START/TOUCH ON.
À la fin du préchauffage du cycle de grillade,
4 tonalités longues se font entendre.
5-10 MIN
5-10 MIN
5-10 MIN
5-10 MIN
5-10 MIN
5-10 MIN
5-10 MIN
5-10 MIN
s’affiche à plusieurs reprises.
Ouvrez la porte et mettez les hamburgers au four.
Refermez la porte.
Appuyez sur START/TOUCH
ON.
START
TOUCH ON
START
TOUCH ON
TABlEAu coMPu BRoIl
R É G L A G E
A L I M E N T
Q U A N T I T É
M A R C H E À S U I V R E
1. Hamburgers 1 à 8 pesant
1/4 de livre
chacun
2. Morceaux
de poulet
0,5 à 3,0
livres
3. Biftecks 0,5 à 2,0
livres
4. Tranches de
poisson
0,5 à 2,0
livres
Choisissez ce réglage pour faire griller des hamburgers. Posez sur la grille
inférieure.
Disposez les morceaux sur la grille inférieure. Après cuisson, laissez reposer
3-5 minutes. La température doit être de 180˚ F sauf pour les blancs qui doivent
être à 170˚ F.
Choisissez ce réglage pour faire griller des biftecks de 3/4 à 1 po d’épaisseur.
Les biftecks individuels désossés cuisent uniformément. Posez les biftecks sur
la grille inférieure. Appuyez sur POWER LEVEL une fois une cuisson à point et
deux fois pour des biftecks saignants.
Choisissez ce réglage pour faire griller une tranche de poisson de 3/4 à 1 po
d’épaisseur. Posez sur la grille inférieure.
A POINT
PRESSER
START
Appuyez sur POWER LEVEL et choisissez More
pour des hamburgers bien cuits ou Less pour une
cuisson plus saignante. Voir l’ajustement de plus ou
moins de temps à la page 24.
ERREUR
POIDS
TROP
ELEVE
CLEAR
PRESSER
ERREUR
POIDS
TROP
PETIT
PRESSER CLEAR
GRAND NOMBRE
ERREUR
TROP
QUANT NULLECLEAR
ERREUR
PRESSER
PRESSER CLEAR
PRE- CHAUF-
FAGE
COMPU
BROIL
22
M A R C H E À S U I V R E A F F I C H A G E
RÔTISSAGE coMPu
RoAST
CompuRoast fait automatiquement rôtir le poulet, la
dinde, le blanc de dinde ou le porc.
• Pour faire rôtir un poulet de 2,5 livres :
Appuyez sur COMPU ROAST.
1
Appuyez sur les chiffres
(Par exemple : pour un
poulet, touche 1.)
2
3
Appuyez sur les chiffres
pour entrer le poids Par
exemple : 2,5)
ALIMENT
CHOISIR NUMERO
Appuyez sur START/TOUCH
ON.
4
À la fin du cycle COMPU ROAST, une longue
tonalité se fait entendre et
LAISSER
REPOSER
COUVERT POUR 5-10 MIN
s’affiche.
1
POULET UTILIS
GRILLE BAS
ENTRER POIDS
2 5
2.5
PRESSER START
TABlEAu coMPu RoAST
R É G L A G E
A L I M E N T
Q U A N T I T É M A R C H E À S U I V R E
1. Poulet 2,5 à 7,0 livres
(1,2 à 3,1 kg)
G R I L L E
Inférieure
2. Dinde
(sans farce)
6,5 à 9,0 livres
(3,0 à 4,0 kg)
Inférieure
3. Blanc
de dinde
3,0 à 6,0 livres
(1,4 à 2,7 kg)
Inférieure
4. Porc 2,0 à 3,5 livres
(0,9 à 1,5 kg)
Inférieure
START
TOUCH ON
C O N V E C T I O N A U T O M A T I Q U E C O M B I N É E F O N C T I O N S
REMARQuE :
1.
CompuRoast peut se programmer avec un ajustement
de plus ou moins de temps. Voir la page 24.
2. Si vous tentez d’entrer un poids supérieur ou inférieur
aux limites établies,
ERREUR
POIDS
TROP
ELEVE PRESSER CLEAR
ou
ERREUR POIDS
TROP PETIT PRESSER CLEAR
apparaît à
l’affichage.
3. Pour faire rôtir d’autres aliments ou des plats pesant
plus ou moins que les poids donnés au tableau ci-
dessous, consulter le tableau de cuisson combinée
présenté dans le livre de cuisine Sharp Carousel
Convection Microwave Cookbook.
À la fin du cycle, couvrir d’une feuille d’aluminium et laissez reposer
5 à10 minutes. La température interne des blancs de poulet doit
être de 170
o
F et de 180
o
F pour les autres pièces.
Assaisonner au goût. Placer sur la grille inférieure. À la fin du
cycle, couvrir d’une feuille d’aluminium et laissez reposer pendant
10 minutes. La température interne des blancs de dinde doit être
de 170
o
F et de 180
o
F pour les autres pièces.
Assaisonner au goût. Placer sur la grille inférieure. À la fin du
cycle, couvrir d’une feuille d’aluminium et laissez reposer pendant
10 minutes. La température interne des blancs de dinde doit être
de 170
o
F.
Le filet de porc désossé est recommandé pour sa cuisson uniforme.
Placez sur la grille inférieure. Après la cuisson, retirez du four,
couvrez d’une feuille d’aluminium et laissez reposer 5 à10 minutes.
La température interne doit être de 160
o
F.
COMPU
ROAST
23
M A R C H E À S U I V R E A F F I C H A G E
REMARQuE :
1. CompuBake peut se programmer avec ajustement
de plus ou moins de temps. Voir la page 24.
2. Pour cuire d’autres aliments au four, voir la section
correspondante du livre de cuisine Sharp Carousel
Convection Microwave Cookbook.
C O N V E C T I O N A U T O M A T I Q U E C O M B I N É E F O N C T I O N S
coMPu BAkE
CompuBake fait automatiquement cuire au four les
gâteaux, les carrés au chocolat, muffins, et frites.
• Pour un gâteau de 13 po x 9 po x 2 po cuit au four:
Appuyez sur COMPU BAKE.
Remarque : le plaueau tournant est
automatiquement mis à l’arrêt.
1
Appuyez sur les chiffres
(Par exemple : pour un
gâteau, touche 1.)
2
3
ALIMENT
CHOISIR
NUMERO
Appuyez sur START/TOUCH
ON.
4
À la fin du cycle COMPU BAKE, une longue tonalité
se fait entendre et apparaît à l’affichage.
1
GATEAU
PLAT METAL-
LIQUE 13X9X2
R É G L A G E
A L I M E N T
1. Gâteau
G R I L L E
Inférieure
2. Carrés au
chocolat
Inférieure
3. Muffins Inférieure
4. Frites Inférieure
POUCES SUR
GRILLE BAS
AUCUN ALIMENT
DANS FOUR
Appuyez sur START/
TOUCH ON.
À la fin du cycle de préchauffage COMPU BAKE,
quatre tonalités se font entendre. L’affichage
indique
FIN
PRE-
CHAUF-
FAGE
PLACER
.
ALIMENT
DANS
FOUR
. Ouvrez la
porte. Introduisez le gâteau à l’intérieur. Refermer
la porte et appuyez sur START/TOUCH ON.
TABlEAu coMPu BAkE
D I M E N S I O N S /
C A P I C I T É
D E S M O U L E S
START
TOUCH ON
START
TOUCH ON
M A R C H E À S U I V R E
13 po x 9 po x 2 po
13 po x 9 po x 2 po
Plaque à
12 moules
Tôle à biscuits
pour 3 à 24
onces
UTILIS
PRESSER START
PRE- CHAUF-
FAGE
FIN
Idéal pour les mélanges à gâteau ou recettes maison dans un
moule de 13 po x 9 po x 2 po. Suivez le mode d’emploi du mélange
ou la recette, et versez dans le moule de dimensions ci-dessus
beurré et saupoudré de farine. Après le préchauffage, placez le
moule au centre de la grille inférieure. Laissez refroidir avant de
napper et de servir.
Idéal pour les mélanges pour carrés au chocolat ou recettes
maison dans un moule de 13 po x 9 po x 2 po. Suivez le mode
d’emploi du mélange ou la recette, et versez dans le moule de
dimensions ci-dessus beurré et saupoudré de farine. Après le
préchauffage, placez le moule au centre de la grille inférieure.
Laisser refroidir avant de découper en portions individuelles.
Idéal pour les mélanges pour muffins ou recettes maison pour 12
muffins de taille moyenne. Suivez le mode d’emploi du mélange
ou la recette, et versez dans 12 moules à muffins. Après le
préchauffage, placez le moule au centre de la grille inférieure.
Utilisez des frites surgelées prêtes à servir.
Aucun préchauffage n’est requis pour la préparation des frites.
Disposez-les sur la tôle placée sur la grille inférieure.
Pour les frites allumettes, Appuyez sur POWER LEVEL deux
fois afin de programmer une durée plus courte avant de toucher
START/TOUCH ON.
COMPU
BAKE
24
Pour une démonstration, appuyez sur CLOCK, 0 puis
appuyez sur START/TOUCH et maintenez le contact
pendant 3 secondes.
POUR
ANNULER
DEMO
PRESSER
CLEAR
apparaît à l’affichage. Les étapes
de préparation et les fonctions pratiques peuvent
maintenant être démontrées sans que le four soit activé.
Par exemple, appuyez sur MINUTE PLUS et l’affichage
indique
1.00
puis un minutage à rebours jusqu’à
0 et
FIN
.
Pour annuler, appuyez sur CLOCK, le chiffre 0 et
STOP/CLEAR.
A U T R E S P A R T I C U L A R I T É S C O M M O D E S
Le four peut se programmer pour un maximum de
quatre séquences de cuisson automatiques en mode
micro-ondes et trois séquences automatiques en mode
convection, passant automatiquement d’un mode à
l’autre.
Les recettes recommandent parfois de commencer la
cuisson à un certain niveau de puissance pour passer
ensuite à un autre niveau, ce que votre four peut
accomplir automatiquement.
• Pour cuire un rôti de boeuf 5 minutes au niveau de
90 %, puis continuer la cuisson pour 30 minutes à
50 % :
cuISSoN PAR SéQuENcES
MulTIPlES
M A R C H E À S U I V R E
REMARQuE :
1. Si vous appuyez sur POWER LEVEL deux fois,
ELEVEE
s’affiche.
2. Si 100 % est choisi comme séquence finale, il n’est
plus nécessaire de toucher POWER LEVEL.
3. Pour connaître le niveau de puissance, touchez
simplement POWER LEVEL. Le niveau reste
affiché tant que vous continuez à toucher POWER
LEVEL.
•
Pour minuter un appel téléphonique de 3 minutes :
MINuTERIE dE cuISINE
M A R C H E À S U I V R E
1
2
Minute de plus permet une cuisson d’une minute à
100 % de puissance en touchant simplement MINUTE
PLUS. La durée de cuisson peut aussi se prolonger
par multiples d’une minute en touchant MINUTE PLUS
à plusieurs reprises en cours de cuisson manuelle en
mode micro-ondes, convection, combiné ou grillade.
• Pour réchauffer un bol de soupe pendant une
minute :
MINuTE dE PluS
M A R C H E À S U I V R E
Appuyez sur MINUTE PLUS.
Plus : Si vous préférez une cuisson un peu plus
à point pour les réglages des fonctions COMPU
DEFROST, COMPU ROAST, COMPU BAKE, COMPU
BROIL, SENSOR COOK ou INSTANT SENSOR,
appuyez sur POWER LEVEL une fois après avoir
sélectionné la fonction.
Moins : Si vous préférez une cuisson un peu moins
poussée pour les réglages des fonctions COMPU
DEFROST, COMPU ROAST, COMPU BAKE, COMPU
BROIL, SENSOR COOK ou INSTANT SENSOR,
appuyez sur POWER LEVEL deux fois après avoir
sélectionné la fonction.
RéGlAGE dES TEMPS dE
cuISSoN
ModE dE
déMoNSTRATIoN
3
AIdE
Chaque réglage de CompuDefrost, CompuBroil,
CompuRoast, CompuBake et de cuisine par capteur,
comporte un conseil de cuisine. Pour consulter ces
conseils, appuyez sur CUSTOM HELP chaque fois que
HELP s’allume en affichage interactif.
1
2
9
3
005
0003
6
4
POWER
LEVEL
5
5
7
Appuyez sur POWER
LEVEL une fois.
Appuyez sur le chiffre de
POWER LEVEL (Ex : 90%)
Entrez la durée de cuisson
(Ex : 5 minutes)
Appuyez sur POWER
LEVEL une deuxième fois.
Appuyez sur le chiffre de
POWER LEVEL (Ex : 50%)
Entrez la durée de cuisson
(Ex : 30 minutes)
Appuyez sur START/
TOUCH ON.
START
TOUCH ON
POWER
LEVEL
Appuyez sur KITCHEN TIMER.
Entrez la durée.
003
Appuyez sur START/TOUCH
ON .
KITCHEN
TIMER
START
TOUCH ON
REMARQuE :
1. La touche Minute Plus n’a d’effet que pendant la
cuisson ou que dans la minute suivant une cuisson,
l’ouverture et la fermeture de la porte, et la pression
sur la appuyez sur Stop/Clear.
2. La touche Minute Plus ne peut pas être utilisée avec
les particularités décrites précédemment.
MINUTE
PLUS

25
1
2
3
4
5
6
AIdE PERSoNNAlISéE
CUSTOM HELP présente cinq fonctions facilitant
l’usage du four par des instructions spécifiques
présentées en affichage interactif.
1. VERROUILLAGE DE SÉCURITÉ
Le verrouillage de sécurité vise à empêcher que le
four soit utilisé par de jeunes engants. Le four peut
être réglé de telle sorte que le tableau de commande
est inopérant ou verrouillé. Pour le réglage, appuyer
sur la appuyez sur CUSTOM HELP, le chiffre 1 et
la appuyez sur START/TOUCH ON. Si on appuie sur
une touche, I’affichage indique
VERROU
.
Pour annuler, appuyer sur CUSTOM HELP et
STOP/CLEAR.
2. SUPPRESSION DU SIGNAL SONORE
Si vous souhaitez que le four fonctionne sans signal
sonore, appuyez sur CUSTOM HELP, le chiffre 2 et
STOP/CLEAR.
Pour annuler et restaurer le signal sonore, appuyez sur
CUSTOM HELP, le chiffre 2 et START/TOUCH ON.
3. DÉMARRAGE AUTOMATIQUE
Si vous souhaitez programmer le four pour qu’il
commence automatiquement une cuisson à une heure
spécifiée, procédez comme suit :
• Pour commencer à faire cuire un ragoût pendant
20 minutes à 16h30. Avant le réglage, vérifiez que
l’heure juste est affichée :
M A R C H E À S U I V R E
REMARQuE :
1. Le démarrage automatique peut s’employer en mode
de cuisson manuelle ou avec CompuBroil/Roast/
Bake, si l’affichage horaire est réglé.
2. Si la porte du four est ouverte après la programmation
du démarrage automatique, appuyez sur START/
TOUCH ON pour que l’heure actuelle s’affiche
et que le four lance automatiquement la cuisson
programmée à l’heure voulue.
A U T R E S P A R T I C U L A R I T É S C O M M O D E S
LANGUECHIFFRE 4
AFFICHAGE
Une fois Anglais
ENGLISH
Deux fois Espagnol
ESPANOL
Tres fois Français
FR
Cuisson-touche permet une cuisson à 100%
de puissance en touchant START/TOUCH ON
continuellement. Cuisson-touche est idéal pour faire
fondre le fromage, chauffer le lait juste à ébullition, etc.
La durée de cuisson maximum est de 3 minutes.
• Pour faire fondre du fromage sur une tartine :
cuISSoN-ToucHE
REMARQuE :
1. Notez la durée de cuisson de vos préparations
fréquentes et programmez cette durée pour les
prochaines fois.
2. Appuyez sur TOUCH ON durant la première minute
de cuisson, après avoir fermé ou ouvert la porte ou
après avoir appuyez sur STOP/CLEAR.
3. Cuisson-touche ne peut s’utiliser que trois fois de
suite. Pour utiliser la fonction à nouveau, ouvrez et
fermez la porte ou appuyez sur STOP/CLEAR.
M A R C H E À S U I V R E
1
Lorsque le fromage est fondu à votre goût,
relâchez la appuyez sur START/TOUCH ON.
Le four s’arrête immédiatement.
2
Appuyez sur START/TOUCH
ON continuellement. Le
minutage de cuisson
commence.
3.
Prenez soin de choisir des aliments qui peuvent
rester au four jusqu’à l’heure du démarrage
automatique sans se gâter. Les pommes de terre
rôties sont souvent indiquées.
4. SÉLECTION DE LANGUE
Le four est fourni avec des réglages en anglais. Pour
changer ce réglage, appuyez sur CUSTOM HELP,
puis le chiffre 4 sans interruption jusqu’à l’affichage
voulu parmi les sélections ci-dessous. Touchez ensuite
START/TOUCH ON.
CLOCK
3
034
0002
START
TOUCH ON
5. SÉLECTION DE POIDS/TEMPÉRATURE
Le four est fourni réglé selon le système U.S. Customary
Unit-pounds. Pour modifier, appuyez sur CUSTOM
HELP, puis le chiffre 5 sans interruption jusqu’à
l’affichage voulu parmi les sélections ci-dessous.
Appuyez sur ensuite START/TOUCH ON.
Appuyez sur le chiffre.
Appuyez sur
CUSTOM HELP.
Entrez l’heure de début.
Appuyez sur
CLOCK.
Entrez la programmation
ou la durée de cuisson.
Appuyez sur
START/
TOUCH ON.
LANGUE
CHFFRE 5
AFFICHAGE
Une fois Livre/Fahrenheit
Deux fois Kilo/Celsius
START
TOUCH ON
LB F
KG C
CUSTOM
HELP
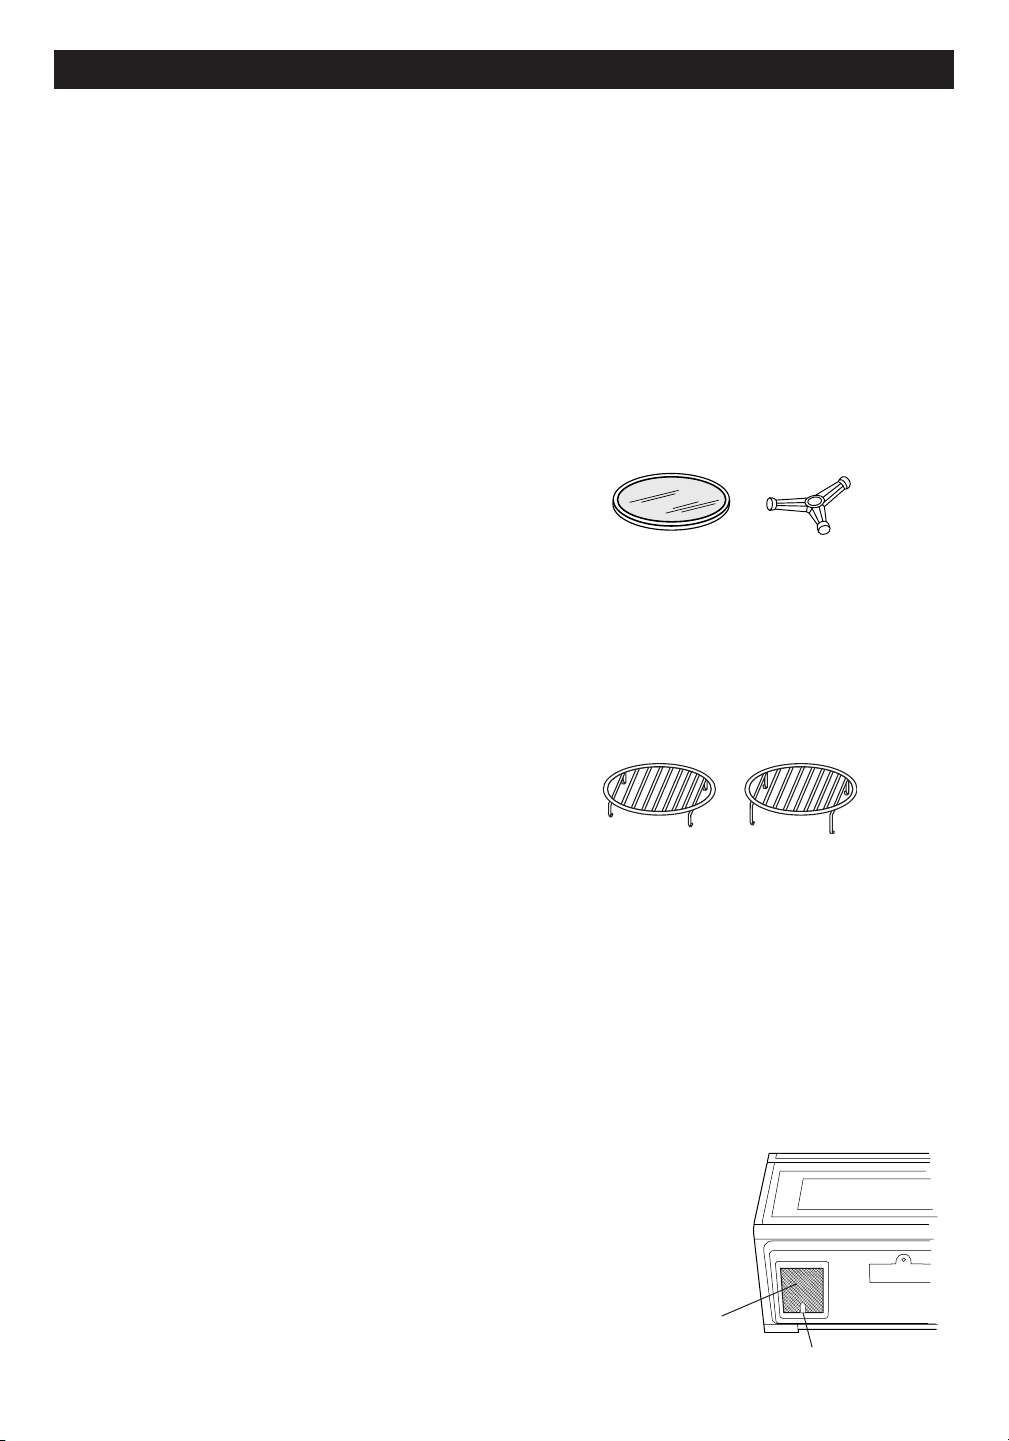
26
N E T T O y A G E E T E N T R E T I E N
EXTéRIEuR
La surface extérieure est en métal conditionné et en
plastique. Nettoyez l’extérieur à l’eau et au savon doux;
rincez et séchez avec un linge doux. N’employez aucun
produit de nettoyage de ménage ou produit abrasif.
PoRTE
Essuyez les deux faces de la porte avec un linge humide
pour supprimer toutes éclaboussures. Les parties
métalliques sont plus faciles à entretenir si elles sont
essuyées souvent avec un linge humide. Évitez l’usage
de produits fortement abrasifs.
PANNEAu TAcTIlE dE
coMMANdE
Nettoyez le panneau avec précaution. S’il se salit, le
désactiver en ouvrant la porte du four avant le nettoyage.
Essuyez le panneau avec un linge légèrement humecté
d’eau seulement. Séchez avec un linge doux. Ne pas
frotter, récurer, ni utiliser aucun produit d’entretien
chimique. Utilisez le moins d’eau possible. Fermez la
porte et appuyez sur STOP/CLEAR.
INTéRIEuR - APRèS cuISSoN
AuX MIcRo-oNdES
Les parois latérales, supérieures et inférieures du
four sont en acier inoxydable. Elles sont faciles
à nettoyer après cuisson aux micro-ondes, car
aucune chaleur ne se forme aux surfaces internes
ni par conséquent aucune adhésion persistante de
taches ou d’éclaboussures. Nettoyez l’intérieur au
moyen d’un linge moelleux mouillé à l’eau tiède. NE
PAS EMPLOYER DE SUBSTANCES ABRASIVES,
DE PRODUITS CORROSIFS NI DE TAMPONS À
RÉCURER. Pour les salissures plus importantes,
appliquez un savon doux et rincez complètement à
l’eau chaude.
INTéRIEuR - APRèS cuISSoN
PAR coNVEcTIoN ou
coMBINéE, ou GRIllAdE
Les corps gras et l’humidité peuvent laisser des
éclaboussures. Lavez immédiatement à l’eau chaude
savonneuse. Rincez à fond et séchez par polissage.
Des salissures plus difficiles à enlever peuvent se
former si le four n’est pas nettoyé scrupuleusement et
en cas de cuisson prolongée ou à haute température.
En pareil cas, il conviendrait d’acheter un tampon à
nettoyer les fours, déjà imbibé d’un produit liquide et
destiné aux surfaces d’acier inox ou de porcelaine - et
non pas un tampon à récurer, saturé de savon. Suivez
soigneusement le mode d’emploi du fabricant et prenez
particulièrement soin de ne pas laisser pénétrer le
liquide dans les perforations des parois ni nulle part sur
la porte. Rincez à fond et séchez par polissage.
couVERclE du GuIdE
d’oNdES
Lavez soigneusement toute particule d’aliment déposée
sur le couvercle du guide d’ondes qui se trouve à la
surface supérieure de l’intérieur du four.
déSodoRISATIoN
Des odeurs de cuisine peuvent éventuellement
persister dans le four. Pour les éliminer, mélangez le
jus et l’écorce râpée d’un citron et quelques clous de
girofle, avec une tasse d’eau dans un récipient de deux
tasses. Faites bouillir quelques minutes au niveau de
100 %. Laissez refroidir dans le four. Essuyez l’intérieur
avec un linge doux.
PlATEAu TouRNANT ET
SuPPoRT
Le plateau tournant en céramique et son support se
démontent et leur nettoyage est facile. Lavez à l’eau
douce savonneuse ; toute tache qui résiste se nettoie
avec un produit doux et une éponge à récurer telle que
décrite plus haut. Ces pièces sont également lavables
dans la partie supérieure du lave-vaisselle.
GRIllES
Les grilles supérieures et inférieures sont amovibles
pour un nettoyage facile et peuvent se ranger à l’écart
du four à micro-ondes lorsqu’elles ne servent pas.
Lavez-les à l’eau douce savonneuse après chaque
usage. Toute tache difficile à enlever se nettoie avec
un produit doux d’entretien et une éponge à récurer
comme décrite ci-dessus. Les grilles sont lavables au
lave-vaisselle.
FIlTRES À GRAISSES
Les filtres doivent être nettoyés au moins une fois par
mois. Ne jamais faire fonctionner le ventilateur ou le
four en l’absence de filtres.
1. Tirez la languette de chacun des deux filtres vers
l’avant et légèrement vers le bas du four pour les
retirer.
2. Laissez tremper les filtres dans l’évier ou dans
une bassine remplie d’eau chaude additionnée de
détergent. NE PAS utiliser d’ammoniaque ou autre
alcali, qui réagissent avec le matériau du filtre pour
le noircir.
3. Secouez et frottez à la brosse pour désincruster.
4. Rincez à fond et secouez
pour faire sécher.
5. Réinstallez les filtres en les
encastrant à leur place.
Filtre à
graisses
Languette
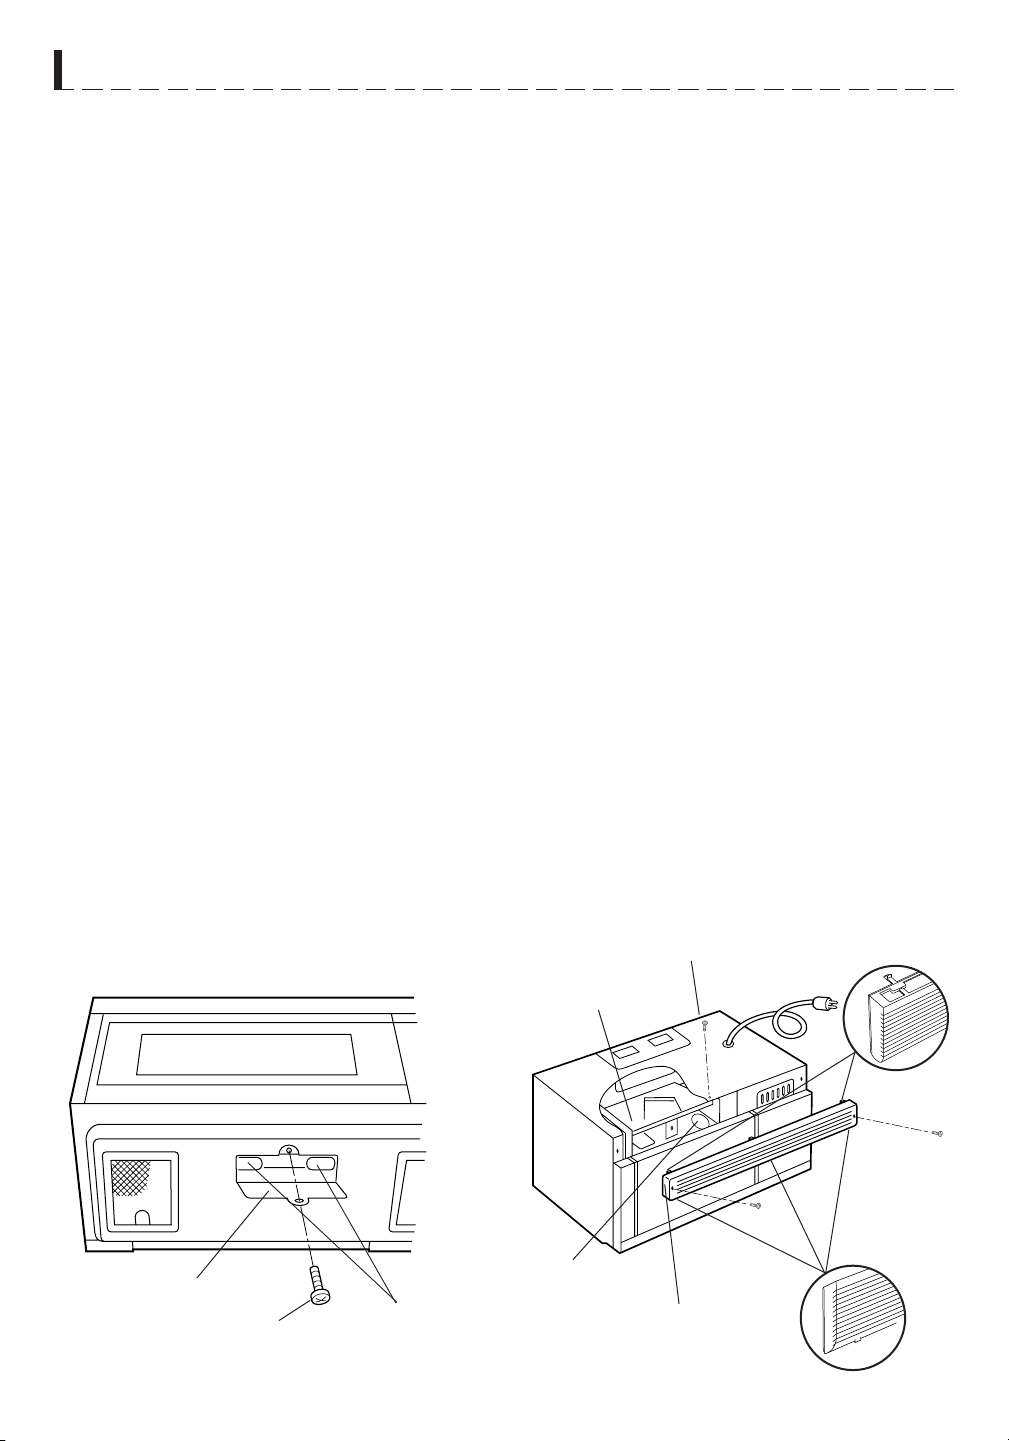
27
N E T T O y A G E E T E N T R E T I E N
Couvercle de
lumière
Vis
Ampoules
FIlTRE À cHARBoN
Le filtre à charbon, Sharp référence RK-220 s’emploie
en installations non ventilées et recirculées. Le filtre
doit être remplacé tous les 6 à 12 mois selon le niveau
d’utilisation.
1. Coupez l’alimentation du four au panneau disjoncteur
ou en débranchant à la prise.
2. Retirez les trois vis du volet.
3. Retirez le volet en introduisant un tournevis à lame
plate sur chaque languette, en faisant pression sur
elle et en écartant le volet de l’unité.
4. Tirez le volet à l’écart du four.
5. Faites glisser le filtre à charbon en place sur les
languettes de support.
6. Poussez le volet pour le remettre en position et
enclenchez manuellement les languettes à leur
place sans forcer et réinstallez les trois vis pour
fixer le volet.
AMPoulE du FouR
Retirez le volet selon les étapes 1-4 ci-dessus et faites
de même pour le filtre à charbon s’il fait partie de
l’installation.
5. Faites glisser le couvercle d’ampoules vers l’avant,
puis soulever.
6. Retirez l’ampoule usagée et remplacez uniquement
par une ampoule de puissance égale disponible
auprès d’un prestataire de services ou fournisseur
de pièces agréé Sharp. Ces ampoules s’obtiennent
aussi dans la plupart des quincailleries ou magasins
d’éclairage. NE PAS UTILISER D’AMPOULES
SUPÉRIEURES À 30 WATTS.
7. Réinstallez le couvercle d’ampoules du four et le filtre
à charbon s’il y a lieu ; poussez le volet en position
et remettez les trois vis de montage.
Vis
Vis
VENTIlATEuR
Le ventilateur se déclenche automatiquement sous
l’effet de la chaleur montant de la cuisinière, ou celle
des cuissons en mode convection, combiné fort ou
faible niveau, ou grillade. Le four à micro-ondes est
ainsi protégé contre toutes températures excessives.
Le ventilateur continue à fonctionner jusqu’à
réduction de la température, et ne peut pas être arrêté
manuellement entre-temps.
Pour d’autres besoins de ventilation, sélectionnez
haute ou basse vitesse.
PRÉCAUTIONS D’EMPLOI :
1. NE PAS laisser la cuisinière réglée à hautes
températures sans surveillance. Le ventilateur risque
de démarrer automatiquement, fournissant trop d’air
aux unités de surface et provoquant d’éventuelles
éclaboussures ou des débordements.
2. Évitez de brûler les préparations.
3. Veillez à la propreté des filtres à graisses.
éclAIRAGE
1. Pour remplacer les ampoules, coupez d’abord
l’alimentation du four au panneau disjoncteur ou en
débranchant à la prise.
2. Pour dégager le couvercle d’ampoules, retirez les
vis qui le maintiennent. (Voir l’illustration).
3. Utilisez uniquement les ampoules de puissance
égale disponibles auprès d’un prestataire de services
ou fournisseur de pièces agréé Sharp. Ces ampoules
s’obtiennent aussi dans la plupart des quincailleries
ou magasins d’éclairage. NE PAS UTILISER
D’AMPOULES SUPÉRIEURES À 30 WATTS.
4. Fermez le couvercle d’ampoules et remettez la vis
retirée à l’étape 2.
AVERTISSEMENT : Le couvercle peut être brûlant. Ne
pas toucher au verre lorsque l’ampoule est allumée. Ne
pas laisser l’éclairage allumé longtemps, comme par
exemple en veilleuse.
Filtre au charbon
de bois
Évent de
la hotte
Lumière de
micro-ondes
Languette
supérieure
Languette inférieure
Vis

A P P EL D E SER VIC E
Veuillez vérifier ce qui suit avant de faire appel à un réparateur :
1. Placez une tasse d’eau dans un verre gradué dans le four et fermez bien la porte.
Faites fonctionner le four pendant 1 minute à puissance HAUTE 100%.
A. Est-ce que la lumière du four est allumée?
Est-ce que le ventilateur de cuisson fonctionne?
(Placez la main sur l’évent à lame au-dessus de l’affichage interactif)
OUI _____ NON _____
B. OUI _____ NON _____
OUI _____ NON _____
OUI _____ NON _____
OUI _____ NON _____
est activé manuellement?
CONVEC
450˚F
5 0 0
START
TOUCH ON
OUI _____ NON _____
B. Après que le four s’arrête, est-ce que l’intérieur est chaud? OUI _____ NON _____
Si vous avez répondu NON à l’une ou l’autre de ces questions, vérifiez la prise électrique, le fusible ou le
disjoncteur. S’ils fonctionnement convenablement, CONTACTEZ LE RÉPARATEUR SHARP
®
AUTORISÉ LE
PLUS PROCHE. Il ne faut jamais réparer un four à micro-ondes soi-même.
REMARQUE :
Si le temps qui apparaît dans l’affichage diminue très rapidement, vérifiez le MODE DÉMON-
STRATION à la page 24 et annulez.
28
C. Est-ce que le plateau tournant pivote lorsque TURNTABLE ON/OFF
est touche et que TURNTABLE ON/OFF est à l’affichage?
(Il est normal que le plateau tourne dans les deux sens lorsque
TURNTABLE ON/OFF est affiché).
D. L’eau dans le four est-elle chaude?
E. Est-ce que "H" apparaît sur l'écran lorsque le ventilateur
2. Enlever l’eau du four et programmer :
A. Est-ce que CONV et COOK s’allument?

FICHE T ECHNIQU E
R-1874 / R-1875
Tension courant alternatif : Homologué UL - Monophasé 120V, 60Hz, courant alternatif seulement
Homologué CSA - Monophasé 116V, 60Hz, courant alternatif seulement
Alimentation requise :
Homologué UL - 1 600 W 13,2 A
Homologué CSA - 1 500 W 13,0 A
Puissance de sortie :*
850 W
Chauffage par convection :
1 400 W
Fréquence :
2 450 MHz
Dimensions extérieures :
29 15/16 po (L) x 16 11/32
po (H) x 15 9/32 po (P)
Dimensions de la cavité :
17 1/8 po (L) x 8 1/16
po (H) x 13 13/16 po (P)
Capacité du four :**
1,1 pi
3
Uniformité de cuisson :
Plateau tournant, diamètre 13 po/ventilateur
Poids :
Environ 71 lb
Conforme aux normes établies par :
FCC - Federal Communications Commission
DHHS
29
★ Méthode normalisée de la Commission électrotechnique internationale pour la mesure de puissance débitée. Cette
méthode de mesure est largement reconnue.
★★La capacité interne est calculée selon les mesures de largeur, de profondeur et de hauteur maximum . La capacité réelle
pour contenir des aliments est moins.
-
Conforme au règlement CFR Title 21 chapitre I section J du Department of Health and Human Services (DHHS)
- Ce symbole sur la plaque signalétique signifie que le produit est homologué par Underwriters Laboratories, Inc.
pour utilisation aux États-Unis ou au Canada.


L i s e z a t t e n t i v e m e n t t o u t e s l e s i n s t r u c t i o n s a v a n t d ’ e m p l o y e r l e f o u r .
G UIDE A UTO- TOUC H
Pour des détails supplémentaires et précautions de sécurité, voir les instructions dans le texte.
RÉGLAGE D’HORLOGE
Si
WELCOME PRESS CLEAR
OPÉRATION MANUELLE
Cuisson à forte puissance
AND PRESS
1 3 0
CLOCK
est affiché, touche d’abord ST
OP/CLEAR.
START
1.
Appuyez sur CLOCK
Entrez l’heure juste en touchant la
séquence de chiffres (par exemple :
12:30)
Appuyez sur CLOCK à nouveau
CLOCK
TOUCH ON
2.
1 2 3 0
2. Après l’étape 1 ci-dessus, Appuyez sur
POWER LEVEL.
Sélectionnez le niveau de puissance
(Ex : 5 pour 50 %) et appuyez sur
START/TOUCH ON.
POWER
LEVEL
5
3.
CLOCK
3.
START
TOUCH ON
INSTANT SENSOR POPCORN
Appuyez sur POPCORN, une fois pour le
format de sachet ordinaire et deux fois pour la
taille snack. Voir la page 15.
POPCORN
MINUTE DE PLUS
Appuyez sur MINUTE PLUS pour une minute
à 100 % de puissance ou pour ajouter des
minutes à la durée.
MINUTE
PLUS
RÉCHAUFFAGE PAR
CAPTEUR INSTANTANÉ
Appuyez sur SENSOR REHEAT une fois. Le
SENSOR
CUISSON-TOUCHE
Touche START/TOUCH ON
continuellement pour une cuisson à 100 %
de puissance. Retirez le doigt pour que le
four s’arrête à l’instant.
REHEAT
START
TOUCH ON
four démarre automatiquement. REHEAT peut se programmer
avec le plateau tournant en marche ou en arrêt.
Voir le tableau du réchauffage par capteur instantané à la
page 15.
COMPU DEFROST
COMPU
DEFROST
CUISSON PAR CAPTEUR
SENSOR
COOK
2 0
1
(Ex : 2 et 0 ).
3. Appuyez sur START/TOUCH ON.
En cours de décongélation, le four
s’arrêtera. Vérifiez l’état de l’aliment.
Voir le tableau CompuDefrost à la page 13.
COOK voulu (par exemple : 1)
3. Appuyez sur START/TOUCH ON.
Voir le tableau de cuisson par capteur à
la page 16.
START
START
TOUCH ON
TOUCH ON
CHOISIR
TEMPE-
RÉCHAUFFAGE ET
CUISSON PAR
CONVECTION
RATURE
PRE-
COMPU ROAST
ou CompuBake ou CompuBroil
COMPU
ROAST
CHAUFE-
FAGE
1. Appuyez sur la fonction COMPU
voulue.
Sélectionnez le réglage Compu voulu (par
exemple : touche 1 pour du poulet).
1
350F
PRESSER
2.
entrer la température voulue
(Ex : Appuyez sur 6 pour
350
o
F).
2 5
START
OU
START
3. Appuyez sur CONVEC.
PRESSER CONVEC-
TOUCH ON
4. Appuyez sur les chiffres
pour la température voulue
(Ex : 5 pour 325
o
F).
Entrez la durée de cuisson
sur les touches chiffrées (Ex :
2000.)
Appuyez sur START/TOUCH
ON.
CHOISIR
TEMPE-
CUISSON AUTOMATIQUE COMBINÉE
RATURE
325F
5.
Appuyez sur LOW MIX/BAKE,
entrez la durée de cuisson voulue
et touche START/TOUCH ON.
Suivez les indications affichées.
325F
ENTRER
ENTRER
20.00
DUREE
CUISSON
6.
PRESSER START
PRESSER
START
Lorsque le four atteint la température
PRE-
CHAUFE-
r o g r a m m é e , i l m a i n ti e n t
Le four peut se programmer pour combiner les opérations de
préchauffage et de cuisson automatique combinée. Voir la
page 20 pour des détails supplémentaires.
utomatiquement la température
FAGE
de préchauffage pendant 30 minutes
tandis que l’affichage revient à l’heure actuelle. Si STOP/CLEAR
est touché pendant ces 30 minutes, PRESS CONVEC ou PRESS
MIX s’affiche et le mode ainsi que la durée de cuisson peuvent
être entrés. Pour des détails supplémentaires sur la cuisson par
convection, voir les pages 19 et 20.
SHARP ELECTRONICS CORPORATION
100 Paragon Drive, Suite #100 • Montvale, NJ 07645
Carousel
®
sest une marqu de commerce déposée de Sharp Corporation.
30
1. Entrez la durée de cuisson en touchant
les chiffres (Ex : 1 min. 30 secs.).
2. Appuyez sur START/TOUCH ON.
Cuisson à puissance variable
1. Touche COMPU DEFROST (Ex : trois
fois pour un bifteck).
2. Entrez le poids en touchant les chiffres.
1. Appuyez sur SENSOR COOK
2. Sélectionnez le réglage SENSOR
1. Appuyez sur PREHEAT.
2. Appuyez sur les chiffres pour
3. Touche les chiffres pour le poids ou la
quantité.
4. Appuyez sur START/TOUCH ON.
Voir les tableaux CompuRoast, Bake et Broil
aux pages 21, 22 et 23.
p
a