Loading ...
Loading ...
Loading ...
11
Rack And Bakeware Positions
Rack Positions – Upper and Lower Oven
Broiling
Food Rack Position
Most broiling 6
For hamburger patties to have a well-seared exterior and a rare
interior, use a at rack in position 6. Side one should cook for
approximately 3 minutes. Side two should cook for approximately
3 to 4 minutes. Expect a moderate degree of smoke when
broiling.
Traditional Cooking
Food Rack Position
Large roasts, turkeys,
angel food cakes, bundt
cakes, quick breads, pies
1 or 2
Yeast breads, casseroles,
meat, poultry
2
Cookies, biscuits, mufns,
cakes
2 or 3 when single-rack baking; 2
and 5 when multi-rack baking
Convection Cooking
Oven Setting Number of
Racks Used
Rack
Position(s)
Rapid Preheat Bake 1 or 2 3
Rapid Preheat
Convection Bake
1 3
Convection Bake 1 1, 2, or 3
Convection Bake 2 2 and 5
Convection Bake 3 1, 3, and 5
Convection Roast 1 1 or 2
Convection Broil 1 4, 5, or 6
Baking Cakes on Two Racks
For best results when baking cakes on two racks, use the Bake
function and racks in positions 2 and 5. Place the cakes on the
racks as shown. Keep at least 2" (5 cm) of space between the
front of the racks and the front of the cakes.
Baking Cookies on Two Racks
For best results when baking cookies on two racks, use the
Convect Bake function and place at racks in positions 2 and 5.
Bakeware
To cook food evenly, hot air must be able to circulate. For best
results, allow 2" (5 cm) of space around bakeware and oven walls.
Use the following chart as a guide.
Number of Pan(s) Position on Rack
1 Center of rack
2 Side by side or slightly staggered
3 or 4 See the rack position graphics
in this section for pan placement
recommendations.
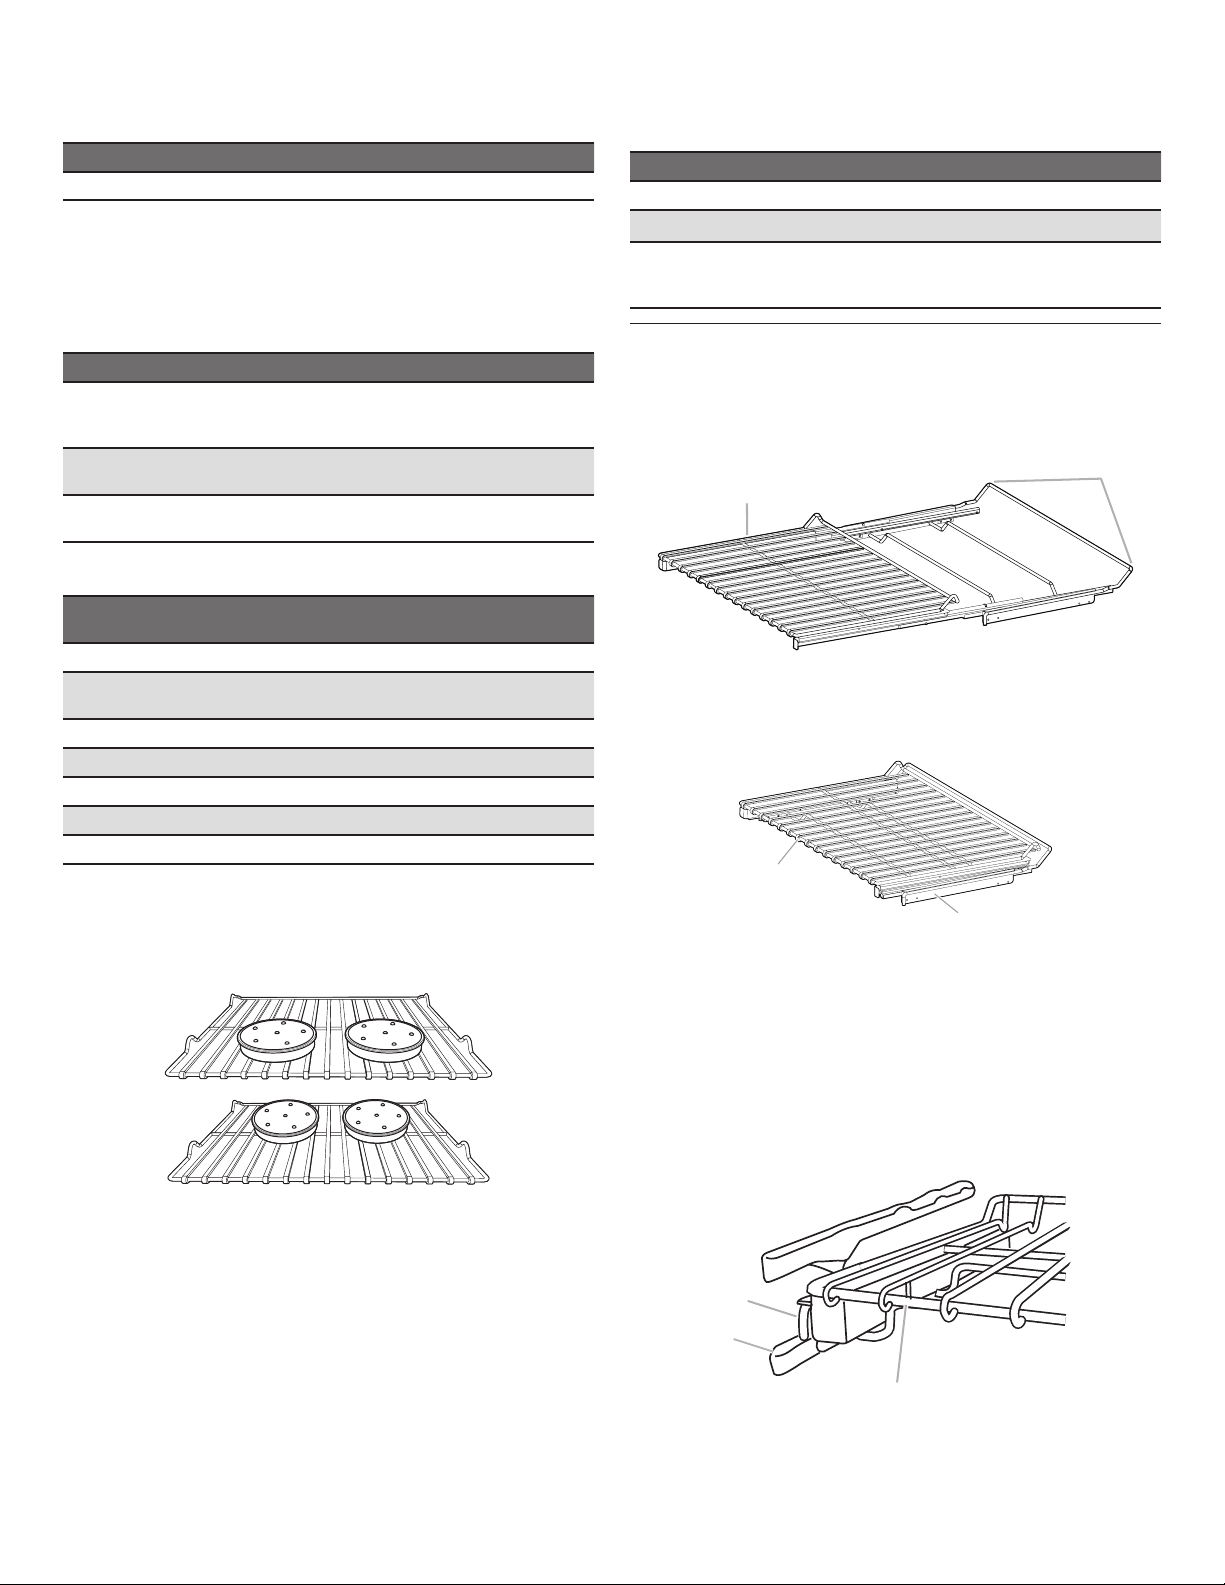
Roll-Out Extension Rack
The roll-out extension rack allows easy access to position food in
the oven and remove food from the oven. It can be used in rack
positions 1 through 6.
Open Position
Closed and Engaged Position
To Remove Roll-Out Extension Rack:
1. Slide the rack in completely so that it is closed and engaged
with the sliding shelf.
2. Using two hands, lift up on the front edge of the rack and
push the sliding shelf to the back wall of the oven so that the
front edge of the sliding shelf sits on the rack guides. The
front edge of the rack and the sliding shelf should be higher
than the back edge.
3. Pull the rack and the sliding shelf out.
A
B
A. Roll-out extension rack
B. Sliding shelf
B
A
A. Roll-out extension rack
B. Sliding shelf
B
A
C
A. Sliding shelf
B. Rack guide
C. Roll-out extension rack
Loading ...
Loading ...
Loading ...