Loading ...
Loading ...
Loading ...
To
Imtill
Chassis into Cabinet or Wall Sleeve...
6. Using scissors or a knife, cut
gasket neatly to window width on
each side. Ends of gaskets should
be flush with the sash trim.
7. Make sure gasket is positioned
correctly along the top of the
cabinet and the panels, and that the
rear flange extends out and under
the lower sash.
&
Make sure the lower sash is
tightly behind the tab of the cabinet
angles, and onto the rear flange of
the gasket. Then bend the sash
gasket downward to expose the tab
of the case angles and install 2
~pe
D screws through the case
angles and into the lower sash.
Adjust to give neat appearance and
tight seal.
Panel Groove
9.
Install the sash locking bracket
using a Type E screw.
Sash Bracket
1
//”
,,
~~Ü‹˜@d•àó••ðü•• æ••€ïÜ‹¤LG•
~
,,,;
.,
,,
:
‘“
w
f’
‘
Type E
Screw
/“
,1’
.,,,
“>”
,m
~
10.
Cut the sash gasket to window
width and stuff it between the top
of the lower sash and glass panes of
the upper sash. The foam gasket
should be flush with the top of the
lower sash.
1
—
,
“
\
\\
*.-
—%—
w
,/
‘“
!
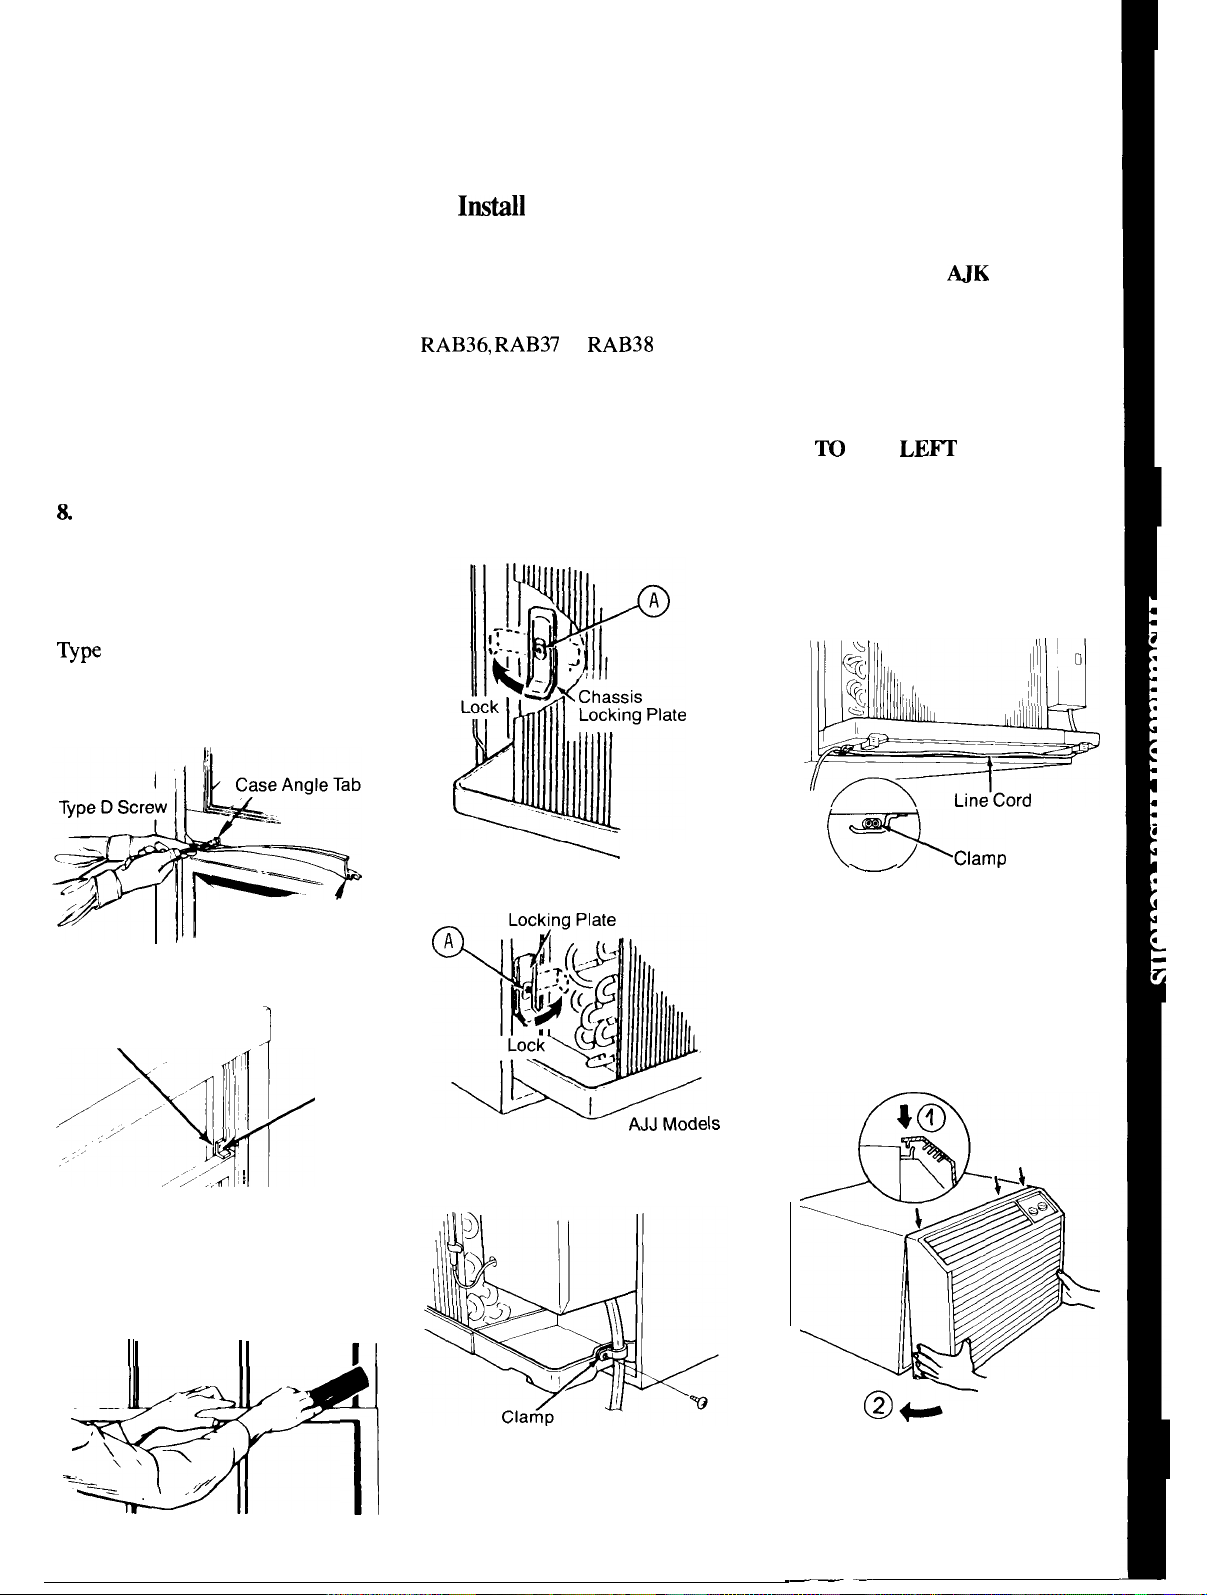
1.
Slide the chassis into the
installed cabinet (provided with
AJK models) or wall sleeve
RAB36,
RAB37
or
RAB38
(not
provided) designed for AJJ models.
Make sure that the tubing on the
unit is not touching the wall case
and that the wall case insulation is
secure.
2. Turn the chassis locking plate
90° upward and lock the chassis
with the plate.
AJK Models
\
Chassis
Is
3.
Secure the line cord to the base
pan with the clamp provided.
Ground Wire on
MK
models,
disconnected when the chassis was
removed from the cabinet, must be
reconnected to the cabinet as
shown in step 3 under
Prepare the
Chassis
on page 11.
WHEN THE LINE CORD RUN
IS
TO
THE
LE~
SIDE OF
THE UNIT,
extend enough cord to
reach the wall receptacle. (Excess
cord length may be stored in the
space just below the electrical
component box). Insert the line
cord under the clamp provided with
the unit.
-clamp
—
This step must be followed before
reinstalling the chassis locking
plate.
4. Mount the grille on the front of
the chassis by hooking the top of
the grille onto the top of the chassis
and pushing bottom of grille in
until it snaps into place.
@;-
13
-—
—
Loading ...
Loading ...
Loading ...