Loading ...
Loading ...
Loading ...
Window Mounting
(~Kmodels)
(continued)
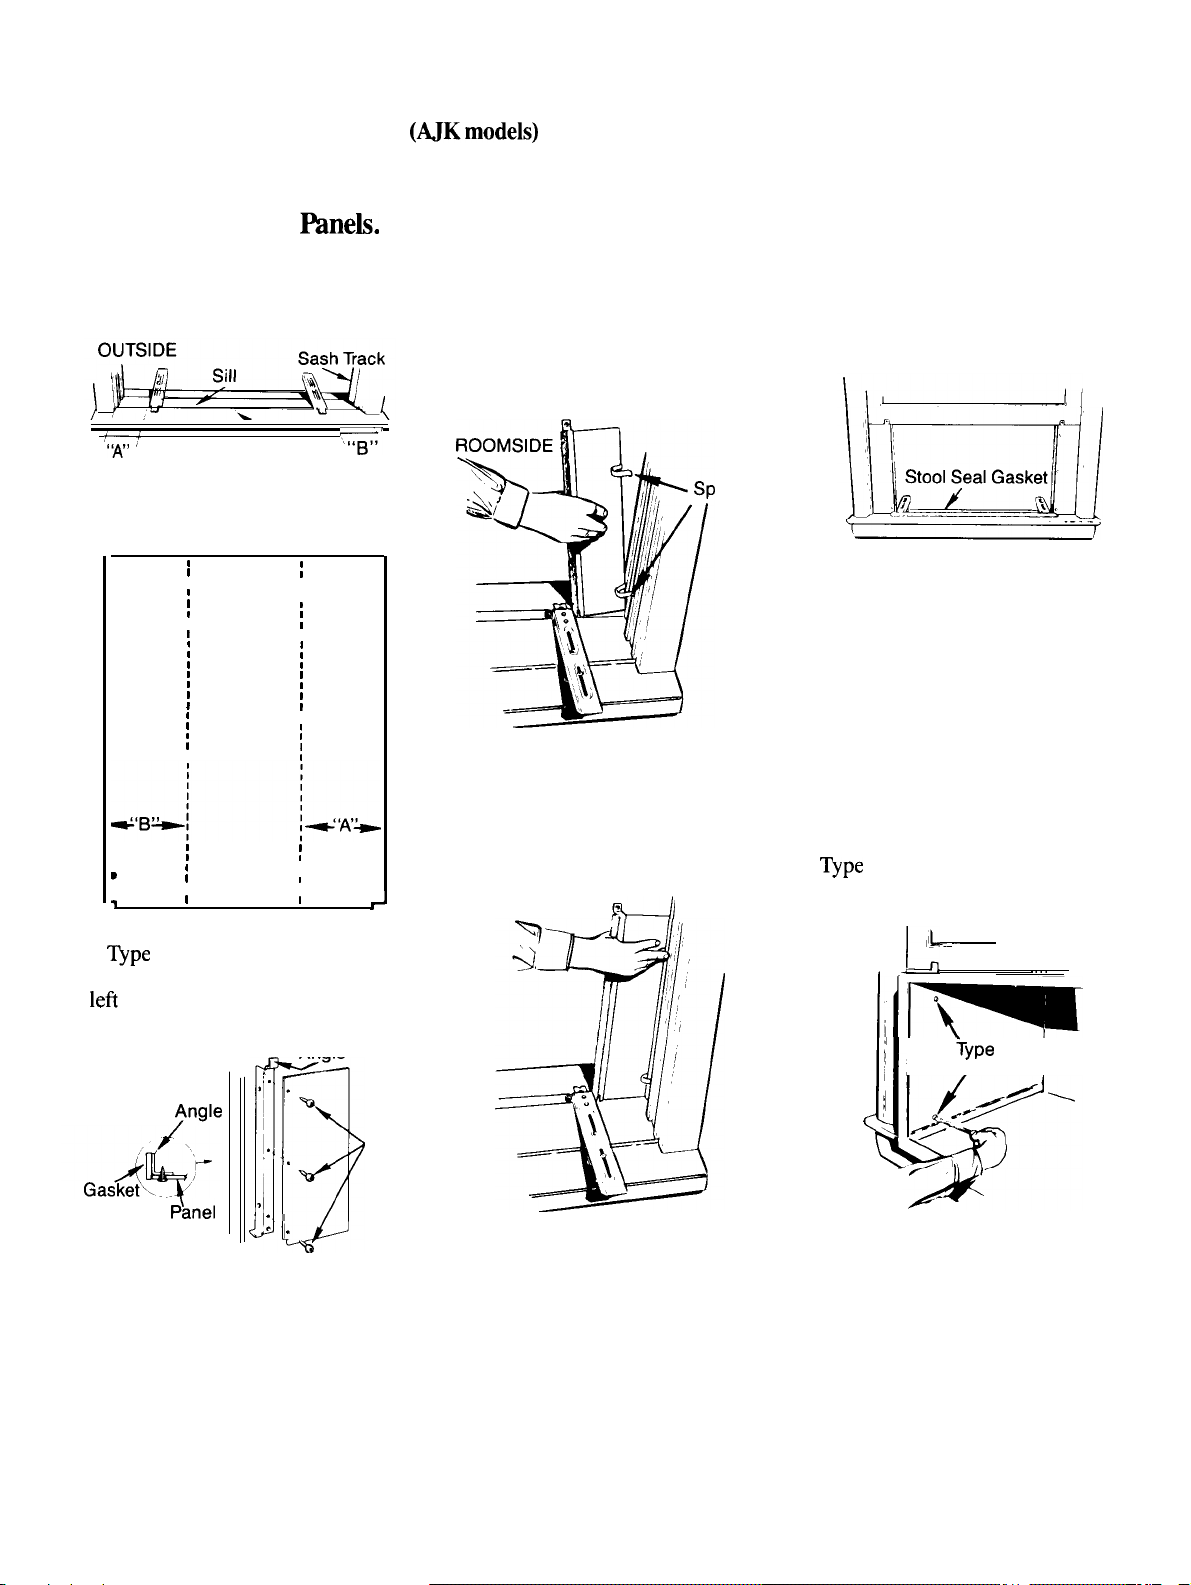
5. Instill Closure
finek.
1.
Measure from the edge of the
panel index mark to the inside of
the sash track.
(
‘A”
;
Centerline
“’’B’;’
2. Mark A & B dimensions on the
panel (position of notches mark
panels for identification) and cut.
1
0
I
●
1
●
I
1
I
I
I
1
1
1
I
1
!
I
1
1
1
1
1
1
1
1
I
I
1
I
1
1
●
1
●
1
1
I
I
1
1
I
I
,
I
1
m
●
I
1
d
I
1
1
3.
Assemble panels to angles with
3
~pe
C screws on each panel.
Panel A must be assembled to the
lefi
case angle and Panel B to the
right case angle.
Gasket
=
~ngle
P&nel
Angle
@
~
!.
,
.
Type C
,.
Screws
.1
.
.
4.
Remove paper backing from the
gasket and apply the gasket to the
edge of the pan and angle. Push
pencil point through the gaskets to
locate holes in the angles.
5. Install 2 spring clips to the
outside edge of each panel, about
3“ from the top and bottom.
ring Clips
6.
Insert the tab at the bottom of the
closure panel assembly into the slot
in the sill support. Insert the outer
edge of the closure panel assembly
into the sash track, and squeeze
clips on the panel to fit in the sash
track.
til
7. Repeat on opposite side.
6. Instill Cabinet
in Window.
1.
Strip backing off stool seal
gasket and place adhesive side
down, with rear edge of gasket
on line with rear of stool.
2. Carefully slide empty cabinet
into window until preselected holes
inside cabinet line up with holes in
cabinet angles. Pull lower sash
down behind top flange of closure
panel angles.
●
Be sure cabinet is installed right
side up.
●
Be sure seal gasket and panel
gaskets remain in position and do
not roll with the case.
3. From inside the cabinet, install 2
~pe
A screws through each side of
the cabinet, through gaskets and
into holes in case angles.
1-
.=.
-
~
.
?ype
A
I
Screws
<
4. Remove backing paper from
case top gasket and apply to top of
cabinet under sash gasket.
5. Position the sash gasket along
the top of the case and insert tabs in
the cabinet angles through the slots
in the gaskets.
12
Loading ...
Loading ...
Loading ...