Loading ...
Loading ...
Loading ...
MAINTENANCE AND STORAGE:
NOTE:Anyothermaintenancenotexplainedinthismanualshouldbe
performed by either
SM
oranAuthorizedServiceCenter.Tostore
unit, coil and secure cord and place in original carton.
USING THE ATTACHMENTS:
Plasticcombsforattachmenttoclippersandtrimmerbladesareincludedwith
some kits. This plastic comb serves as a clipping guide so that the hair is not
clippedshort.Thecombattachmentisgroovedto�tsnuglyovertheblades.
Whenattachingthecombtotheclipper,slidethecombdown�rmlyasfaras
it will go. Make sure the comb is seated securely against the lower blade. To
disengage the comb, pull and slide the comb upward until it is off the clipper.
Replacement combs are not covered under warranty.
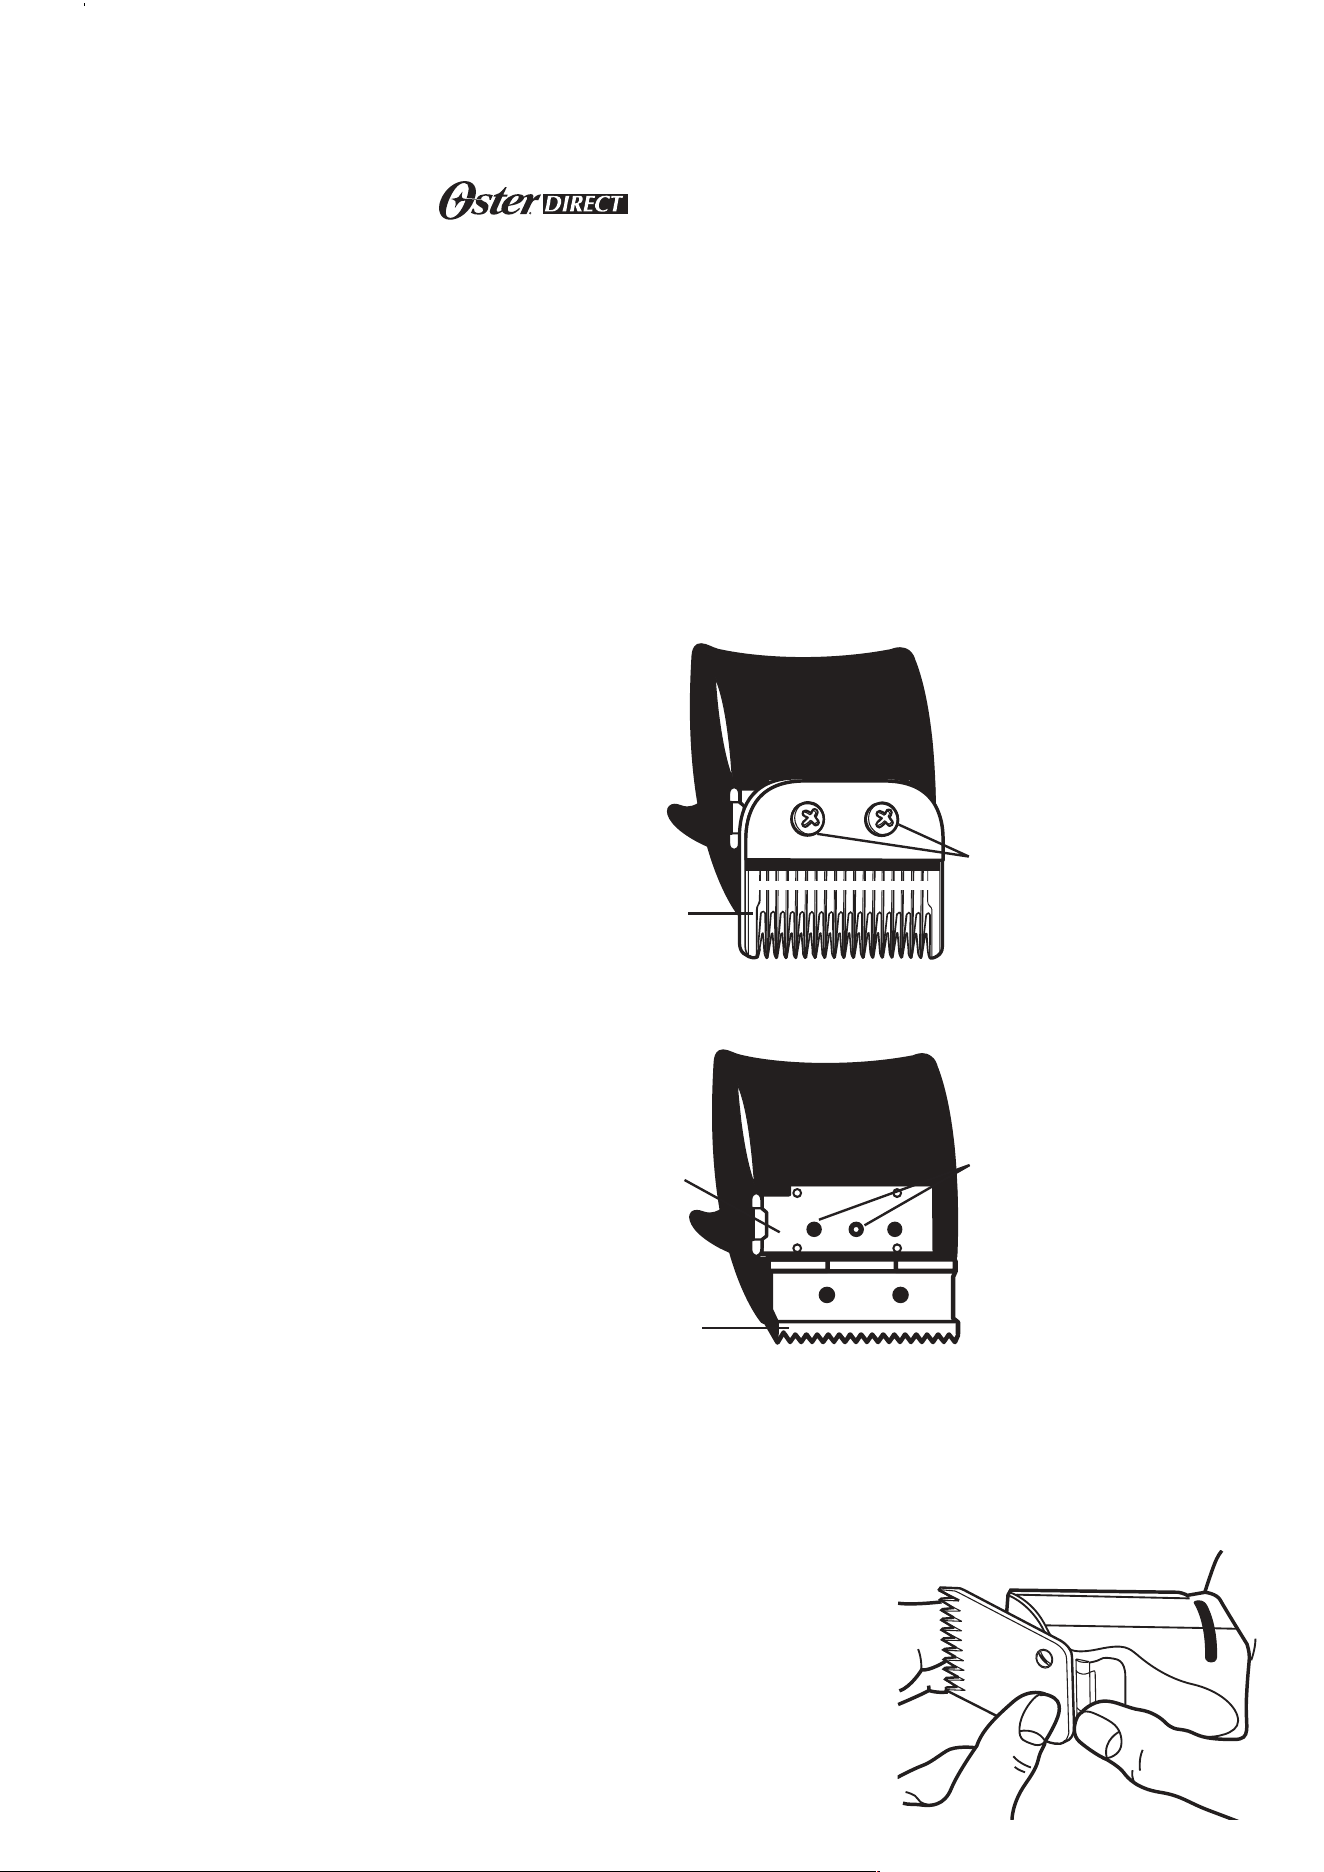
ADJUSTABLE CLIPPERS:
Aftercontinueduse,thetopand
bottom blades may wear out.
Replacement blades are available
throughyournearestAuthorized
ServiceStation.
To remove the blades, unplug the
clipperfromtheelectricoutlet.Lay
theunitupsidedownonaat,dry
surface. Remove the two screws
located in the bottom of the blade.
To replace blades, put the new top
blade into position on the clipper
head. Make sure the adjustment
lever is pushed downward.
Lineupthenewbottomblade
so that the screw holes in the
bottom blade are directly over
the two center screw holes in
the mounting plate. Replace the
screws. Before tightening the
screwsadjustthepositionofthebladessothatthetopbladeis1/32”backfrom
and is parallel to the front edge of the bottom blade. The blades should also be
evenoneachside.Tightenscrews�rmly.
DETACHABlE BLADE CLIPPERS:
Toremove:IMPORTANT·Stopmotor;depress
“BladeLockLatch”;pushbladeawayfromclipper.
Toreplace:Turnmotoron;insertbladetonguefully
into slot on clippers and then snap blade into place.
(It is not necessary to operate blade latch.)
C. Bottom Blade
D.ScrewHoles
E.ScrewPlate
F. Top Blade
G.ScrewHoles
C
E
G
F
D
Loading ...
Loading ...
Loading ...