Loading ...
Loading ...
Loading ...
E-3
INSTALLATION INSTRUCTIONS
WARNING:
Turn off and disconnect the unit before working.
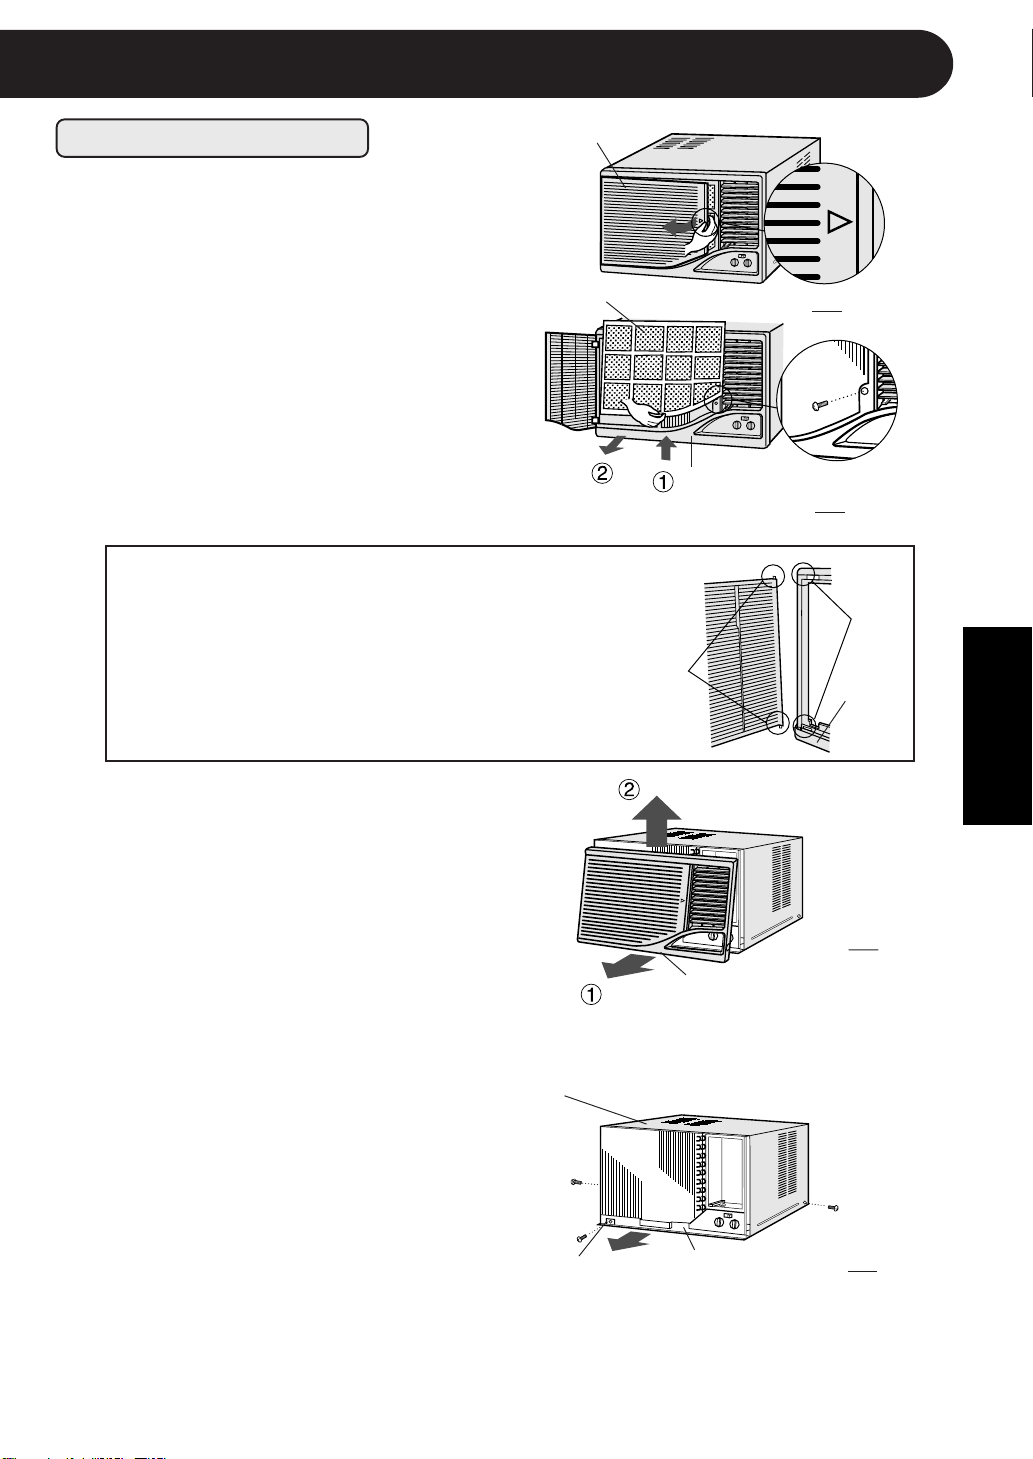
INSTALLATION
1
Unscrew the 3 stopper screws of
the cabinet. (Fig.4) Keep the front
screw and the angle as they will be
used later in step 5.
Slide the chassis out from the cabi-
net by pulling on the hand hold
located at the bottom center of the
chassis. (Fig.4)
2
(1)
(2)
(2)
Close the grille firmly, and remove
the front panel by pulling the front
panel at the lower corners towards
you for about 3 cm (1" ). Then lift it
up and pull it towards you. (Fig.3)
Angle Fig.4
Chassis
Front panel
Fig.3
Air filter
Front panel
Fig.2
Fig.1
Grille
(1)
Open the grille (Fig.1) by gently
pulling the arrow marked portion.
Remove the air filter (Fig.2) from
the front panel.
Unscrew the screw fixing the front
panel to the chassis. (Fig.2)
Keep the screw as it will be used
later.
CAUTION:
Do not open the grille extremely wide, or provide
stress to the opened grille. The grille may come
off, or the grille shaft may get damaged. If the
grille should come off, it can be replaced. Fit one
of the grille shaft into the matching hole on the
front panel, curve the grille slightly and fit in the
other grille shaft.
Hole
Front
panel
Grille shaft
Cabinet
ENGLISH
Downloaded from: http://www.usersmanualguide.com/
Loading ...
Loading ...
Loading ...