Loading ...
Loading ...
Loading ...
9 10
ninjacoffeebar.com1-877-646-5288
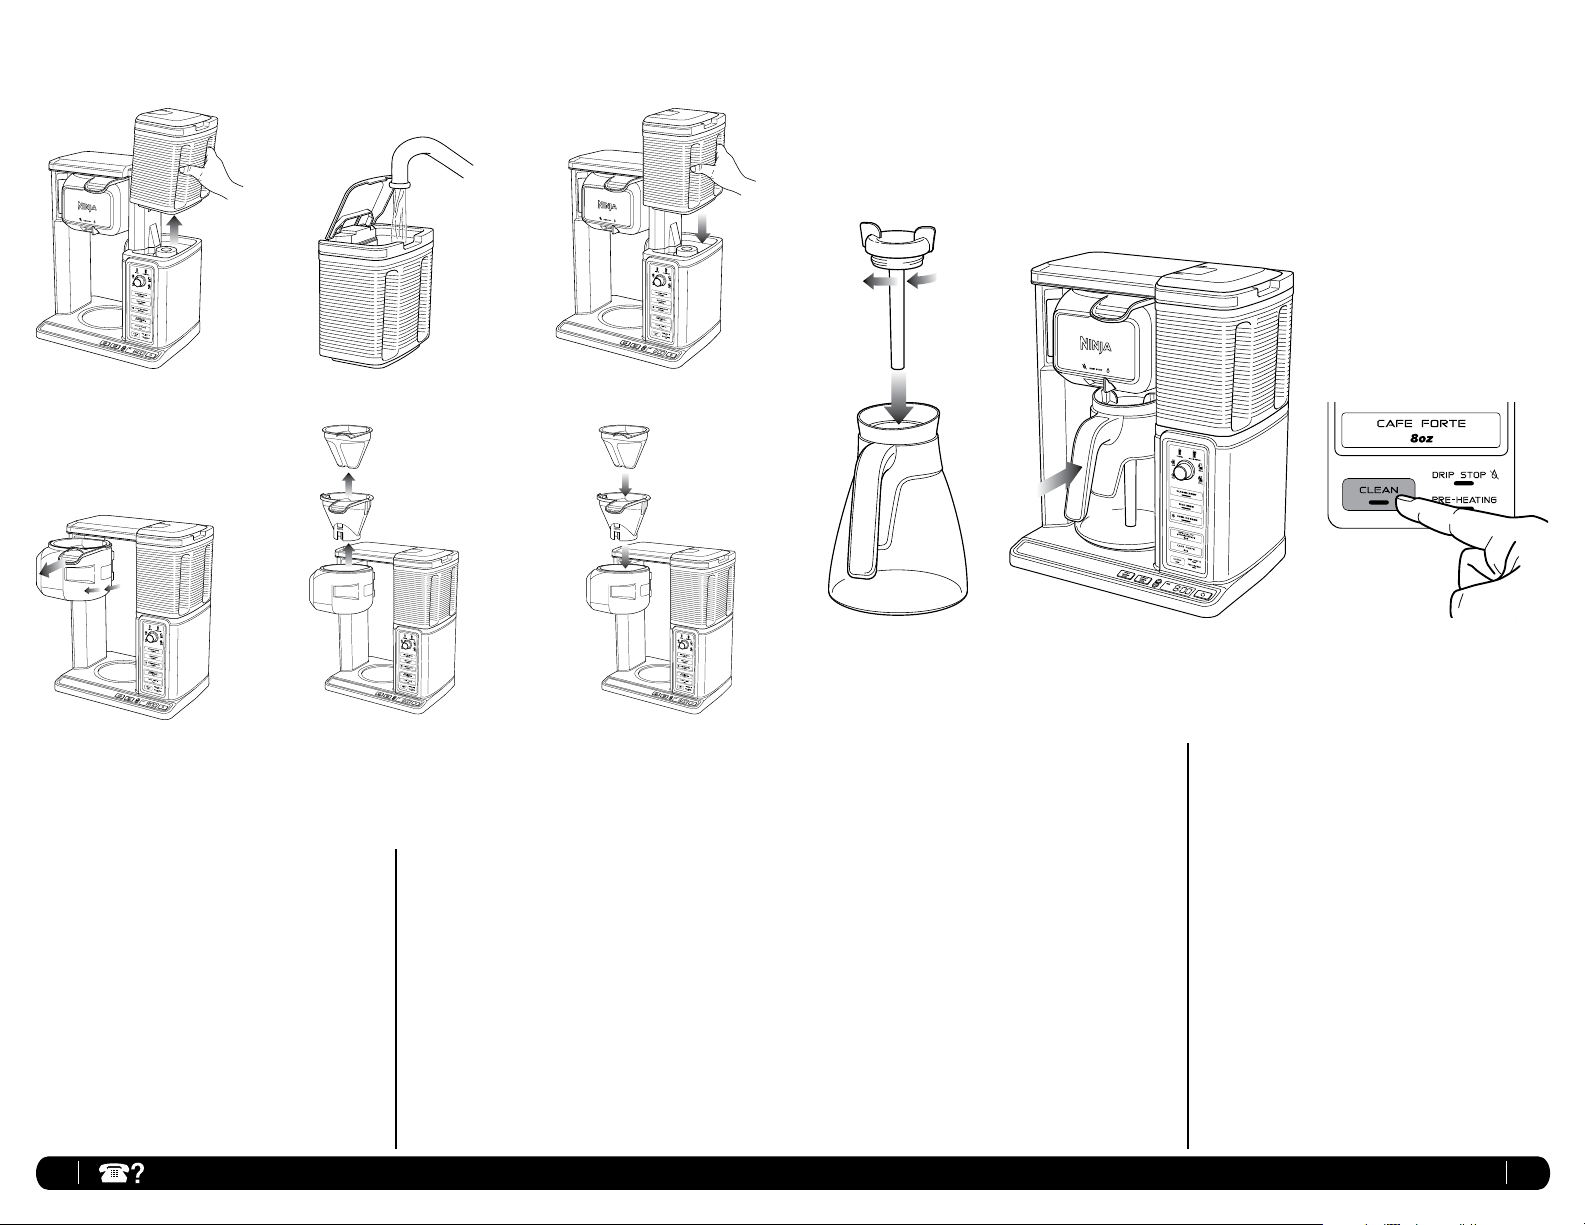
Assembly
1 Place the brewer on a dry, clean and level surface.
2 To easily fill the water reservoir, use the hand grips to lift
it straight up off the brewer. (Fig. 5) The water reservoir
lid flips open for easy filling, and the entire lid is easily
removable for quick cleaning. Add fresh, filtered water at
or above the minimum fill line for your desired beverage
size (Fig. 6), then return the water reservoir to the brewer
and lock into place. (Fig. 7) Do not fill water reservoir
with any other liquids such as brewed coffee, carbonated
beverages, etc. as other liquids may damage your brewer.
3 Slide brew basket out (Fig. 8) and lift both the
permanent filter and Filter Carrier Insert from the
brew basket to remove. (Fig. 9) To reinsert, set the
permanent filter and Filter Carrier Insert back into the
brew basket. (Fig. 10) When cleaning, you can remove
the permanent filter from the brew basket.
4 Once the filter is in place, slide the brew basket all the
way in until you hear a slight click.
Fig. 5
Fig. 8
Fig. 6
Fig. 9
Fig. 7
Fig. 10
Fig. 11 Fig. 12
5 Twist the brew-through lid clockwise onto the glass
carafe to lock into place. (Fig. 11)
6 Center the carafe below the brew basket. (Fig. 12)
NOTE: Do not use any coffee for the first two brew
cycles in order to clean the brewer.
7 Plug the brewer into an electrical outlet.
8 Once all parts are securely in place, press the Power
Save button then press the CLEAN button to thoroughly
clean the machine before first use. (Fig. 13)
9 Discard the water in the carafe and repeat, beginning
with step 2, with one more Clean Cycle of water before
first use.
Fig. 13
Loading ...
Loading ...
Loading ...