Loading ...
Loading ...
Loading ...
7 8
ninjacoffeebar.com1-877-646-5288
Before First Use
1 Remove all packaging material, stickers and labels from
the brewer.
NOTE: The glass carafe is dishwasher safe. Place on
top rack only.
2 Wash the water reservoir, permanent filter, glass carafe
and brew basket in warm, soapy water with a soft cloth.
3 Rinse and dry thoroughly.
4 Wipe the intelligent warming plate with a damp cloth.
5 Before first use, prime the system by running two
full carafe cycles with water only. After each cycle is
complete, discard the brew.
PLEASE KEEP THESE IMPORTANT
SAFEGUARDS IN MIND WHEN USING THE
APPLIANCE:
CAUTION: APPLIANCE CREATES HOT LIQUID.
HANDLE WITH CARE.
CAUTION: DO NOT remove the vessel while
the appliance is running without the Drip
Stop in the closed position. Return the
vessel quickly and open the Drip Stop to
continue the brew.
CAUTION: Never open the brew basket when
the coffeemaker is in use.
CAUTION: Please ensure that you are using at
least a 12 oz. cup for the cup size, 14 oz. cup for
the tall cup size, 16 oz. travel mug for the travel
mug size and 20 oz. travel mug for the XL Multi-
Serve size to prevent overflow and a scalding
injury.
IMPORTANT: DO NOT run the appliance
without water.
IMPORTANT: Always place a vessel beneath
the brew basket to receive the brewed
coffee.
IMPORTANT:
DO NOT overfill the water
reservoir. Fill water only to the Max Fill line.
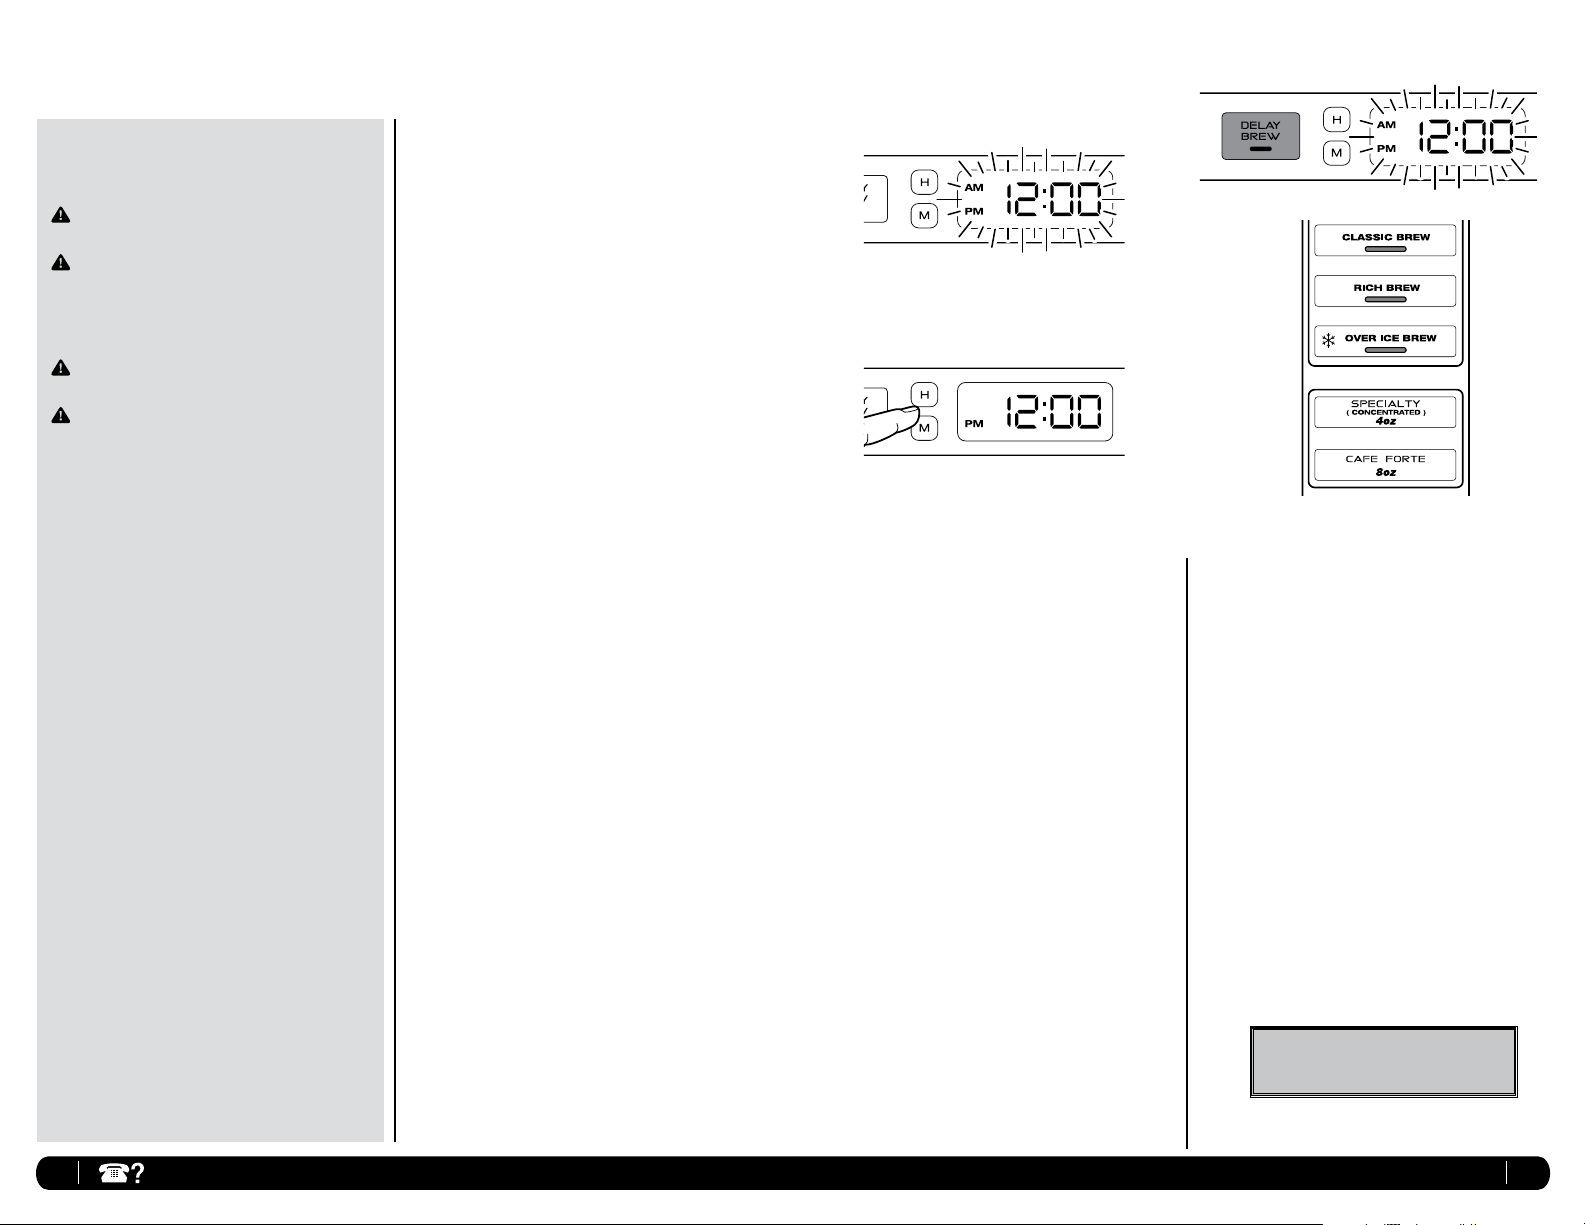
TO SET THE CLOCK
1 Plug the power cord into an electrical outlet. The clock
will flash on the control panel to indicate that the time
has not been set. (Fig. 1)
2 Press the H (hour) or M (minute) button until you reach
the current time. The AM or PM indicator will illuminate
on the left side of the display as you are setting the
time. (Fig. 2)
3 After 5 seconds the clock will stop flashing and the
clock will be set.
NOTE: If the clock stops flashing and does not display
the correct time of day, pressing the H (hour) or the M
(minute) button at any time will cause the clock to flash
again. You can now re-program the correct time of day
by following the steps above.
NOTE: If you unplug the brewer or in the event of an
extended power loss, you will need to reset the clock
the next time the brewer is plugged in.
TO SET THE DELAY BREW TIME
1 Press Delay Brew. The Delay Brew button will illuminate
and the clock will begin to flash “12:00” or the last
delay brew time that was set. (Fig. 3)
2 While the clock is flashing, press the H (hour) or M
(minute) button to set the time that you would like
the delay brew to begin. The AM or PM indicator will
illuminate on the left side of the display as you are
setting the desired time.
Setting the Clock & Delay Brew
3 Once the proper time has been set, select the size of
the vessel that you would like to brew.
4
Select the Brew Type that you desire from the 5 flashing
buttons. The selected brew type will be lit.
(Fig. 4)
5 Once the time, brew size, and brew type have been set, allow
the Delay Brew to flash and lock in or press the Delay Brew
button to activate the Delay Brew. When the Delay Brew is
activated, the light on the Delay Brew button will illuminate
and an audible signal will play to verify the Delay Brew is set.
6 The Delay Brew time is now set and your Ninja
Coffee Bar
®
will automatically brew at the time you programmed.
NOTE: To deactivate the Delay Brew cycle, press the Delay
Brew button once more and the light on the Delay Brew
button will turn off. Any change to the selected brew size or
starting any other brew will cancel the programmed
Delay Brew.
7 Place the appropriate-sized vessel under brew basket for the
selected size.
IMPORTANT: Make sure the Drip Stop is in the open position.
Go to ninjacoffeebar.com for more
information and how-to videos.
Fig. 3
Fig. 4
Fig. 2
Fig. 1
Loading ...
Loading ...
Loading ...